Pulsar NX02
Below you will find brief product information for Pulsar NX02.
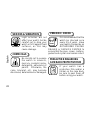
The Pulsar NX02 is a versatile timepiece that combines analog and digital displays, providing a range of functionalities for various needs.
Key Features:
-
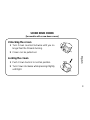
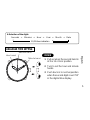
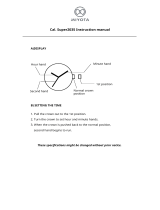
Analog Time Display: The NX02 features a traditional analog dial with hour, minute, and second hands, offering a classic and elegant timekeeping experience.
-
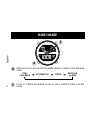
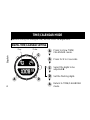
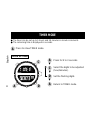
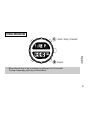
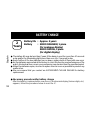
Digital Time and Calendar: In addition to the analog display, the NX02 boasts a digital display that showcases the time in either 12 or 24-hour format. It also includes a perpetual calendar that automatically adjusts for different month lengths and leap years.
Pulsar NX02
Below you will find brief product information for Pulsar NX02.
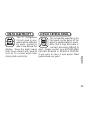
The Pulsar NX02 is a versatile timepiece that combines analog and digital displays, providing a range of functionalities for various needs.
Key Features:
-
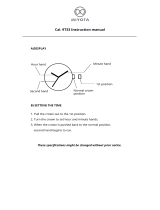
Analog Time Display: The NX02 features a traditional analog dial with hour, minute, and second hands, offering a classic and elegant timekeeping experience.
-
Digital Time and Calendar: In addition to the analog display, the NX02 boasts a digital display that showcases the time in either 12 or 24-hour format. It also includes a perpetual calendar that automatically adjusts for different month lengths and leap years.


-
 1
1
-
 2
2
-
 3
3
-
 4
4
-
 5
5
-
 6
6
-
 7
7
-
 8
8
-
 9
9
-
 10
10
-
 11
11
-
 12
12
-
 13
13
-
 14
14
-
 15
15
-
 16
16
-
 17
17
-
 18
18
-
 19
19
-
 20
20
-
 21
21
-
 22
22
-
 23
23


Pulsar NX02
Below you will find brief product information for Pulsar NX02.
The Pulsar NX02 is a versatile timepiece that combines analog and digital displays, providing a range of functionalities for various needs.
Key Features:
-
Analog Time Display: The NX02 features a traditional analog dial with hour, minute, and second hands, offering a classic and elegant timekeeping experience.
-
Digital Time and Calendar: In addition to the analog display, the NX02 boasts a digital display that showcases the time in either 12 or 24-hour format. It also includes a perpetual calendar that automatically adjusts for different month lengths and leap years.
Ask a question and I''ll find the answer in the document
Finding information in a document is now easier with AI
Related papers
-
Pulsar W510 Owner's manual
-
-
-
-
-
-
-
-
-
Other documents
-
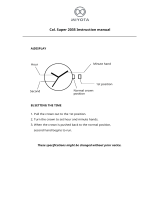 MIYOTA Super 2035 Watch Movement User manual
-
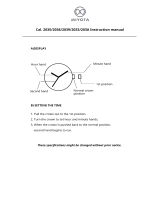 MIYOTA 2035 Smartwatch User manual
-
 MIYOTA GL32 Hands Quartz Movement User manual
-
 MIYOTA Super2035 Watch Movement User manual
-
 MIYOTA Cal. 9T33 Watch Movement User manual
-
Casio Men's Black Resin Strap Watch User manual
-
-
-
MIYOTA 6P28 User manual
-
Alba N021 Operating instructions


