Page is loading ...

ENGLISH
INTRODUCTION
This product, Retro phone with Dual Mode Caller ID Type 2, can provide a
features to store and display the FSK type 1 & 2 / DTMF Caller ID information
that provided by your local telephone company.
Your Caller ID phone enables you to:
Identify callers before you answer the phone.
View the time and date of each incoming call.
Record up to 70 Caller ID messages.
10 two-touch memories.
In order to use the Caller ID function on this unit, you must subscribe the
Caller ID services from your telephone company.
To get the most from your new phone, you are suggested to take a few
minutes right now to read through this user guide.
SHORT GLOSSARY OF TERMINOLOGY USED IN THIS MANUAL
Hook switch. The part of the phone that pops up to activate the phone line
when the handset is lifted from the base.
O-hook. A term used to describe the phone in its active mode when the
handset is o of the base cradle.
On-hook. A term used to describe the phone in an inactive mode.
BEFORE YOU BEGIN
PARTS CHECKLIST
Make sure your package includes the following items:
a base and handset.
a telephone cord.
a spiral cord.
TELEPHONE JACK REQUIREMENTS
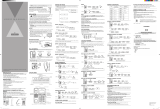
To use this phone, you need an RJ11C type
modular telephone jack, which might look like the
one pictured here, installed in your home. If you
don’t have a modular jack, call your local phone
company to nd out how to get one installed.
IMPORTANT INSTALLATION INFORMATION
CAUTION: Disconnect the phone cord from the wall outlet before
installing or replacing the batteries.
Never install telephone wiring during a lightning storm.
Never touch uninsulated telephone wires or terminals, unless the
telephone line has been disconnected at the network interface.
Use caution when installing or modifying telephone lines.
Never install telephone jacks in wet locations unless the jack is specically
designed for wet locations.
Temporarily disconnect any equipment connected to the phone, such as
faxes, other phones, or modems.
INSTALLING AND REPLACING THE BATTERIES
Your Caller ID phone uses 3 AA-size alkaline batteries for receiving and
storing Caller ID records and for storing the numbers you use for memory
dialing, pulse dialing, and redial.
IMPORTANT: You will have approximately 60 seconds to replace
the batteries before the memories stored are lost. Please read the
instructions before replacing the batteries and have the batteries
ready to be inserted beforehand.
IMPORTANT: If you are not going to use the telephone for more than
30 days, remove the batteries because they may leak and damage
the unit.
If the telephone line cord is connected, disconnect it from the base unit.
Open the battery compartment located under the phone.
Insert 3 AA-size alkaline batteries (not included) as shown on the diagram
inside the compartment.
Replace the battery compartment door.
Re-attach the line cords to the unit and check your memory. If installation
takes longer than 60 seconds, you should re-set your memory.
INSTALLING THE PHONE
Your phone should be placed on a level surface, such as a desk or table top.
CONNECTING THE HANDSET
Connect one end of the coiled handset cord to the jack on the handset.
Plug the other end of the coiled handset cord to the jack on the base.
Place the handset in the cradle.
CONNECTING THE TELEPHONE LINE
Connect one end of the straight telephone line cord to the jack on the
back of the base.
Connect the other end to a wall phone jack.
NOTE: The unit is properly installed if you pick up the handset and
hear the dial tone. Otherwise, recheck all installation steps.
•
•
•
•
•
•
•
•
•
•
•
•
1.
2.
3.
4.
5.
1.
2.
3.
1.
2.
OPERATION
CALLER ID FEATURES
Caller ID (CID) is a service available from your local telephone company. For
Caller ID to work on this system, you must subscribe to Caller ID service. This
unit can receive the FSK type 1 & 2 and DTMF caller ID without any setting.
This information may include the phone number, date and time; The unit
stores up to 70 calls for later review.
RECEIVING AND STORING CALLS
When you receive a call, the information is transmitted by the phone
company to your caller ID telephone.
When the memory is full, a new call automatically replaces the oldest call in
memory.
NEW
appears in the display for calls received that have not been
reviewed.
If a FSK Caller ID is received, it will automatically update the date/time on
this unit. If the DTMF Caller ID is received, the record date/time will copy from
the unit Date/Time. However, it must be set before.
REVIEWING CALL RECORDS
When the NEW indicator is ON, you have received new incoming calls.
Press the
-
or + arrow button to review the stored calls. After the new
call records are reviewed, the indicator turns O.
If the incoming caller ID indicator is received in previous, the repeat indicator
‘REP’ will turn On.
When you reach the end of the call records, the display shows START/END.
You can exit the caller ID review by pressing the button.
TRANSFERRING CID RECORD TO MEMORY
You may transfer a Caller ID record to your phone’s memory.
Press the REVIEW
-
or + to select the CID record while the phone is in
On-hook mode.
Press the STORE then digit 0 … 9 or REVIEW
-
/ + to select the memory
location.
Press the button to confirm the location then you can edit the
displayed number if necessary.
Press the button to confirm the number then you can edit the
displayed name if necessary.
Finally, press the button to confirm the entry. If the memory has
content, it will be replaced by new entry.
If the name is longer than 12 characters, only the rst 12 characters will be
stored into the memory. If the number is longer than 14 digits, the operation
will be ignored.
DELETING CALL RECORDS TO DELETE AN INDIVIDUAL CALL
When reviewing calls, you may delete an individual call by pressing the
button.
The contents of the display will be erased and the remaining Caller ID records
are renumbered.
TO DELETE ALL CALLS
When reviewing calls, you may delete all calls by pressing and holding the
button for more than 3 seconds. DELETE ALL? appears in the display.
Press delete button again to conrm.
DIALING A CALLER ID NUMBER
Dialing from On-hook:
Press the
-
or
+
arrow button to select the CID record.
Press the
button, the display will show ‘PICK UP or ADJ’.
If necessary, press the ‘#’ button to remove a digit or press a numeric
button to insert a digit from left hand side of the displayed number, until
the correct number of digits show in the display.
Pick up the handset, the number will be automatically dial out after 3
second.
Dialing in O-hook:
Pick up the handset to make the phone in O-hook rst.
Use the
-
or
+
arrow button to select the CID record.
Press the
button to dial out the displayed number.
CALLER ID MESSAGE
If the part or all of the Caller ID information are blocked by the calling party,
the display will show ‘BLOCKED CALL’, ‘BLOCKED NUMBER’ or ‘BLOCKED
NAME’.
If the part or all of the Caller ID information does not available from the
calling party due to the out of area, the display will show ‘UNKNOWN
CALLER’, ‘UNKNOWN NUMBER’ or ‘UNKNOWN NAME’.
If the part of the Caller ID information is incorrect, the display will show
‘INCOMPLETE DATA’.
TELEPHONE BASICS
RECEIVING A PHONE CALL
Lift the handset to answer the call.
Replace the handset in the cradle to hang up.
MAKING A PHONE CALL
Lift the handset. Wait for a dial tone.
Dial the telephone number you want to call.
Replace the handset in the cradle to hang up.
HEARING VOLUME
You may adjust the receiver volume from a switch located at the rear side of
the unit.
3 levels are available: Low (Lo), medium (Mid), High (Hi)
You may adjust the ringer volume from a switch located at the rear side of
the unit.3 levels are available: OFF, low (lo), High (Hi)
REDIAL (OUT GOING CALLLOG)
In On-hook mode:
You can press " " key and then the
-
or
+
button to review the outgoing
call up to last 5 times redial number.
Lift the handset to dial out the outgoing call.
In O-hook mode:
You can press the button to redial out the last number.
If the line is detected in busy before redial, the unit will perform a ash then
try to redial the number.
DELETE REDIAL RECORD
During the redial record review in On-hook, press the button to delete
the displayed record. If press and hold the button for 3 sec, the display
will show ‘DELETE ALL’. Press button again, all the redial record will be
deleted.
TEMPORARY TONE DIALING
If you have pulse (rotary) service and want to access customer calling
services (such as telebanking and long distance services) that require tone
dialing, you can use this feature to temporarily change from pulse to tone
service.
After dialing the telephone number and connecting to the customer calling
service,
Press and release the TONE (*) button.
When you hang up, the telephone automatically returns to pulse dialing
mode.
PRE-DIALING
With the handset on the cradle, enter the telephone number wish to call
(max 32 digit). The telephone number shows in the display.
Lift the handset, the number will be automatically dialed out.
NOTE: Use the button to delete an incorrectly entered number.
•
•
•
•
1.
2.
3.
4.
5.
1.
2.
3.
4.
1.
2.
1.
2.
1.
2.
3.
1.
2.
1.
2.
MEMORY
Store up to ten, 16-digit 12 char, name & numbers in memory for quick
dialing. This memory feature is in addition to the 70 Caller ID records that
can be stored in the Caller ID memory log.
STORING A NAME AND NUMBER IN MEMORY
Press the button to enter the program mode.
Press the digit 0 … 9 to select the memory location.
Press the button then enter the phone number up to 16 digits.
Press the button to store the number.
Use the dialing button to enter the name up to 12 character and press the
to save. More than one letter is stored in each of button. For example,
press the ‘2’ button twice to input the letter ‘b’. Press the ‘9’ button 4 times
to input the letter ‘z’.
Use the REVIEW
+
button to move the next position or REVIEW
-
to
backward one position.
If the input is incorrect, press the button to delete the current
character.
Press the button to store the entry.
DELETE MEMORY
Press the button to enter the program mode.
Press the digit 0 … 9 or - / + to select the memory location.
Press the button, the display will show ‘ERASE MEM?’.
Press the button again to conrm the deletion.
If you press and hold the button for 3 second in step 3, the display will
show ‘ERASE ALL MEM?’ to delete all memories.
COPY REDIAL NUMBER TO MEMORY
Press the button while the phone is in On-hook mode. The display shows
‘PICKUP PHONE’.
Press REVIEW
- / +
to select redial record.
Press button to enter the program mode.
Press the digit 0 … 9 to select the memory location then press the
button to conrm.
You can edit the displayed number if necessary. Afterwards, press the
button to conrm.
You can edit the displayed name right now if necessary.
Finally, press the button to conrm the entry. If the memory has
content, it will be replaced by new entry.
MEMORY DIALING
In On-hook mode:
Press
button.
Press [0 ] ... [ 9 ] or
- / +
arrow button to select memory location.
Pickup the handset to dial out the numbers.
In O-hook mode:
Press
button.
Press
- / +
button to select memory location.
Press
button to directly dial out the number.
OR
Press
button then digit [0] … [9] to directly dial out the number.
HANDSET MICROPHONE MUTE
You can press the button to mute the microphone during the
conversation. When the Mute function is activated, the display will show
“Muting…”. You can press the button again to release the mute function.
VISUAL MESSAGE WAITING INDICATOR
The VMWI will blank if there have a message in the centralized voice mail
system. You need to contact your services provider for more details.
BATTERY LOW INDICATION
When the LCD display shows the battery low icon, you need change a new
battery (3 x AA) to ensure the unit is properly to operate.
TROUBLESHOOTING TIPS
No Dial Tone
Check all cabling to make sure that all connections are secure and not
damaged.
Check hook switch: Does it fully extend when handset is lifted from
cradle?
No Display
Replace the batteries.
Check for proper battery installation.
No Information is Shown After the Phone Rings
Are you subscribed to Caller ID service from your local telephone
company?
Be sure to wait until the second ring before answering.
Phone Dials in Pulse with Tone Service
Make sure T/P DIAL MODE is set to TONE DIAL.
Phone Won't Dial Out with Pulse Service
Make sure T/P DIAL MODE is set to PULSE DIAL.
Phone Does Not Ring
You may have too many extension phones on your line. Try unplugging
some extension phones.
Check that ringer volume is not OFF (see RINGER VOLUME).
Incoming and Outgoing Voice Volume Low
Are other phones o hook at same time? If so, this is normal condition as
volume drops when additional phones are used at once.
Check the handset receiver volume.
PRODUCT WARRANTY
Please read carefully the user’s guide included in this package.
The product Temporis Retro is certied as conforming to European technical
standards, as evidenced by the CE Mark axed thereto.
The product you have just bought is a technological product, which must be
handled with care.
UK legislation, including Sale of Goods Acts and regulations, imply certain
conditions which may apply to the product you have purchased from the
retailer (statutory warranty). These include conditions relating to quality.
For information concerning the statutory warranty, please consult the
retailer who sold the product to you (seller).
Without prejudice to any statutory warranty from which the product
benets, ATLINKS Europe whose registered oce address is at 22 quai
Gallieni 92150 Suresnes France warrants that the product contained in this
package complies with the technical specications set forth in the user’s
guide, during a warranty period commencing on the date of purchase of an
unused Product, which shall be presumed to be the date appearing on the
invoice or the receipt issued by the seller, upon which appears the seller’s
name and continuing for:
Twenty-four (24) months for the telephone, excluding consumables,
accessories and batteries.
Together with any claim made under this warranty during the warranty
period, the complete Product must be returned to the seller as soon as the
defect appears or is discovered, together with proof of purchase, consisting
of an invoice or receipt issued by the seller specifying the place of purchase
and the serial number of the Product.
Any Product or Product part found, during the warranty period, to have a
defect in design, materials or workmanship shall be repaired or replaced, at
no cost to you, by a product or part that is identical or at least equivalent in
terms of function and performance. If repair or replacement is not possible
on a commercially reasonable basis, ATLINKS will refund the purchase price
of the Product or replace the Product by an equivalent product.
1.
2.
3.
4.
5.
6.
7.
8.
1.
2.
3.
4.
5.
1.
2.
3.
4.
5.
6.
7.
1.
2.
3.
1.
2.
3.
•
•
•
•
•
•
•
•
•
•
•
•
Wall plate
Mo dular
telephone
line jack
The repaired or replaced Product or part, which, may be new or refurbished,
shall be under warranty for a period of ninety (90) days from the date
of repair or replacement, or until the end of the initial warranty period if
that exceeds the said ninety (90) days; the warranty period shall also be
extended by any period exceeding six days between the date the defective
Product is delivered to the seller and the date that the repaired or replaced
Product is placed at your disposition.
This warranty does not apply in case of:
- damage caused by installing or using the Product otherwise than in
accordance with the instructions contained in the user’s guide;
- improper connection or abnormal use of the Product, in particular
together with incompatible accessories, as stipulated in the user’s guide;
- a Product that has been opened, modied or tted with unapproved
replacement parts;
- removal of the serial number or defacement rendering the serial
number illegible;
- normal wear and tear, including normal wear and tear of accessories,
batteries and screens;
- non-compliance with technical and safety standards in force in the
geographical area of utilization;
- Products having suered an impact or a fall;
- damage caused by lightning, power surge, proximity to a source of heat
or radiation, water damage, exposure to excessive temperature, humidity
or other environmental conditions or any other cause external to the
Product;
- negligent or defective maintenance;
- damage caused by servicing, modication or repair performed by any
person other than an authorized ATLINKS service provider.
If the returned Product is not covered by the warranty, you will receive a
repair estimate giving the processing cost and the transport fees that will be
charged if you wish the Product to be returned to you.
This warranty is applicable where the Product is lawfully purchased, in the
United Kingdom .
All warranties other than the warranty set forth herein are expressly
excluded. Nothing in this warranty shall exclude or limit conditions or
warranties implied by law including the statutory warranty.
ATLINKS shall:
(a) only be responsible to you for losses suffered by you that are a
foreseeable consequence of a defect in the Product;
(b) not be responsible to you for losses that result from a defect in the
Product which fall into the following categories:
(i) loss of income or revenue;
(ii) loss of prot;
(iii) loss of business;
(iv) loss of anticipated savings;
(v) loss of data;
(vi) any waste of time; or
(vii) downtime or loss of use;
However this clause shall not prevent claims for foreseeable loss of, or
damage to, your physical property;
Nothing in this warranty excludes or limits in any way ATLINKS liability for:
(i) death or personal injury caused by our negligence;
(ii) fraud or fraudulent misrepresentation;
(iii) any breach of the obligations implied by section 12 of the Sale of
Goods Act 1979 or section 2 of the Supply of Goods and Services Act
1982;
(iv) defective products under the Consumer Protection Act 1987; or
(v) any other matter for which it would be illegal or unlawful for ATLINKS
to exclude or attempt to exclude liability.
BORRAR TODOS LOS REGISTROS DE LLAMADAS PARA
BORRAR UNA LLAMADA INDIVIDUAL
Al revisar las llamadas, puede borrar una llamada individual pulsando la
tecla .
Se borrarán los contenidos de la pantalla y se renumerarán los registros
restantes de identicación de llamadas.
PARA BORRAR TODAS LAS LLAMADAS
Al revisar las llamadas, puede borrar todas las llamadas pulsando y
manteniendo pulsado la tecla durante más de 3 segundos. Aparecerá en
pantalla ¿BORRAR TODO?
Vuelva a pulsar la tecla para conrmarlo.
MARCAR UN NÚMERO DEL IDENTIFICADOR DE LLAMADAS
Marcación desde Descuelgue conectado:
Pulse la tecla de echa - o + para seleccionar el registro CID.
Pulse la tecla MARCAR; la pantalla mostrará ‘COGER o ADJ’.
Si fuera necesario, pulse la tecla ‘#’ para eliminar un dígito o pulse la tecla
numérica para insertar un dígito del lateral izquierdo del número que se
muestra, hasta que aparezcan en pantalla en número correcto de dígitos.
Coja el auricular; se marcará el número de forma automática tras 3
segundos.
Marcación desde Descuelgue desconectado:
Coja el auricular para colocar al teléfono en modo Descuelgue
desconectado
Use la tecla de echa - o + para seleccionar el registro CID.
Pulse la tecla MARCAR para marcar el número que se muestra.
MENSAJE DE IDENTIFICACIÓN DE LLAMADAS
Si se bloquea una parte o toda la información del identicador de llamadas
por parte de la persona que llama, la pantalla mostrará “BLOQUEADO
TODO” “NÚMERO BLOQUEADO” o ”NOMBRE BLOQUEADO”.
Si no está disponible una parte o toda la información del identicador de
llamadas por parte de la persona que llama pero debido a que se encuentra
fuera de área, la pantalla mostrará “LLAMADA DESCONOCIDA” “NÚMERO
DESCONOCIDO” o ”NOMBRE DESCONOCIDO”.
Si una parte de la información del identicador de llamadas es incorrecta, la
pantalla mostrará “DATOS INCOMPLETOS”.
CONOCIMIENTOS BÁSICOS DEL TELÉFONO
RECIBIR UNA LLAMADA TELEFÓNICA
Levante el auricular para responder a la llamada.
Vuelva a colocar el auricular en la base para colgar.
HACER UNA LLAMADA TELEFÓNICA
Levante el auricular y espere el tono de marcación.
Marque el número al que desee llamar.
Vuelva a colocar el auricular en la base para colgar.
VOLUMEN DE ESCUCHA
Puede ajustar el volumen del receptor de un conmutador situado en la parte
posterior de la unidad.
Dispone de 3 niveles; normal (Lo), fuerte (Mid), más fuerte (Hi)
VOLUMEN DEL TIMBRE
Se dispone de 3 niveles sonoros
REMARCACIÓN (REGISTRO DE LLAMADAS SALIENTES)
En modo Descuelgue conectado:
Puede pulsar la tecla "REMARCACIÓN" y posteriormente la tecla - o + para
revisar las llamadas salientes hasta los 5 últimos números de rellamada.
Levante el auricular para marcar la llamada saliente.
En modo Descuelgue desconectado:
Puede pulsar la tecla "REMARCACIÓN" para remarcar el último número.
Si se detecta que la línea está ocupada antes de la remarcación, la unidad
parpadeará y posteriormente intentará remarcar el número.
BORRAR REGISTRO DE REMARCACIÓN
Durante el registro de remarcación, en modo Descuelgue conectado, pulse
la tecla para borrar el registro que se muestra. Si pulsa y mantiene
pulsado la tecla durante 3 segundos, la pantalla mostrará “BORRAR
TODO”. Vuelva a pulsar la tecla y se borrarán todos los registros de
remarcación.
MARCACIÓN POR TONOS TEMPORALES
Si tiene un servicio de pulso (rotatorio) y quiere acceder a los servicios de
llamadas a clientes (como telebanca, y servicios de larga distancia) que
requieran marcación por tonos, puede usar esta propiedad para cambiar
temporalmente del servicio de pulso al servicio de tono.
Tras marcar el número de teléfono y conectar con el servicio de llamada al
cliente,
Pulse y suelte la tecla TONO (*).
Cuando cuelgue, el teléfono vuelve automáticamente al modo de
marcación por pulsos.
PREMARCACIÓN
Con el auricular en la base, introduzca el número de teléfono al que
desea llamar (máximo 32 dígitos). El número de teléfono aparece en
pantalla.
Levante el auricular y se marcará el teléfono de forma automática.
NOTA: Use la tecla para borrar un teléfono que se haya
introducido de forma incorrecta.
MEMORIA
Guarda hasta diez nombres y números de 16 dígitos y caracteres.
Esta propiedad de la memoria es complementaria a los 70 registros
de identicación de llamada que se pueden guardar en el registro de
identicación de llamadas.
GUARDAR UN NOMBRE Y UN NÚMERO EN LA MEMORIA
Pulse la tecla para entrar en el modo programa.
Pulse los dígitos del 0 … 9 para seleccionar la ubicación de la memoria.
Pulse la tecla y posteriormente introduzca el número de teléfono de
hasta 16 dígitos.
Pulse la tecla para guardar el número.
Use la tecla de marcación para introducir el nombre de hasta 12
caracteres y pulse GUADAR para guardarlo. Se guarda más de una letra
en cada botón. Por ejemplo, pulse la tecla ‘2’ dos veces para introducir la
letra ‘b’. Pulse la tecla ‘9’ 4 veces para introducir la letra ‘z’.
Use la tecla REVISAR + para moverse a la siguiente posición o REVISAR
- para atrasar una posición.
En caso de que la entrada sea incorrecta, pulse la tecla para borrar el
carácter actual.
Pulse la tecla para guardar la entrada.
BORRAR LA MEMORIA
Pulse la tecla para entrar en el modo programa.
Pulse los dígitos del 0 … 9 para seleccionar la ubicación de la memoria - /
+ .
Pulse la tecla ; la pantalla mostrará ‘¿BORRAR MEMORIA?’.
Vuelva a pulsar la tecla para conrmar el borrado.
Si pulsa y mantiene pulsado la tecla durante 3 segundos en el paso 3,
la pantalla mostrará ‘¿BORRAR TODAS LAS MEMORIAS?’ para borrar todas
las memorias.
COPIAR EL NÚMERO DE REMARCACIÓN EN LA MEMORIA
Pulse la tecla mientras el teléfono está en modo Descuelgue activado.
La pantalla muestra ‘CONTESTAR TELEF’.
Pulse REVISAR - / + para seleccionar el registro de remarcación.
1.
2.
3.
4.
1.
2.
1.
2.
1.
2.
3.
1.
2.
1.
2.
1.
2.
3.
4.
5.
6.
7.
8.
1.
2.
3.
4.
5.
1.
2.
Pulse la tecla para entrar en el modo programa.
Pulse los dígitos del 0 … 9 para seleccionar la ubicación de la memoria;
posteriormente, pulse la tecla para conrmarlo.
Puede editar el número que se muestra si es necesario; después, pulse la
tecla para conrmarlo.
Puede editar el nombre que se muestra directamente si es necesario.
Para nalizar, pulse la tecla para conrmar la entrada- Si la memoria
tiene contenidos, estos se sustituirán por la nueva entrada.
MARCACIÓN DESDE LA MEMORIA
En modo Descuelgue conectado:
Pulse la tecla .
Pulse [0 ] ... [ 9 ] o la tecla de echa - / + para seleccionar la ubicación
de la memoria.
Coja el auricular para marcar los números.
En modo Descuelgue desconectado:
Pulse la tecla .
Pulse la tecla - / + para seleccionar la ubicación de la memoria.
Pulse la tecla para marcar el número directamente.
O
Pulse la tecla y posteriormente los dígitos [0] … [9] para marcar
directamente el número.
MICRÓFONO DEL AURICULAR SILENCIADO
Puede pulsar la tecla para silenciar el micrófono durante una
conversación. Cuando se activa la función Silenciar, la pantalla muestra
“Silenciando…”. Puede volver a pulsar la tecla para abandonar la función
silenciar.
INDICADOR DE ESPERA DE MENSAJE VISUAL
El VMWI parpadeará si tiene un mensaje en el sistema de buzón de voz
centralizado. Es necesario que se ponga en contacto con su proveedor de
servicios para obtener más detalles.
INDICADOR DE BATERÍA BAJA
Cuando la pantalla LCD muestra el icono de batería baja, es necesario que
cambie las pilas por unas nuevas (3 x AA) para asegurarse que la unidad
opera de forma óptima.
CONSEJOS SOBRE PROBLEMAS Y SOLUCIONES
No hay tono de marcación
Compruebe todo el cableado para asegurarse que todas las conexiones
están seguras y no presentan daños.
Compruebe el conmutador de descuelgue: ¿se extiende totalmente
cuando se levanta el auricular de la base?
No aparece nada en la pantalla
Sustituya las pilas.
Compruebe la adecuada instalación de las pilas.
No se muestra información después de que suena el teléfono
¿Está suscrito al servicio de identicación de llamadas en su compañía
telefónica local?
Asegúrese de esperar al segundo tono antes de responder.
El teléfono marca en pulso con el servicio de tonos
Asegúrese que el MODO MARCACIÓN T/P está congurado en
MARCACIÓN POR TONOS.
El teléfono no marca con el servicio de tono.
Asegúrese que el modo marcacion está congurado en (T).
El cursor situado debajo del teléfono, debe estar posicionado a la
izquierda (T).
El teléfono no suena
Puede que tenga demasiados cables de extensión en la línea. Intente
desconectar algunas extensiones de teléfonos.
Compruebe el volume de marcación. Véase los consejos de problemas y
soluciones sobre Sin tono de marcación.
Volumen de voz bajo de llamadas entrantes y salientes
¿Están otros teléfonos en modo descuelgue desconectado? En tal caso,
esto es una condición normal ya que el volumen cae cuando se utilizan a
la vez teléfonos adicionales.
Compruebe el volumen del receptor del auricular.
La tienda en donde se ha comprado el teléfono puede también
informarle y efectuar el servicio de atención al cliente.
GARANTÍA
Informamos que deberá leer atentamente el manual de utilización incluido
en este embalaje.
El producto Temporis Retro está conforme con las normas técnicas
europeas, certicado con la marcación CE.
El producto que acaba de adquirir es un producto tecnológico, que debe ser
manipulado con cuidado.
Este producto dispone de una garantía legal en los términos y condiciones
aplicables a la venta de bienes de consumo del país donde compró el
producto.
Para cualquiera información relativa a esta garantía legal, pregunte a su
vendedor.
Sin perjuicio de toda y cualquier garantía legal del que el producto se
benecie, ATLINKS garantiza que el producto que consta en el presente
embalaje (el «Temporis Retro») es conforme a las especicaciones técnicas
indicadas en el manual de utilización, durante el periodo de garantía. Este
periodo de garantía tendrá inicio en la fecha de la compra de un Producto
no usado, que se presume que sea la fecha que consta en la factura o en el
ticket de compra emitido por su vendedor y en el que gura el nombre del
vendedor, y por un periodo de:
Veinticuatro (24) meses para el teléfono, con excepción de los consumibles,
accesorios y baterías.
Cualquiera reclamación realizada en el ámbito de esta garantía y durante el
periodo de garantía, deberá ser acompañada del Producto completo, el cual
deberá ser devuelto al vendedor al que compró el Producto a la dirección
correspondiente a su establecimiento de venta, tan pronto como surja o sea
conocido el defecto, juntamente con el justicante de la compra, ya sea la
factura o el ticket de compra emitido por el vendedor especicando el lugar
de la compra y el número de serie del Producto
Durante el periodo de garantía, el Producto o la pieza que posea un
defecto en su diseño, materiales o acabamientos será reparado o
sustituido, gratuitamente, por un producto o pieza idénticos o por lo
menos equivalentes en lo que se reere a funcionalidades y desempeños.
Si la reparación o la sustitución se revelasen imposibles o fueran
desproporcionadas desde el punto de vista comercial teniendo en cuenta
el valor del Producto, ATLINKS reembolsará el precio que fue pagado en la
compra del Producto o sustituirá el Producto por un producto equivalente.
En los más amplios términos permitidos por la ley, el Producto o pieza
reparados o substituidos, que pueden ser nuevos o remodelados, se
benecian de una garantía de noventa (90) días a partir de la fecha de la
reparación o sustitución, o hasta el n de la garantía inicial del Producto, si
esta fuese superior a los noventa (90) días. En el caso de que el periodo en
que estuviese privado del uso del Producto por causa de la reparación o
sustitución (siempre que el Producto con defecto se entregue a su vendedor
hasta que sea puesto a su disposición) fuera superior a seis días, el periodo
de garantía será alargado por el periodo excedente correspondiente.
No obstante, si el plazo de la garantía legal en el caso de sustitución o
reparación en vigor en su país fuese superior, sólo será aplicable la garantía
legal.
Se excluyen de la presente garantía los siguientes casos:
- Productos dañados por un mal uso o utilización del Producto no
conforme a las instrucciones del manual de usuario;
- Por una conexión incorrecta o uso inadecuado del producto, en
3.
4.
5.
6.
7.
1.
2.
3.
1.
2.
3.
•
•
•
•
•
•
•
•
•
•
•
•
•
•
particular con accesorios incompatibles en los términos que constan en
el manual de utilización;
- Por causa de que el Producto haya sido abierto, modicado o equipado
con piezas de sustitución no aprobadas;
- Remoción del número de serie o alteración de modo que el número de
serie se torne ilegible.
- Desgaste normal, incluido el desgaste normal de los accesorios,
baterías y pantallas;
- No haber respetado las normas técnicas y de seguridad vigentes en el
área geográca de utilización;
- Productos que hayan sufrido golpes o caídas;
- Daños resultantes de rayos, oscilaciones de energía, proximidad a una
fuente de calor radiación, agua, exposición a temperatura excesiva,
humedad u otras condiciones ambientales o cualquier causa externa al
Producto.
- Negligencia o manutención incorrecta;
- Daños causados por servicios de manutención o reparación fuera de un
centro homologado ATLINKS.
Si el producto reexpedido no estuviese cubierto por la garantía, recibirá un
presupuesto de reparación que mencionará el coste de análisis y los costes
logísticos que serán cobrados en el caso de que pretenda que el Producto le
sea devuelto.
Esta garantía es válida en el país donde usted ha comprado el producto,
con la condición de que sea un miembro de la Unión Europea.
Sin perjuicio de las disposiciones legales imperativas, todas las garantías
que no están descritas en el presente documento son expresamente
excluidas.
EN LOS MÁS AMPLIOS TÉRMINOS PERMITIDOS POR LA LEY APLICABLE.
A) ESTA GARANTIA ES EXCLUSIVA DE TODAS Y CUALESQUIERA OTRAS
GARANTIAS, EXPRESAS O IMPLÍCITAS, INCLUIDO, PERO CON LIMITACIÓN,
LAS GARANTIAS DE CALIDAD MERCANTIL O DE ADAPTACION A UN
OBJETO PARTICULAR;
B) ATLINKS DECLINA CUALQUIER RESPONSABILIDAD POR PÉRDIDA O
DETERIORO DE DATOS, INACTIVIDAD, PÉRDIDA DE OPORTUNIDADES
DE NEGOCIOS, LUCRO CESANTE, PÉRDIDA DE CLIENTELA O DE OTRA
VENTAJA ECONOMICA , O, EN GENERAL POR CUALESQUIERA DAÑOS
INDIRECTOS, INMATERIALES, CONSECUTIVOS O ACCESORIOS;
C) LA RESPONSABILIDAD DE ATLINKS ESTÁ LIMITADA AL VALOR DE
COMPRA DEL PRODUCTO, SALVO EN EL CASO DE NEGLIGENCIA, DOLO O
DE RESPONSABILIDAD OBJETIVA DEL PRODUCTOR Y RESPONSABILIDAD
POR MUERTE O DAÑOS PERSONALES.
SEGURIDAD
! No use el teléfono para avisar de una fuga de gas si se encuentra en las
cercanías de dicha fuga!
Se recomienda que evite usar este dispositivo durante tormentas eléctricas.
No intente abrir la batería ya que contiene sustancias químicas. En caso
de fuga, evite el contacto con la piel, ojos, nariz y boca. En caso de que se
produzca el contacto, limpie bien la zona afectada durante unos veinte
minutos con agua del grifo y busque atención médica urgente. Limpie el
producto con un papel absorbente o un paño seco y póngase en contacto
con su distribuidor para sustituir las baterías.
ATLINKS declara que el teléfono Temporis Retro cumple con los requisitos
esenciales y otras disposiciones aplicables de la directiva europea 1999/5/
EC.
MEDIO AMBIENTE
Este símbolo indica que el electrodoméstico electrónico no operativo debe
recogerse de forma separada y no mezclarse con los residuos domésticos.
La Unión Europea ha implementado una recogida especíca y un sistema
de reciclaje de los que los fabricantes son los responsables.
Este electrodoméstico ha sido diseñado y fabricado con materiales y
componentes de gran calidad que pueden reciclarse y reutilizarse. Los
electrodomésticos eléctricos y electrónicos pueden contener piezas que
son necesarias para que el sistema funcione debidamente pero que pueden
convertirse en un riesgo sanitario y medioambiental si no se manejan
y se eliminan de forma adecuada. Por consiguiente, rogamos no tire el
electrodoméstico inoperativo como si fuera un residuo doméstico.
En caso de que sea el propietario del electrodoméstico, debe depositarlo en
el punto apropiado de recogida local o dejarlo con el distribuidor cuando
adquiera uno nuevo.
- En caso de que sea un usuario profesional, rogamos siga las instrucciones
del fabricante.
- Si el electrodoméstico es alquilado o se ha dejado a su cuidado, por favor,
póngase en contacto con su proveedor de servicios.
Deseoso de conservar el medioambiente, ATLINKS ha equipado este
electrodoméstico con un dispositivo de alimentación que ofrece una mayor
eciencia energética. Las ventajas incluyen no sólo un consumo muy bajo
de energía, sino también un formato más compacto que las unidades de
alimentación convencionales que se empleaban en la gama anterior.
Las baterías usadas del teléfono (si dispone de las mismas) deben eliminarse
según la normativa de protección medioambiental actual, Cumpla con la
normativa local.
Lleve a su distribuidor las baterías o deshágase de ellas en un centro de
reciclaje aprobado.
¡Ayúdenos a proteger el medioambiente en el que vivimos!
SETUP MENU
When applying power for the rst time, the summary screen appears.
NOTE: Proceed immediately to change any of the following factory
preset settings as required.
To enter the setup menu, press the MENU button. DATE / TIME appears.
At this point you can press either arrow button to scroll through 5 menu
screens:
1) DATE / TIME 2) LANGUAGE (Default: English)
3) CONTRAST (Default: 3) 4) LOCK (Call Lock ‘0’)
5) CHANGE PIN (Default Password: 0000)
You have 10 seconds following any key press before the unit
automatically return to the summary screen.
NOTE: You can exit the setup menu by pressing the button.
UNIT’S DATE / TIME
The Unit’s Date / Time will NOT be shown after the Batteries installed. It can be set
by incoming FSK type I / II Caller ID or Date / Time set menu.
If you set the system clock by Date / Time set menu, it will never be updated by
incoming Caller ID. unless the battery power to be removed.
If the system clock is rstly set by incoming Caller ID after the power up, it will be
automatically updated by each Caller ID received.
If a DTMF Caller ID is received, the receiving date / time for that Caller ID will be
recorded as the system clock.
SETUP MENU
1. DATE / TIME SET
To enter the setup menu, press the MENU button. The display shows DATE
/ TIME.
Press the MENU button again, the hour’s digit will flashing. You can
change it by using the - or + arrow button.
Press the MENU button to move to minute’s digit. You can press the - or +
arrow button to change the digits.
Press the MENU button to move to month’s digit and use the - or + arrow
button to change the value.
Press the MENU button to move to day’s digit and use the - or + arrow
button to change the value.
Afterward, press the MENU button again, the display shows 24H. You can
change the clock in 12 hours format by press - or + arrow button.
To save the date / time setting and go to the language set menu, press
MENU button again.
SETTING THE LANGUAGE
You may select the language of the user interface from this menu.
To enter the setup menu, press the MENU button. The display shows
LANGUAGE.
Press the MENU button again to enter the language set. There are six
language to be selected. The default is English.
Press the - or + arrow button to cyclically change to ENGLISH, FRENCH,
SPANISH, GREEK, PORTUGUESE, POLISH.
After the selection, press the MENU button to conrm the setting.
SETTING THE LCD CONTRAST
This adjustment allows you to adjust the contrast and viewing angle of the
display.
To enter the setup menu, press the MENU button.
Press the - or + arrow button until the display shows ‘CONTRAST’.
Press the MENU button the digit will be flashing. There are 5 levels of
contrast, with the default set to 3.
To decrease the contrast, press the - arrow button. To increase, press the
+ arrow button.
Press MENU again to store the contrast setting.
ACTIVATE OR DEACTIVATE CALL LOCK ‘0’
To enter the setup menu, press the MENU button.
Press the - or + arrow button until the display shows ‘LOCK’.
Press MENU button to activate or deactivate the call lock ‘0’ function.
If the call lock ‘0’ function is deactivated, it will activate the call lock ‘0’
function. If the call lock ‘0’ function is activated, it will prompt the user to
enter the password to deactivate call lock. If the password has not been
entered before, it defaults 0000.
If the password is incorrect, the display will show ‘INCORRECT PIN!’.
CHANGE PASSWORD FOR CALL LOCK ‘0’ FUNCTION
To enter the setup menu, press the MENU button.
Press the - or + arrow button until the display shows ‘CHANGE PIN?’.
Press MENU button to change the password of call lock ‘0’.
It prompts the user to enter the old password in rst.
Afterwards, it will prompt the user to enter the new one and then re-enter
again for conrmation.
EXITING THE SETUP MENU
You can abort the current operating and exit by going off-hook, or by
pressing ' ' button.
1.
2.
•
1)
2)
3)
4)
5)
6)
7)
2.
1)
2)
3)
4)
3.
1)
2)
3)
4)
5)
4.
1)
2)
3)
5.
1)
2)
3)
4)
5)
Adquirido por:
Domicilio:
Población:
Provincia:
Teléfono:
Sello del punto de venta
DATOS DEL COMPRADOR
TIPO DE GARANTÍA
CP:
Marca:
Modelo:
N° Serie:
Fecha de compra:
DATOS DEL TELÉFONO
NO DOMICILIARIA
TARJETA DE GARANTÍA
Un producto de ATLINKS
Carte de Garantie_ES:Mise en page 1 10/11/2010 11:57 Page 1
© ATLINKS 2011 - Reproduction interdite.
ATLINKS et TEMPORIS sont des marques déposées
Le constructeur se réserve le droit de modier les caractéristiques de ses produits en vue d'y
apporter des améliorations techniques ou de respecter de nouvelles réglementations.
Le logo et le nom ALCATEL sont des marques enregistrées d'ALCATEL, utilisées sous licence par
ATLINKS.
© ATLINKS 2011 - Reproducción prohibida
ATLINKS y TEMPORIS son marcas registradas.
El fabricante se reserva el derecho de modicar sin previo aviso las características de sus
productos para introducir mejoras técnicas o cumplir con nuevas regulaciones ociales.
El logotipo y el nombre de ALCATEL sont marcas registradas de ALCATEL utilizadas bajo licencia
por ATLINKS.
© ATLINKS 2011 - Reproduction prohibited.
The Manufacturer reserves the right to modify the specications of its products in order to
make technical improvements or comply with new regulations.
ALCATEL and ATLINKS are registered trademarks.
The Alcatel logo and Alcatel name are trademarks of Alcatel and used under licence by
ATLINKS.
A/W No.: 10000333 Rev.0 (FR/SP/EN)
Printed in China
RINGER
(OFF/Lo/Hi)
VOLUME
(Lo/Mid/Hi)
FLASH TIME
(100/300/600)
TONE/PULSE
Month
DayHour
Minute
Message Waiting
Repeat call
Call log
Number
New Call
Battery
Low
Lock 0 icon
Call Waiting
www.atlinks.com
ATLINKS Europe
22 quai Gallieni
92150 Suresnes- France
FLASH button
MENU button
MUTE button
DIAL button
REVIEW button
DELETE button
DIRECTORY button
REDIAL button
R
m
e
n
u
+
-
/