Page is loading ...

MANUAL
Ref.
FR - Manuel d'Utilisation - p. 5
NL - Handleiding - p. 10
DE - Bedienungsanleitung - S. 14
SI - Navodila za uporabo - p. 18
RO - Manual de utilizare - p. 22
ES - Manual de instrucciones - p. 26
FXBAR140
Code: 16-2104
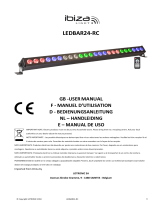
2-IN-1 WARM WHITE BLINDER / MATRIX ANIMATION BAR
WITH RGB BACKGROUND ILLUMINATION
BARRE D'ANIMATION MATRICABLE 2-EN-1 AVEC EFFET
BLINDER BLANC CHAUD & ECLAIRAGE RVB EN ARRIERE-PLAN
2-IN-1 WARM WITTE BLINDER / MATRIX ANIMATION BAR
MET RGB ACHTERGRONDVERLICHTING
2-IN-1 WARMWEISSER BLINDER / MATRIX ANIMATION BAR
MIT RGB HINTERGRUNDBELEUCHTUNG
2-V-1 TOPLA BELA BLINDER / MATRIX ANIMACIJSKI BAR
Z RGB OSVETLJENIM OZADJEM
BARĂ CU SISTEM DE ANIMAȚIE MATRICIAL 2-IN-1 ALB CALD
BLINDER / MATRICE
CU ILUMINARE RGB
BARRA DE ANIMACION MATRICIABLE 2-EN-1
CON EFECTO BLINDER BLANCO CALIDO
E ILUMINACION RGB EN EL FONDO

MANUAL - FXBAR140
2
©Copyright LOTRONIC 2019
2-IN-1 WARM WHITE BLINDER / MATRIX ANIMATION BAR
WITH RGB BACKGROUND ILLUMINATION
INSTRUCTION MANUAL
UNPACKING INSTRUCTIONS
Immediately upon receiving a xture, carefully unpack the carton, check the contents to ensure that all parts
are present and have been received in good condition. Notify the freight company immediately and retain
packing material for inspection if any parts appear to be damaged from shipping or the carton itself shows
signs of mishandling. Keep the carton and all packing materials. In the event that a xture must be returned to
the factory, it is important that the xture be returned in the original factory box and packing.
CONTENTS OF THE CARTON
• 1 pc. FXBAR140
• 1 pc. user manual
• 1 pc. power cable
EXPLANATION OF SYMBOLS ON THE SILKSCREEN
The triangle containing a lightning symbol is used to indicate whenever your health is at risk (due to
electrocution, for example).
An exclamation mark in a triangle indicates particular risks in handling or operating the appliance.
The unit complies with CE standards
For indoor use only
0.5m
Minimum distance between the appliance and other objects
CAUTION
DO NOT OPEN THE HOUSING
SHOCK HAZARD
Please read this manual carefully before operating this product.
SAFETY RECOMMENDATIONS
• Please read these instructions carefully, they include important information about the installation, usage and
maintenance of this product.
• Please keep this User Guide for future reference. If you sell the unit to another user, be sure that he also
receives this instruction booklet.
• Always make sure that you are connecting to the proper voltage, and that the line voltage you are connecting
to is not higher than that stated on the bottom of the xture.
• The appliance is part of class I and must exclusively connected to an earthed mains outlet.
• This product is intended for indoor use only!
• To prevent risk of re or shock, do not expose xture to rain or moisture. Make sure there are no ammable
materials close to the unit during operation.
• The unit must be installed in a location with adequate ventilation, at least 20in (50cm) from adjacent sur-
faces. Be sure that no ventilation slots are blocked.
• The minimum distance luminaire from that part of the luminaire or lamp to the lighted object is 0.5m.
0.5m
• •Maximum ambient temperature (Ta) is 104° F (40°C). Do not operate the xture at temperatures higher
than this.
• In the event of a serious operating problem, stop using the unit immediately. Never try to repair the unit
by yourself. Repairs carried out by unskilled people can lead to damage or malfunction. Please contact the
EN

MANUAL - FXBAR140
3
www.ibiza-light.com
nearest authorized technical assistance center. Always use the same type of spare parts.
• Make sure the power cord is never crimped or damaged.
• Never disconnect the power cord by pulling or tugging on the cord.
• Avoid direct eye exposure to the light source while it is on as sensitive persons may suer an epileptic shock
(especially meant for epileptics)!.
• The product is for decorative purposes only and not suitable as a household room illumination.
• If the external exible cable or cord of this luminaire is damaged, it shall be exclusively replaced by the manu-
facturer or his service agent or a similar qualied person in order to avoid a hazard.
• The light source of this luminaire is not replaceable. When it reaches the end of its life time, the whole unit
must be discarded..
DISCONNECT DEVICE
Where the MAINS plug or an appliance coupler is used as the disconnect device, the disconnect device shall
remain readily operable.
FUSE REPLACEMENT
Locate and remove the unit’s power cord. Once the cord has been removed located the fuse holder located in-
side the power socket. Insert a at-head screw driver into the power socket and gently pry out the fuse holder.
Remove the bad fuse and replace with a new one.
Warning: If after replacing the fuse you continue to blow fuses, STOP using the unit. Contact customer support
for further instructions. Continuing to use the unit may cause serious damage.
INSTALLATION
The unit should be mounted via its screw holes on the bracket. Always ensure that the unit is rmly xed to
avoid vibration and slipping while operating. Always ensure that the structure to which you are attaching the
unit is secure and is able to support a weight of 10 times of the unit’s weight.
Never stand directly below the device when mounting, removing or servicing the xture.
FIXTURE LINKING
You will need a serial data link to run light shows of one or more xtures using a DMX-512 controller or to run
synchronized shows on two or more xtures set to a master/slave operating mode. The combined number of
channels required by all xtures on a serial data link determines the number of xtures that the data link can
support.
Important: Fixtures on a serial/data link must be daisy chained in one single line. Maximum recommended
serial data link distance: 100 meters (1640 ft.) Maximum recommended number of xtures on a serial data link:
16 xtures
DATA CABLING
To link xtures together you must use data cables. If you choose to create your own cable, please use da-
ta-grade cables that can carry a high quality signal and are less prone to electromagnetic interference.
CABLE CONNECTORS
Cabling must have a male XLR connector on
one end and a female XLR connector on the
other end.
DMX connector conguration
Termination reduces signal errors. To avoid signal transmission problems and interference, it is always advisable
to connect a DMX signal terminator.
CAUTION
Do not allow contact between the common and the xture’s chassis ground. Grounding the common can cause
a ground loop, and your xture may perform erratically. Test cables with an ohm meter to check correct polarity
and to make sure the pins are not grounded or shorted to the shield or each other.

MANUAL - FXBAR140
4
©Copyright LOTRONIC 2019
LED DISPLAY
The LED display has 4 buttons: MENU / UP / DOWN / ENTER
SYSTEM MENU
Press any key to enter the initial interface.
ADDR - DMX Address Setting
1. Press the either the MENU, UP, or DOWN buttons until “Addr” is displayed, press ENTER.
2. The current address will now be displayed and ashing. Press the UP or DOWN buttons to nd your desired
address. Press ENTER to set your desired DMX address.
CHND - DMX channel Mode
1. Press the MENU button until “Chnd” is displayed, press ENTER. "6CH", "8CH",“12CH”, “60CH” will be dis-
played
2. Press the UP or DOWN buttons to nd your desired DMX channel mode and press ENTER to conrm and
exit.
SLND - Master-Slave Mode
1. Press the MENU button until “SLnd” is displayed, press ENTER. Select among Mast, SL1 and SL2 and press
ENTER.
SoUn - Sound controlled Mode
1. Press the MENU button until “SoUn” is displayed, press ENTER.
2. Su 0-59 or Se 00-99 will be displayed. Press the UP or DOWN buttons to nd your desired show. Su 0-59
means sound controlled mode with programs from 0 to 59. Select a program and press ENTER. Se 00-99
means Sound sensitivity. 99 is the highest sensitivity.
AUTO - Auto Running eect
1. Press the MENU button until “Auto” is displayed, press ENTER.
2. The Display will show “Au 0” - “Au 59”. Press the UP or DOWN buttons to nd your desired show, and then
press Enter. SP 1-9 will be displayed. Set the auto running speed to a value between 1 and 9 and press
ENTER.
COLO - Color selection
1. Press the MENU button until “Colo” is displayed, press ENTER.
2. Co 1-15 will be displayed. Select a color between 1 and 15 via the UP & DOWN buttons and press ENTER.
MANU - Manual mode
1. Press the MENU button until “Manu” is displayed, press ENTER.
2. Select a color among Red 0-255/Green 0-255/Blue 0-255/Whit 0-255 and press ENTER.
DISP - Display reverse by 180°
1. Press the MENU button until “dISP” is displayed, press ENTER.
2. Press the UP button to select “dSIP” to reverse the display, or “dISP” to change the display back.
3. Press ENTER to conrm.
Ver - Displays the device version
DMX CHANNEL CHART PLEASE REFER TO THE END OF THE MANUAL
CARE
Before cleaning the unit, disconnect it if from the mains. Do not use aggressive cleaning agents. Use a clean
cloth to wipe any dust or dirt from the product. We are not liable for damage arising from incorrect handing,
improper use or wear and tear. We reserve the right to make technical modications.

MANUAL - FXBAR140
5
www.ibiza-light.com
SPECIFICATIONS
Power supply 110-220V~ 50/60Hz
Consumption 100W
Light source 14x 3W warm white CREE LEDs
56x 3-in-1 5050 RGB LEDs
DMX channels 6, 8 12 or 60
Dimensions 1000 x 70 x 100mm
Weight 2.66kg
TROUBLE-SHOOTING
The unit doesn't work, no
light and no fan
1. Check the connection of power and main fuse
2. Measure the mains voltage on the main connector
3. Check the power on LED
No response to the DMX
controller
1. DMX LED should be on. If not, check DMX connectors, cables to see if
link properly
2. If the DMX LED is on and no response to the channel, check the address
settings and DMX polarity
3. If you have intermittent DMX signal problems, check the pins on connec-
tors or on PCB of the unit or the previous one.
4. Try to use another DMX controller
5. Check if the DMX cables run near or run alongside to high voltage
cables that may cause damage or interference to DMX interface circuit
Some of the units don't res-
pond to the controller
1. You may have a break in the DMX cabling, Check the LED for the res-
ponse of the master/slave mode signal
2. Wrong DMX address in the unit, Set the proper address
No response to the sound
1. Make sure the unit does not receive DMX signal
2. Check microphone to see if it is good by tapping the microphone
Correct Disposal of this product
This marking indicates that this product should not be disposed with other household wastes throughout the EU. To
prevent possible harm to the environment or human health from uncontrolled waste disposal, recycle it responsibly
to promote the sustainable reuse of material resources. To return your used device, please use the return and collec-
tion systems or contact the retailer where the product was purchased. They can take this product for environmental
safe recycling.
BARRE D'ANIMATION MATRICABLE 2-EN-1
AVEC EFFET BLINDER BLANC CHAUD & ECLAIRAGE
RVB EN ARRIERE-PLAN
NOTICE D’UTILISATION
DÉBALLAGE
Dès réception de l’appareil, ouvrez le carton et vériez que le contenu est complet et en bon état. Sinon, pré-
venez immédiatement le transporteur et conservez l’emballage s’il montre des signes de mauvais traitements.
Conservez le carton et tous les matériaux d’emballage an de pouvoir transporter l’appareil en toute sécurité.
CONTENU DE L’EMBALLAGE:
• 1 FXBAR140
• 1 cordon secteur
• 1 Mode d’emploi
FR

MANUAL - FXBAR140
30
©Copyright LOTRONIC 2019
6-CHANNEL
Channel Value Function
1 0-255 Red Dimmer 0-100%
2 0-255 Green Dimmer 0-100%
3 0-255 Blue Dimmer 0-100%
4 0-255 Warm White Dimmer 0-100%
5
Color Chase
000-007 No function
008-12 Color chase 1
13-16 Color chase 2
17-20 Color chase 3
21-24 Color chase 4
...... ......
227-247 Color chase 59
248-255 Sound controlled strobe
6 0-255 Speed control slow-fast
8-CHANNEL
Channel Value Function
1 0-255 Dimmer 0-100%
2 0-255 Strobe
3 0-255 Red Dimmer 0-100%
4 0-255 Green Dimmer 0-100%
5 0-255 Blue Dimmer 0-100%
6 0-255 Warm White Dimmer 0-100%
7
Color Chase
000-007 No function
008-12 Color chase 1
13-16 Color chase 2
17-20 Color chase 3
21-24 Color chase 4
...... ......
227-247 Color chase 59
248-255 Sound controlled strobe
8 0-255 Speed control slow-fast
12-CHANNEL
Channel Value Function
1 0-255 Dimmer 0-100%
2 0-255 Strobe
3 0-255 Part 1Red Dimmer 0-100%
4 0-255 Part 1 Green Dimmer 0-100%
5 0-255 Part 1 Blue Dimmer 0-100%
6 0-255 Part 1 Warm White Dimmer 0-100%
7 0-255 Part 2 Red Dimmer 0-100%

MANUAL - FXBAR140
31
www.ibiza-light.com
8 0-255 Part 2 Green Dimmer 0-100%
9 0-255 Part 2 Blue Dimmer 0-100%
10 0-255 Part 2 Warm White Dimmer 0-100%
11
Color Chase
000-007 No function
008-12 Color chase 1
13-16 Color chase 2
17-20 Color chase 3
21-24 Color chase 4
...... ......
227-247 Color chase 59
248-255 Sound controlled strobe
12 0-255 Speed control slow-fast
60-CHANNEL
Channel Value Function
1 0-255 Dimmer 0-100%
2 0-255 Strobe
3 0-255 Group 1 Red Dimmer 0-100%
4 0-255 Group 1 Green Dimmer 0-100%
5 0-255 Group 1 Blue Dimmer 0-100%
6 0-255 Warm White 1 Dimmer 0-100%
... ... ...
... ... ...
... ... ...
55 0-255 Group 14 Red Dimmer 0-100%
56 0-255 Group 14 Green Dimmer 0-100%
57 0-255 Group 14 Blue Dimmer 0-100%
58 0-255 Warm White 14 Dimmer 0-100%
59
Color Chase
000-007 No function
008-12 Color chase 1
13-16 Color chase 2
17-20 Color chase 3
21-24 Color chase 4
...... ......
227-247 Color chase 59
248-255 Sound controlled strobe
60 0-255 Speed control slow-fast

©Copyright LOTRONIC 2019
View the product on our website
Imported from China by LOTRONIC S.A.
Avenue Zénobe Gramme 9
B-1480 Saintes
www.ibiza-light.com
FXBAR140
/