Page is loading ...

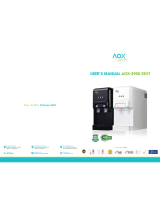
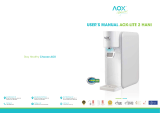
User Guide
Please read this instrucon manual before using your water dispenser
COUNTERTOP WATER
DISPENSER
AOX-3T

Please read this instrucon manual thoroughly before installaon
FOR YOUR SAFETY
•This appliance is not intended for use by persons (including children) with reduced physical,
sensory or mental capabilies, or lack of experience and knowledge, unless they have been given
supervision or instrucon concerning use of the appliance by the person responsible for their safety
Children should be supervised to ensure that they do not play with the appliance•
If the supply cord is damaged, it must be replaced by a special cord or assembly available from the•
manufacturer or its service agent
This appliance must be earthed•
This dispenser is intended to be used y in indoor environments, such as homes, shops, offices,• onl
hotels and restaurants
Check the available power supply against the data plate to ensure correct electrical service•
Dispose of the first cup of water when using the dispenser for the first me each day•
Do not touch the water outlet to avoid scalding•
This appliance is only for use with purified water. Do not pour milk, so drinks or any other liquid into•
the appliance. AOX is not liable for any damages due to misuse or alteraon
The float in the water tank indicates the water level. Do not use the appliance if the float is removed•
to avoid burning out the heater.
Keep the dispenser away from heat. Place in a dry, cool locaon. Do not expose the dispenser to•
direct sunlight or in an area where water sprays may be used
The heater may temporarily release steam in low room temperatures due to fully boiled water•
Place the dispenser on a flat, level surface, and keep at least 15cm away from walls. Overheang of•
the dispenser may reduce its performance and could cause fire
The best room temperature for the dispenser is 15-25°C. Switch off the cold tank when the•
temperature is lower than 10°C to avoid ice clogging.
Press the hot-water or cold-water bu on aer installaon in order to clear air from the system•
Cleaning and maintenance: Switch off the dispenser and unplug the power cord. Do not put the•
dispenser into water
Do not spray water directly onto the dispenser. Wipe the dispenser and water tank with wet cloth•
only - do not use chemical cleaners
When the drip tray is full, li it from the dispenser and pour away the water. Reinstall the tray aer•
cleaning.
Disconnect the power supply during cleaning or inspecon to avoid electric shocksCAUTION:

STRUCTURE & PARTS
1
2
3
4
5
6
7
8
9
10
11
12
13
14
15
19
16
17
18
1
Timer
2
Cold Tank Indicator
3
Ioniser Indicator
4
Child Lock
5
Timer Set-up
6
Refill Indicator
7
Errror Indicator
8
Cold Water Button
9
Warm Water
Button
10
Hot Water Button
11
Water Outlet
12
Drip Tray
13
Power Switch
14
Ventilation Panel
15
Power Cord
16
Top Cover
17
Cold Tank Power
Switch
18
Vent Hole
19
Stability Anchor
Stability Anchor Installaon
Desctripon Plasc Expanding Screws L-Shaped Fixing Plate
Screw
Requirement
22
ST4X8TA(4 pcs)
Fig 1 Fig 2
Install stability anchor as follows:
•Place the dispenser in upright posion on flat surface.
Stability Anchor 1 and 2 are placed at the bo om of the dispenser's back panel (Fig 1• )
•Put the screws on the Stability Anchor 1 and 2 (Fig 2).
Fix the dispenser with the screws on a flat and level surface. Keep the dispenser at least 15 cm away from the wall.•
NOTE: Do not plug the unit into a power supply during installaon

BUTTON OPERATION
SWITCH 1 Child Lock
S1To unlock the dispenser, press bu on for one second unl light turns OFF. You must unlock the dispenser before
dispensing HOT or WARM water from the dispenser. The Child Lock will automacally reset 3 seconds aer you stop
dispensing Hot or Extra Hot water
SWITCH 2 Timer Setup
S2Press bu on for 5 seconds to setup the mer. The order of setup is: Hour setup - Minute setup - Confirm - Hour
setup. In the setup mode, press Cold water bu on for "-" and Warm water for “+”. The three water bu ons are
disabled in the setup mode. Aer 7-9 seconds, the dispenser will return to normal mode.
SWITCH 3 Hot Water Bu on
Press bu on to dispense hot water and press it again to stop dispensing or the water will automacally stopS3
dispensing aer 15 seconds. Light is on when water flows - temperature at water outlet: 83-87°C. Note: you must turn
off Child Lock before dispensing hot water
SWITCH 4 Warm Water Bu on
Press bu on to dispense hot water and press it again to stop dispensing or the water will automacally stopS4
dispensing aer 15 seconds. Light is on when water flows - temperature at water outlet: 68-72°C. Note: you must turn
off Child Lock before dispensing warm water
SWITCH 5 Cold Water Bu on
S5Press bu on to dispense cold water and press it again to stop dispensing, or the water will automacally stop
dispensing aer 20 seconds. Light is on when water flows - temperature at water outlet is 10°C lower than ambient
temperature
FUNCTIONS
FUNCTION 1 Ionizer Indicator
F1Indicator light is ON during operaon. Negave ion output: 5 x 10 PCS/cm (±15%)
63
FUNCTION 2 Chilling Indicator
F2Chilling Indicator light is ON during operaon of the cooling system. Light is OFF when water has reached set
temperature or cooling system is not in operaon.
FUNCTION 3 Error Indicator
F3Error Indicator light flashes when the dispenser is not operang properly.
FUNCTION 4 Refill Indicator
F4Refill Indicator light flashes and there is audible sound when water level is low
FUNCTION 5 Water Temperature Sensor
The colour of the indicator light on the water outlet indicates the temperature of the water being dispensed - red
indicates “extra hot”, green indicates “hot” & blue indicates “chilled” water
FUNCTION 6 Power
Press the red switch on the rear of the unit to turn on the water dispenser
FUNCTION 7 Cold Tank / Ionizer Switch
Press the black switch on the rear of the unit to acvate the chilling system and ionizer, tum off to deacvate.
F1 F5F2 F4 F3
S1 S2 S3 S5S4

OPERATING THE DISPENSER
1.Remove the dispenser from the carton and place on a flat surface. Use the stability anchors if
required.
2.Connect the unit to a suitable power supply (220-240V, 10A) and turn on the red power switch at
the rear of the dispenser. Icons on display monitor will flash when the unit enters its “normal”
mode mer, cooling system & ioniser light ON)( will turn
3.Set the mer – follow the instrucons for “SWITCH 2 Timer setup” in the “BUTTON OPERATION”
secon above.
4.Connect the purified water source to the inlet of the dispenser. Turn on the water source to allow
water into the unit. Then press the cold-water bu on unl water flows from the outlet. Turn on the
Cold Tank Switch at the rear of the unit to acvate the cooling system
5.For first me use, both the “Hot” & “Warm” bu ons supply ambient temperature water only.
Normal operaon will begin aer the first cup of water.
: Press “Cold Water Bu on” . Water dispensing will stop when you6.To dispense cold water S5
remove press the bu on again
: Press the “Child Lock” bu on for one second to disable child lock.7.To dispense “Hot” water S1
When Child Lock indicator light turns OFF, then press the “Hot Water Bu on” . Water dispensingS3
will stop when you press the bu on again. The Child Lock will automacally reset itself 3 seconds
aer you remove your finger from the “Hot Water Bu on” and the Child Lock indicator light willS3
turn ON
: Press the “Child Lock” bu on for one second to disable child lock.8.To dispense “Warm” water S1
When Child Lock indicator light turns OFF, then press the “Warm Water Bu on” . WaterS4
dispensing will stop when you press the bu on again. The Child Lock will automacally reset itself
3 seconds aer you remove your finger from the “Warm Water Bu on” and the Child LockS4
indicator light will turn ON
9.When the water level in the dispenser is low, there will be an audible alarm, the dispense bu ons
will be disabled and the “refill” icon will light up. Check the water supply to ensure water is
entering the reservoir to return the system to normal.

TECHNICAL SPECIFICATION
Model
AOX-3T
Suitable Water Source AOX kits
Voltage
Rated Frequency
Rated Power
Net Weight
Dimensions (cm)
220 - 240 V
50 Hz
2200W
4.3 kg
26(W) x 30.5(D) x 35(H)
Heang Capacity
18 LPH (> 25°C ambient)
Cooling capacity
0.7 LPH (≤ 15°C)
Water temperature
Hot: 83 - 87°C
Warm: 68-72°C
Cold: 10°C below ambient
Electrical Protecon
Class 1
Working temperature
15 - 25°C
Trouble Shoong
Problem Possible Cause Soluon
Dispenser does not operate
Not plugged in
Overheang protecon is on
Loose interconnecon wire
Check the connecon
Bring the dispenser to repair centre
Water bu on does not operate
Child Lock is on
Control circuit error
Check the child lock bu on icon on display
Bring the dispenser to repair centre
Slow water flow from outlet Outlet blocked with scale
Descale and check inlet to water tank
Water is not hot enough
Excessive scale on heater
Control circuit error
Abnormal voltage
Descale and check inlet to water tank
Bring the dispenser to repair centre
Bring the dispenser to repair centre
Error E01
Error E02
Error E03
Error E04
No water in tank
Check water supply
Inlet water temperature sensor error
Outlet water temperature sensor error
Heater burn out
Bring the dispenser to repair centre
Error E05
Water supply temperature is higher
than 40 C
0
Check water supply and temperature
of water supply
Error E06
Pump temperature sensor overheated
Bring the dispenser to repair centre
Error E07
Fault on power frequency of water pump
Unplug and check plug

Circuit Diagram
Data Label
AOX PTE LTD
No. 28 Sin Ming Lane,
#03-143 Midview City
Singapore 573972
MODEL: AOX-3T
POWER VOLTAGE: 220 V ~ 240 V
FREQUENCY: 50-60 Hz
RATED COOLING CURRENT: 0.55 A
CLIMATIC CLASS: N
DIMENSIONS: 260W × 305D × 350H mm
SERIAL NO: HW YYMMXXXX
DISTRIBUTED BY: AOX
NET WEIGHT: 4 kg
TOTAL RATED POWER : 2300 W
HEATING POWER: 2235 W

WARRANTY
AOX provide 12-month warranty, starng from date of purchase of the dispenser. Parts will bes
charged separately aer warranty period has expired. Please keep the invoice as proof of purchase.
For repair service, please contact AOX Customer Services
Please note that the warranty does not cover the following condions:
Any damage caused by failure to follow the instrucons.
Any damage caused by alteraon of the dispenser.
Any damage caused by misuse (e.g. filling the dispenser with hot water, using the dispenser to heat
other drinks and liquids, falling from height)
Any damage caused by Acts of God (including food, fire, earthquake, thunder and other natural
disasters)
AOX shall not be liable for any damage resulng from accidents, alteraon, exposure to
elements, misuse, abuse or failure to follow instrucon in respect to installaon, cleaning or
maintenance.
AOX PTE LTD
No. 28 Sin Ming Lane #03-143 Midview City, Singapore 573972
O. +65 6456 4321 extn 621 | M. +65 9221 4321 | AOX.com.sg
AOX PTE LTD
No. 28 Sin Ming Lane #03-143 Midview City, Singapore 573972
O. +65 6456 4321 extn 621 | M. +65 9221 4321 | AOX.com.sg
/