Craftsman 917.773710 Owner's manual

Category
Garden tools
Type
Owner's manual

This manual is also suitable for

Owner's Manual
(RRFTSMRH
EEDTRI E
625 Series Briggs & Stratton Engine
22 Inch Cut
Model No.
917.773711
. Espahot, p. 17
_IbCAUTION:
Read and follow all
Safety Rules and Instructions
before operating this equipment.
Sears, Roebuck and Co., Hoffman Estates, IL 60179 U.S.A.
Visit our Craftsman website: www, sears,com/craftsman
Warranty .................................................... 2
Safety Rules ........................................... 2-4
Product Specifications .............................. 5
Assembly / Pre-Operation ......................... 5
Operation ............................................... 6-8
Maintenance Schedule ............................. 9
Maintenance ......................................... 9-11
Service and Adjustments ................... 12-13
Storage .................................................... 14
Troubleshooting ...................................... 15
Repair Parts ........................................ 32-41
Sears Service ........................... Back Cover
LIMITED TWO YEAR WARRANTY ON CRAFTSMAN WEEDTRIMMER
For two (2) years from date of purchase, when this Craftsman Weedtrimmer is main-
tained, lubricated, and tuned up according to the operating and maintenance instruc-
tions in the owner's manual, Sears will repair free of charge any defect in material or
workmanship.
If this Craftsman Weedtrimmer is used for commercial or rental purposes, this warranty
applies for only 90 days from the date of purchase.
This Warranty does not cover:
o Expendable items which become worn during normal use, such as rotating lines,
belts, air cleaners and spark plug.
Repairs necessary because of operator abuse or negligence, including bent crank-
shafts and the failure to maintain the equipment according to the instructions con-
tained in the owner's manual.
Warranty service is available by returning the Craftsman Weedtrimmer to the nearest
Sears Parts & Repair Center in the United States. This warranty applies only while this
product is used in the United States.
This Warranty gives you specific legal rights, and you may also have other rights which
vary from state to state.
Sears, Roebuck and Co., Dept. 817 WA, Hoffman Estates, IL 60179
A WARNING: This trimmer is equipped with an internal combustion engine and
should not be used on or near any unimproved forest-covered, brush-covered or grass-
covered land unless the engine's exhaust system is equipped with a spark arrester
meeting applicable local or state laws (if any). If a spark arrester is used, it should be
maintained in effective working order by the operator.
In the state of California the above is required by law (Section 4442 of the California
Public Resources Code). Other states may have similar laws. Federal laws apply on
federal lands. A spark arrester for the muffler is available through your nearest Sears
service center (see the REPAIR PARTS section of this manual).
A
SAFETYGLASSES
&Look for
important safety precautions. It means
CAUTION!!! BECOME ALERT!!!
YOUR SAFETY IS INVOLVED.
The operation of any trimmer can result in foreign objects thrown into
the eyes, which can result in severe eye damage. Always wear safety
glasses or eye shields while operating your trimmer or performing any
adjustments or repairs. We recommend standard safety glasses or a
wide vision safety mask worn over spectacles.
this symbol to point out AWARNING:lnordertopreventaccidental
starting when setting up, transporting, ad-
justing or making repairs, always disconnect
spark plug wire and place wire where it
2 cannot contact plug.
_kWARNING: Engine exhaust, some
of its constituents, and certain vehicle
components contain or emit chemicals
known to the State of California to cause
cancer and birth defects or other reproduc-
tive harm.
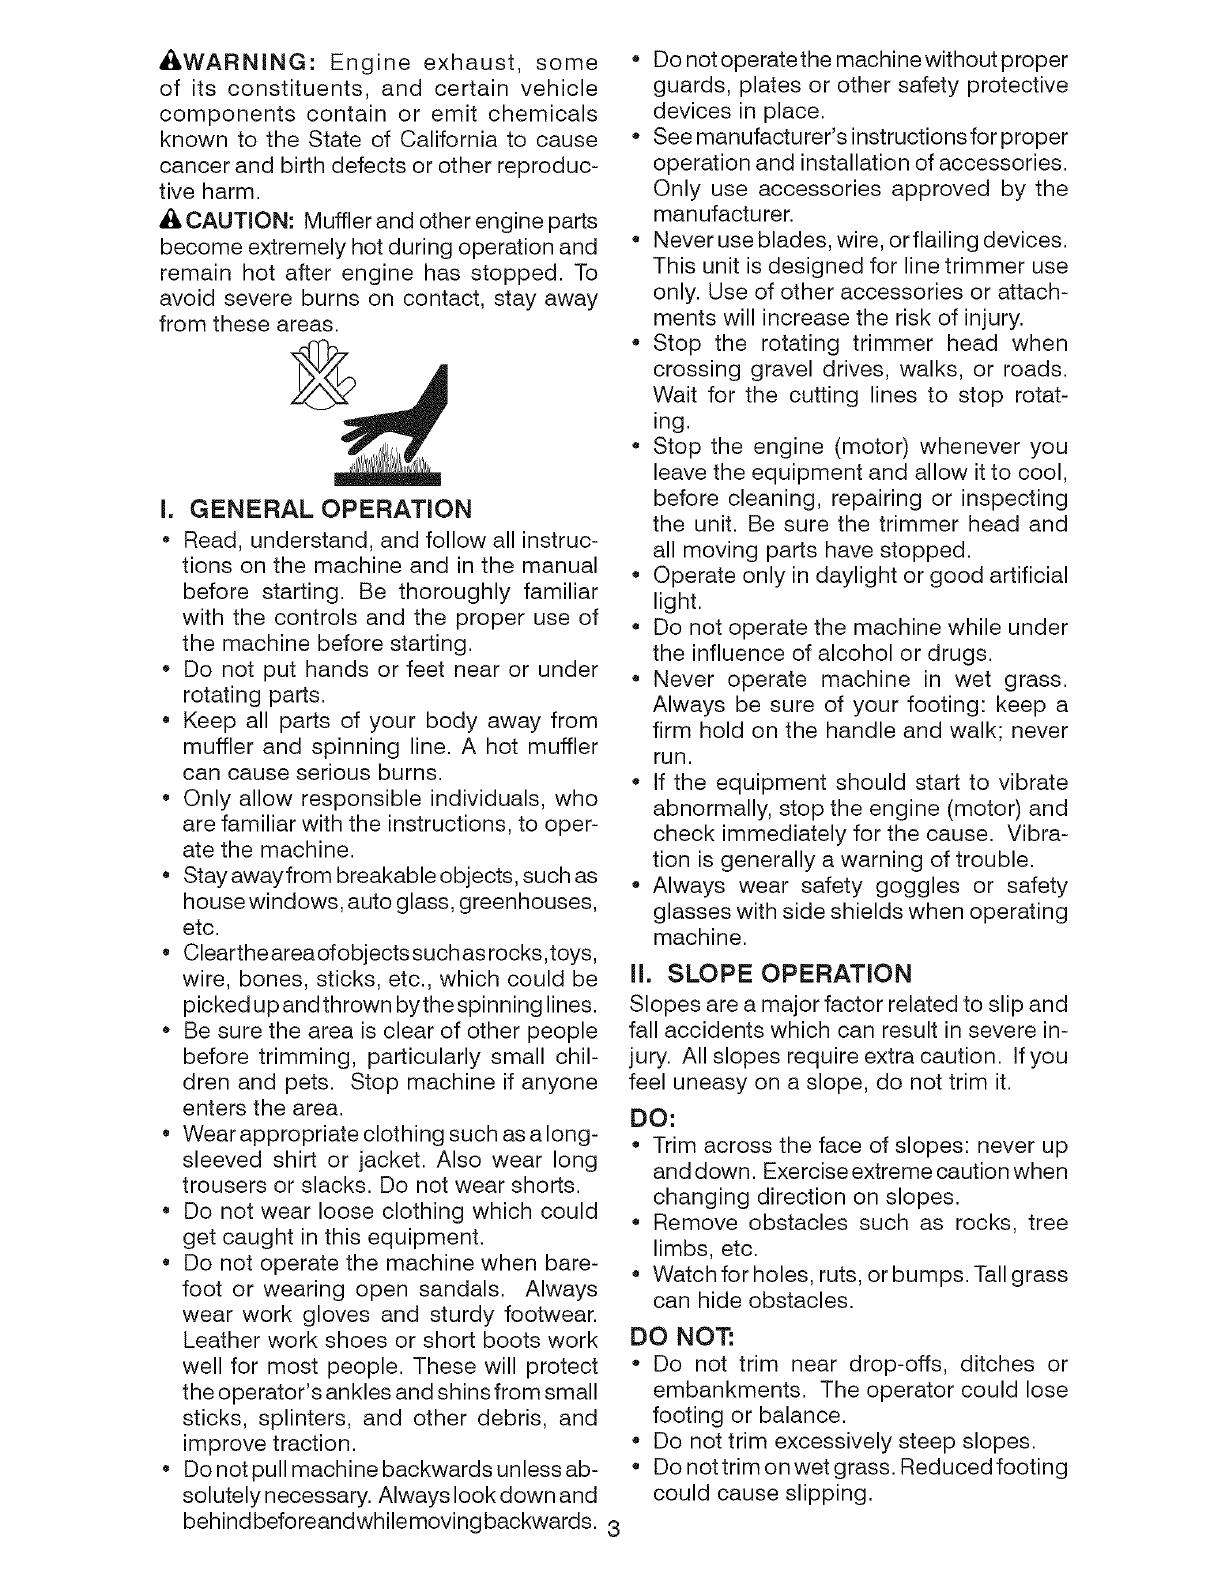
A CAUTION: Muffler and other engine parts
become extremely hot during operation and
remain hot after engine has stopped. To
avoid severe burns on contact, stay away
from these areas.
I. GENERAL OPERATION
Read, understand, and follow all instruc-
tions on the machine and in the manual
before starting. Be thoroughly familiar
with the controls and the proper use of
the machine before starting.
Do not put hands or feet near or under
rotating parts.
Keep all parts of your body away from
muffler and spinning line. A hot muffler
can cause serious burns.
Only allow responsible individuals, who
are familiar with the instructions, to oper-
ate the machine.
Stayawayfrom breakable objects, such as
house windows, auto glass, greenhouses,
etc.
Clearthe area ofobjects such as rocks,toys,
wire, bones, sticks, etc., which could be
picked up and thrown bythe spinning lines.
Be sure the area is clear of other people
before trimming, particularly small chil-
dren and pets. Stop machine if anyone
enters the area.
Wearappropriate clothing such as a long-
sleeved shirt or jacket. Also wear long
trousers or slacks. Do not wear shorts.
Do not wear loose clothing which could
get caught in this equipment.
Do not operate the machine when bare-
foot or wearing open sandals. Always
wear work gloves and sturdy footwear.
Leather work shoes or short boots work
well for most people. These will protect
the operator's ankles and shins from small
sticks, splinters, and other debris, and
improve traction.
Do not pull machine backwards unless ab-
solutely necessary. Always look down and
behind beforeandwhile moving backwards.
3
Do not operatethe machine without proper
guards, plates or other safety protective
devices in place.
See manufacturer's instructionsforproper
operation and installation of accessories.
Only use accessories approved by the
manufacturer.
Never use blades, wire, orflailing devices.
This unit is designed for line trimmer use
only. Use of other accessories or attach-
ments will increase the risk of injury.
Stop the rotating trimmer head when
crossing gravel drives, walks, or roads.
Wait for the cutting lines to stop rotat-
ing.
Stop the engine (motor) whenever you
leave the equipment and allow it to cool,
before cleaning, repairing or inspecting
the unit. Be sure the trimmer head and
all moving parts have stopped.
Operate only in daylight or good artificial
light.
Do not operate the machine while under
the influence of alcohol or drugs.
Never operate machine in wet grass.
Always be sure of your footing: keep a
firm hold on the handle and walk; never
run.
If the equipment should start to vibrate
abnormally, stop the engine (motor) and
check immediately for the cause. Vibra-
tion is generally a warning of trouble.
Always wear safety goggles or safety
glasses with side shields when operating
machine.
II. SLOPE OPERATION
Slopes are a major factor related to slip and
fall accidents which can result in severe in-
jury. All slopes require extra caution. If you
feel uneasy on a slope, do not trim it.
DO:
Trim across the face of slopes: never up
and down. Exercise extreme caution when
changing direction on slopes.
Remove obstacles such as rocks, tree
limbs, etc.
Watch for holes, ruts, or bumps. Tall grass
can hide obstacles.
DO NOT:
Do not trim near drop-offs, ditches or
embankments. The operator could lose
footing or balance.
Do not trim excessively steep slopes.
Do not trim on wet grass. Reduced footing
could cause slipping.
ill. CHILDREN
Tragic accidents can occur if the operator
is not alert to the presence of children.
Childrenareoftenattractedto the machine
and the trimming activity. Never assume
that children will remain where you last
saw them.
Keep children out of the trimming area
and under the watchful care of another
responsible adult.
Be alert and turn machine off if children
enter the area.
Before and while moving backwards, look
behind & down for small children.
Never allow children to operate the ma-
chine.
Use extra care when approaching blind
corners, shrubs, trees, or other objects
that may obscure vision.
iV, SERVICE
Use extra care in handling gasoline and
other fuels. They are flammable and
vapors are explosive.
Use only an approved container.
Never remove gas cap or add fuel with
with the engine running. Allow engine
to cool before refueling. Don't smoke.
Never refuel the machine indoors.
Never store the machine or fuel
container inside where there is an
open flame, such as a water heater.
Move away from fueling site before
starting engine.
Never run trimmer inside a closed area.
Never make adjustments or repairs with
the engine (motor) running. Disconnect
the spark plug wire, and keep the wire
away from the spark plug to prevent ac-
cidental starting.
Keep nuts and bolts, especially trimmer
head and engine bolts, tight and keep
equipment in good condition.
Never tamper with safety devices.
Check their proper operation regularly.
Keep machine free of grass, leaves, or
other debris buildup. Clean oil or fuel
spillage. Allow machine to cool before
cleaning or storing.
Stop and inspect the equipment if you
strike an object. Repair, if necessary,
before restarting.
Do not changethe engine governorsetting
or overspeed the engine.
Clean and replace safety and instruction
decals as necessary.
Repair Protection Agreements
Congratulations on making a smart pur-
chase. Your new Craftsman® product is
designed and manufactured for years of
dependable operation. But like all prod-
ucts, it may require repair from time to
time. That's when having a Repair Protec-
tion Agreement can save you money and
aggravation.
Purchase a Repair Protection Agreement
now and protect yourself from unexpected
hassle and expense.
Here's what's included in the Agreement:
Expert service by our 12,000 profe-
sional repair specialists.
Unlimited service and no charge for
parts and labor on all covered repairs.
Product replacement if your covered
product can't be fixed.
Discount of 10% from regular price of
service and service-related parts not
covered by the agreement; also, 10%
off regular price of preventive mainte-
nance check.
Fast help by phone - phone support
from a Sears technician on products
requiring in-home repair, plus conve-
nient repair scheduling.
Once you purchase the Agreement, a
simple phone call is all that it takes for you
to schedule service. You can call anytime
day or night, or schedule a service ap-
pointment online.
Sears has over 12,000 professional repair
specialists, who have access to over 4.5
million quality parts and accessories.
That's the kind of professionalism you can
count on to help prolong the life of your
new purchase for years to come. Pur-
chase your Repair Protection Agreement
today!
Some limitations and exclusions apply.
For prices and additional information
call 1=800=827=6655.
Sears installation Service
For Sears professional installation of home
appliances, garage door openers, water
heaters, and other major home items, in
the U.S.A. call 1=800-4-MY=HOME®.
SerialNumber:
Dateof Purchase:
GasolineCapacity/ Type: 1.6 Quarts (Unleaded Regular)
Oil Type (API SG-SL): SAE 30 (above 32°F); SAE 5W-30 (below 32°F)
Oil Capacity: 20 Ounces
Spark Plug (Gap: .030") Champion RJ19LM or J19LM
Trimmer Line Length: 18.75 Inches (0.155 Inch Diameter)
The model and serial numbers will be found on a decal on the rear of the trimmer.
Record both serial number and date of purchase in the space provided above.
Read these instructions and this manual
in its entirety before you attempt to as-
semble or operate your new trimmer.
IMPORTANT: This trimmer is shipped WITH-
OUT OIL OR GASOLINE in the engine.
Your new trimmer has been assembled
at the factory with the exception of those
parts left unassembled for shipping
purposes. All parts such as nuts, wash-
ers, bolts, etc., necessary to complete the
assembly have been placed in the parts
bag. To ensure safe and proper operation
of your trimmer, all parts and hardware
you assemble must be tightened securely.
Use the correct tools as necessary to
ensure proper tightness.
When right hand (RH) or left hand (LH) is
mentioned in this manual, it means when
you are in the operating position (stand-
ing behind the handle).
Loose Parts Packed Separately
HOW TO SET UP YOUR TRIMMER
TO UNFOLD HANDLE
IMPORTANT: Unfold handle carefully so
as not to pinch or damage control cables.
1. Loosen handle knob enough to allow
upper handle to be unfolded from the
shipping position.
2. Raise upper handle section into place on
lower handle and tighten handle knob.
3. Remove handle padding holding trim-
mer head control bar to upper handle.
Your trimmer handle can be adjusted for
your trimming comfort. Refer to "ADJUST
HANDLE" in the Service and Adjustments
section of this manual.
Upper handle
LIFT UP
Bottle of oil Trimmer Lines (2) Sets
(0,155 diameter
x 18.75 inches long)
REMOVE TRIMMER FROM
CARTON
1. Remove Ioosepartsincludedwithtrimmer.
2. Cut down two end corners of carton
and lay end panel down flat.
3. Remove all packing materials.
4. Rolltrimmeroutofcartonand checkcar-
ton thoroughlyforadditional loose parts. 5
Handle
knob
Lower
handle
KNOW YOUR TRIMMER
READ THIS OWNER'S MANUAL AND ALL SAFETY RULES BEFORE OPERATING YOUR
TRIMMER. Compare the illustrations with your trimmer to familiarize yourself with the
location of various controls and adjustments. Save this manual for future reference.
These symbols may appear on your trimmer or in literature supplied with the product. Learn
and understand their meaning.
FAST SLOW CAUTION ENGINE OFF FUEL
INJURYORDEATH
Trimmer head control bar
Throttle control
Starter handle
Engine oil cap
with dipstick
Handle
Gasoline cap
Air filter
Primer
Muffler
Chassis cover
Trimmer head
IMPORTANT: This trimmer is shipped
WITHOUT OIL OR GASOLINE in the engine.
Trimmer head control bar = must be held
down to the handle to engage trimmer
head. Release to stop the trimmer head.
Primer = pumps additional fuel from the
carburetor to the cylinder for use when
starting a cold engine.
line
Throttle control = used for starting and
stopping the engine and allows you to se-
lect either FAST or SLOW engine speed.
Starter handle = used for starting the
engine.
Theoperation of anytrimmer can result
inforeign objects beingthrown intothe
eyes,which can result in severeeye dam-
age. Alwayswearsafetyglassesor eye
shields while operating your trimmeror
performingany adjustmentsor repairs.
We recommendstandardsafetyglasses
ora widevisionsafetymaskworn over
spectacles.
HOW TO USE YOUR TRIMMER
ENGINESPEED
Theengine speed is controlled by a
throttle located on the side of the up-
per handle. FAST position is for starting
and normal trimming. SLOW is for light
trimming and fuel economy. STOP is for
stopping the engine.
TO ADJUST TRIMMING HEIGHT
II:ICAUTION: Stop the engine and wait
for all moving parts to stop. Disconnect
spark plug wire from spark plug and place
wire where it cannot come in contact with
plug.
The height of cut can be set to six (6) dif-
ferent positions ranging from 1-1/2 inches
to 3 inches. Recommended cutting height
for the average yard is 2 inches.
1. To adjust trimming height, push in the
locking plate tab and move trimmer
head up or down to desired position.
2. Release tab and be sure head is
locked into one of the six (6) height
positions.
Adj
Trimmer
Head
Locking
Plate Tab
FAST
S LOW
/
TRIMMER HEAD DRIVE CONTROL
Your trimmer is equipped with a trimmer
head drive control bar which will require
the operator to be positioned behind the
trimmer handle to operate the trimmer.
Trimmer head rotation is controlled by
holding the trimmer head control bar
down to the handle.
Trimmer head rotation will stop when
the control bar is released.
1
\
\
7
BEFORE STARTING ENGINE
ADD OIL
Your trimmer is shipped without oil in the
engine. For type and grade of oil to use,
see "ENGINE" in the Maintenance section
of this manual.
CAUTION: DO NOT overfill engine with
oil, or it will smoke heavily from the muffler
on startup.
1. Be sure trimmer is level.
2. Remove oil dipstick from oil fill spout.
3. You receive a container of oil with the
unit. Slowly pour the entire container
down the oil fill spout into the engine.
4. Insert and tighten dipstick.
IMPORTANT:
Check oil level before each use. Add
oil if needed. Fill to full line on dipstick.
Change the oil after every 25 hours of
operation or each season. You may
need to change the oil more often un-
der dusty, dirty conditions.
ADD GASOLINE
Fillfueltankto bottomof gastank
filler neck. Do not overfill. Usefresh,
clean, regular unleadedgasolinewith a
minimumof 87 octane. Do not mixoil
with gasoline. Purchasefuel in quanti-
tiesthat can be usedwithin30 days to
assurefuel freshness.
A CAUTION: Wipe off any spilled oil or
fuel. Do notstore, spill or usegasoline
nearan openflame.
_CAUTION: Alcohol blendedfuels
(calledgasohol or using ethanol or
methanol) can attract moisture which
leads to separation and formation of acids
during storage. Acidic gas can damage
the fuel system of an engine while in
storage. To avoid engine problems, the
fuel system should be emptied before
storage of 30 days or longer. Empty
the gas tank, start the engine and let it
run until the fuel lines and carburetor
are empty. Use fresh fuel next season.
See Storage Instructions for additional
information. Never use engine or
carburetor cleaner products in the fuel
tank or permanent damage may occur.
Gasoline filler ine
ca oil cap
Primer
TO STOP ENGINE
To stop engine, move throttle control
lever to STOP position.
TO START ENGINE
1. To start a cold engine, push primerthree
(3) times before trying to start. Use a firm
push. This step is not usually neces-
sary when starting an engine which has
already run for a few minutes.
2. Move throttle control lever to FAST
position.
3. Hold upper handle firmly and pull
starter handle quickly. Do not allow
starter rope to snap back.
NOTE: In cooler weather it may be
necessary to repeat priming steps. In
warmer weather overpriming may cause
flooding and engine will not start. If
you do flood engine, wait a few minutes
before attempting to start and do not
repeat priming steps.
Starter
handle
TRIMMING TIPS
Set the throttle control in the FAST posi-
tion. If the weeds or grass are tall and
thick, operate the trimmer at a slower
walking speed.
Frequently clean the underside of the
trimmer to remove any grass build up.
Keep top of engine around starter clear
and clean of grass clippings and chaff.
This will help engine air flow and extend
engine life.
For best results and longer lasting
line, use the ends of the line to do the
cutting. This is easily done by moving
slowly through very thick and heavy
weeds.
Use the left side of trimmer when trim-
ming along fences, walls, flowerbeds
and other such objects.
If trimmer lines become too short, it
will take longer to complete the job. If
trimmer lines are worn to less than half
their original length, they should be
replaced. See "TO REPLACE TRIMMER
LINE" in the Maintenance section of this
manual.
Trimmer head contact with concrete, as-
phalt or other hard surfaces may cause
premature wear of the ball on bottom of
trimmer head.
.A..T..A.C,SC..OU',
F,,,,NOATES ......
AS YOU COMPLETE /__._O_Y SERVICE
REGULAR SERVICE /__:x'_..,." 4'r_'_'- "Z DATES
Check for Loose Fasteners if I_
Clean Trimmer If If
Clean Under Engine Cover 1_2 if
Check Drive Belt / Pulleys
v'
R Check / Replace Trimmer Lines Ill3
Check Engine Oil Level I_
Change Engine Oil _1,2
Clean Air Filter I_ 2
Inspect Muffler I_
Clean or Replace Spark Plug
Replace Air Filter Paper Cartridge 1_2
1 - Change more often when operating under a heavy load or in high ambient temperatures.
2 - Service more often when operating in dirty or dusty conditions.
3 - Replace trimmer lines when they have worn to half their original length.
GENERAL RECOMMENDATIONS
The warranty on this trimmer does not
cover items that have been subjected to
operator abuse or negligence. To receive
full value from the warranty, operator must
maintain trimmer as instructed in this
manual.
Some adjustments will need to be made
periodically to properly maintain your unit.
At least once a season, check to see if
you should make any of the adjustments
described in the Service and Adjustments
section of this manual.
At least once a year, replace the spark
plug and replace air filter element. A
new spark plug and clean/new air filter
element assure proper air-fuel mixture
and help your engine run better and
last longer.
Followthe maintenance schedule in
this manual.
BEFORE EACH USE
1. Check engine oil level.
2. Check for loose fasteners.
3. Clean under engine cover.
LUBRICATION
To prolong the useful life of your trimmer,
change engine oil as recommended in
this section of Owner's Manual.
IMPORTANT." Do not oil or grease plastic
wheel bearings. Viscous lubricants will
attract dust and dirt that will shorten the
life of the self- lubricating bearings. If you
feel they must be lubricated, use only a
dry, powdered graphite type lubricant
sparingly.
9
TRIMMER
Always observe safety rules when per-
forming any maintenance.
TIRES
Keep tires free of gasoline, oil, or insect
control chemicals which can harm rub-
ber.
Avoid stumps, stones, deep ruts, sharp
objects and other hazards that may
cause tire damage.
TRIMMER LiNE
For best results, replace trimmer lines
when they have worn to half their original
length. Use .155 inch diameter trimmer
line. Cut new trimmer line length to 18-3/4
inches. After new line is installed on
trimmer head, check all lines so they do
not vary more then one (1) inch in length.
This is important to make sure the trim-
mer head is balanced and will not vibrate
abnormally.
_WARNING: Use only the specified
trimmer line. Do not use other materials
such as wire, string, rope, etc. Wire can
break off during trimming and become a
dangerous missile that can cause serious
injury.
TO CUT LiNE TO PROPER LENGTH
NOTE: Trimmer line pre-cut to proper
length is available for this unit; see the
Repair Parts section of this manual.
If trimmer line is purchased in bulk, it must
be cut to 18-3/4 inches before using.
Use the built-in length guage as follows:
1. From front of trimmer, place the end
of spooled trimmer line at the mark on
the side of the debris shield as shown.
2. Wrap trimmer line around front of
chassis cover to other side and cut
at the "22" mark (your unit's width of
cut).
Chassis cover
TO REPLACE TRIMMER LINE
1. Disconnect spark plug wire from spark
plug and place wire where it cannot
come in contact with spark plug.
2. Remove worn trimmer line from line
carrier plate.
3. Fold new, cut to length, trimmer line
in half and insert folded end through
carrier plate opening to back side of
retainer clip.
4. With folded end of line at back side of
retainer clip, pull line outward until line
is fully seated under the retainer clip.
5. Repeat on other side of carrier plate.
6. Check all lines to be sure they are the
same length.
7. Reconnect spark plug wire to spark
plug.
Trimmer
line
Carrier plate
opening
WRAP
LiNE
&ROUND
Debris New
shield End of trimmer
mark spooled line line
10
Retainer
clip
ENGINE
LUBRiCATiON
Use only high quality detergent oil rated
with API service classification SG-SL.
Select the oil's SAE viscosity grade
according to your expected operating
temperature.
SAE VISCOSITY GRADES
-20 0 30 32 40 60 80 100
-30 -20 -10 0 10 20 30 40
TEMPERATURE RANGE ANTICIPATED BEFORE NEXT OIL CHANGE
NOTE: Although multi-viscosity oils
(5W30, 10W30 etc.) improve starting in
cold weather, these multi-viscosity oils will
result in increased oil consumption when
used above 32°F. Check your engine oil
level more frequently to avoid possible en-
gine damage from running low on oil.
Change the oil after every 25 hours of
operation or at least once a year if the unit
is not used for 25 hours in one year.
Check the crankcase oil level before
starting the engine and after each five (5)
hours of continuous use. Tighten oil plug
securely each time you check the oil level.
TO CHANGE ENGINE OIL
NOTE: Before tipping trimmer to drain oil,
drain fuel tank by running engine until fuel
tank is empty.
1. Disconnect spark plug wire from spark
plug and place wire where it cannot
come in contact with spark plug.
2. Remove engine oil cap; lay aside on a
clean surface.
3. Tip trimmer on its side as shown and
drain oil into a suitable container.
Rock trimmer back and forth to re-
move any oil trapped inside of engine.
Container
4. Wipe off any spilled oil from trimmer or
side of engine.
5. Fill engine with oil (See "ADD Oil" in
the Operation section of this manual).
11
6. Replace engine oil cap.
7. Reconnect spark plug wire to spark
plug.
AIR FILTER
Your engine will not run properly and
may be damaged by using a dirty air
filter. Replace the air filter cartridge every
1O0 hours of operation or every season,
whichever occurs first. Service air cleaner
more often under dusty conditions.
TO CLEAN AIR FILTER
1. Loosen screw and tilt cover to remove.
2. Carefully remove cartridge.
3. Clean by gently tapping on a flat sur-
face. If very dirty, replace cartridge.
_,CAUTION: Petroleum solvents, such
as kerosene, are not to be used to clean
cartridge. They may cause deterioration
of the cartridge. Do not oil cartridge. Do
not use pressurized air to clean or dry
cartridge.
4. Install cartridge, then replace cover
making sure the tabs are aligned with
the slots in the back plate. Fasten
screw securely.
Lip Back plate
Cartridge
Slot
Cover
Cover tab
MUFFLER
Inspect and replace corroded muffler as it
could create a fire hazard and/or damage.
SPARK PLUG
Replace spark plug at the beginning of
each mowing season or after every 100
hours of operation, whichever occurs
first. Spark plug type and gap setting
are shown in the "PRODUCT SPECIFIC-
ATIONS" section of this manual.
CLEANING
iMPORTANT: For best performance,
keep trimmer free of built-up grass and
trash. Clean the underside of your trimmer
after each use.
_CAUTION: Disconnectspark plug wire
from spark plugand place wirewhereit
cannot come in contactwith plug.
o Turntrimmer on itsside. Makesure air
filterand carburetorare up. Cleanthe
undersideof your trimmer byscraping
to removebuild-up of grass andtrash.
Cleanengine oftento keeptrashfrom
accumulating. A clogged engine runs
hotterand shortensengine life.
Keepfinished surfacesand wheelsfree
of all gasoline,oil, etc.
Wedo not recommend usinga gar-
den hoseto cleantrimmer unlessthe
electricalsystem, muffler,air filterand
carburetorare coveredto keepwater
out. Waterin enginecan resultin short-
enedengine life.
L,WARNING: To avoid serious injury,
before performing any service and
adjustments:
1. Stop engine.
2. Make sure the rotating lines and
all moving parts have completely
stopped.
3. Disconnect spark plug wire from spark
plug and place wire where it cannot
come in contact with plug.
TO REMOVE/REPLACE TRIMMER
HEAD DRIVE BELT
1. Remove screw at front of chassis
cover.
2. Lift cover up and away from trimmer.
3. Remove the two (2) screws on sides of
Screw
TRIMMER
TO ADJUST TRIMMING HEIGHT
See "TO ADJUST TRIMMING HEIGHT" in
the Operation section of this manual.
TO ADJUST HANDLE
The upper handle may be adjusted to dif-
ferent height positions.
Loosen handle knob only enough to
allow the upper handle to pivot to the
desired position.
Tighten handle knob securely.
NOTE: The handle knob and bolt may be
reversed for left handed operation.
Upper handle
//
Chassis
cover
trimmer securing the debris shield.
4. Turn trimmer on its side with carbu-
retor and fuel cap up.
5. Remove the two (2) screws on under-
side of trimmer securing the debris
shield.
6. Slide the debris shield rearward and
remove.
7. Remove belt from engine pulley on
crankshaft.
8. Remove belt from trimmer head pulley.
Eric
pulley
Handle knob
12
Debris shield screws
9. Note the position of the control cable
and idler return spring, then remove
idler assembly from chassis and re-
move belt and idler from trimmer.
10. Remove belt from idler assembly by
removing bottom belt keeper and idler
pulleys.
11 .Assemble new belt, idler pulleys and
bottom belt keeper to idler bracket.
Tighten pulley bolts securely.
NOTE: Be sure belt is inside top belt
keeper on idler assembly.
12. Position belt and idler assembly in
trimmer, reconnect idler spring and as-
semble idler to chassis.
13. Install belt around trimmer head pulley
and engine pulley.
14. Replace debris shield and tighten the
four (4) screws securely.
15. Replace chassis cover and tighten
screw securely.
Always use Craftsman replacement parts
to assure proper fit and long life.
Engine pulley
Nut
-. s oer/
I
I
-.. \
Control cable j '" " "
Belt /_ "-
Idler assembly -.'_< ,,
Top belt keeper _ "
Bolt
Idler bracket
Spacer
Idler
spring
Flatidler
Bottom
., belt
keeper
/ / Flat idler
Trimmer head pulley
ENGINE
ENGINE SPEED
Your engine speed has been factory set.
Do not attempt to increase engine speed
or it may result in personal injury. If you
believe that the engine is running too fast
or too slow, take your unit to a Sears or
other qualified service center for repair
and/or adjustment.
CARBURETOR
Your carburetor has a nonadjustable
fixed main jet for mixture control. If your
engine does not operate properly due to
suspected carburetor problems, take your
unit to a Sears or other qualified service
center for repair and/or adjustment.
IMPORTANT: Never tamper with the
engine governor, which is factory set for
proper engine speed. Overspeeding
the engine above the factory high speed
setting can be dangerous. If you think
the engine-governed high speed needs
adjusting, take your unit to a Sears or
other qualified service center, which has
proper equipment and experience to make
any necessary adjustments.
13
Immediately prepare your trimmer for stor-
age at the end of the season or if the unit
will not be used for 30 days or more.
TRIMMER
When trimmer is to be stored for a period
of time, clean it thoroughly, remove all dirt,
grease, leaves, etc. Store in a clean, dry area.
1. Clean entiretrimmer (See"CLEANING" in
the Maintenance section ofthis manual).
2. Lubricate as shown in the Mainte-
nance section of this manual.
3. Be sure that all nuts, bolts, screws, and
pins are securely fastened. Inspect
moving parts for damage, breakage and
wear. Replace if necessary.
4. Touch up all rusted or chipped paint
surfaces; sand lightly before painting.
HANDLE
You can fold your trimmer handle for storage.
Loosen handle knob enough to allow
upper handle to be folded forward.
iMPORTANT." When folding the handle
for storage or transportation, be sure to
fold the handle as shown or you may
damage the control cables.
Handle knob
ENGINE
FUEL SYSTEM
iMPORTANT: It ts important to prevent
gum deposits from forming in essential
fuel system parts such as carburetor, fuel
filter, fuel hose or tank during storage.
Also, alcohol blended fuels (called
gasohol or using ethanol or methanol)
can attract moisture which leads to
separation and formation of acids during
storage. Acidic gas can damage the fuel
system of an engine while in storage.
Empty the fuel tank by starting the en-
gine and letting it run until the fuel lines
and carburetor are empty.
Never use engine or carburetor cleaner
products in the fuel tank or permanent
damage may occur.
Use fresh fuel next season.
NOTE: Fuel stabilizer is an acceptable
alternative in minimizing the formation
of fuel gum deposits during storage.
Add stabilizer to gasoline in fuel tank or
storage container. Always follow the mix
ratio found on stabilizer container. Run
engine at least 10 minutes after adding
stabilizer to allow the stabilizer to reach
the carburetor. Do not drain the gas tank
and carburetor if using fuel stabilizer.
ENGINE OiL
Drain oil (with engine warm) and replace
with clean engine oil. (See "ENGINE" in
the Maintenance section of this manual).
CYLINDER
1. Remove spark plug.
2. Pour one ounce (29 ml) of oil through
spark plug hole into cylinder.
3. Pull starter handle slowly a few times
to distribute oil.
4. Replace with new spark plug.
OTHER
Do not store gasoline from one season
to another.
Replace your gasoline can if your can
starts to rust. Rust and/or dirt in your
gasoline will cause problems.
If possible, store your unit indoors and
cover it to protect it from dust and dirt.
Cover your unit with a suitable protec-
tive cover that does not retain moisture.
Do not use plastic. Plastic cannot
breathe, which allows condensation to
form and will cause your unit to rust.
iMPORTANT: Never cover trimmer while
engine and exhaust areas are still warm.
_I_CAUTION: Never store the trimmer
with gasoline in the tank inside a building
where fumes may reach an open flame
or spark. Allow the engine to cool before
14storing in any enclosure.
TROUBLESHOOTING =See appropriate section in manual unless directed
PROBLEM
Does not start
to a Sears Parts & Repair Center.
CAUSE
1. Dirty air filter.
2. Out of fuel.
3. Stale fuel.
Loss of power
4. Water in fuel.
5. Spark plug wire is
disconnected.
6. Bad spark plug.
7. Throttle control lever not
in correct position
(if equipped).
1. Dirty air filter.
2. Buildup of grass, leaves,
and trash under trimmer.
3. Too much oil in engine.
4. Walking speed too fast.
CORRECTION
1. Clean/replace air filter.
2. Fill fuel tank.
3. Empty fuel tank and refill
with fresh, clean gasoline.
4. Empty fuel tank and refill
with fresh, clean gasoline.
5. Connect wire to spark plug.
6. Replace spark plug.
7. Move throttle lever to FAST
position.
1. Clean/replace air filter.
2. Clean underside of trimmer
and trimmer head.
3. Check oil level.
4. Trim at slower walking
speed.
Excessive 1. Lines uneven or broken. 1. Check trimmer lines.
Vibration 2. Loose nuts or bolts. 2. Check all hardware,
including engine bolts.
3. Damaged trimmer head. 3. Check/repair trimmer head.
Starter rope 1. Bent engine crankshaft. 1. Contact a Sears or other
hard to pull qualified service center.
Loss of head 1. Belt not driving. 1. Put belt on pulleys or
drive replace belt if broken.
Hard to push 1. Handle height position not 1. Adjust handle height
right for you. to suit.
1.
1. Trimmer line length is
too short.
2. Throttle control lever not
in correct position
(if equipped).
Poor trimming
performance
Trimmer head
does not
retain line
1. Trimmer line not
properly installed.
2. Broken line retainer clip.
3. Incorrect size of
trimmer line.
,
If line is worn or broken to
half of original length,
replace line.
Move throttle lever to FAST
position.
1. Follow instructions in
Maintenance section.
2. Replace string carrier plate
assembly.
3. Use .155 diameter
trimmer line.
15
I
1
10 DE ,ES
Operate a trimmer aoross the fece
of slopes, never up or down slopes.
15 DEGREES
(.O
-r-
Use this guide and do not trim on a slope greater than 15 degrees.
A 10 degree slope is a hill that increases in height at approximately 1.7 feet in 10 feet.
A 15 degree slope is a hill that increases in height at approximately 2.5 feet in 10 feet.
Use extreme care at all times and avoid sudden turns or maneuvers. Follow other instructions in this
manual for safety in trimming on elopes. Operate a trimmer across the face of slopes, never up or down
slopes= Use extra care when operating on or near slopes and obstructions.
CRAFTSMAN WEED TRIMMER - - MODEL NUMBER 917,773711
20
21
16
10
27
9
26
15
28
18
8
23
24
3O
29
39
4O
\
11
15
24
22
38
36
37
26
27
32
CRAFTSMAN WEED TRIMMER ==MODEL NUMBER g17,773711
KEY PART
NO. NO. DESCRiPTiON
1 - - - Engine, Briggs & Stratton,
Model No. 122T02=1012=B1
(See Breakdown)
2 150406 Bolt, Engine Mounting 3/8-16
3 179466 Pulley, Engine
(Includes Setscrew, Key #4)
8 169821X479 Handle, Lower
9 150078 Screw, Hex Washer Head
5/16-18 x .75
10 169797X479 Handle, Upper
11 170980 Bolt, Handle
12 189713X428 Knob, Handle
15 179751 Handle Adjuster Assembly
16 194788 Guide, Rope
18 66426 Wire Tire
19 176983 Control Bar
20 417238 Throttle Control
21 158755 Screw, Hex Washer Head
22 178700X004 Axle Shaft Assembly
23 150078 Screw, Hex Washer Head
5/16-18 x .75
24 52160 Washer, Axle
26 752063 Wheel, 14 x 2
27 409148 Nut, Hex, Flangelock 3/8-16
28 181699 Drive Control Cable
29 178365 Decal, Warning
30 406678 Decal, Engine Cover
33 132004 Nut, Hex
34 86899X004 Bracket, Upstop
35 750634 Screw, Threaded, Rolled
#10-24 x 5/8
36 851084 Bolt, Hex Head
37 850263 Washer, Lock
38 851074 Washer, Flat, Hardened
39 111190X Clamp, Cable
40 83816 Screw
- - 417701 Owner's Manual
Available accessories
-- 71 33623
-- 71 33000
-- 71 79991
not included with trimmer:
Gas Can (2.5 Gallon Container)
SAE 30W Oil (20 Ounce Bottle)
Trimmer Line
(Pack of 24 strings, .155 dia.)
NOTE: All component dimensions given in U.S. inches. 1 inch = 25.4 mm.
IMPORTANT: Use only Original Equipment Manufacturer (O.EM.) replacement parts.
Failure to do so could be hazardous, damage your weed trimmer and void your warranty.
33
CRAFTSMAN WEED TRIMMER - - MODEL NUMBER 917,773711
52 51 20 44 47 21
14
43
\
17 __
8 23
12 24
5
41
6
4 4O
45
J.
11
9
19
3
32
29
27
O_ 31
33
34
CRAFTSMAN WEED TRIMMER ==MODEL NUMBER 917,773711
KEY PART
NO. NO.
1 174031X815
2 182219
3 173715
4 185476
5 172145X004
6 166042
7 173716
8 751592
9 166043
10 160829
11 155552
12 173717
13 174719
14 409149
15 173811
16 180268
17 57808
18 178848
19 199574
20 170553
21 149746
22 STD541137
23 STD551137
24 STD551037
25 180340
26 172551
27 174549
28 172520
29 169766X479
30 174543
31 174581
32 173973
33 172519
34 180338
35 182217
36 172516
37 174580
38 172523
39 180334
40 180333
41 174029
43 174042
44 404936
45 174596X479
48 17060408
47 174036
51 189006
52 178848
DESCRIPTION
Chassis Assembly
Line, Trimmer .155 diameter x 18.75 long
Screw, Self-Tapping 5/16-18 x 1
V-Belt
Bracket, idler
Pulley, idler, V-Groove
Bolt, Hex Head 3/8-16 x 1.25
Locknut, Hex 3/8-16
Pulley, idler, Flat
Bolt, Shoulder
Locknut 5/16-18
Spacer
Bolt, Shoulder
Locknut, Flange
Spring, Return
Deflector, Bottom
Screw 1/4-20 x 1/2
Screw #10-24 x 3/4
Belt Keeper
Cover, Chassis, Top
Screw #10-24 x 1-3/4
Nut, Hex 3/8-24 UNF
Washer, Lock 3/8
Washer, Flat 3/8
Pulley, Driven
Spacer, Pulley
Bearing
Jackshaft
Cover, Chassis, Bottom
Spindle Housing Assembly
(* Includes Upper Bearing, Key Number 27)
Ring, Retaining, External, 17mm
Spring, Locking Plate
Locking Plate
Carrier Plate Assembly
Mow Ball Assembly
(Includes Key Numbers 27, 37 and 38)
Cover, Bearing
Ring, Retaining, internal, 40mm
Mow Ball
Bolt, Mow Ball
Spindle Assembly, Complete
(Includes Key Numbers 22-28 and 30-39)
Spacer
Decal, Instruction
Decal, Chassis Cover
Belt Keeper, Bottom
Screw, Self-Tapping
Decal, instruction
Deflector, Rear
Screw
NOTE: All component dimensions given in U.S.inches. 1 inch = 25.4 mm.
IMPORTANT: Use only Original Equipment Manufacturer (O.E.M.)replacement parts.
Failureto do so could be hazardous, damage your weed trimmer and void your warranty.
35
  • Page 1 1
  • Page 2 2
  • Page 3 3
  • Page 4 4
  • Page 5 5
  • Page 6 6
  • Page 7 7
  • Page 8 8
  • Page 9 9
  • Page 10 10
  • Page 11 11
  • Page 12 12
  • Page 13 13
  • Page 14 14
  • Page 15 15
  • Page 16 16
  • Page 17 17
  • Page 18 18
  • Page 19 19
  • Page 20 20
  • Page 21 21
  • Page 22 22
  • Page 23 23
  • Page 24 24
  • Page 25 25
  • Page 26 26
  • Page 27 27
  • Page 28 28
  • Page 29 29
  • Page 30 30
  • Page 31 31
  • Page 32 32
  • Page 33 33
  • Page 34 34
  • Page 35 35
  • Page 36 36
  • Page 37 37
  • Page 38 38
  • Page 39 39
  • Page 40 40
  • Page 41 41
  • Page 42 42
  • Page 43 43
  • Page 44 44

Craftsman 917.773710 Owner's manual

Category
Garden tools
Type
Owner's manual
This manual is also suitable for

Ask a question and I''ll find the answer in the document

Finding information in a document is now easier with AI

in other languages