Page is loading ...

MALONE
R
MPG545 MegaSport Second Tier Instructions
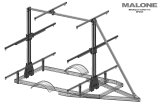
ASSEMBLED VIEW
SECOND TIER INSTRUCTIONS
forward tongue bolts
MALONE
MPG545 MEGASPORT
tie plate
MALONE AUTO RACKS 81 County Rd. Ste 1, Westbrook, ME 04092
P: 207.774.9100 F: 207.615.0551
E: support@maloneautoracks.com W: www.maloneautoracks.com
Limited Five (5) Year Warranty
The Malone Auto Racks (Malone) Limited 5 Year Warranty covers certain Malone-brand products that have been specically
identied for inclusion in the program. This warranty is in eect for ve (5) years, from the time of sale, for the original retail purchaser
of the product. This warranty is terminated after ve years from the date of purchase, or, when the original retail purchaser sells or
otherwise transfers the product to any other person or entity during the ve year warranty period.
Subject to the limitations and exclusions described in this warranty, Malone will remedy defects in materials and/or workmanship
by repairing or replacing, at its option, a defective product without charge for parts or labor. Malone may elect, at its option, not to
repair or replace a defective product but rather issue to the original retail purchaser a refund equal to the purchase price paid for the
product, or credit to be used toward the purchase of a replacement Malone product.
This warranty does not cover, and no warranty is given for defects or problems caused by normal wear and tear, which includes,
but is not limited to, surface (aesthetic) metal corrosion, scratches, dents, deformities, accidents, unlawful vehicle operation, or any
modication of a product not performed or authorized in writing by Malone.
In addition, this warranty does not cover problems resulting from conditions beyond Malone’s control including, but not limited to,
theft, misuse, overloading, or failure to assemble, mount or use the product in accordance with Malone’s written instructions or
guidelines included with the product provided to the original retail purchaser.
No warranty is given for Malone products purchased outside of the continental United States, Canada and Mexico.
If the product is believed to be defective, the original retail purchaser should contact the Malone dealer from whom it was purchased,
who will give the original retail purchaser instructions on how to proceed. If the original retail purchaser is unable to contact the
Malone dealer, or the dealer is not able to remedy the defect, the original retail purchaser should contact Malone by email at
In the event that the product must be returned to Malone, a technician at the email address above will provide the original purchaser
with return shipping instructions. The original purchaser will be responsible for the cost of mailing the product to Malone. In order
to be eligible to receive any remedy under this warranty, a copy of the original purchase receipt, a description of the defect and a
return address must be provided.
Disclaimer of Liability
Repair or replacement of a defective product, or the issue of a refund or credit (as determined by Malone) is the original retail
purchaser’s sole and exclusive remedy under this warranty. Damage to original purchaser’s vehicle, cargo, or property, and/ or to
any other person or property is not covered by this warranty.
This warranty is expressly made in lieu of any and all other warranties, express or implied, including the warranties of merchantability
and tness of a particular purpose
Malone’s sole liability to any purchaser is limited to the remedy set forth above. In no event will Malone be liable for any direct,
indirect, consequential, incidental, special, exemplary, or punitive damages , or, for any other damages of any kind or nature
(including but not limited to, lost prots, lost income or lost sales).
Some states do not allow the exclusion or limitation of incidental or consequential damages, so the above limitations may not be
applicable.
In addition, all vehicular transports are potentially hazardous. Any person(s) using Malone products are personally responsible for
following the given directions for use and/or installation and accepts full responsibility for any and all damages or injury of any kind
including death, which may result from their use and/or installation.
MALONE
R

EXPLODED VIEW
SECOND TIER INSTRUCTIONS
MPG545 MEGASPORT
MALONE
short bolts
short bolts
vertical tube
bracket
brace plates
loadbar
tie tube
sliding brackets (L&R)
brace tube
MPG545-INST rev 4-2016
end plugs
front brackets (L&R)
brace
vertical tube
While assembling, leave all bolts loose.1.
Remove the trailer's two forward tongue bolts. 2.
Install the brace bracket on top of frame and under the tie plate.3.
Sandwich the second and rear cross member between brace plates.4.
Insert vertical tubes between brace plates resting on cross member.5.
Install end plugs: tie tube(1), brace tube(1) loadbars(4).6.
Install front and rear brackets onto tie tube.7.
Install tie tube on top of vertical tubes.8.
Install sliding brackets.9.
Install loadbars using 4 short bolts with washers.10.
Install brace tube.11.
Tighten all bolts except sliding bracket bolts.12.
DO NOT over tighten and crush tubes.13.
Position rear loadbar to your preferred loadbar spacing.14.
Tighten sliding brackets.15.
rear
brackets
15. Install the D-Rings to the ends of the load bars. Slide a nylon lock
nut into the open end of the load bar and align with the hole. Insert bolt
with washer and hand tighten the bolt.
16. Use a 9/16 socket and wrench to tighten, or Slip a screwdriver
under the nylon nut to hold it in place as you fully tighten the bolt with a
9/16 socket/wrench.
17. Add the end caps to your load bars to complete your trailer.
/


