Page is loading ...

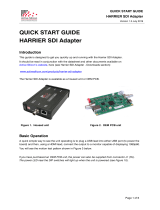
QUICK START GUIDE
HARRIER HDMI CAMERA INTERFACE BOARD
Version 1.6.0.s March 2022
Page 1 of 7
QUICK START GUIDE
HARRIER HDMI
CAMERA INTERFACE BOARD
Introduction
This guide is designed to get you quickly up and running with the
Harrier HDMI Camera Interface Board (AS-CIB-HDMI-001-A) and the Harrier USB/HDMI Evaluation
Kit (AS-CIB-USBHDMI-001-EVAL-A). The interface board can be purchased with a Sony FCB-
EV7520A camera as a pre-assembled unit, shown in Figure 1 (AS-CIB-HDMI-001-7520A-A).
This document should be read in conjunction with the Harrier HDMI interface board datasheet and
other documents available on Active Silicon’s website, (see Harrier HDMI Camera Interface Board -
Downloads section):
https://www.activesilicon.com/products/harrier-hdmi-camera-interface-board/
Figure 1. Harrier HDMI Camera Interface
Board mounted on a camera.
Figure 2. Reverse side of Harrier HDMI
Camera Interface Board.
Figure 3. Interface board block diagram showing position of connectors and DIP switches
The Harrier HDMI Camera Interface Board can also be supplied in USB/HDMI or USB-only variants.
A 3G-SDI/HD-SDI camera interface board is also available. For more details contact Active Silicon.

QUICK START GUIDE
HARRIER HDMI CAMERA INTERFACE BOARD
Version 1.6.0.s March 2022
Page 2 of 7
Evaluation Kit Contents
The Evaluation Kit (AS-CIB-USBHDMI-001-EVAL-A) contains all the parts needed to evaluate the
Harrier HDMI Camera Interface Board (and the Harrier USB/HDMI board).
Note that the Evaluation Kit does not include a Harrier HDMI Camera Interface Board or camera,
these need to be ordered separately.
Please check that you have all the parts listed below:
• Harrier Evaluation Board (Figure 4)
• 10-way cable (Figure 5)
• 4-way cable (Figure 5)
• White 8-way cable (Figure 5)
• Micro HDMI cable
• 30-way micro coax cable (KEL cable; Figure 6)
• USB Type A to mini USB cable
• USB-C plug to USB-A socket adapter (not required for HDMI interface board evaluation)
• USB3 USB Type C SuperSpeed cable (not required for HDMI interface board evaluation)
• Multi-region 12V power supply (please fit the adapter suitable for your region)
Figure 4. Harrier Evaluation Board Figure 5. Harrier Evaluation Board cables
Figure 6. 30-way micro coax KEL cable

QUICK START GUIDE
HARRIER HDMI CAMERA INTERFACE BOARD
Version 1.6.0.s March 2022
Page 3 of 7
Sony Camera Control Application
To evaluate the serial communications capability you will need an application that can provide serial
communication via a COM port, for example the Sony Camera Control software application.
Note: in its default build configuration, the Harrier HDMI Camera Interface Board only supports TTL
communications.
Harrier Evaluation Board Overview
Figure 7. Harrier Evaluation Board diagram
The Harrier Evaluation Board connects to the camera interface board using the supplied cable kit.
• JTAG (J104) - white 8-way cable (connects to J4; not required for normal use).
• I/O (J102) - 4-way cable (connects to J2).
• Power/control RS-232 (J103) - 10-way cable (connects to J3).
The board is powered by the 12V power supply via a barrel connector (J306). This supply is also
used as a power supply for the camera and is connected to the camera via the Power Switch
(SW302). When the Power Switch (and camera power supply) is switched ON the PWR ON LED will
illuminate.
For more information please see the Harrier Evaluation Board datasheet on the Active Silicon website
(see Harrier HDMI Camera Interface Board - Downloads section).

QUICK START GUIDE
HARRIER HDMI CAMERA INTERFACE BOARD
Version 1.6.0.s March 2022
Page 4 of 7
Setting the Camera Video Mode
Changing the video output mode of the Harrier HDMI Camera Interface Board can be done using an
external controller over the serial (TTL) interface.
Cameras usually start up in the same video mode that was set when the camera was powered down.
Immediately after power-up completes, the camera interface board can change the camera video
mode to a user chosen mode; this ensures that on application start-up the camera is always in a
known video mode. This is done by setting DIP switches 1 to 4 on the Harrier HDMI Camera
Interface Board as shown below. VISCA commands can be used at any time to change the camera
video mode (requires camera reset).
SW1-4 SW1-3 SW1-2 SW1-1 VIDEO FORMAT MODE HDMI
OFF OFF OFF OFF Default Camera
Mode (1) 0 ✔
OFF OFF OFF ON 1080p60 (2) 1 ✔
OFF OFF ON OFF 1080p59.94 (2) 2 ✔
OFF OFF ON ON 1080p50 (2) 3 ✔
OFF ON OFF OFF 1080p30 4 ✔
OFF ON OFF ON 1080p29 5 ✔
OFF ON ON OFF 1080p25 6 ✔
OFF ON ON ON 1080i60 7 ✔
ON OFF OFF OFF 1080i59.94 8 ✔
ON OFF OFF ON 1080i50 9 ✔
ON OFF ON OFF 720p60 10 ✔
ON OFF ON ON 720p59.94 11 ✔
ON ON OFF OFF 720p50 12 ✔
ON ON OFF ON 720p30 13 ✔
ON ON ON OFF 720p29 14 ✔
ON ON ON ON 720p25 15 ✔
Table 1. DIP switch settings for selecting camera video output mode
Notes:
1) “Default camera mode”: on power-up, the camera will start in the video format/mode that was
set/being used when it was last powered down. The video mode can then be changed using a
VISCA serial command, followed by a camera reset (there is also the camera hard reset in the
extended VISCA commands which will also serve this purpose).

QUICK START GUIDE
HARRIER HDMI CAMERA INTERFACE BOARD
Version 1.6.0.s March 2022
Page 5 of 7
2) Due to the high data bandwidth required, these video modes (above 1080p30) require the
camera to be set to dual LVDS mode. Other modes (1080p30 and below) require the camera to
be set to single LVDS mode. When using VISCA commands to change camera video mode the
LVDS mode must be set correctly, otherwise there will be no video output from the camera.
See your camera documentation for more information on VISCA commands for LVDS settings .
3) The DIP switches to select the video format are only read on power-up. Therefore, to
change mode using the DIP switches, power down the camera, set the switches and then power
up the camera. DIP switches will only be effective for the operating modes supported by the
camera currently in use.
Setting up the System
The Harrier HDMI Camera Interface Board needs to be connected to a camera and power supply.
To get the board running please follow the instructions below:
1. Connect the camera to the camera interface board connector (J1) using the 30-way coax
cable (connector type: KEL USL00-30L). (If you have purchased a pre-assembled camera
module, e.g. AS-CIB-HDMI-001-7520A-A, this cable will already be connected).
2. Connect the camera interface board I/O connector (J2) to the Harrier Evaluation Board I/O
connector (J102) using the 4-way cable.
3. Connect the camera interface board PWR/CTRL connector (J3) to the Harrier Evaluation
Board PWR/CTRL connector J103 using the 10-way cable.
4. For a HDMI camera output, use the micro HDMI cable to connect the camera interface
board micro HDMI out connector (J5) to a monitor that can display the video modes that you
intend to use (maximum 1080p60).
5. For serial communications with the camera, connect the mini USB connector to the USB
connector on the Harrier Evaluation Board and connect the USB A plug to a PC. The USB
PWR LED should light up indicating a live connection to the PC. The serial interfaces will
appear as COM ports on the PC and be accessible to PC software. These COM ports can
be tested using the HarrierControl command line software or the Sony Camera Control
software application. Both of these applications can be downloaded from the downloads
section of the appropriate product page under the Products->Software section of
www.activesilicon.com.
6. Set/check the DIP switch settings, e.g. SW1(1-4) OFF (no video mode change on power up).
7. Connect the power supply barrel connector to the Harrier Evaluation Board power input
connector (J306).
8. Set the Harrier Evaluation Board power switch (SW302) to OFF (left, viewed from above).
9. Plug in the power supply and switch ON the Harrier Evaluation Board power switch (SW302).
The PWR ON should light up.
10. The camera will make audible mechanical noises as it goes through its power up sequence
and after a short time the interface board video output will be working.
Note: if the DIP switches have been used to set the camera mode, and the mode last used
was different to the DIP switch setting, it will take a few seconds for the camera interface
board to detect this, change the camera mode and reset the camera.
11. If the HDMI cable is connected you will see the camera video on the monitor
(if the monitor supports the mode set on the camera).

QUICK START GUIDE
HARRIER HDMI CAMERA INTERFACE BOARD
Version 1.6.0.s March 2022
Page 6 of 7
Figure 8. Harrier Evaluation Board connected to the Harrier HDMI camera interface board
and Sony FCB-EV7520A camera
Test Pattern
With no video input connected, a simple blue screen is displayed. You may see this when the
camera resets.
To display a 1080p60 static test pattern (Figure 9), press the PGEN button on the Harrier Evaluation
Board.
Note: this will only work if the 4-way cable is connected between the Harrier Evaluation Board (J102)
and the camera interface board (J2).
Figure 9. Static Test Pattern (PGEN pressed)

QUICK START GUIDE
HARRIER HDMI CAMERA INTERFACE BOARD
Version 1.6.0.s March 2022
Page 7 of 7
Reset Button
Pressing this button on the Harrier Evaluation Board causes the camera interface board and camera
to reset. Some features require a camera reset to activate/complete certain VISCA commands (e.g.
change of video mode).
Note: this button only works if the 4-way cable is connected between the Harrier Evaluation Board
(J102) and the camera interface board (J2).
Technical Support
In case of any issues, please contact Active Silicon Technical Support on the telephone numbers
below or by email to techsupport@activesilicon.com.
Headquarters:
Active Silicon Ltd
Pinewood Mews, Bond Close, Iver,
Bucks, SL0 0NA, UK.
Tel: +44 (0)1753 650600
Fax: +44 (0)1753 651661
Email info@activesilicon.com
Website: www.activesilicon.com
North America:
Active Silicon, Inc.
479 Jumpers Hole Road, Suite 301,
Severna Park, MD 21146, USA.
Tel: +1 410-696-7642
Fax: +1 410-696-7643
Email: info@activesilicon.com
Website: www.activesilicon.com
25-Mar-2022, ASL
/