Page is loading ...

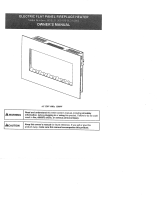
INSTALLER: LEAVE THIS MANUAL WITH THE APPLIANCE.
CONSUMER: RETAIN THIS MANUAL FOR FUTURE REFERENCE.
SAFETY INFORMATION
WARNING
If the information in these instructions are
not followed exactly, a fire or explosion
may result causing property damage,
personal injury or loss of life.
Do not store or use gasoline or other flammable vapors
and liquids in the vicinity of this or any other appliance.
INSTALLATION AND OPERATION INSTRUCTIONS FOR
STRATUS 100-30 XS
STRATUS 125-30 XS
STRATUS 75-30 XS

2
TABLE OF CONTENTS
Please read and carefully follow all of the instruction found in this manual. Please pay special
attention to the safety instructions provided in this manual. The instructions included here will assure
that you have many years of dependable and enjoyable service from your Rayburn product.
IMPORTANT INSTRUCTIONS................................................................................................................................... 3
UNPACKING AND TESTING APPLIANCE.............................................................................................................. 5
LOCATING THE FIREPLACE.................................................................................................................................... 5
STRATUS 100-30 XS................................................................................................................................................... 7
STRATUS 125-30 XS................................................................................................................................................... 8
SAFETY DRILL SCREW AREA..................................................................................................................................9
MEDIA OPTIONS.......................................................................................................................................................17
OPERATION................................................................................................................................................................18
CARE AND MAINTENANCE.....................................................................................................................................22
REPLACEMENT PARTS............................................................................................................................................23
WIRING DIAGRAM...................................................................................................................................................25
TROUBLE SHOOTING..............................................................................................................................................26
SERVICE HISTORY....................................................................................................................................................27
WARRANTY...............................................................................................................................................................28
INSTALLATION.........................................................................................................................................................10
INSTALLATION BUILT-IN......................................................................................................................................10
INSTALLATION WALL-MOUNT............................................................................................................................14
EXPLODED VIEW......................................................................................................................................................24
STRATUS 75-30 XS..................................................................................................................................................... 6

3
IMPORTANT INSTRUCTIONS
1. Read all instructions before installing or using this heater.
2. Keep combustible materials, such as furniture, pillows, bedding, papers, clothes and curtains at
least 3 feet from the front of the heater; keep them away from sides and rear as well.
3. Always switch off the heater at the mains supply when not in use.
4. Do not operate the fireplace if it has a damaged cord or plug, after it has malfunctioned, or if the
unit has been dropped or damaged in anyway.
5. Never place the heater where it may fall into a bathtub or other water containers.
6. Do not run the cord under carpeting. Do not cover the cord with throw rugs, runners or anything
else. Arrange the cord away from traffic area where it could not be tripped over.
7. To disconnect the heater, turn the controls to "OFF" before disconnecting from the mains supply.
8. Do not insert or allow foreign objects to enter any ventilation or exhaust opening, as this may
cause an electric shock, fire or damage to the heater.
10. Do not use it in areas where gasoline, paint or flammable liquids are used or stored.
11. Use this heater only as described in this manual. Any other use not recommended by the
manufacturer may cause fire, electric shock or injury to persons.
13. Always use properly grounded fused and polarized outlets.
14. Always use ground fault protection where it is required by electrical codes.
15. Always disconnect the power before performing any cleaning, maintenance or relocation of the
heater.
16. To prevent a possible fire, do not burn wood or other materials in this heater.
17. To prevent electric shock or fire, always use a certified electrician, should new circuits or
outlets be required.
18. When transporting or storing the heater, keep it in a dry place, free from excessive vibration.
19. This appliance should not be modified under any circumstances.
20.
Packaging material should be kept away from children and be disposed of in a safe manner.
Plastic bags are not toys and should be kept away from children and infants.
21.
Do not use this heater in small rooms when they are occupied by persons not capable of leaving
the room on their own, unless constant supervision is provided.
22. If the glass is damaged, do not use the heater in order to avoid a hazard.
23.
Children of less than 3 years should be kept away from unless continuously supervised.
24. CAUTION Some parts of this product can become very hot and cause burns. Particular attention
has to be given where children and vulnerable people are present.
9. Ensure air intakes are free from obstruction, free from debris, fibres, pet hair, etc.
12. Do not use an extension cord because the extension cord may overheat and cause a fire.

4
Cautions
Do’s
·Always install the heater in accordance with this guide. If in doubt obtain
expert advice.
·Always make sure the electrical socket is accessible and located adjacent to,
but not above the heater.
·Always disconnect the heater from the electrical supply before moving it, or
carrying out cleaning, maintenance.
·Always make sure the heater is firmly secured to prevent it from
being tipped
over.
·Always use a fire guard when young children and infirm persons can come
into contact with the heater.
Don’ts
·Never leave children unsupervised in a room where the heater is ON and
unguarded.
·Never obstruct or cover the fan outlet or force items into heater openings.
·Never use aerosols or steam cleaners on or around the heater.
·Never route the mains supply cable under carpet etc.
·Never install the heater close to curtains or combustible materials.
·Never use the heater to dry clothes etc.
·Never sit or stand on the heater.

5
Carefully remove the appliance from the box.
Prior to installing the appliance, test to make sure the appliance operates properly by
plugging the power supply cord into a conveniently located 230V electrical socket.
Test all aspects of its operation (manual switches, remote and heater) to make sure all
components operate correctly.
As with most electronic devices, your new electric fireplace has been designed to operate at
temperatures between 5
℃ and 35℃. During the cold winter months, allow the fireplace to
reach room temperature before turning it on.
NOTE:There maybe trace of odor during the first few minutes of initial use.This is
harmless, normal and will never occur again.
Plan where to locate and frame the fireplace. This will save time and money later when you
install the fireplace. Before installation consider the following:
1.
Where the fireplace is located must allow for wall and ceiling clearances.
2.
Consider a location where the fireplace screen will not be exposed to direct sunlight from
windows or doors.
3.
The appliance must be wired into a separate single phase power supply 230V~50Hz,
13amp fused spur. The fused spur/socket must be accessible at all times and must not
be placed behind the unit. The mains socket must be accessible to ensure the appliance
can be safely disconnected when required.
4.
On built in units the connection must be made using a 13 amp switched fused spur, the
switch must be accessible at all times, to connect to a fused spur trim the power cord
provided.
WARNING – ELECTRIC SHOCK HAZARD
It is the customers responsibility to contact a qualified
electrical installer to make sure the electrical installation
is adequate and in conformance with the regulations.
Take special care when cutting holes in walls or floor.
Electrical wires may be behind the wall or floor covering
and could cause an electrical shock if you touch them.
Locate any electrical circuits that could be affected by the
installation of this product and disconnect power circuit.
WARNING: THIS APPLIANCE MUST BE EARTHED.
DO NOT use an extension lead with this appliance.
The appliance is designed for the voltage stated on the
data plate.
Recommended but not mandatory to fit an individual
Residual Current Device (RCD) to the cooker supply
circuit.
Hand this Manual to the User for retention and instruct
in the safe operation of the appliance.
UNPACKING AND TESTING APPLIANCE
LOCATING THE FIREPLACE

6
STRATUS 75-30 XS
Description STRATUS 75-30 XS
Voltage 230V AC 50Hz
Watts 1900W Max
NO HEATER 25W
MOTOR HEATER 19W
Appliance Width 74.1cm
Appliance Height 50.4cm
Appliance Depth 10.25cm
Gross Weight 23kg
Plug Location Left side
Cord Length 180 cm
Rough Wall Opening Size
73.66 cm X 52 cm
KW 1.9
This appliance has been tested in
accordance with the EN 60335-
1:2012 + A11:2014 + A13:2017,EN
60335-2-30:2009 + A11:2012, EN
62233:2008. If you need assistance
during installation, please contact
your local dealer.
NOTE: The complete installation
must be done in accordance with
current Standards and Local
Codes. The instructions in this
manual must be followed to
ensure safe operation of the
appliance. It should be noted
that the requirements and this
publication may be superseded
during the life of the stove.

7
STRATUS 100-30 XS
Description STRATUS 100-30 XS
Voltage 230V AC 50Hz
Watts 1900W Max
NO HEATER 25W
MOTOR HEATER 19W
Appliance Width 99.5cm
Appliance Height 50.4cm
Appliance Depth 10.25cm
Gross Weight 25.5kg
Plug Location Left side
Cord Length 180 cm
Rough Wall Opening Size 99.1 cm X 52 cm
KW 1.9
This appliance has been tested in
accordance with the EN 60335-
1:2012 + A11:2014 + A13:2017,EN
60335-2-30:2009 + A11:2012, EN
62233:2008. If you need assistance
during installation, please contact
your local dealer.
NOTE: The complete installation
must be done in accordance with
current Standards and Local
Codes. The instructions in this
manual must be followed to
ensure safe operation of the
appliance. It should be noted
that the requirements and this
publication may be superseded
during the life of the stove.

STRATUS 125-30 XS
Description STRATUS 125-30 XS
Voltage 230V AC 50Hz
Watts 1900W Max
NO HEATER 25W
MOTOR HEATER 19W
Appliance Width 124.9cm
Appliance Height 50.4cm
Appliance Depth 10.25cm
Gross Weight 30.4kg
Plug Location Left side
Cord Length 180 cm
Rough Wall Opening Size 125 cm X 52 cm
KW 1.9
This appliance has been tested in
accordance with the EN 60335-
1:2012 + A11:2014 + A13:2017,EN
60335-2-30:2009 + A11:2012, EN
62233:2008. If you need assistance
during installation, please contact
your local dealer.
NOTE: The complete installation
must be done in accordance with
current Standards and Local
Codes. The instructions in this
manual must be followed to
ensure safe operation of the
appliance. It should be noted
that the requirements and this
publication may be superseded
during the life of the stove.
8

9
SAFETY DRILL SCREW AREA
There is a safety drill screw area as show below.
Please make sure that the fix screws are in this area.
The manual control pad position
Safety drill screw area
(Dark area)

10
INSTALLATION
The rough wall opening size of the fireplace:
W(") D(") H(")
STRATUS 100-30 XS 99 11.5 52
STRATUS 125-30 XS 124.5 11.5 52
Built-in Installation Instructions
STRATUS 75-30 XS 73.66 11.5 52
NOTE: Due to the many different materials used to build walls, it is highly recommended that
you consult your local builder before you install this appliance on a wall.
The STRATUS XS Models are designed to be either built-in or wall-mounted depending on
preference. These units allow for the finishing material (drywall, stone, tile, etc.) to be built
right down to the glass edge. However, should that application not be desirable or available,
the included surround can be used as an alternate finish option.
Note: The optional steel surround is not firmly attached and can be removed from the unit by
simply pulling it off. It is recommended that two people remove the surround.
1. Carefully remove the unit from the packaging. Plug in and test the fireplace prior to
installation.

11
2. Remove the optional trim from the unit as illustrated below. Remove the wall framing
plates from the unit.
3. Re-attach the framing plates to the unit as shown below.

12
4. Bend the framing plates as shown.
5. Lift the unit into the wall opening.
Note: Two people are required.

13
6. Drive the mounting screws through the flaming plates securing the unit into the wall
studs.
7. Using desired materials, finish to the glass for a clean face installation OR re-attach the
steel surround that was removed in STEP 1.

14
Wall-mount installation instructions
Note: The mantel is available for Optional Purchase only and does not come with the unit.
1. Take out the unit from the box. Please do the pre-test before you install the fireplace.
2. Take the hanger from the back of the fireplace by removing screws. Select a location for
the hanger to be fixed that is not prone to moisture and is located at least 0.91 m or 3
feet away from combustible materials such as curtains, drapes, furniture, bedding, paper,
etc. Before drill, check the wall to ensure there is no wiring, pipe wires etc in the area.
Drill 8 or more holes (8mm diameter & 40mm depth) using a suitable size drill and put
the wall plugs into the hole.

15
3. Fix the hanger onto the wall and put the fireplace on.

16
4. Fix a bracket beneath the fireplace to ensure the fireplace won’t move.

17
MEDIA
OPTIONS
Amber glass
Removing the front glass
Installing the decorative media
The media that come with this appliance are amber glass and vermiculite decorative media.
Unplug the unit from the power and make sure it is switched off. Unscrew the adjustable screws to
take off the front glass.
Pour the fire glass media into the try. Feel free to use any combination of fire glass media that you
find most appealing. Put back the front glass after you finish the fire glass decoration.
Vermiculite

18
OPERATION
The fireplace can be operated either by the switches located on the left bottom of the fireplace
unit or by supplied remote control.
Plug the fireplace into a13 Amp wall socket.
MANUAL OPERATION
1、Press key . Press for the first time, heater work at 1900W, indicator lights red.
Press for the second time, heater work at 950W,indicator lights blue. Press for the
third time, the heating element turns off, indicator extinguishes.
Note: after the heating elements are turned on manually, the heating elements work but
are not controlled by the temperature sensor.
2、Press key . Press for the first time and the charcoal and flame is in the highest
brightness. Press for the second time, the charcoal and flame is in medium brightness.
Press for the third time, the charcoal and flame is in low brightness. Press for the fourth time,
The charcoal and flame goes out. If you press again, it returns to the start of the cycle, i.e.
highest brightness.

19
REMOTE CONTROL OPERATION
1
2
3
6 “ ” is void in this model; The buzzer beeps once when the key is pressed;
1 Press the remote control’s key“ ”, its screen turns on, the flame ignites and the flame icon appears on
the LCD screen of the remote control. Week, time (24h system), and temperature setting are displayed
normally. Press it again, the screen of the remote control will turn off;
2
Key“ ”, flame and charcoal control switch. In case of ON, press once, the flame and the charcoal bed
go out, the LCD screen does not display . Press it again and the flame and the charcoal bed turn on,
the LCD screen displays . The buzzer beeps once when the key is pressed;
3
Press“ (1) ”to adjust the red flame. The buzzer beeps once when the key is pressed;
4 Press“ (2) ” to adjust the yellow flame. The buzzer beeps once when the key is pressed;
5
Press“ (3) ” to adjust the blue flame. The buzzer beeps once when the key is pressed;

7、Press the heating key“ .” Press for the first time ,the heating elements work at 1900W,
the LCD screen displays , the indicator on the machine lights red. Press a second
time , the heating elements work at 950W, the LCD screen displays
, the indicator
on the machine lights blue. Press a third time and the heating elements turn off, the LCD
screen does not display the function icon, the indicator
on the machine goes off. The
buzzer beeps once when the key is pressed;
Note: in case the heating elements are turned on by remote control, whether the heating
elements work or not depends on the temperature setting and ambient temperature. They
work only when the temperature setting is above the ambient temperature.
8、Press key“ ”“ ” to adjust the temperature setting between 7 and 30
.
The
buzzer beeps when the key is pressed;
9、Press shift key“ ”. Press once, the corresponding figure flashes. Press “ ” “
”
now to set current time and week. The buzzer does not beep when the key is pressed;
10、Press timing parameter setting key“ .” Press for the first time and the LCD screen
displays to indicate Monday. Now the temperature setting flashes, press “ ” to
set the timing temperature for Monday, press key “ ” to confirm and then press “ ”
the time setting for timing.. The displayed time parameter is “00-23.” Press “ ”
to set the current operating state of timing function; indicates that the timing is on
currently and the control temperature is the temperature setting, indicates that the
timing is on currently and the control temperature is the temperature setting minus 3 ℃, No
display indicates timing is off current and the heating elements do not work. Corresponding
point flashes when setting. Press for the second time, it displays , set the parameters
20
/