Page is loading ...

Product Information
• 10,000 RPM
• Requires 90 PSI
• Requires 5 CFM
• Requires 5" hook and loop sanding disc with
5-hole pattern
•
1
/4" NPT air inlet
• Weighs 2.4 lbs.
• 1
1
/4" Dust port
• Directional exhaust port
Inventory
A. Orbital Sander ..............................................1
B. Wrench .........................................................1
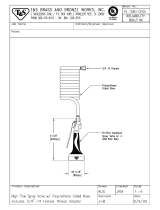
MODEL H6192
RANDOM ORBITAL SANDER
INSTRUCTION SHEET
EYE INJURY HAZARD!
Always wear safety glasses
when using this tool to
prevent serious personal
injury.
INJURY HAZARD!
Always disconnect tool from
air to prevent unexpected
operation during service.
DUST HAZARD!
Always wear respirator when
using this tool.
Figure 1. Model H6192 inventory.
Assembly
To assemble the Model H6192:
1. Install a
1
⁄4" NPT male quick-connect fitting
(not included) into the air inlet.
2. Attach a 5" hook and loop sanding disc to the
sanding pad as shown in
Figure 2.
A
B
Figure 2. Attaching sanding disc.
COPYRIGHT © AUGUST, 2006 BY GRIZZLY INDUSTRIAL, INC.
WARNING: NO PORTION OF THIS MANUAL MAY BE REPRODUCED IN ANY SHAPE
OR FORM WITHOUT THE WRITTEN APPROVAL OF GRIZZLY INDUSTRIAL, INC.
#BL8505 PRINTED IN TAIWAN
DO NOT EXCEED 120 PSI!
Personal injury could
occur.

Maintenance
Lubricate at the beginning of the sanding task.
Place one or two drops of pneumatic tool oil
directly into the air fitting as shown in Figure
5.
Figure 5. Lubricating directly into air fitting.
Operation
To operate the sander:
1. Plug the tool into compressed air and turn ON
the optional canister vacuum.
2. Hold the sander and press the throttle lever
(Figure 4) to turn the sander ON.
Considerable caution must be used with an inline
lubricator set up, as excess oil will be expelled
from the sander onto the workpiece. If you must
use an inline lubricator, monitor the exhaust port
for oil emissions to avoid spraying oil on your
workpiece.
Before installing the sanding disc, run the sander
for a few minutes to eject excess oil, then wipe
the tool down with a clean rag and begin sanding.
Oil the tool after use or storage.
Service
To replace the sanding pad:
1. Insert the included wrench onto the spindle
as shown in
Figure 6.
3. Turn the regulator (Figure 4) to adjust the
sanding pad speed to a fixed rate, and rotate
the directional exhaust port.
4. Remove pressure on the throttle lever to stop
the sanding pad, then turn the vacuum
OFF.
5. When the sandpaper loses its effectiveness,
disconnect the sander and replace the
sandpaper.
If you need help with your new pneumatic tool, call
our Tech Support at: (570) 546-9663.
Figure 4. Sander controls.
Figure 6. Wrench inserted onto spindle.
2. Hold the wrench and unscrew the sanding
pad.
3. Install a new sanding pad (Part # PH6192039)
and secure it with the wrench.
Wrench
Sanding
Pad
3. (Optional) Attach the sander to a 1
1
/4" vacu-
um hose as shown in
Figure 3.
Figure 3. Attaching sander to 1
1
/4" canister
vacuum hose.
Regulator
Exhaust
Port
Throttle
Lever

Accessories
G9955—Bench Top Dual Fan Dust Filter
Two separately switched fan motors can be used
to draw a maximum 400 CFM of your dusty shop
air though the 5 micron pleated filter. Perfect for
sanding and power carving, the clear plastic hood
helps to direct flow from the work area directly into
the filter.
Figure 10. G9955 Dust Filter.
Figure 9. Half-mask respirator and disposable
cartridge filters
.
H2499—Small Half-Mask Respirator
H3631—Medium Half-Mask Respirator
H3632—Large Half-Mask Respirator
H3635—Disposable Cartridge Filter Pair P100
Wood dust is now considered a known carcino
-
gen and has been linked to nasal cancer and
severe respiratory illnesses. If you work around
dust everyday, a half-mask respirator can be a
lifesaver. Also compatible with safety glasses!
H3275—
1
⁄4" x 25' Coil Hose
These recoil hoses stay neatly coiled when not
in use, yet stretch to full length when needed.
Great for bench-top use when clutter is always a
concern. Coil springs protect ends from kinking.
1
⁄4"NPT.
Figure 8. H3275 Coil Hose.
H3263—5 Pc. Quick Coupler Set
This 5-Pc. Solid Brass Quick Coupler Set includes
one
1
⁄4" NPT female quick coupler, one
1
⁄4" NPT
female thread connector and three
1
⁄4" NPT male
thread connectors.
Figure 7. H3263 Quick Coupler Set.
G6407—60 Grit, 5" Sanding Disc
G6408
—80 Grit, 5" Sanding Disc
G6409
—100 Grit, 5" Sanding Disc
G6410
—120 Grit, 5" Sanding Disc
G6411
—150 Grit, 5" Sanding Disc
G6412
—220 Grit, 5" Sanding Disc
H6604
—280 Grit, 5" Sanding Disc
H6605
—320 Grit, 5" Sanding Disc
H6606
—400 Grit, 5" Sanding Disc
H6607
—500 Grit, 5" Sanding Disc
H6608
—600 Grit, 5" Sanding Disc

H6192 Parts Breakdown and List
REF PART # DESCRIPTION REF PART # DESCRIPTION
1 PH6192001 REGULATOR 23 PRP61M ROLL PIN 3 X 12
2 PH6192002 O-RING 24 PH6192024 CYLINDER
3 PR49M INT RETAINING RING 12MM 25 PH6192025 O-RING 47 X 2.5
4 PH6192004 O-RING 26 PH6192026 FRONT PLATE
5 PH6192005 VALVE STEM 27 P6000 BALL BEARING 6000ZZ
6 PH6192006 WASHER 28 PH6192028 SPECIAL WASHER
7 PH6192007 NEEDLE VALVE 29 PH6192029 SPECIAL WASHER
8 PH6192008 VALVE SPRING 30 PH6192030 WOODRUFF KEY
9 PH6192009 INLET BUSHING 31 PH6192031 MOTOR SHAFT BALANCER
10 PH6192010 MUFFLER BODY 32 PR48M EXT RETAINING RING 11MM
11 PH6192011 O-RING 33 P6001 BALL BEARING 6001ZZ
12 PH6192012 EXHAUST SLEEVE 34 PH6192034 SPECIAL EXT RETAINING RING
13 PH6192013 EXHAUST SLEEVE NUT 35 PH6192035 SHAFT
14 PH6192014 THROTTLE LEVER 36 PH6192036 HOUSING COVER
15 PRP53M ROLL PIN 3 X 40 37 PSB50M CAP SCREW M5-.8 X 10
16 PH6192016 HOUSING 39 PH6192039 5" SANDING PAD
17 PH6192017 GASKET 40 PH6192040 SPINDLE WRENCH
18 PR16M EXT RETAINING RING 9MM 44 PH6192044 VACUUM PORT 1-1/4 " OD
19 P6000 BALL BEARING 6000ZZ 45 PH6192045 SHROUD
20 PH6192020 REAR PLATE 46 PH6192046 DUST WARNING LABEL
21 PH6192021 ROTOR BLADE 47 PH6192047 GRIZZLY AIR TOOLS LABEL
22 PH6192022 ROTOR
/