ADJ Inno Spot Elite User manual
- Category
- Floodlights
- Type
- User manual
ADJ Inno Spot Elite is a versatile moving head LED fixture with 15 DMX channels, 7 colors plus white, 7 rotating and replaceable gobos, and 3 operating modes. It can operate as a standalone fixture or in a master/slave configuration, making it suitable for various applications. With its internal microphone, it can respond to sound, and it also has 4 preprogrammed shows for automated light effects. The Inno Spot Elite is ideal for theaters, studios, retail stores, and other similar venues, and its power cord daisy chain capability allows for easy power distribution.
ADJ Inno Spot Elite is a versatile moving head LED fixture with 15 DMX channels, 7 colors plus white, 7 rotating and replaceable gobos, and 3 operating modes. It can operate as a standalone fixture or in a master/slave configuration, making it suitable for various applications. With its internal microphone, it can respond to sound, and it also has 4 preprogrammed shows for automated light effects. The Inno Spot Elite is ideal for theaters, studios, retail stores, and other similar venues, and its power cord daisy chain capability allows for easy power distribution.


-
 1
1
-
 2
2
-
 3
3
-
 4
4
-
 5
5
-
 6
6
-
 7
7
-
 8
8
-
 9
9
-
 10
10
-
 11
11
-
 12
12
-
 13
13
-
 14
14


ADJ Inno Spot Elite User manual
- Category
- Floodlights
- Type
- User manual
ADJ Inno Spot Elite is a versatile moving head LED fixture with 15 DMX channels, 7 colors plus white, 7 rotating and replaceable gobos, and 3 operating modes. It can operate as a standalone fixture or in a master/slave configuration, making it suitable for various applications. With its internal microphone, it can respond to sound, and it also has 4 preprogrammed shows for automated light effects. The Inno Spot Elite is ideal for theaters, studios, retail stores, and other similar venues, and its power cord daisy chain capability allows for easy power distribution.
Ask a question and I''ll find the answer in the document
Finding information in a document is now easier with AI
Related papers
Other documents
-
ACME LED-275 D User manual
-
ACME LED-3084 RGB User manual
-
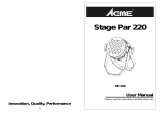
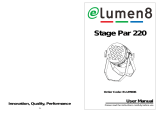 Elumen8 Stage Par 220 User manual
-
 Elumen8 Stage Par 220 User manual
-
 ADJ Products Pocket Pro User manual
-
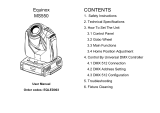
Equinox Systems Fusion 50 User manual
-
-
-
-
 Elumen8 EQLED003 User manual


