Vermeiren Inovys II-E User manual

Type
User manual

Vermeiren Inovys II-E is a lightweight, foldable wheelchair designed for both indoor and outdoor use. It features a sturdy frame, comfortable seat and backrest, and adjustable armrests and leg rests. The Inovys II-E is powered by two motors, providing a smooth and reliable ride. It also comes with a variety of safety features, including parking brakes, anti-tip wheels, and a horn. With its user-friendly design and excellent performance, the Inovys II-E is an ideal choice for those seeking an independent and active lifestyle.

Vermeiren Inovys II-E is a lightweight, foldable wheelchair designed for both indoor and outdoor use. It features a sturdy frame, comfortable seat and backrest, and adjustable armrests and leg rests. The Inovys II-E is powered by two motors, providing a smooth and reliable ride. It also comes with a variety of safety features, including parking brakes, anti-tip wheels, and a horn. With its user-friendly design and excellent performance, the Inovys II-E is an ideal choice for those seeking an independent and active lifestyle.

VERMEIREN
Inovys II-E
U S E R M A N U A L
Inovys II-E
2020-11
Content
1
EN
NL
Content
Preface........................................................................................................................ 2
1 Your product .................................................................................................. 3
1.1 Description ...................................................................................................... 3
1.2 Accessories .................................................................................................... 4
2 Before use ..................................................................................................... 5
2.1 Intended use ................................................................................................... 5
2.2 General safety instructions ............................................................................. 5
2.3 Symbols on the wheelchair ............................................................................. 5
2.4 Transport and (dis)assembly ........................................................................... 6
2.5 First use and storage .................................................................................... 11
3 Using your wheelchair ................................................................................ 12
3.1 Parking brakes (only for 22”/24” wheels) ...................................................... 12
3.2 Drum brakes (only for 16” fixed wheels) ....................................................... 12
3.3 Moving to/from wheelchair ............................................................................ 13
3.4 Comfort adjustments ..................................................................................... 13
3.5 Riding ............................................................................................................ 15
3.6 Using the handset ......................................................................................... 18
3.7 Battery status and charging .......................................................................... 18
4 Maintenance ................................................................................................ 21
4.1 Points of maintenance .................................................................................. 21
4.2 Instructions of maintenance .......................................................................... 21
4.3 Troubleshooting ............................................................................................ 22
4.4 Expected lifespan .......................................................................................... 22
4.5 End of use ..................................................................................................... 22
5 Technical specifications ............................................................................. 23
Inovys II-E
2020-11
Preface
2
EN
NL
Preface
Congratulations! You are now owner of a Vermeiren wheelchair!
This wheelchair is made by qualified and committed personnel. It is designed and produced
according to high quality standards guarded by Vermeiren.
Thank you for your trust in the products of Vermeiren. To support you on the use of this wheelchair
and its operating options, this manual is offered. Please read it carefully; it will help you to get
familiar with the operation, capabilities and limitations of your wheelchair.
If you still have questions after reading this manual, do not hesitate to contact your specialist
dealer. He/she will be glad to help you.
Important note
To ensure your safety and to prolong the lifetime of your product, please take good care of it and
have it checked and/serviced on a regular basis.
The warranty on this product is based on normal use and maintenance as described in this
manual. Damage to your product caused by improper use or lack of maintenance will cause the
warranty to lapse.
This manual reflects the latest product developments. Vermeiren has the right to implement
changes to this type of product without any obligation to adapt or replace similar products
previously delivered.
Pictures of the product are used to clarify the instructions in this manual. Details of the depicted
product may deviate from your product.
Information available
On our website http://www.vermeiren.com/ you will always find the most recent version of the
information in this manual. Please consult this website regularly for possible updates.
Visually impaired people can download the electronic version of this manual and have it read out
by means of a text-to-speech software application.
User manual
For user and specialist dealer
Installation manual
For specialist dealer
Service manual for wheelchairs
For specialist dealer
Inovys II-E
2020-11
Content
3
EN
NL
1 Your product
1.1 Description
This Inovys II-E wheelchair is easy to operate and can be used indoors as well as outdoors. It is
foldable which makes it very compact to store. The wheelchair is available in multiple sizes and
is easily expandable with optional parts to enhance user’s comfort.
The following picture shows all parts that are relevant to the user. In the operation and
maintenance section, these parts are described if applicable.
Important parts
Before using your wheelchair, check the technical details and limits of intended use, see
chapter 5.
7. Foot strap (2x)
8. Leg rest (2x)
9. Armrest (2x)
10. Brake (2x)
11. Front wheel (2x)
12. Frame
13. Rear wheel (2x)
14. Hand rim (2x)
15. Storage pocket with power adapter
16. Push handle with handgrip (2x)
17. Headrest support (optional)
1
3
4
5
6
9
12
8
13
16
17
2
7
11
15
14
10
Inovys II-E
2020-11
Your product
4
EN
NL
18
20
22
19
23
21
Important parts, continued
1.2 Accessories
Following accessories are available for the Inovys II-E:
Wooden table (B12)
Headrest (L55, L58)
Personal safety belt (B58)
Horizontal wedge (B22)
Hemiplegic armrests (B66)
For more information, please consult your specialist dealer.
18. Handset holder
19. Seat
20. Battery
21. Motor
22. Side panel (2x)
23. Push bar
24. Tip cap (2x)
25. Location of
identification plate
24
25
Inovys II-E
2020-11
Content
5
EN
NL
2 Before use
2.1 Intended use
In this paragraph a brief description of the intended use of your wheelchair is given. Additionally,
relevant warnings are added to the instructions in the other paragraphs. In this way we would like
to make you aware of the possible misuse that may appear.
This wheelchair is suitable for indoor and outdoor use.
This wheelchair is designed and produced solely to transport one (1) person with a
maximum weight of 135kg. It is not designed for transport of goods or objects, nor for any
other use than previously described.
Depending on the type of wheels on your wheelchair, it can be operated by an attendant or
by the user sitting in the wheelchair. You should NOT use this wheelchair without attendant
if you suffer from physical or mental impairments that may put you, or other people, in danger
when riding the wheelchair. For this reason, consult your doctor first and make sure that
your specialist dealer is informed about his advice.
This wheelchair is not intended to be used as a seat in a motorized vehicle.
Only use accessories and spare parts approved by Vermeiren.
Please read all technical details and limits of your wheelchair in §7.
2.2 General safety instructions
Risk of injuries and/or damage
Please read and follow the instructions in this manual. Otherwise you may get injured or your
wheelchair may get damaged.
Keep the following general warnings in mind during use:
Do not use your wheelchair if you are under influence of alcohol, medicines or other
substances that may influence your riding abilities. This also counts for your attendant
operating the wheelchair.
Be aware that some parts of your wheelchair may get very hot or cold due to ambient
temperature, solar radiation or heating devices. Be careful when touching. Wear protective
clothing if the weather is cold. When going outdoors, riding gloves can be used to improve
the grip on the hand rims.
Take note of the instructions for care and service. The manufacturer is not liable for damage
caused by improper servicing / care.
2.3 Symbols on the wheelchair
The symbols in following list are applicable to your wheelchair. Symbols can be found in the
relevant ISO standard (ISO 7000, ISO 7001 and IEC 417).
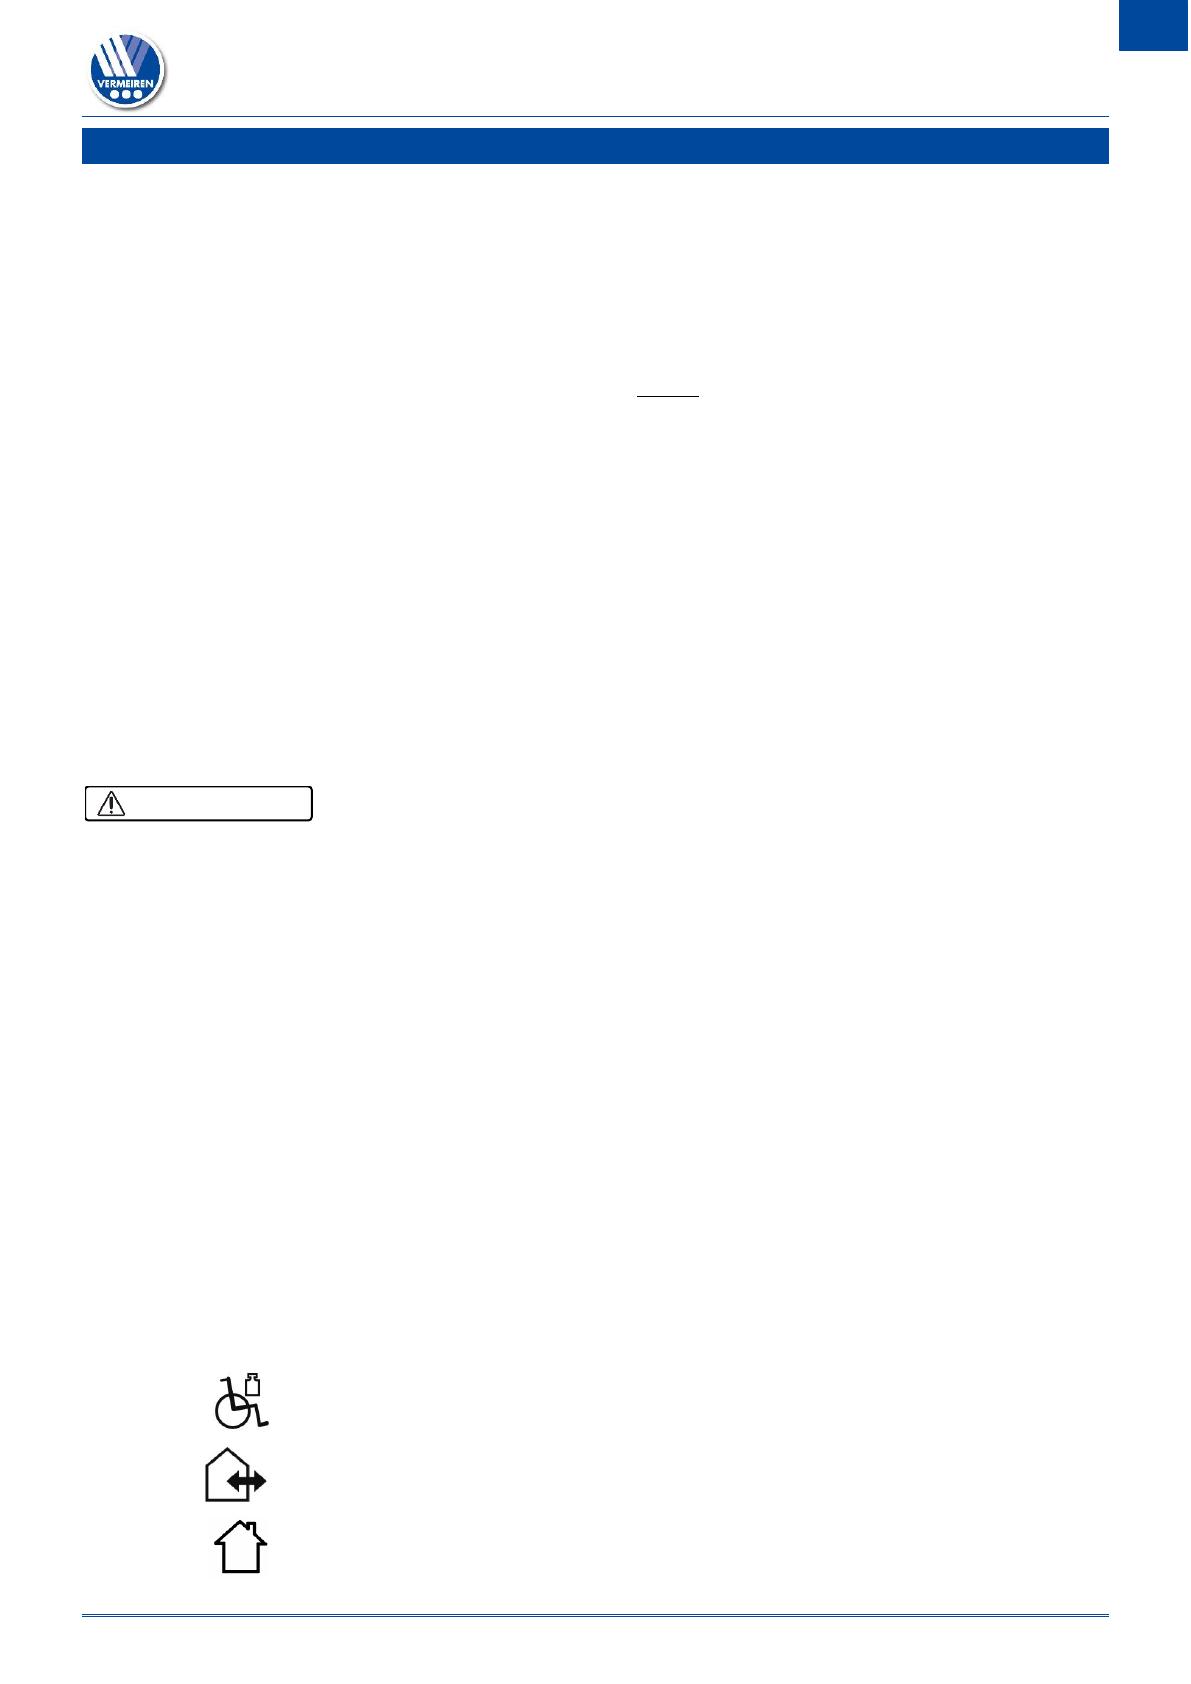
Maximum weight of the user in kg
Outdoor/indoor use (battery and power adapter excluded)
For indoor use only (battery and power adapter)
CAUTION
Inovys II-E
2020-11
Before use
6
EN
NL
Maximum safe slope in ° (degrees).
Maximum speed
Not intended to be used as seat in a motor vehicle
Type designation
2.4 Transport and (dis)assembly
2.4.1 Moving out of the way
Move the wheelchair by using its wheels and roll it to the destination.
If this is not possible, and disassembling is not desired, ask help to lift the wheelchair. Firmly
grasp the frame with both hands and lift it from the floor. Do not use foot or arm rests, or wheels
to grasp the wheelchair.
2.4.2 Transport by aircraft
Since the wheelchair is equipped with a lead-acid battery, it is not possible to transport the
wheelchair (as a whole) by aircraft. If you still consider to do so, consult your airline before
booking your flight. It is also possible to remove the battery and buy a new one at your arrival.
Contact your specialist dealer for information.
2.4.3 Transport by vehicle
Risk of injuries
Do NOT use your wheelchair as a seat in a vehicle, see symbol.
Never use the same safety belt for passenger and wheelchair.
1. Use the handset to return your wheelchair to sitting position, see §3.6.
2. Disassemble and lift the wheelchair in the vehicle according to the instructions in §2.4.4.
3. Store the wheelchair and its parts in the luggage compartment. If luggage and passenger
compartments are NOT separated or enclosed, fasten the wheelchair frame securely to the
vehicle.
You can use a ramp to push the wheelchair inside the vehicle, see 3.5.4.
Apply the parking brakes after loading, see §3.1.
2.4.4 Assembly
Risk of injuries or damage
Make sure that your fingers, clothes, buckles won’t get trapped during assembly.
Always keep the swing range of the footrest in mind to prevent bystanders from being injured
or objects from being damaged.
Before use, always make sure that all assembled parts have been firmly secured.
WARNING
CAUTION
Inovys II-E
2020-11
Content
7
EN
NL
Inovys II-E base frame with 16” and 24” wheels - disassembled parts
[1]
[2]
Place the wheelchair with four wheels on
the ground.
Fold the backrest frame (34) open.
Mount the front of the motor to the
backrest frame with the fastener pin (33)
and lock its brace.
Make sure that the backrest frame is firmly
secured to the motor.
34
33
34
16”
24”
Inovys II-E
2020-11
Before use
8
EN
NL
[3]
[4]
Hang the backrest with its four screws in
the four brackets (35) of the backrest
frame.
Tighten the two upper star buttons (36) by
hand.
Make sure that the backrest is firmly
secured.
Turn the star knob (37) of the armrest
support anticlockwise and remove it.
Insert the armrest (9) in the armrest
support.
Insert the star knob (37) and turn it
clockwise until it is finger-tight.
Make sure that the armrest is firmly
secured.
Repeat this for the second armrest.
[5]
[6]
Hold the leg rest (5) sideways and hang it
in the footrest support (39). Make sure
that the leg rest hole (44) fits over the
lower support part and that the leg rest pin
(38) is inserted in the top support.
Swing the leg rest (5) inwards until it clicks
in position.
Repeat for the second leg rest.
Swing the footplate (6) downwards.
Repeat for the second footplate.
37
9
38
39
5
44
6
36
35
Inovys II-E
2020-11
Content
9
EN
NL
[7]
[8]
Swing the calf rest support (40) inwards.
Turn the calf rest (8) to the back.
Repeat this for the second calf rest.
(If applicable) mount the headrest (1) with
the square tube in the headrest support
(41) on the backrest.
Turn the star knob (42) finger tight.
Your wheelchair is now ready for use.
2.4.5 Disassembly
Risk of injuries or damage
Make sure that your fingers, clothes, buckles won’t get entrapped during disassembly.
Always keep the swing range of the footrest in mind to prevent bystanders from being injured or
objects from being damaged.
[1]
[2]
Apply both parking brakes by operating
the brake lever (10), see §3.1.
Close the calf rest (8) and turn the calf rest
support (40) outwards.
Repeat this for the other calf rest.
Fold both footplates (6) upwards.
CAUTION
8
40
41
42
1
6
40
8
10
Inovys II-E
2020-11
Before use
10
EN
NL
[3]
[4]
Pull the leg rest lever (50) and swing the
leg rest (5) outwards.
Lift the leg rest to remove it.
Repeat this for the other leg rest.
Turn the star knob (37) anticlockwise.
Pull and hold the star knob while pulling
the armrest (9) out of the armrest support.
Retighten the star knob (37).
[5]
[6]
(If applicable) demount the headrest (1):
o Loosen the star knob (42) of the
headrest suppport and remove it.
o Pull the headrest up until it is free from
the support on the backrest.
Loosen the two upper star buttons (36) of
the backrest by hand.
Pull the backrest upwards until it is
released from the four brackets (35).
37
9
1
42
50
5
36
35
Inovys II-E
2020-11
Content
11
EN
NL
[7]
[8]
Demount the motor from the backrest
frame by opening the brace of the fastener
pin (33) and removing it.
Fold the backrest frame (34) down onto
the seat.
Place the fastener pin (33) back in the
frame.
2.4.6 (Dis)Assembling rear wheels (only for 22”/24”):
For transport purposes, it might be necessary to (dis)assemble the rear wheels.
Removing the rear wheels:
1. Press and hold the button (43) while sliding the wheel axle
out of the axle bushy.
2. Repeat this for the other wheel and place the wheelchair
gently on the tipping caps.
Installing the rear wheels:
1. Take one of the rear wheels and lift the wheelchair on one
side.
2. Press and hold the button (43) while sliding the wheel axle
in the axle bushy.
3. Release the button to lock the wheel.
4. Repeat this for the other wheel. Make sure that both wheels are firmly secured.
2.5 First use and storage
Risk of battery damage
Never completely discharge the battery.
Do not interrupt the charging cycle; only disconnect the battery charger when the battery is
fully charged.
Make sure that your wheelchair is stored dry to prevent mould to grow and damage the
upholstery.
Check the technical details for storage, see chapter 5.
Ensure that all battery connections are plugged in, and that the battery has been fully charged
before using your wheelchair. Ask your dealer if this has already been done or not. To charge,
follow the charging instructions in §3.7.
CAUTION
33
34
34
33
43
Inovys II-E
2020-11
Using your wheelchair
12
EN
NL
3 Using your wheelchair
Risk of injuries
First read the previous chapters and inform yourself about the intended use. Do NOT use your
wheelchair unless you have read and fully understood all instructions.
In case of doubts or questions, do not hesitate to contact your local specialist dealer, your care
provider or technical adviser to help you.
3.1 Parking brakes (only for 22”/24” wheels)
Risk of injuries
Only operate the brake lever when your wheelchair is stopped.
An attendant should operate the brake lever if you have impaired mobility.
Make sure the wheelchair is on a flat horizontal surface before releasing the brakes.
Never release both brakes simultaneously.
Brakes may only be adjusted by your specialist dealer.
Risk of damage
Do not use the parking brakes to slow the wheelchair down during movement.
Your wheelchair is equipped with two manually-operated parking brakes. These brakes are
intended to prevent movement of the wheelchair when parked.
Releasing brakes [A]:
1. With one hand, hold one hand rim tight (or your attendant holds
the push bar with one hand).
2. Pull the brake lever (10) of the OTHER wheel to the REAR.
3. Repeat this for the second wheel and parking brake.
Applying brakes [B]:
1. With one hand, hold one hand rim tight (or your attendant holds
the push bar with one hand).
2. Push the brake lever (10) of the OTHER wheel to the FRONT
until you feel a distinctive lock.
3. Repeat this for the second wheel and parking brake.
Operating parking brakes
3.2 Drum brakes (only for 16” fixed wheels)
Risk of injuries
Make sure that the wheelchair is on a flat horizontal surface before releasing the brakes.
Never release both brakes simultaneously.
To park or stop on a slope, use the parking brakes after coming to a halt.
Brakes may only be adjusted by your specialist dealer.
WARNING
CAUTION
CAUTION
CAUTION
A
B
10
Inovys II-E
2020-11
Content
13
EN
NL
To operate the drum brakes:
1. Pull the brake levers (60) in a squeeze motion.
2. Each brake lever (60) can be blocked by pushing the lock
lever (61) down with your finger.
3. Release the brake levers (60).
To move/ride again:
1. Pull the brake levers (60) in a squeeze motion. The lock
lever (61) is release by this movement.
2. Hold the handgrips firmly, while releasing the brake levers
(60).
Operating drum brakes
3.3 Moving to/from wheelchair
Risk of injuries or damage
In case you cannot perform the transfer in a safe manner, ask someone to assist you.
Do not stand on the footplates during transfer into or out of the chair.
Transfer
1. Position the wheelchair as close as possible to you when sitting in your chair, couch, seat
or bed.
2. Apply both parking brakes to block the movement, see §3.1.
3. Use the handset to move the backrest and seat to sitting position, see §3.6.
4. Fold the footplates upwards to prevent standing on them, or turn the leg rests aside to free
the passage for transfer.
5. If necessary, remove the armrest and/or leg rest on one side (see §0).
6. Transfer to/from the wheelchair using the strength of your arms, or with the help of an
attendant or lifting equipment.
Sitting in the wheelchair
1. Sit down on the seat with your lower back against the backrest.
2. Reinstall the armrest and/or leg rest, if removed.
3. Turn the leg rests back to the front, fold down the footplates and put your feet on the
footplates.
4. Make sure that your upper legs are horizontal and that your feet are in a comfortable
position; adjust the wheelchair according to the instructions in § 3.4.
3.4 Comfort adjustments
Risk of injuries or damage
The following comfort adjustments can be made by an attendant or caretaker. All other
adjustments are done by your specialist dealer.
Always keep the swing range of the footrest in mind to prevent bystanders from being injured
or objects from being damaged.
Make sure that your fingers, clothes, buckles won’t get trapped during adjustment.
CAUTION
CAUTION
60
61
Inovys II-E
2020-11
Using your wheelchair
14
EN
NL
3.4.1 Armrest height
The arm pads (3) of the wheelchair can be adjusted in 6 different
height positions:
1. Turn the star knob (45) anticlockwise to unlock.
2. Pull and hold the star knob to release the inner tube of the
armrest (9).
3. Slide the inner tube of the armrest (9) up/down in the support
(46) until the desired height. Make sure that the holes on the
inner/outer tube align.
4. Retighten the star knob (45) by turning it clockwise.
5. Repeat this for the second armrest. Make sure that the
armrests is firmly secured.
Adjusting armrest height
3.4.2 Push handles / push bar height
Risk of injuries
Always use the available adjustment holes on the push handle. Never exceed the maximum
height adjustment.
The push handles (16) and push bar (23) are connected and can
be adjusted in 7 different height positions:
1. Loosen both star knobs (31) on the handle supports and
remove them.
2. Adjust the height of both push handles simultaneously by
sliding them up/down in the supports. Make sure that the
holes on the inner/outer tube align.
3. Insert the two star knobs (31) in the supports and the
adjustment holes.
4. Turn the star knobs clockwise until they are finger-tight.
5. Make sure that the push handles are firmly secured.
Adjusting push-handle height
3.4.3 Leg rest angle
1. Loosen the lever (62) at the rotation point.
2. Adjust the angle of the leg rest by lifting/lowering the
footplates (between 100° - 190°).
3. Retighten the lever (62) firmly by hand.
4. Repeat this for the second leg rest. Make sure that both
leg rests are firmly secured.
Adjusting footrest angle
CAUTION
16
23
31
9
45
3
46
62
Inovys II-E
2020-11
Content
15
EN
NL
3.4.4 Tip cap height
1. Press and hold the spring button (63).
2. Slide the tip cap tube (64) in/out of the frame tube.
3. Release the spring button.
4. Repeat this for the second tip cap. Make sure that both tip
caps are firmly secured.
Adjusting tip cap height
3.5 Riding
Depending on your medical condition and type of wheelchair, you can ride the wheelchair
yourself or have it pushed by an attendant.
Risk of entrapment
Prevent your fingers from being caught by the wheel spokes.
Prevent getting your hands trapped on the hand rims when riding through small passages.
When driving with an attendant, keep your arms away from the wheels and keep your feet on
the footplates.
Risk of injuries and damage
Do NOT drive on slopes, obstacles, steps or kerbs larger than the size described in the
technical specifications in chapter 5.
Do not proceed with your wheelchair in traffic. Always stay on the pavement.
Do not operate the hand rims with wet hands.
Pay attention if the road has holes or gaps that may cause entrapment of the wheels.
Avoid stones and other objects that may block the wheels.
Always keep the swing range of the footrest in mind to prevent bystanders from being injured
or objects from being damaged.
Before every usage, make sure that:
o all adjustments are firmly secured, see §3.4.
o the parking brakes are working properly.
o the tires are in good condition, see §4.
3.5.1 Riding with an attendant
1. Release the brakes or have them released by the attendant, while he/she is holding the
wheelchair to prevent movement, see §3.1 or §3.2.
2. The attendant grasps the handgrips or push bar to push the wheelchair in the desired direction.
3. After stopping, apply the brakes while holding the wheelchair in place, see §3.1 or §3.2.
3.5.2 Riding on your own
1. Release the parking brakes one by one, see §3.1.
2. Move your hands to the highest position on both hand rims.
3. Lean forward and push/turn the hand rims forward until your arms are straight.
4. Swing your arms loosely back to the topside of the hand rims and repeat the push movement.
5. To stop: wait until the wheelchair stops and move forward/backward by operating the hand
rims. Apply the parking brakes one by one, see §3.1.
CAUTION
CAUTION
63
64
Inovys II-E
2020-11
Using your wheelchair
16
EN
NL
3.5.3 Riding on slopes
Risk of injuries
If the attendant has too little strength to control the wheelchair, stop riding
and use the brakes immediately.
When you stop on a (small) slope, use your brakes, since the wheelchair
may start moving unexpectedly.
1. Secure yourself in the wheelchair with a safety belt.
2. Ask an attendant or a bystander to help you.
3. Drive slowly and in a straight line. Lean slightly forward (A/B) when going
up the slope. Lean backwards, against the backrest, when going down
the slope.
4. Never reverse on a slope.
Going up a slope
3.5.4 Using ramps
Risk of injuries caused by tipping over
Only use ramps approved by Vermeiren and do not exceed their maximum load.
Make sure that the wheelchair does not touch the ground or ramp due to the inclination of
the wheelchair.
Only negotiate ramps with the help of one or two attendants.
1. Adjust the position of backrest, seat and footrest to decrease the volume taken by the
wheelchair and to increase the stability during inclination.
2. Remove the footrests, see §2.4.5.
3. Follow the instructions in §3.5.3.
3.5.5 Using stairs
Risk of injuries caused by tipping over
Stairs should always be negotiated with the help of two attendants.
Never try to use stairs that are not appropriate for wheelchairs.
To use the stairs while sitting in your wheelchair, the following instructions should be followed:
1. Remove the footrests, see §2.4.5.
2. One attendant tips the wheelchair slightly backwards by the handles.
3. The second attendant grabs the wheelchair at the front of the frame, on
both sides of the wheelchair.
4. Stay calm, avoid sudden movements and keep your arms inside the
wheelchair.
5. Both attendants lift and pull the wheelchair from step to step while the rear
wheels roll over the steps.
6. After using the stairs, mount the footrests back in place, see §2.4.4.
Using stairs
3.5.6 Coping with obstacles
Risk of injuries caused by tipping over
Always ask assistance of one or two attendant (s).
Make sure that the footplates won't touch ground while taking an obstacle. If necessary,
remove the footrests.
Do not use your wheelchair on an escalator.
If available, wear your safety belt.
CAUTION
CAUTION
CAUTION
CAUTION
B
A
Inovys II-E
2020-11
Content
17
EN
NL
Small kerbs (up or down)
These can be taken forward (E / F) with one attendant:
1. The attendant moves the wheelchair forward approaching the kerb. Make
sure the footplates won’t touch the kerbs.
2. Lean backwards to reduce the pressure on the front wheels.
3. The attendant holds the handles firmly while moving forward. If necessary
he uses the tip cap to keep the front wheels lifted until they have passed
the kerb rim.
4. The attendant releases the pressure on the handles and tip cap to gently
put the front wheels on the ground.
5. Next, he holds the handles firmly while pushing the wheelchair with the
rear wheels up/down the kerb.
Negotiating small kerbs with one attendant
Medium kerbs (up or down)
These should be taken backwards with one attendant:
1. The attendant reverses the wheelchair so that rear wheels approach the
kerb first (G / H).
2. Going down: Lean forward (G) to move your centre of gravity to the front.
Going up: Lean backward (H) to move your centre of gravity to the back.
3. The attendant pulls the wheelchair gently from/on the kerb.
Negotiating medium kerbs with one attendant
Higher kerbs
Higher kerbs, but below maximum size, see §5, should be taken with help of
two attendants.
Going down:
1. Remove the footrests.
2. The attendant moves the wheelchair forward approaching the kerb.
3. Lean backwards to reduce the pressure on the front wheels.
4. The attendant holds the handles firmly and uses the tip cap to keep the front wheels
lifted till they have passed the kerb rim.
5. The second attendant grabs the front of the frame and moves backwards while pulling
the rear wheels down the kerb.
6. The first attendant releases the pressure on the handles and tip cap to put the front
wheels on the ground.
Going up:
1. Remove the footrests.
2. The first attendant reverses the wheelchair so that rear wheels approach the kerb first.
3. Lean backward to move your centre of gravity to the back.
4. The second attendant grabs the front of the frame and moves forward while
pulling/pushing the rear wheels on the kerb. The first attendant lifts and holds the
handles firmly to prevent the wheelchair from tipping over.
E
F
G
H
Inovys II-E
2020-11
Using your wheelchair
18
EN
NL
3.6 Using the handset
Risk of injuries or damage
Only a capable user or his/her authorized and trained staff are allowed to operate the handset.
Be aware that the stability decreases when the wheelchair is moved from sitting upright to
inclined position.
Risk of damage
Make sure that there is enough space around the wheelchair to operate the backrest and seat.
Make sure that no objects get trapped between the moving parts.
The wheelchair is delivered with a handset to operate the
moveable parts. Use as follows:
1. Apply the parking brakes, see §3.1.
2. Connect the power cable to the 220/230V AC power
socket.
3. Wait for at least 15 seconds. The indicator light (e) goes
on.
4. To operate, press and hold one of the
buttons (a d).
5. To stop the movement, release the button.
Operating buttons:
(a) Backrest Raising to upright sitting position
(b) Seat Lowering to sitting position
(c) Backrest Lowering to reclined position
(d) Seat Raising to reclined position
Handset in handset holder
For more information on the inclination angles of backrest and
seat, see chapter 5.
3.7 Battery status and charging
Risk of injuries and damage due to fire
Only use the power adapter delivered with the wheelchair. The use of any other adapter may
be dangerous (fire hazard).
The power adapter is only intended to charge the battery delivered with the wheelchair, not to
charge any other batteries.
Do not adapt any of the delivered parts, like cables, plugs or power adapter. Never open or
change the battery or the connection points.
Protect the battery and power adapter against flames, high temperatures (>45°C), moisture,
sunshine, severe shocks (for example dropping). Do NOT use the battery if it has been
subjected to any of these circumstances.
Charge the battery with the power adapter, indoors, in a well-ventilated area, out of children's
reach. Do not use any power strip or extension cord for charging.
Risk of damage
Read the storage and maintenance instructions in §4.1 and the technical details in chapter 5.
Never completely discharge the battery.
CAUTION
CAUTION
WARNING
CAUTION
a
b
c
d
e
  • Page 1 1
  • Page 2 2
  • Page 3 3
  • Page 4 4
  • Page 5 5
  • Page 6 6
  • Page 7 7
  • Page 8 8
  • Page 9 9
  • Page 10 10
  • Page 11 11
  • Page 12 12
  • Page 13 13
  • Page 14 14
  • Page 15 15
  • Page 16 16
  • Page 17 17
  • Page 18 18
  • Page 19 19
  • Page 20 20
  • Page 21 21
  • Page 22 22
  • Page 23 23
  • Page 24 24
  • Page 25 25
  • Page 26 26
  • Page 27 27
  • Page 28 28

Vermeiren Inovys II-E User manual

Type
User manual

Vermeiren Inovys II-E is a lightweight, foldable wheelchair designed for both indoor and outdoor use. It features a sturdy frame, comfortable seat and backrest, and adjustable armrests and leg rests. The Inovys II-E is powered by two motors, providing a smooth and reliable ride. It also comes with a variety of safety features, including parking brakes, anti-tip wheels, and a horn. With its user-friendly design and excellent performance, the Inovys II-E is an ideal choice for those seeking an independent and active lifestyle.

Ask a question and I''ll find the answer in the document

Finding information in a document is now easier with AI