Installation Guide
Version 0.90
1. Package Contents
Installation Guide
External Battery Backup Unit
Cable Holder Accessory
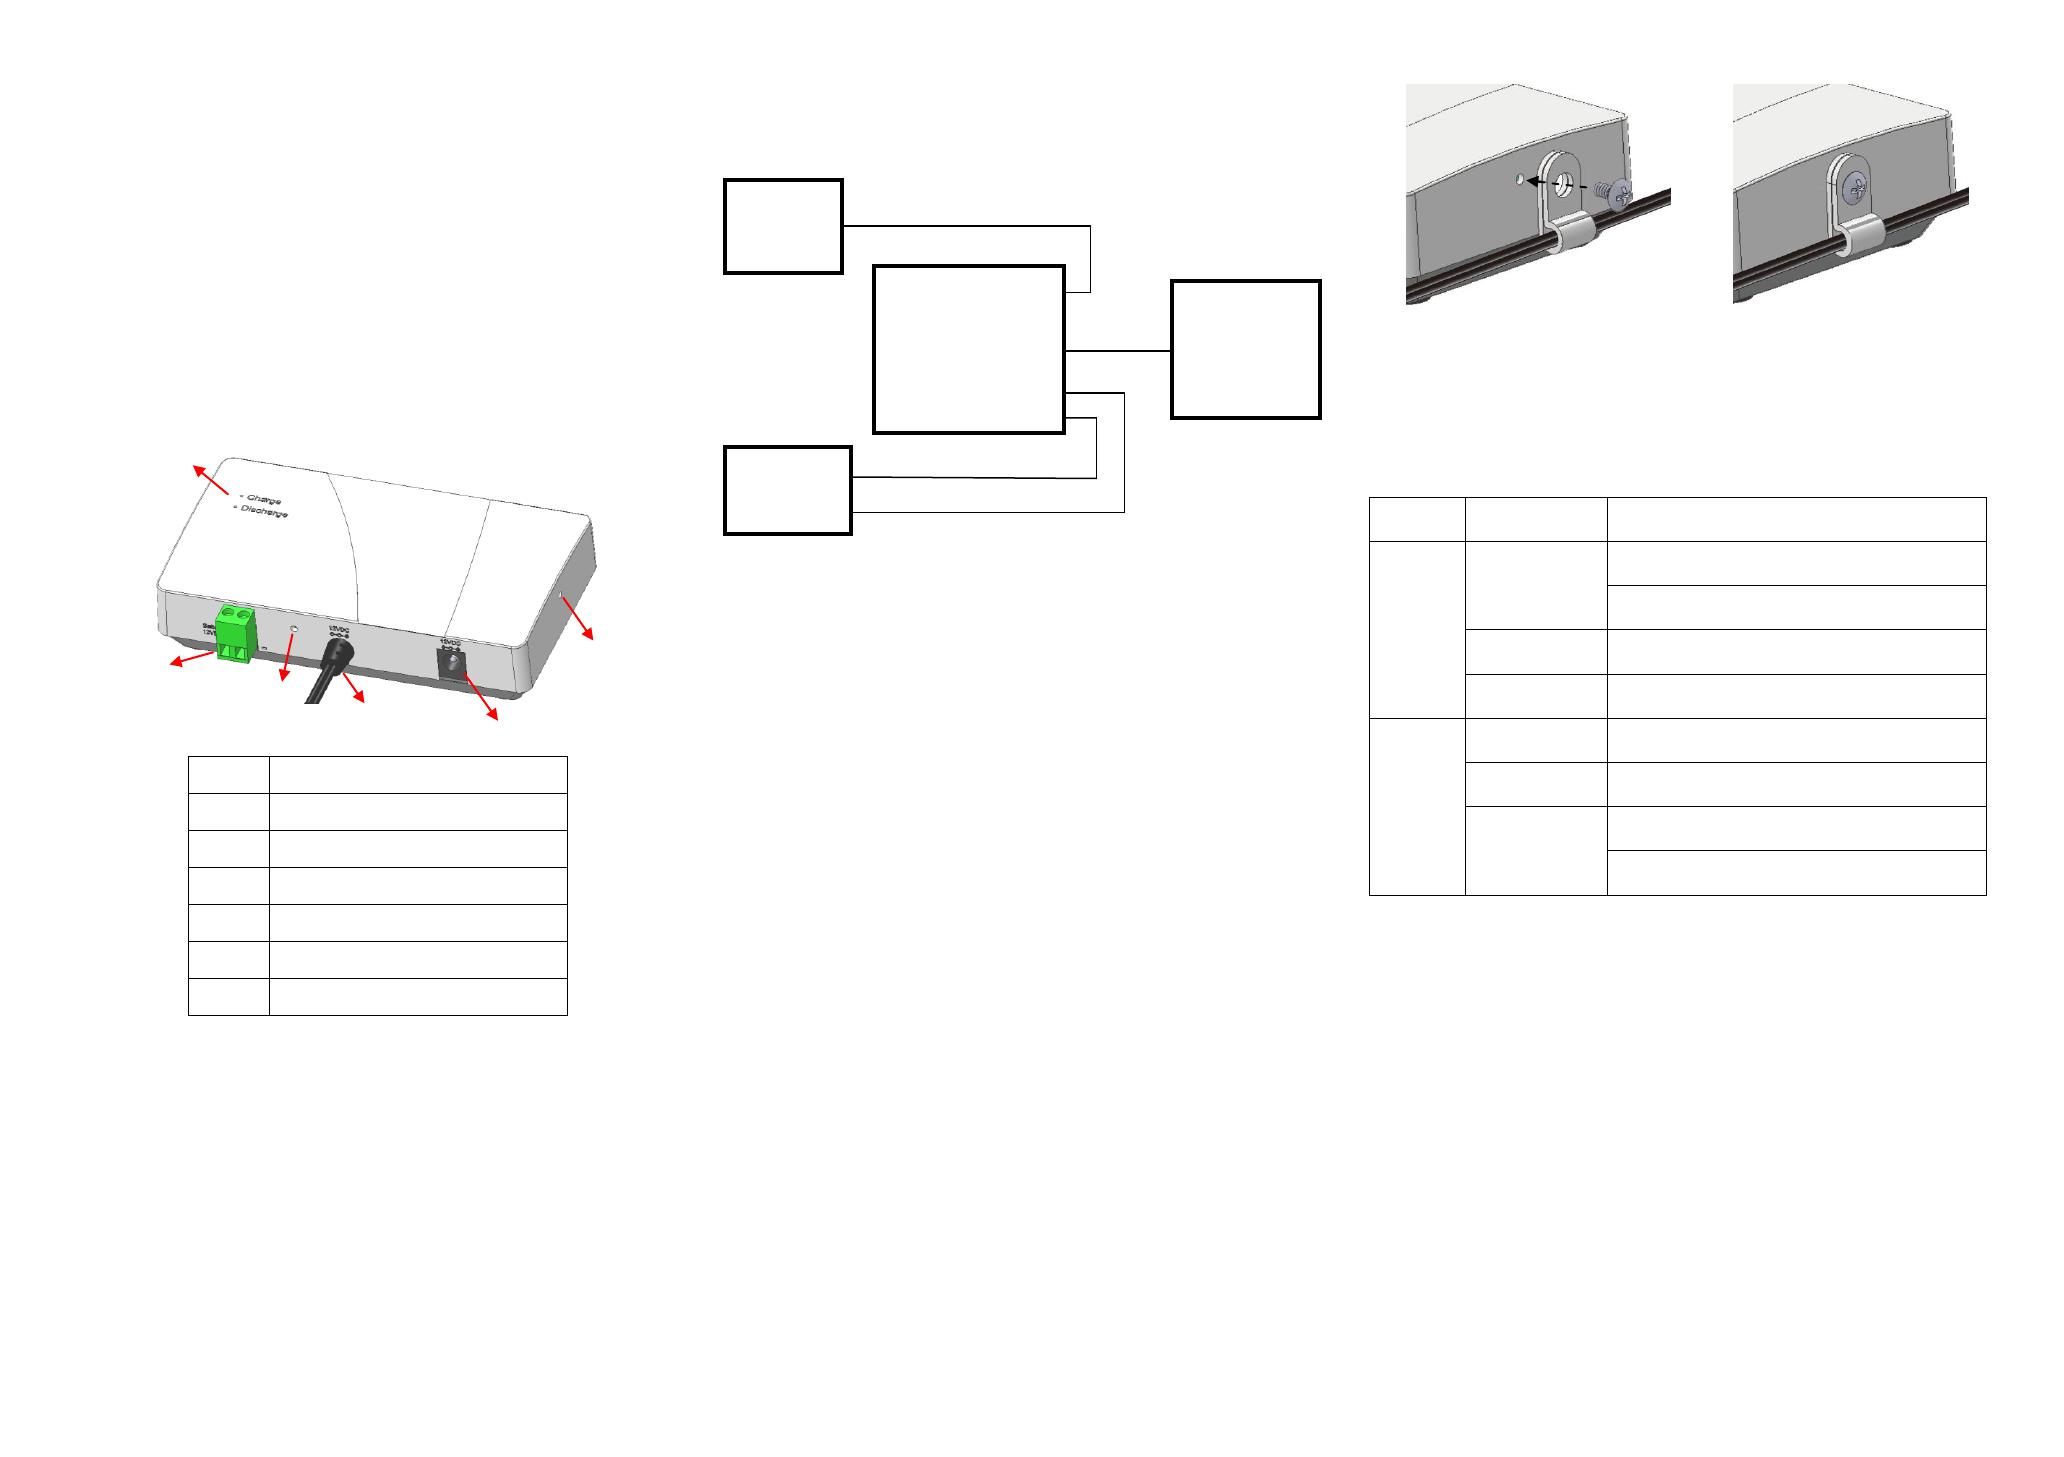
2. Overview
Terminal Block for Battery Charging
3. Installation
3.1 Connect Power Supply
Power Configuration
1. Insert the positive and negative wires into the battery and “+” and “-” contact on the
terminal block of External Battery Backup Unit. Check out for the polarity. If the wiring is
reversely connected, the Discharge LED will show solid orange.
2. Tighten the wire-clamping screws to fix battery wires tight using flat-head screwdriver.
3. Connect the power cord with Device A.
4. Connect the power adaptor with a power outlet.
5. External Battery Backup Unit starts to supply power to both the Device A and the battery.
The Charge LED shows blinking green while the battery is being charged. Once the battery
is fully charged, the Charge LED shows solid green.
6. Once the AC power fails, the battery starts to supply power to Device A. Meanwhile, the
Discharge LED shows blinking orange.
3.2 Cable Holder
The supplied one cable holder and one screw are designed to keep power cord well-organized
by attaching along the case. Follow the below steps to complete installation.
1. Put the power cord through cable holder.
2. The cable holder and screw should be in alignment with either Cable Holder Position A or B.
3. Tighten the screw to fix cable holder using screwdriver.
Cable Holder Illustration
4. OPERATION
LED Status
The battery is fully charged.
DC input from power adaptor is ready.
The battery is being charged.
DC input from power adaptor is not ready.
The battery wiring is reversely connected.
The battery is supplying power.
No power output from battery.
The battery is in charging state.
External Battery
Backup Unit
