Page is loading ...

EXPERT 2K-FA
2KW SOLID STATE FULLY AUTOMATIC
LINEAR AMPLIFIER
USER’S MANUAL
Rev. 1.0

User manual EXPERT 2K-FA
Pag. 2 di 2
Index
IMPORTANT...................................................................................................................................................... 4
PRECAUTIONS................................................................................................................................................. 4
UNPACKING ..................................................................................................................................................... 7
1. PANEL DESCRIPTION ................................................................................................................... 8
1.1
Front Panel ...................................................................................................................................... 8
1.2 Rear Panel....................................................................................................................................... 9
2. GENERAL INFORMATION ........................................................................................................... 10
2.2
Input / Output ................................................................................................................................. 10
2.3 ALC / RELAY / CAT....................................................................................................................... 10
3. INTERCONNECTION WITH THE TRANSCEIVER ...................................................................... 12
4. USE OF THE LINEAR AMPLIFIER ............................................................................................... 13
4.1
SO2R (Single Operator Two Radio ) ............................................................................................ 14
4.2 BAND-PASS FILTERS SET “SPE BPF1” ..................................................................................... 15
4.3 QSK (FULL BREAK-IN) OPERATION........................................................................................... 17
4.4 REMOTABLE TUNER, UNIT “SPE RAT1”.................................................................................... 17
4.5 TUNEABLE ANTENNAS CONTROL ............................................................................................ 17
4.6 SETTING UP A SINGLE ANTENNA FOR RECEPTION .............................................................. 19
5. EXTERNAL GROUND CONNECTION ......................................................................................... 20
6. ANTENNA...................................................................................................................................... 21
7. POWER SUPPLY .......................................................................................................................... 22
8. TUNER (ATU)............................................................................................................................. 23
9. PROTECTIONS / ALARMS........................................................................................................... 25
10. PROGRAMMING........................................................................................................................... 26
10.1
Ways to operate............................................................................................................................. 26
11. INITIAL OPERATION OF THE AMPLIFIER .................................................................................. 29
11.1
Initial Programming........................................................................................................................ 29
Operating ....................................................................................................................................... 30
Setting Drive Levels..................................................................................................................... 31
12. CONNECTIONS ............................................................................................................................ 32
12.1 CAT Connector .............................................................................................................................. 32
12.2 SPE................................................................................................................................................ 33
12.3 ICOM.............................................................................................................................................. 33
CAT CI–V Interface........................................................................................................................ 33
12.4 KENWOOD.................................................................................................................................... 34
CAT RS232 Interface..................................................................................................................... 34
CAT 5V TTL Interface.................................................................................................................... 34
12.5 YAESU........................................................................................................................................... 35
CAT RS232 Interface..................................................................................................................... 35
CAT 5V TTL Interface.................................................................................................................... 35
BAND DATA Interface ................................................................................................................... 36
12.6 TEN – TEC, FlexRadio, ELECRAFT ............................................................................................. 36
CAT RS232 Interface..................................................................................................................... 36
ALC with FLEX-RADIO................................................................................................................ 37
12.7 TRANSCEIVERS OF OTHER BRANDS ....................................................................................... 38
13. OTHER CONNECTIONS...............................................................................................................39
13.1
ALC, RELAY CONNECTIONS ...................................................................................................... 39
13.2 REMOTE ON LINK ........................................................................................................................ 39
13.3 CONNECTIONS / TX-INH, TX-INH ........................................................................................... 40
13.4 AUX Connector.............................................................................................................................. 41
13.5 PORT Connector ........................................................................................................................... 42
14. TRANSCEIVER CONTROLLED WITH A PC................................................................................ 44
14.1
ICOM CI-V INTERFACE............................................................................................................... 44
14.2 RS232 INTERFACE ...................................................................................................................... 45
14.3 5V TTL KENWOOD INTERFACE ................................................................................................. 45
14.4 5V TTL YAESU INTERFACE ........................................................................................................ 46

User manual EXPERT 2K-FA
Pag. 3 di 3
15. USE OF THE USB PORT...............................................................................................................47
15.1
REMOTE CONTROL......................................................................................................................47
15.2 DOWNLOAD...................................................................................................................................48
16. MAINTENANCE .............................................................................................................................49
17. CHARACTERISTICS / SPECIFICATIONS ....................................................................................50
18 DIAGNOSTICS..............................................................................................................................52
19. TABLE ............................................................................................................................................53
20. WARRANTY TERMS ....................................................................................................................54
REPAIR FORM.................................................................................................................................................56

User manual EXPERT 2K-FA
Pag. 4 di 4
Congratulations for choosing the SPE EXPERT 2K-FA solid state linear amplifier: It is
small and powerful, it covers all the amateurs bands from 1.8 to 54 MHz WARC
included, completely automatically.
All operating conditions (frequency, antenna, tuner etc.) are controlled from your
transceiver. The operator has only to move the frequency tuning knob on the
transceiver.
It is possible to connect it to every type of device, it is extremely user-friendly and offers
a product which is best-in-class.
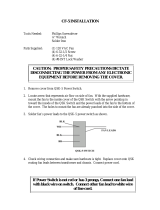
IMPORTANT
Read this instruction manual carefully before attempting to operate the linear
amplifier.
The warranty will be invalidated in the case of non-observance of these
instructions.
Keep this manual. It contains important safety and operating instructions for the
SPE EXPERT 2K-FA.
This manual may be subject to changes and updates therefore please refer
always to the updated version available on the website www.linear-amplifier.com.
If in doubt, refer to the English language version.
PRECAUTIONS
Explicit definitions
WORD DEFINITION
WARNING!
Risk of danger of fire or electric shock to persons.
Possible damage to the amplifier.
NOTE:
Serious problems if not observed. Danger of fire or electric shock for the operator,
or damage to the equipment.
WARNING!
HIGH VOLTAGE! DO NOT disconnect an antenna from the amplifier during
transmission; electric shock or fire is possible.
WARNING!
DO NOT modify the internal wiring of the amplifier. Any modifications will invalidate the
warranty, and may reduce the performance of the linear amplifier or damage it.
WARNING!
Before using the linear amplifier, compare the value of voltage of the local mains supply
network with the value required by the amplifier.
WARNING!
DO NOT turn ON the linear amplifier unless it has been properly grounded through the
green/yellow conductor of the mains cord. Your dealer will already have provided the

User manual EXPERT 2K-FA
Pag. 5 di 5
correct mains plug for your local electricity network, with the earth pin connected to that
conductor. Do not disconnect this under any circumstances, or there is a risk of severe
or fatal electric shock.
WARNING!
DO NOT use an extension cord with the AC power cable, as if it is not correctly rated
there is a risk of fire or electric shock.WARNING!
DO NOT allow metallic objects or wires to enter inside the amplifier.
WARNING!
DO NOT obstruct the entries for cooling air at both the sides of the amplifier.
Ensure that no object impedes the correct operation of the fans.
WARNING!
DO NOT expose the linear amplifier to rain, snow or any liquids.
WARNING!
DO NOT instal the linear amplifier in a place without good ventilation. This could limit
heat dissipation and the amplifier could be damaged.
WARNING!
DO NOT touch the amplifier with damp or wet hands. There is danger of electric shock.
Avoid opening it before you have disconnected it from the mains supply, then wait at
least 2 minutes for electrolytic capacitors to complete their discharge.
To clean the amplifier DO NOT use chemical agents like alcohol or benzene because
the plastic surfaces could be damaged.
AVOID using the amplifier in areas with temperatures below –10° C (+14°F) or above
+40°C (+104°F).
AVOID using the linear amplifier in locations that are very dusty, damp or in direct
sunlight.
AVOID placing the linear amplifier against walls, the circulation of the air would be
obstructed and the noise of the fans would be reflected toward the operator.
AVOID permitting children to play with the amplifier.
If you do not use the linear amplifier for long time, set the back main switch [I/O] to the
OFF position [O].

User manual EXPERT 2K-FA
Pag. 6 di 6
Information for Users on Collection and Disposal of Old Equipment and used
Batteries.
These symbols on the products, packaging, and/or accompanying
documents mean that used electrical and electronic products and batteries
should not be mixed with general household waste.
For proper treatment, recovery and recycling of old products and used
batteries, please take them to applicable collection points, in accordance
with your national legislation.
This amplifier should only be operated by persons who have an appropriate radio
transmitting licence.
You should observe your licence conditions whilst using it in accordance with
national legislation.

User manual EXPERT 2K-FA
Pag. 7 di 7
UNPACKING
Remove the packing and carefully check the contents.
If you find any damage or if there are any parts missing, contact your retailer
immediately.
Keep the shipping cartons for future transportation if required.
Accessories included in the carton
a) Transport carry bag.
b) 2 - cables with RCA (phono) connectors for ALC, RELAY links.
c) N° 1 USB standard cable.
d) N° 3 connectors DB-15, n. 1 connector DB-9
e) User manual.
f) Spare fuses:
n°1 20 A,
n°1 0,5 A,
g) Spare air filter.
h) Certificate of compliance and warranty form.
b
c
d
f
g
e
a
h

User manual EXPERT 2K-FA
Pag. 8 di 8
1. PANEL DESCRIPTION
1.1 Front Panel
1) ON
2) OFF
3) DISPLAY switches between display pages.
4) POWER switches output power from “MAX / MID / LOW“.
5) OPERATE switches between Standby / Operate.
6) SET used to program the amplifier.
7) ▼► used to program the amplifier.
8) ◄▲ used to program the amplifier.
9) INPUT selects one of the two inputs of the amplifier.
10) ◄BAND switches bands manually (downward in frequency).
11) BAND► switches bands manually (upward in frequency).
12) ANT switches the antennas for every single band
13) CAT shows the current CAT interface setting.
14) TUNE: starts the automatic tuning process.
15) ◄C used for manual tuning.
16) C► used for manual tuning.
17) ◄L used for manual tuning.
18) L► used for manual tuning.
19) TX red led, illuminates during transmission.
20) OP yellow led, illuminates when the amplifier is in “Operate” state.
21) ON green led, illuminates when the amplifier is “ON”.
22) SET green led, illuminates during programming.
23) TUNE yellow led, illuminates during tuning.
24) ALL red led, illuminates when there is an alarm.
25) DISPLAY
26) AIRFLOW GRID

User manual EXPERT 2K-FA
Pag. 9 di 9
1.2 Rear Panel
1) ANT connectors for six possible antennas.
2) SO2R connector for SO2R operations
3) INPUT connectors to connect two exciters.
4) FANS
5) IN 1 ALC, RELAY, CAT connectors for exciter 1.
6) IN 2 ALC, RELAY, CAT connectors for exciter 2.
7) PORT “PORT”.
8) PORT “USB”.
9) PORT “AUX”.
10) ON main switch.
11) FUSE 1 PA unit, 20A.
12) FUSE 2 electronic unit 0,5A.
13) AC mains power cable.
14) GND ground connector.

User manual EXPERT 2K-FA
Pag. 10 di 10
2. GENERAL INFORMATION
(Read the specific chapters for more details).
2.1 Power supply
The linear uses a switching power supply with a continuous input between 190 and 255
Vac.
The main switch [I/O] is located on the rear panel, in the [O] position all the internal
circuitry is powered off, in the [I] position (red led ON) it is possible to turn ON or turn
OFF the linear amplifier in one of the following ways:
a) Using the [ON]/[ OFF] keys on the front panel.
b) Applying / removing 9 -15 Vdc on pin (8) of the CAT connector.
c) Using the USB port and the management software. It is possible to download
this software from the website www.linear-amplifier.com
.
Note: when turned ON, almost all transceivers output 13,8 Vdc. With this voltage, the linear
amplifier can be turned automatically ON / OFF at the same time as the transceiver.
2.2 Input / Output
The linear amplifier has two inputs (INPUT 1, INPUT 2) to which it is possible to connect
two transceivers of any brand or type.
These inputs are selected with the [INPUT] key or automatically with the PTT of each
transceiver.
It can manage up to six antennas (ANT 1, ANT 2, ANT 3, ANT 4, ANT 5, ANT 6).
The amplifier selects antennas automatically when they have been programmed.
The SO2R functionality is implemented using its own connector.
2.3 ALC / RELAY / CAT
There are two transceiver inputs (IN 1, IN 2), to allow two different transceivers to be
connected at the same time.
ALC is a voltage (0, -11 Vcc) generated by the amplifier, it is used to control the
output power of the transceiver (max. in STANDBY”, the required in
“OPERATE”).
In this way the power from the exciter may be automatically regulated.
If the ALC port is not connected, it is necessary to manually regulate the
drive power from the transceiver.
This link is highly recommended.
RELAY This essential link allows the amplifier to be put in the transmit state. To do
that it is necessary that the inner pin of the phono connector is connected to
signal ground. This is normally done at the transceiver with either a close on
ground relay, or with a switching transistor. It is important that the voltages at
that terminal do not exceed 12 Vdc. On the transceiver this link is often called
SEND or TX GND. Refer to your transceiver manual for more details.

User manual EXPERT 2K-FA
Pag. 11 di 11
CAT This link is highly recommended.
Thanks to this link the linear amplifier will detect, while in receive mode, the
operating frequency of the transceiver and then automatically control
changes of band, antenna and automatic antenna tuner. Most modern
transceivers have CAT control. In old models often, analog or digital
information are sent for changing band. The SPE Expert 2K-FA, thanks to an
efficient frequency counter, constantly controls and verifies data coming from
the transceiver. Automatic management of bands, antennas and tuner can be
done in the following way:
a) In all recent transceivers through CAT connection.
b) In the YAESU models not listed, or without CAT, through "BAND
DATA".
c) The possibilities a) and b) are recommended. In every other case
through the internal frequency counter.
Note: in case c) the CAT link with the transceiver is not needed because the
frequency is detected from the transmitted signal.
Note: in some transceivers the “RELAY” and “CAT” signals are activated by
menu selection: refer in this case to their user’s manuals..

User manual EXPERT 2K-FA
Pag. 12 di 12
3. INTERCONNECTION WITH THE TRANSCEIVER
The diagram shows the connections with one transceiver only.To connect the second
transceiver repeat the same connections using the port “IN 2“.
For the ALC, RELAY connections, use the shielded cable (supplied) with phono RCA
connectors.
For the CAT connection, the cable must be made for the transceiver to be connected.
This cable may also be made to include ALC, RELAY ON / OFF (read the “CAT
CONNECTIONS“ chapter of this manual).
For all other information about connecting a transceiver, please refer to its manual.
Note: Do not use the RELAY and ALC phono connections if they have been implemented in
the DB15 “CAT” connectors.

User manual EXPERT 2K-FA
Pag. 13 di 13
4. USE OF THE LINEAR AMPLIFIER
Block diagram.
The position of the contacts, as shown in the diagram, is the situation of the linear
amplifier in OFF state.
The linear amplifier can be used in the following ways:
1) OFF Only two direct connections are actuated:
between INPUT 1 and ANT 1
between INPUT 2 and SO2R
2) STANDBY All the functions are activated (band change, antenna change, tuner
control) but the transmission is from the transceiver only.
3) OPERATE All the functions are activated and the transmission is using the
linear amplifier.
Note: regulation of the exciter’s power is automatic through the ALC connection. With the
ALC connected, the amplifier input power in OPERATE mode is reduced to the correct
level to drive the amplifier. In standby, the exciter will give the output power as set by
its POWER OUTPUT control. Without the connection, you have to manually regulate
the exciter power to drive the amplifier correctly.

User manual EXPERT 2K-FA
Pag. 14 di 14
4.1 SO2R (Single Operator Two Radio )
This kind of operation is used during a contest in order to acquire, as quickly as
possible, a new multiplier.
The following connections are needed (see the diagram):
1. INPUT 1 connected to the first transceiver (RTX1).
2. INPUT 2 connected to the second transceiver (RTX2).
3. ANT 1/2/3/4/5/6 connected to the available antennas set.
4. SO2R connected to a multi-band antenna.
The operating mode could be the following:
If you are operating using RTX1 on a given band (e.g 20 m), the correct antenna
(ANT 1/2/3/4/5/6 is automatically selected while RTX2 is connected to the multi-band
antenna in RX mode on another band.
If, when operating on 20 m, a multiplier of interest is heard on RTX2 (e.g 40 m), the only
action needed is to push the PTT2 in order to connect RTX2 to the 40 m antenna, while
RTX1 will be switched to the multiband antenna in order to receive the 20 m band.
In place of the multiband antenna one of the antennas ANT 1/2/3/4/5/6 can be used, in
such a case all of them must be monoband to avoid the danger of using the same
antenna for RTX1 and RTX2..
A careful design is needed to avoid such a danger which could be devastating for the
receivers.
This possibility is available with the optional external unit "SPE SO2R1" according to
the following diagram.

User manual EXPERT 2K-FA
Pag. 15 di 15
The unit is controlled and powered from the AUX port.
Note: the isolation between the transmitting antenna and the receiving antenna must be very
high and, therefore, very well planned. Locating the antennas at some distance from
each other, and using appropriate band-pass filters will help to achieve this.
However, SPE is not responsible for any damage caused to equipment.
4.2 BAND-PASS FILTERS SET “SPE BPF1”
To increase the isolation between the transmitting and the receiving antenna SPE offers
the optional unit "SPE BPF1" which must be placed between RTX1 / RTX2 and linear.
The unit is controlled and powered from the AUX port.
The unit automatically enables the following features:
a) DXpetition, Contest Multi / Multi.
In this case the amplifier is connected to a single transceiver (INPUT 1 / 2).
"SPE BPF1 automatically selects the filter on the band to be used in the input where the
transceiver is connected, while the other unrelated input is unused.

User manual EXPERT 2K-FA
Pag. 16 di 16
2) Contest SO2R.
In this case the amplifier is connected to two transceivers.
"SPE BPF1" automatically selects the right filters and the right inputs as well.
These features can be possible also with the simultaneous use of the unit "SPE SO2R1,
(use the AUX port with a Y cable).
To ensure the perfect functionality of these options, the use of the CATs is
recommended.

User manual EXPERT 2K-FA
Pag. 17 di 17
4.3 QSK (FULL BREAK-IN) OPERATION
The Expert 2K-FA allows also QSK (FULL BREAK-IN) operation, thanks to the perfect
control carried out on RX / TX switching relays, any possibility of "hot switching" is
avoided.
This feature is compatible with all modern transceivers, in fact the minimum delay
required before transmission is only 6.5 msec (check the manual of the transceiver).
In the case (very remote) of minor delay, you can use the link TX - INH (see "CAT"
paragraph) or, upon purchase, ask for optional installation of " vacuum relays " (Kilovac
HC1 12 Vdc)
4.4 REMOTABLE TUNER, UNIT “SPE RAT1”
The Expert 2K-FA has inside an automatic tuner (ATU) system that allows the selection
of 6 different antennas and their automatic tuning (see "TUNER" paragraph).
The "SPE RAT1" allows to remote such ATU bringing to a more convenient location
(roof, towers etc..), using a single coaxial cable, no other cable is required.
The length depends only on RF cable attenuation.
You get the following benefits:
- A single cable between the amplifier and antennas.
- Cable always perfectly matched, and hence lower losses.
- ATU closer to the antenna.
- Drastic reduction in the number of cables that stem from the shack, and hence money
saved.
The "SPE RAT1" is provided in a water proof container, the procedure of installation is
very simple:
- Remove the ATU unit from the linear.
- Install in its place the new unit included in the option.
- Install the ATU in the water proof container.
- Connect, with a coaxial cable, the unit replaced with the "SPE RAT1".
Following these simple steps (explained in detail) it is possible to have remotely the
same features as if the ATU is still inside the linear.
4.5 TUNEABLE ANTENNAS CONTROL
The use of tuneable antennas (SteppIR, Ultrabeam) is becoming popular. These
antennas vary the physical dimensions of the elements in accordance with the operating
frequency to guarantee always a perfect resonance.
The Expert 2K-FA, through the dedicated connector "PORT" connected to the antenna
controller, allows their automatic control following the tuning knob.
This dedicated link allows the following advantages:
- Simplification of wiring, the difficulty of adding an additional wiring to CAT input is
removed.
- Compatibility with all types of CAT, the Expert 2K-FA converts the CAT protocol, so
two different transceivers (CATs) can be used simultaneously with the same controller.
- Thanks to the frequency counter inside the linear, the antenna can be controlled also
without the use of CAT.

User manual EXPERT 2K-FA
Pag. 18 di 18
All of the automatic features of the linear are retained even in the most complex
configurations, antennas of all kinds can be connected to the connectors "ANT", the
Expert 2K-FA will choose the antennas according to the set-up and will manage them
according to their characteristics.
The CAT is recommended, if the transceiver does not have the CAT or if has only the
"Band Data", the Expert 2K-FA will continue to drive the antenna with the frequency
measured by the counter (data collected after the first transmission) .
Up to 6 tuneable antennas can be controlled through their own controller.
The simplest configuration is a single tuneable antenna according to the following
diagram :
The link is unique for any position (ANT 1,2,3,4,5,6) you want use.

User manual EXPERT 2K-FA
Pag. 19 di 19
If you have several tuneable antennas (up to 6) and their controllers, the optional unit
"SPE CBU1" is needed according to the following diagram:
In this case you need to connect the unit control box outputs 1,2,3,4,5,6 in accordance
respectively with the antennas ANT 1,2,3,4,5,6.
For the selection of antennas, refer to the "ANT TUN" in the menu.
The Protocol used is "Kenwood", the communication speed is settable.
4.6 SETTING UP A SINGLE ANTENNA FOR RECEPTION
In some cases it may be appropriate to transmit with an antenna and receive with a
more appropriate one.
A unique feature allows the Expert 2K-FA to set a receiving antenna and to provide an
its automatic switching after transmission.
For the selection of this antenna refer to the menu item "RX ANT".
The antenna number selected will appear close to an "r" (eg, 3r).
Because, with linear OFF the INPUT1 is directly connected to ANT1, the selection of
ANT1 is not permitted to avoid some possible danger to the transceiver if only a
receiving antenna (eg beverage) is connected.

User manual EXPERT 2K-FA
Pag. 20 di 20
5. EXTERNAL GROUND CONNECTION
WARNING! Before connecting an external ground as described below, check
with a qualified electrician that your national wiring codes permit such a
connection.
To reduce TVI, BCI and other RF problems it is sometimes helpful to connect the
amplifier to a good RF ground.
The inductance of such a connection has to be low, so the connection to ground should
be as short and direct as possible. Large-section copper conductors should be used for
this purpose. Terminating the earth connection with a small metal plate is suggested.
The best solution is to have a ground stake, driven into the ground, and used only for
the radio station.
Often good results can be acheived using correct earthing clamps, connected to the
mains water supply pipe (attention, most water pipes are now in plastic).
DO NOT use central heating pipework.
AVOID the electric circuit ground of the building (to be used for 50/60 Hz safety only).
WARNING! DO NOT connect to gas pipes because there is danger of explosion !!
/