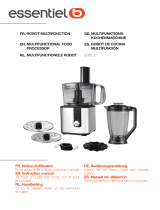
KAH647PL

Kenwood KAH647PL, Bol Multifonction KAH647PL User manual

  • Hello! I am an AI chatbot trained to assist you with the Kenwood KAH647PL User manual. I’ve already reviewed the document and can help you find the information you need or explain it in simple terms. Just ask your questions, and providing more details will help me assist you more effectively!
English 2 - 6
Nederlands 7 - 12
Français 13 - 18
Deutsch 19 - 24
Italiano 25 - 30
Português 31 - 36
Español 37 - 42
Dansk 43 - 47
Svenska 48 - 52
Norsk 53 - 57
Suomi 58 - 62
Türkçe 63 - 67
Ïesky 68 - 73
Magyar 74 - 79
Polski 80 - 85
Русский 86 - 91
Ekkgmij 92 - 97
Slovenčina 98 - 103
Українська 104 - 109
´¸∂w
011 - 411
2
English
safety
Read these instructions carefully and retain
for future reference.
The blades and cutting discs are very sharp,
handle with care. Always hold by the
finger grip at the top, away from the
cutting edge, both when handling
and cleaning.
Always remove the knife blade before pouring
contents from the bowl.
Keep hands and utensils out of the bowl
whilst the kitchen machine is connected to
the power supply.
Never use your fingers to push food down
the feed tube. Only use the pushers supplied
with the attachment.
Switch off and unplug:
before fitting or removing parts
after use
before cleaning
Never remove the lid from the attachment
until the blade or cutting disc has completely
stopped.
When using the slicing, grating or julienne
disc, don’t let the bowl fill up as far as the
cutting disc: empty it regularly.
When using the knife blade do not fill above
the Max level marked on the bowl.
Do not touch moving parts.
Do not use excessive force to push food
down the feed tube - you could damage the
attachment.
Don't chop ice cubes or other hard foods,
such as spices, they may damage the
attachment.
Don’t use the knife blade to mix heavy
loads such as bread dough otherwise you
may damage your attachment or machine.
Use the dough hook in the kitchen
machine.
Never blend hot ingredients in the
bowl, allow to cool to room
temperature before processing.
Don’t blend liquid ingredients as they may
leak from around the lid. A blender is
available for this purpose.
Do not use the lid to operate the food
processor, always use the on/off or speed
control.
Misuse of your food processor attachment
can result in injury.
Should excessive vibration occur when
using this attachment, either reduce the
speed or stop the machine and remove the
contents.
Never use a damaged attachment. Get it
checked or repaired. See ‘service and
customer care’.
Refer to your main kitchen machine
instruction book for additional safety
warnings.
3
T
his appliance conforms to EC
directive 2004/108/EC on
E
lectromagnetic Compatibility and
E
C regulation no. 1935/2004 of
27/10/2004 on materials intended
f
or contact with food.
b
efore using your Kenwood
a
ttachment
Remove all packaging including the
plastic blade covers from the knife
blade. Take care the blades
are very sharp. These covers
should be discarded as they are to
protect the blade during
manufacture and transit only.
Wash the parts see ‘cleaning’
key
pushers: large and small
feed tube
attachment lid
finger grip
knife blade
attachment bowl
connector
cutting discs
1 extra fine grating disc
2 fine grating disc
3 coarse grating disc
4 thin slicing disc
5 thick slicing disc
6 julienne disc
knife blade
Use on speed 2 to 5
Use the knife blade to chop raw
and cooked meat, cooked eggs,
vegetables, nuts, pâtés and dips
and to also make crumbs from
bread and biscuits. It can also be
used to make shortcrust pastry
and crumble toppings.
maximum capacities
pastry (flour weight) 400g
meat 500g
Never exceed the ‘max’ level
marked on the bowl.
to use the knife blade
1 Place the kitchen machine on the
work surface with the speed
c
ontrol facing the front.
2 Lift off the high speed outlet cover
.
3
Place the connector onto the outlet
with the triangle facing towards
you and turn clockwise until it
locks into position.
4 Place the bowl onto the connector
with the handle at the back of the
kitchen machine then turn
clockwise to lock in place.
5 Place the knife blade in the
attachment bowl. Turn and push
down if necessary to locate.
Handle the knife blade with
care - the blades are
extremely sharp. Hold by the
finger grip.
6 Cut the food up and place into the
bowl ensuring it is evenly
distributed.
7 Fit the lid onto the bowl by placing
the feed tube behind the handle
then push down and turn
clockwise to lock in place. The lid
can be fitted in four different
positions.
If you experience difficulty in
fitting the lid, remove the
attachment and switch on
the kitchen machine briefly.
Refit the attachment.
8 Fit the pushers.
9 Switch on and select a suitable
speed. Process until the desired
result has been achieved.
10 Switch off and unplug.
11 Remove the attachment from the
outlet by turning anti-clockwise
and lifting off. Dismantle the
attachment. (To remove the bowl
from the connector, hold the base
of the connector and turn the bowl
anti-clockwise and lift off . If you
experience difficulty in removing
the connector from the bowl, refit
the bowl and connector to the
outlet. Turn the assembly anti-
clockwise until it reaches a stop,
then turn the bowl further to unlock
from the connector .)
4
h
ints
Cut food up before placing into the
b
owl. Meat, bread, vegetables and
o
ther foods of a similar texture
should be cut into cubes
a
pproximately 2cm/
3
4 i
n. Biscuits
s
hould be broken into pieces and
added down the feed tube whilst
t
he machine is operating.
I
f you want to blend soups, drain
the ingredients and add the solids
to the bowl. Process and then add
back to the liquid.
When making pastry, use firm fat
cut into 2cm/
3
4 in cubes from the
fridge. Mix with the flour until
breadcrumb stage is reached.
Gradually add sufficient water
down the feed tube to form a
dough. Switch off as soon as the
ingredients are combined.
Take care not to over process
when using the knife blade.
Use the K-beater in the mixing
bowl
to mix cakes - you will get
better results.
cutting discs
Use speed 1 to 2 for most
operations.
If more power is required increase
to speed 3.
Use the slicing/grating discs to
slice or grate fruit, vegetables and
cheese and the julienne disc to cut
vegetables e.g. potatoes and
carrots.
important - Don’t let the bowl fill
up as far as the cutting disc:
empty it regularly.
The range of discs listed below are
included in pack and can be
identified by the numbers marked
on each disc as follows:-
Disc No 1 - extra fine grating. For
parmesan cheese and potato for
German potato dumplings.
Disc No 2 - fine grating. For
cheese, chocolate, nuts and firm
fruit or vegetables.
Disc No 3 - coarse grating. For
cheese and firm fruit or vegetables.
Disc No 4 - thin slice. For cheese
and firm fruit or vegetables.
D
isc No 5 - thick slice. For
cheese and firm fruit or vegetables
D
isc No 6 - julienne. Cuts
p
otatoes for French Fries and
ingredients for casseroles, salads
a
nd dips (e.g. carrot, apple and
pear.)
to use the cutting discs
1 Place the kitchen machine on the
work surface with the speed
control facing the front.
2 Lift off the high speed outlet cover
.
3 Place the connector onto the outlet
with the triangle facing towards
you and turn clockwise until it
locks into position.
4 Place the bowl onto the connector
with the handle at the back of the
kitchen machine then turn
clockwise to lock in place.
5 Select the desired cutting disc and
place onto the connector drive - it
will only fit one way. The number
marked on the disc should be
facing uppermost. Handle the
cutting discs with care -
they are extremely sharp.
Hold the disc by the finger
grip.
6 Fit the lid onto the bowl by placing
the feed tube behind the handle
then push down and turn
clockwise to lock in place. The lid
can be fitted in four different
positions.
If you experience difficulty in
fitting the lid, remove the
attachment and switch on
the kitchen machine briefly.
Refit the attachment.
7 Choose which feed tube you want
to use. The pusher contains a
smaller feed tube for processing
individual items or thin ingredients.
to use the small feed tube
First put the large pusher inside the
feed tube .
to use the large feed tube
Use both pushers together .
8 Put the food into the feed tube.
5
9
Switch on and push down evenly
with the pusher - never put your
f
ingers in the feed tube.
A
t the completion of the
processing operation, raising and
l
owering the pusher several times
m
ay help to reduce the amount of
food left on the cutting disc.
1
0 Switch off and unplug.
1
1 Remove the attachment from the
outlet by turning anti-clockwise
and lifting off. Dismantle the
attachment.
(To remove the bowl from the
connector, hold the base of the
connector and turn the bowl anti-
clockwise and lift off . If you
experience difficulty in removing
the connector from the bowl, refit
the bowl and connector to the
outlet. Turn the assembly anti-
clockwise until it reaches a stop,
then turn the bowl further to unlock
from the connector .)
hints
Use fresh ingredients.
Don’t cut food up too small. Fill the
width of the large feed tube fairly
full. This prevents the food from
slipping sideways during
processing. Alternatively, use the
small feed tube.
When using the julienne disc, place
thin ingredients horizontally.
When slicing or grating: food
placed upright comes out shorter
than food placed horizontally.
After using a cutting disc there will
always be a small amount of waste
on the disc or in the food.
cleaning
Always switch off and unplug
before removing the attachment
from the kitchen machine.
Dismantle the attachment fully
before cleaning.
Never immerse the connector in
water, wipe over with a damp
cloth.
W
ash remaining parts in hot soapy
water, then dry thoroughly. Take
c
are as the blades and cutting
d
iscs are sharp. Alternatively wash
in the dishwasher (top rack only).
D
O NOT DISHWASH THE
C
ONNECTOR.
service and customer
care
UK only
If you need help with:
using your attachment
servicing or repairs (in or out of
guarantee)
call Kenwood customer care on
023 9239 2333.
spares and attachments
call 0844 557 3653.
other countries
Contact the shop where you
bought your attachment.
Designed and engineered by
Kenwood in the UK.
Made in China.
6
   
     ,
     
     
.
Μην χρησιμοποιείτε ποτέ εξάρτημα που
έχει υποστεί βλάβη. Φροντίστε να
ελέγχετε ή να επισκευάζετε τις βλάβες.
Βλέπε ενότητα «σέρβις και εξυπηρέτηση
πελατών».
     
  
 .
94
   a
  a  
2004/108/   
a aa
a  a  ’
a 1935/2004 
27/10/2004   a 
 a a  
a  a.
ππρριινν χχρρηησσιιμμοοπποοιιήήσσεεττεε ττοο
εεξξάάρρττηημμαα KKeennwwoooodd
   

 
   
  . 
    
.   
   
    
    
  .
    
‘’
 
:   
 
 
λαβή λεπίδας
 
 
 
δίσκοι κοπής
11
δίσκος για πολύ λεπτό τρίψιμο
22
δίσκος για λεπτό τρίψιμο
33
δίσκος για χοντρό τρίψιμο
44
δίσκος κοπής για λεπτές φέτες
55
δίσκος κοπής για χοντρές
φέτες
66
δίσκος κοπής για λωρίδες
 
ΓΓιιαα χχρρήήσσηη σσττιιςς ττααχχύύττηηττεεςς 22 έέωωςς 55
   
     
 , 
, ,  ,
   ()   
   .
   
    
    
   
  .
 
 ( ) 400
 500
Μην υπερβαίνετε ποτέ την ένδειξη
«μέγιστης» στάθμης στο μπολ.
 
 
  
1 Τοποθετήστε την κουζινομηχανή
πάνω στην επιφάνεια εργασίας με
τ
ο ρυθμιστή ταχύτητας στραμμένο
εμπρός.
2 Αφαιρέστε το κάλυμμα υποδοχής
υψηλής ταχύτητας .
3    
    
     
   
    .
4 Τοποθετήστε το μπολ στη βάση
σύνδεσης με τη λαβή προς το
πίσω μέρος της κουζινομηχανής
και στρέψτε το δεξιόστροφα έως
ότου ασφαλίσει στη θέση του.
5 Τοποθετήστε τη λεπίδα του
μαχαιριού στο μπολ εξαρτήματος.
Στρέψτε την και πιέστε την προς
τα κάτω, εάν χρειάζεται, για να
εφαρμόσει.
ΝΝαα χχεειιρρίίζζεεσσττεε ττηη
λλεεππίίδδαα ττοουυ μμααχχααιιρριιοούύ μμεε ππρροοσσοοχχήή
οοιι λλεεππίίδδεεςς εείίννααιι εεξξααιιρρεεττιικκάά
κκοοφφττεερρέέςς.. ΝΝαα ττηηνν κκρρααττάάττεε ααππόό ττηη
λλααββήή..
6     
     
   .
7 Τοποθετήστε το καπάκι στο μπολ
βάζοντας το σωλήνα τροφοδοσίας
πίσω από τη λαβή, πιέστε προς
τα κάτω και στρέψτε δεξιόστροφα
για να ασφαλίσει στη θέση του.
Μπορείτε να τοποθετήσετε το
καπάκι σε τέσσερις διαφορετικές
θέσεις.
ΕΕάάνν δδυυσσκκοολλεεύύεεσσττεε νναα
ττοοπποοθθεεττήήσσεεττεε ττοο κκααππάάκκιι,,
ααφφααιιρρέέσσττεε ττοο εεξξάάρρττηημμαα κκααιι θθέέσσττεε
ττηηνν κκοουυζζιιννοομμηηχχααννήή σσεε λλεειιττοουυρργγίίαα
γγιιαα σσύύννττοομμοο χχρροοννιικκόό δδιιάάσσττηημμαα..
ΕΕππααννααττοοπποοθθεεττήήσσττεε ττοο εεξξάάρρττηημμαα..
8   .
9 Θέστε τη συσκευή σε λειτουργία
και επιλέξτε την κατάλληλη
ταχύτητα. Επεξεργαστείτε τα
τρόφιμα, έως ότου επιτύχετε το
επιθυμητό αποτέλεσμα.
1
0 Θέστε τη συσκευή εκτός
λειτουργίας και αποσυνδέστε την
α
πό το ρεύμα.
1
1 Αφαιρέστε το εξάρτημα από την
υποδοχή στρέφοντάς το
α
ριστερόστροφα και
α
νασηκώνοντάς το.
Αποσυναρμολογήστε το εξάρτημα.
(
Για να αφαιρέσετε το μπολ από
τη βάση σύνδεσης, κρατήστε τη
βάση, στρέψτε το μπολ
αριστερόστροφα και ανασηκώστε
το . Εάν δυσκολεύεστε να
αφαιρέσετε τη βάση σύνδεσης
από το μπολ, επανατοποθετήστε
το μπολ και τη βάση σύνδεσης
στην υποδοχή. Στρέψτε τη
διάταξη αριστερόστροφα έως ότου
σταματήσει, και μετά στρέψτε το
μπολ περισσότερο για να
απασφαλίσει από τη βάση
σύνδεσης .)
 
     
   . 
,  ,   
    
    
 2 .  
     
     
   
   .
   
,    
    
.   
    
.
  ,
  
     
 2.    
     
  .
   
    
  . Θέστε τη
συσκευή εκτός λειτουργία μόλις τα
υλικά δέσουν.
   
   
   
.
95
ôß∑ªb«Â ≠∑∫W ≈œîU‰ «∞DFUÂ
«∞J∂Od…
«ß∑ªb±w Øq ±s ´BU œ≠l «∞DFU «∞BGOd
Ë«∞J∂Od… ±FUÎ .
8 {Fw «∞DFU ±s îö‰ ≠∑∫W ≈œîU‰ «∞DFUÂ.
9 ®GKw «∞πNU“ ±l œ≠l «∞DFU °U∞∑ºUËÍ
°u«ßDW ´BU œ≠l «∞LJu≤U‹ - ¥∫c¸ Ë{l
√ÅU°Fp œ«îq √≤∂u» «∞∑Gc¥W.
≠w ≤NU¥W ´LKOW ¢∫COd «∞DFUÂ, Æb ¥RœÍ
¸≠l ´BU œ≠l «∞LJu≤U‹ ËîHCNU œ«îq
√≤∂u» «∞∑Gc¥W ´b… ±d«‹ ≈∞v îHi ØLOW
«∞DFUÂ «∞L∑∂IOW ´Kv ßD` «∞∑IDOl.
01√ËÆHw ¢AGOq «∞πNU“ Ë«≠BKOt ´s ±Bb¸
«∞∑OU¸ «∞JNd°w.
11√“¥Kw «∞LK∫o ´s «∞Lªdà ´s ©d¥o ∞n
«∞LK∫o ≠w «¢πUÁ ´Jf ´IU¸» «∞ºU´W £r
¸≠Ft _´Kv. ≠Jw «∞LK∫o. (ù“«∞W
«∞ºKDU≤OW ´s «∞LuÅq, «±ºJw ÆU´b…
«∞LuÅq £r ∞Hw «∞ºKDU≤OW ≠w «¢πUÁ
´Jf ´IU¸» «∞ºU´W Ë«¸≠FONU _´Kv .
≈–« Ë«§N∑p ÅFu°W ≠w ≈“«∞W «∞LuÅq ´s
«∞ºKDU≤OW, ≠Hw ≥cÁ «∞∫U∞W √´ObÍ ¢dØOV
«∞ºKDU≤OW Ë«∞LuÅq ≠w «∞LªdÃ. ∞Hw
«∞LπLu´W ≠w «¢πUÁ ´Jf ´IU¸» «∞ºU´W
•∑v ¢∑uÆn, £r ∞Hw «∞ºKDU≤OW •∑v
¢∑∫d¸ ±s «∞LuÅq .
¢KLO∫U‹
«ß∑ªb±w ±Ju≤U‹ ©U“§W.
ô ¢IDFw «∞DFUÂ ≈∞v ÆDl ÅGOd… §b«Î.
«§FKw ´d÷ ≠∑∫W ≈œîU‰ «∞DFU «∞J∂Od…
±L∑KµW ¢LU±UÎ. ¥∫u‰ –∞p œËÊ «≤eô‚ «∞DFUÂ
´Kv «∞πu«≤V √£MU¡ «∞LFU∞πW.
√Ë °Dd¥IW
√îdÍ, ¥LJMp «ß∑ªb«Â √≤∂u» «∞∑Gc¥W
«∞BGOd.
´Mb «ß∑ªb«Â ßD` ¢IDOl √ÅU°l ¸≠OFW,
{Fw «∞LJu≤U‹ °AJq √≠Iw.
´Mb ¢IDOl «∞Ad«z` √Ë «∞Hd :«∞DFUÂ
«∞Lu{uŸ °AJq ¸√ßw ¥ªdà ÆBOd«Î ´s
«∞DFU «∞Lu{uŸ °AJq √≠Iw.
°Fb «ß∑ªb«Â ßD` ¢IDOl, ≥MU„ œ«zLU
ØLOW ÅGOd… ±s «∞MHU¥W ´Kv «∞ºD` √Ë
≠w «∞DFUÂ «∞L∫Cd.
«∞∑MEOn
«≠BKw «∞πNU“ œ«zLUÎ ´s ±Bb¸ «∞∑OU¸
«∞JNd°w Æ∂q ≈“«∞W «∞LK∫o ´s §NU“
¢∫COd «∞DFUÂ.
≠Jw «∞LK∫o ¢LU±UÎ Æ∂q «∞∑MEOn.
ô ¢GLdÍ «∞LuÅq ≠w «∞LU¡, «±º∫Ot °IDFW
ÆLU‘ ¸©∂W.
«¨ºKw «_§e«¡ «∞L∑∂IOW ≠w ±∫Ku‰ ßUîs
±s «∞LU¡ Ë«∞BU°uÊ £r §HHONU §Ob«Î.
¢uîw «∞∫c¸ •OY √Ê ≤Bq «∞ºJOs
Ë√ßD` «∞∑IDOl •Uœ… §b«Î. ¥LJMp ¨ºKNU
≠w ¨ºU∞W «_©∂U‚ (´Kv «∞d· «∞FKuÍ
≠Ij). ô ¢GºKw «∞LuÅq ≠w ¨ºU∞W
«_©∂U‚.
«∞ªb±W ˸´U¥W «∞FLö¡
«ß∑ªb«Â «∞LK∫o
«ß∑ªb«Â «∞πNU“ ´LKOU‹ ÅOU≤W
Ë≈Åö•U‹
«¢BKw °U∞L∑πd «∞cÍ «®∑d¥∑w ±Mt
«∞πNU“.
¢BLOr Ë¢Du¥d doowneK ≠w «∞LLKJW
«∞L∑∫b….
ÅMl ≠w «∞BOs.
411
¥∑u«≠o ≥c« «∞πNU“ ±l ¢u§ONU‹
«∞LπLu´W «_˸˰OW
C
E/801/4002
«∞L∑FKIW °U∞∑u«≠o «∞JNd˱GMU©Oºw
Ë¢MEOLU‹ «∞LπLu´W «_˸˰OW ¸Ær
4002/5391 °∑U¸¥a 72/01/4002
«∞L∑FKIW °U∞Lu«œ «∞L∑ö±ºW ±l «∞DFUÂ.
Æ∂q «ß∑ªb«Â ±K∫o §NU“
doowneK
√“¥Kw Øq ±∫∑u¥U‹ «∞∑GKOn Ë¥∑CLs –∞p
√¨DOW «∞MBq «∞∂öß∑OJOW ´s ≤Bq
«∞ºJOs. ¢uîw «∞∫c¸ ≠MBq «∞ºJOs
•Uœ §b«Î. ¥πV «∞∑ªKh ±s ≥cÁ «_¨DOW
•OY √≤NU ±eËœ… ∞∫LU¥W ≤Bq «∞ºJOs √£MU¡
«∞∑BMOl Ë«∞MIq.
«¨ºKw «_§e«¡ "¸«§Fw ƺr «∞∑MEOn"
œ∞Oq «∞dßr «∞∑u{O∫w
´BU œ≠l «∞DFUÂ: «∞BGOd… Ë«∞J∂Od…
≠∑∫W ≈œîU‰ «∞DFUÂ
«∞GDU¡ «∞FKuÍ ∞KLK∫o
±I∂i «_ÅU°l
≤Bq «∞ºJOs
Ë´U¡ «∞∑IDOl «∞ªU’ °U∞LK∫o
±uÅq
√ßD` «∞∑IDOl
1 Æd’ «∞∑IDOl «∞Du∞w («∞∂Ad)
«∞MU´r §b«Î
2 Æd’ «∞∑IDOl «∞Du∞w («∞∂Ad) «∞MU´r
3 Æd’ «∞∑IDOl «∞Du∞w («∞∂Ad) «∞ªAs
4 Æd’ «∞∑IDOl «∞d≠Ol
5 Æd’ «∞∑IDOl «∞ºLOp
6 Æd’ «_ÅU°l «∞d≠OFW
≤Bq «∞ºJOs
«ß∑ªb«Â ´Kv «∞ºd´W 2 ≈∞v 5
«ß∑ªb±w ≤Bq «∞ºJOs ∞∑IDOl «∞K∫r
«∞ªU ˫∞LD∂uŒ, «∞∂Oi «∞LD∂uŒ,
«∞ªCd«Ë«‹, «∞∂Mb‚, «∞∂U¢Ot Ë«∞LFπMU‹
Ë√¥CUÎ ∞FLq ≠∑U‹ ±s «∞ª∂e Ë«∞∂ºJu¥X.
¥LJs √¥CUÎ «ß∑ªb«±t ≠w ´Lq «∞LFπMU‹
«∞NAW Ë«ù{U≠U‹ «∞LD∫u≤W.
«∞ºFU‹ «∞IBuÈ
«∞LFπMU‹ (Ë“Ê «∞bÆOo) 004⁄
«∞K∫r 005⁄
¥∫c¸ ¢πUË“ ´ö±W «∞ºFW «∞IBuÈ "xam"
«∞Lu{∫W ´Kv «∞ºKDU≤OW.
ôß∑ªb«Â ≤Bq «∞ºJOs
1 {Fw §NU“ ¢∫COd «∞DFUÂ ´Kv ßD`
«∞∑AGOq °∫OY ¥JuÊ ¢∫Jr «∞ºd´W ±∑πNUÎ
≈∞v «_±UÂ.
2 «¸≠Fw ¨DU¡ ±MHc «ùîd«Ã ´Kv «∞ºd´W
«∞FU∞OW .
3 {Fw «∞LuÅq ´Kv ±MHc «ùîd«Ã °∫OY
¥AOd «∞L∏KY
≤U•O∑p £r Æu±w °∑bË¥dÁ
≠w «¢πUÁ ´IU¸» «∞ºU´W ≈∞v √Ê ¥º∑Id ≠w
±uÆFt.
4 {Fw «∞ºKDU≤OW ´Kv «∞LuÅq °∫OY
¥JuÊ «∞LI∂i ≤U•OW «∞πe¡ «∞ªKHw ±s
§NU“ ¢∫COd «∞DFUÂ £r ∞HONU ≠w «¢πUÁ
´IU¸» «∞ºU´W •∑v ¢º∑Id ≠w ±u{l
«∞∑FAOo.
5 {Fw ßJOs «∞∑IDOl ≠w «∞ºKDU≤OW «∞ªUÅW
°U∞LK∫o. ≈–« ∞e «_±d, ∞Hw ßJOs «∞∑IDOl
√Ë «{GDw ´KOt ∞Oº∑Id ≠w ±u{l
«∞∑FAOo. ¢FU±Kw ±l ßJOs «∞∑IDOl
°∫c¸ ®b¥b - •OY √≤t •Uœ §b«Î.
«±ºJw ßJOs «∞∑IDOl ±s «∞LUßJW
°I∂CW ≈Å∂FOp.
6 ÆDFw «∞DFU ≈∞v √§e«¡ Ë{FOt ≠w Ë´U¡
«∞∑IDOl Ë¢QØbÍ ±s ¢u“¥Ft °U≤∑EUÂ.
7 ¸Ø∂w «∞GDU¡ «∞FKuÍ ´Kv «∞ºKDU≤OW ´s
©d¥o Ë{l √≤∂u» «∞∑Gc¥W îKn «∞LI∂i £r
«{GDw ´KOt _ßHq ±l «∞Kn ≠w «¢πUÁ
´IU¸» «∞ºU´W •∑v ¥º∑Id ≠w ±u{l
«∞∑FAOo. ¥LJs ¢dØOV «∞GDU¡ «∞FKuÍ ≠w
√¸°FW ±u«{l ±ª∑KHW.
≈–« Ë«§N∑p ÅFu°W ≠w ¢dØOV
«∞GDU¡ «∞FKuÍ, √“¥Kw «∞LK∫o
Ë®GKw §NU“ ¢∫COd «∞DFU ∞H∑d…
ÆBOd…. √´ObÍ ¢dØOV «∞LK∫o.
8 ¸Ø∂w ´DU œ≠l «∞DFUÂ.
9 ®GKw «∞πNU“ Ë•bœÍ «∞ºd´W «∞LDKu°W.
´U∞πw «∞LJu≤U‹ ∞∫Os «∞uÅu‰ ≈∞v
«∞M∑OπW «∞LDKu°W.
01 √ËÆHw ¢AGOq «∞πNU“ Ë«≠BKOt ´s ±Bb¸
«∞∑OU¸ «∞JNd°w.
11 √“¥Kw «∞LK∫o ´s «∞Lªdà ´s ©d¥o ∞n
«∞LK∫o ≠w «¢πUÁ ´Jf ´IU¸» «∞ºU´W £r
¸≠Ft _´Kv. ≠Jw «∞LK∫o. (ù“«∞W «∞ºKDU≤OW
´s «∞LuÅq, «±ºJw ÆU´b… «∞LuÅq £r ∞Hw
«∞ºKDU≤OW ≠w «¢πUÁ ´Jf ´IU¸» «∞ºU´W
Ë«¸≠FONU _´Kv . ≈–« Ë«§N∑p ÅFu°W ≠w
≈“«∞W «∞LuÅq ´s «∞ºKDU≤OW, ≠Hw ≥cÁ
«∞∫U∞W √´ObÍ ¢dØOV «∞ºKDU≤OW Ë«∞LuÅq
≠w «∞LªdÃ.. ∞Hw «∞LπLu´W ≠w «¢πUÁ ´Jf
´IU¸» «∞ºU´W •∑v ¢∑uÆn, £r ∞Hw
«∞ºKDU≤OW •∑v ¢∑∫d¸ ±s «∞LuÅq .
)
211
HEAD OFFICE: Kenwood Limited, 1-3 Kenwood Business Park, New Lane, Havant, Hampshire PO9 2NH
124540/1
/