Kohler K-T10278-4-BN Installation guide

Category
Sanitary ware
Type
Installation guide
Tools and Materials
Thank You For Choosing Kohler Company
We appreciate your commitment to Kohler quality. Please take a few
minutes to review this manual before you start installation. If you
encounter any installation or performance problems, please don’t
hesitate to contact us. Our phone numbers and web site are listed on
the back cover. Thanks again for choosing Kohler Company.
Before You Begin
Deep rough-in kit #73444 allows an additional 1/2” (1.3cm) of tile
thickness.
Please read all instructions before you begin.
Observe all local plumbing and building codes.
Before installation, unpack the new faucet and inspect it for damage.
Return the faucet to the carton until you are ready to install.
Leave the protective sleeve on the spout supply tube until the spout
is installed. The spout has an O-ring sealing surface which may be
damaged if unprotected.
Provide an access panel to the valves from under the deck.
Installer-supplied copper tubing is to be 5/8” O.D. (1/2” nominal).
Install water hammer arrestors in the supply lines near the valves.
These instructions cover two methods of installation; installation on
finished deck or rim, and installation on rough (unfinished) deck.
Follow the sections that pertain to your particular installation.
1017937-2-A 2 Kohler Co.
Before You Begin (cont.)
Instructions are given for installations with 8” (20.3cm) centers. For
wider installations, adjust all roughing-in dimensions and copper
tubing lengths accordingly.
Shut off the main water supply.
Kohler Co. reserves the right to make revisions in the design of
faucets without notice, as specified in the Price Book.
Kohler Co. 3 1017937-2-A
1. Prepare the Site
Install or relocate the water supplies as needed.
Protect the surfaces of the bath/deck during installation.
Ensure that holes drilled into the deck are not oversized. The spout
and valves require adequate base material strength and maximum
contact area with the deck.
Plaster guard diameters are approximately 1–5/8” (4.1cm) for the
valves and 7/8” (2.2cm) for the spout.
NOTE: Reinforcing material may be required if the deck or rim is
thin. Install before proceeding.
NOTE: For installations to be covered with tile, the tile thickness
must not exceed 1–1/4” (3.2cm).
RIM OR DECK MOUNT
INSTALLATION
7" (17.8cm)
6-3/4"
(17.1cm)
1-1/8" D. (2.9cm)
2-13/16" D.
(7.1cm)
ROUGH + FINISHED
DECK MOUNT INSTALLATION
2-3/8" D. (6cm)
TRADITIONAL
2-3/8" D. (6cm)
SCULPTED
7/8" D.
(2.2cm)
3" (7.6cm) 2-7/8" (7.3cm)
4-11/16"
(11.9cm)
4-5/8"
(11.7cm)
2-1/8" (5.4cm) MAX.
ROUGH DECK
5" (12.7cm)
1/4" (6mm) TO
1-1/4" (3.2cm)
MAX. FINISHED
DECK
8" Min. (20.3CM)
5/8" O.D. (1.6cm)
SUPPLIED BY
INSTALLER
5/8" I.D.
(1.6cm)
1/4"
(6mm)
TO 2-1/8"
(5.4cm)
MAX.
RIM OR
DECK
MOUNT
1-13/16"
(4.6cm)
1-1/4"
(3.2cm)
3/4" (1.9cm)
I.D.
1017937-2-A 4 Kohler Co.
2. Installation on Finished Deck or Rim
NOTE: For installation on a rough (unfinished) deck, proceed to
Installation on Rough (Unfinished) Deck.
Use 1/2” nominal, 5/8” O.D. copper tubing. Cut two pieces of
tubing to a length of 2–7/8” (7.3cm). Cut one piece of tubing to a
length of 2–3/8” (6cm) for the spout supply.
IMPORTANT! Leave the protective sleeve on the spout supply tube
until the spout is installed to protect the O-ring sealing surface.
Install Spout Supply Tube
Slide a brass washer from the bottom of the spout supply tube over
the threads until the washer reaches the supply tube shoulder.
Insert the spout supply tube through the mounting hole from the
top of the deck/rim. Ensure that the flat portion of the washer faces
forward. The supply tube will be suspended by the washer.
From the bottom of the deck, slide the plate, with the tabs toward
the deck, and washer onto the spout supply tube. Secure with the
mounting nut.
Secure the plate to the deck with two wood screws.
Spout Supply Tube
Supply Tube Shoulder
Threaded Sleeve
Collar
1" (2.5cm)
1-13/16"
(4.6cm) From
Finished
Surface to Top
of Valve Stem
Brass Washer
Plate
Wood Screws
Washer
Nut
Valve Body
Solder
Cold
Supply
1/2" (1.3cm)
Tee
2-7/8" (7.3cm)
Copper Tubes
Solder
Solder
2-3/8" (6cm) Copper
Tube (Finished
Deck Or Bath Rim
Installation Only)
Rubber Washer
Fiber Washer
Mounting Nut
Hot Supply
Kohler Co. 5 1017937-2-A
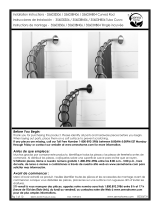
Installation on Finished Deck or Rim (cont.)
Install Valve Bodies
Thread one mounting nut, flange side up, followed by one fiber
washer and one rubber washer onto each valve body.
Insert the 2–7/8” (7.3cm) long copper tubes between the valve
bodies and the 1/2” tee. Insert the 2–3/8” (6cm) long copper tube
into the top of the tee.
Do not solder the connections at this time.
NOTE: The valve body marked “Cold” must be on the right side
when you are facing the front of the faucet.
Insert the valve bodies through the mounting holes from the bottom
of the deck/rim. Match the copper tube from the tee with the spout
supply tube. Hold in place.
Place a collar with the flange side up, onto each valve body. Thread
the collar down to at least 1” (2.5cm) from the top thread on the
valve body.
Install a threaded sleeve fully onto each valve body.
Thread each collar until it contacts the sleeve.
Tighten the mounting nuts on each valve body from underneath the
deck/rim.
Solder the copper tubes to the valve bodies, tee and spout supply
tube.
Ensure that the cold supply is on the right side.
Solder the hot and cold water tubes to the valve body inlets.
Proceed to Check Operation of Valves.
1017937-2-A 6 Kohler Co.
3. Installation on Rough (Unfinished) Deck
Use 1/2” nominal, 5/8” O.D. copper tubing. Cut two pieces of
tubing to a length of 2–7/8” (7.3cm).
IMPORTANT! Leave the protective sleeve on the spout supply tube
until the spout is installed to protect the O-ring sealing surface.
Install Spout Supply Tube
Slide a brass washer from the bottom of the spout supply tube over
the threads until the washer reaches the supply tube shoulder.
Insert the spout supply tube through the mounting hole from the
top of the deck. Ensure that the flat portion of the washer faces
forward. The supply tube will be suspended by the washer.
Slide the plate, with the tabs toward the deck, and washer onto the
spout supply tube from the bottom. Secure with the mounting nut.
Secure the plate to the deck with the two wood screws.
Install Valve Bodies
Thread one mounting nut, flange side up, followed by one fiber
washer and one rubber washer onto each valve body.
Insert the 2–7/8” (7.3cm) long copper tubes between the valve
bodies and the 1/2” tee.
Spout Supply Tube
Supply Tube Shoulder
Threaded Sleeve
Collar
1" (2.5cm)
Brass Washer
Plate
Wood Screws
Washer
Nut
Valve Body
Cold
Supply
1/2" (1.3cm)
Tee
2-7/8" (7.3cm)
Copper Tubes
Rubber Washer
Fiber Washer
Mounting Nut
Hot Supply
Kohler Co. 7 1017937-2-A
Installation on Rough (Unfinished) Deck (cont.)
Do not solder the connections at this time.
NOTE: The valve body marked “Cold” must be on the right side
when you are facing the front of the faucet.
Insert the valve bodies through the mounting holes from the bottom
of the deck.
Place a collar with the flange side up, onto each valve body. Thread
the collar down to at least 1” (2.5cm) from the top thread on the
valve body.
Install a threaded sleeve fully onto each valve body.
Thread each collar until it contacts the sleeve.
1017937-2-A 8 Kohler Co.
4. Complete Installation on Rough Deck
Set Valve Body Height
NOTE: Use one of the following two formulas to calculate the valve
body clearance required for the finish material at your site.
For tile that is less than 1” (2.5cm) thick, add 1–1/4” (3.2cm) to the
tile thickness. Example: Tile thickness is 3/4” + 1–1/4” = 2” (5cm) of
clearance required.
For tile that is between 1” (2.5cm) and 1–1/4” (3.2cm) thick, add
only 1” (2.5cm) to the tile thickness. Example: Tile thickness is
1–1/4” + 1” = 2–1/4” (5.7cm).
Adjust the threaded collar until the dimension from the top of the
sleeve to the top of the rough deck equals the clearance requirement
needed. Make a note of this dimension. You will use it again after
connecting the supply tube.
Connect Supply Tube
Measure the distance from the bottom of the spout supply tube to
the top of the tee.
Add 1” (2.5cm) to this measurement and cut a piece of copper
tubing to fit into the supply tube and tee port.
Fully loosen the threaded collars but do not remove them.
Cold
Supply
Solder
Solder
Hot
Supply
Tee
Solder
Copper
Tube
Top Of Sleeve
1-1/4" (3.2cm)
Nominal
2" (5cm)
Clearance
3/4"
(2cm)
Mounting
Nut
2-1/8"
(5.4cm)
Max.
Tile
Thickness
Threaded
Collar
Spout Supply Tube
Sleeve
Valve
Body
Rough
Deck
Measure
Distance
Kohler Co. 9 1017937-2-A
Complete Installation on Rough Deck (cont.)
Pivot the valve bodies enough to remove the tee and two pieces of
tubing. If the valve body holes are smaller than recommended, it
may be necessary to remove the entire valve body assembly.
Install the tubing into the tee. Match the copper tube from the tee
with the spout supply tube.
Pivot the valve bodies onto the two pieces of copper tubing.
Do not solder at this time.
Reset Valve Body Height
Adjust the threaded collars until the dimension from the top of the
sleeve to the top of the rough deck equals the clearance requirement
calculated earlier.
Solder Connections
Tighten the mounting nuts on each valve body under the deck.
Solder the copper tubes to the valve bodies, tee and spout supply
tube.
Ensure that the cold supply is on the right side.
Solder the hot and cold water supply tubes to the valve body inlets.
1017937-2-A 10 Kohler Co.
5. Check Operation of Valves
Thread a 3/8” pipe plug into the top of the spout supply tube.
Ensure that the valves are closed (cold fully counterclockwise; hot
fully clockwise).
Turn on the main water supply and check the complete installation
for leaks with the valves closed and open. Repair leaks as needed.
Close both valves and turn off the main water supply.
WARNING: Risk of personal injury.
Wrap a towel around the pipe plug to prevent water spray. Water
will purge from the supply tube when you remove the plug.
Carefully loosen the pipe plug to remove pressure.
Thread the pipe plug back into the spout supply tube. Leave the
pipe plug installed until the spout and handles are installed.
Install the cardboard plaster guards over both valves and the spout
supply tube. Leave in place until the spout and handles are
installed.
3/8" Pipe Plug
CLOSE
HOT
CLOSE
COLD
Kohler Co. 11 1017937-2-A
6. Install Tile (If Applicable)
Verify that there will be a 1” (2.5cm) to 1–1/2” (3.8cm) distance from
the top of the sleeve to the top of the tile. If there is not, correct the
valve clearance as described earlier.
Install tile up to the plaster guards on the valves and the spout
supply tube.
NOTE: The final stem heights for both K-300 and K-301 valves are
1–13/16” (4.6cm) minimum to 2–5/16” (5.9cm) maximum from the
top of the valve to the top of the tile.
Sleeve
Tile
Rough
Deck
Threaded
Collar
Spout Supply Tube
1" (2.5cm) MIN.
1-1/2" (3.8cm) MAX.
1-13/16" (4.6cm) MIN.
2-5/16" (5.9cm) MAX.
1017937-2-A 12 Kohler Co.
7. Install Spout
Wrap a towel around the pipe plug and carefully remove it.
Remove the plaster guard from the spout supply tube.
Cut off the spout supply tube 1–1/4” (3.2cm) above the rim, finished
deck or tile.
Ensure that all burrs are removed from the supply tube.
NOTE: If your installation is on a tile-covered rough deck, slide a
brass washer, flat side facing forward, onto the supply tube. The
brass washer is supplied with the spout. This washer is not needed
for rim/finished deck installations.
Loosen the setscrews in the sleeve. Use a twisting motion to install
the sleeve on the spout supply tube until it contacts the washer.
Align the sleeve so the setscrews are not facing directly forward or
backward and tighten the setscrews.
CAUTION: Risk of product damage. Use care when installing
the spout to prevent damage to the O-ring seal on the sleeve.
Install the spout onto the sleeve and carefully press down until the
spout base contacts the finished deck surface.
Align the spout and tighten the setscrew. If included, press the plug
button into the setscrew hole.
Kohler Co. 13 1017937-2-A
8. Install Handles
NOTE: There are different handle styles available for this product.
Only the sculpted handle is shown. Installation of all handle styles
is identical.
Remove the plaster guards from the hot and cold valves.
Measure the distance from the top of the valve stem to the finished
surface.
For a valve stem height between 1–13/16” (4.6cm) and 2–1/8”
(5.4cm) use a brass spline adapter and screw. For a valve stem
height between 2–1/8” (5.4cm) and 2–5/16” (5.9cm) use a plastic
spline adapter.
If the brass spline adapter is required, attach using the screw
supplied. The plastic spline adapter slides on with no attachment.
Thread the handle onto the valve body. Ensure that the splines in
the handle and spline adapter are engaged.
Position the handle assemblies facing in opposite directions away
from the spout.
NOTE: The spline adapter allows fine adjustment of the handle
alignment. To adjust, unthread the handle and reposition the spline
adapter. Rethread the handle and check alignment. Repeat until
handle alignment is satisfactory.
Handle
Plumbers
Putty
Screw
Brass
Spline
Adapter
Valve
Stem
Height
Measurement
Plastic
Spline
Adapter
Valve Stem
Valve Body
Threaded
Sleeve
Finished
Surface
Hot
Cold
Orientation Of Handles
In Off Position
1017937-2-A 14 Kohler Co.
9. Complete the Installation
Ensure that both faucet handles are turned off.
Remove the aerator assembly by turning it counterclockwise.
Turn on the main water supply and check for leaks.
Turn on the hot and cold valves and run water through the spout to
remove debris. Check for leaks.
Turn off the hot and cold valves.
Remove any debris from the aerator and reinstall.
Aerator
Kohler Co. 15 1017937-2-A
  • Page 1 1
  • Page 2 2
  • Page 3 3
  • Page 4 4
  • Page 5 5
  • Page 6 6
  • Page 7 7
  • Page 8 8
  • Page 9 9
  • Page 10 10
  • Page 11 11
  • Page 12 12
  • Page 13 13
  • Page 14 14
  • Page 15 15
  • Page 16 16
  • Page 17 17
  • Page 18 18
  • Page 19 19
  • Page 20 20
  • Page 21 21
  • Page 22 22
  • Page 23 23
  • Page 24 24
  • Page 25 25
  • Page 26 26
  • Page 27 27
  • Page 28 28
  • Page 29 29
  • Page 30 30
  • Page 31 31
  • Page 32 32
  • Page 33 33
  • Page 34 34
  • Page 35 35
  • Page 36 36
  • Page 37 37
  • Page 38 38
  • Page 39 39
  • Page 40 40
  • Page 41 41
  • Page 42 42
  • Page 43 43
  • Page 44 44
  • Page 45 45
  • Page 46 46
  • Page 47 47
  • Page 48 48

Kohler K-T10278-4-BN Installation guide

Category
Sanitary ware
Type
Installation guide

Ask a question and I''ll find the answer in the document

Finding information in a document is now easier with AI