Page is loading ...

Thank You For Choosing Kohler Company
Thank you for choosing Kohler Company. Your Kohler Company
product reflects the true passion for design, craftsmanship, artistry, and
innovation Kohler Company stands for. We are confident its
dependability and beauty will surpass your highest expectations,
satisfying you for years to come.
All the information in this guide is based upon the latest product
information available at the time of publication. At Kohler Company,
we strive to fulfill our mission of improving the level of gracious living
for each person who is touched by our products and services. We
reserve the right to make changes in product characteristics, packaging,
or availability at any time without notice.
Please take a few minutes to review this guide. If you encounter any
installation or performance problems, please call 1-800-4-KOHLER
from within the USA, 1-800-964-5590 from within Canada, or
001-877-680-1310 from within Mexico.
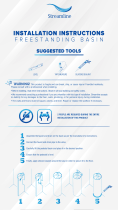
Tools and Materials
Before You Begin
CAUTION: Risk of personal injury. Vitreous china is heavy.
Do not attempt to lift or install this product without
assistance.
IMPORTANT! The lavatory must be supported by a pedestal or
installed as a self-rimming lavatory on a vanity or countertop. Do
not install the lavatory as a wall-mount or undermount unit.
Adjustable
Wrench
Tape
Measure
Safety
Glasses
Pipe
Wrench
Socket Wrench
With Sockets
Square
Drill
Pencil
Pliers
Level
Plus:
• 1/8" Thick Cardboard Sheet
• Silicone Sealant
• 1/4" Drill Bit
• P-Trap
• 28-7/8" (73.3 cm)
Support Braces
1052866-2-D 2 Kohler Co.

Before You Begin (cont.)
IMPORTANT! For lavatory installations using the K-18598 vanity:
Review the K-18598 vanity installation guide to properly plan for
the lavatory installation.
IMPORTANT! For K-18691 installations: When selecting support
braces, ensure they will support a minimum of 69.1 lbs (31.34 kg)
load bearing.
NOTE: This installation guide includes instructions for a pedestal
installation or a vanity/countertop installation. Refer to applicable
sections in this guide for your installation.
Observe all local plumbing and building codes.
Ensure the walls and the floor are square, plumb, and level before
proceeding with the installation.
Install the faucet and drain to the lavatory before permanently
mounting the lavatory.
To properly secure the lavatory to the finished wall, use the
hanger bolts provided or select lag bolts according to your
finished wall thickness and rated with a minimum of 69.1 lbs
(31.34 kg) load bearing. The hanger bolts must extend a minimum
of 1-1/4″ (3.2 cm) beyond the finished wall.
Kohler Co. reserves the right to make revisions in the design of
products without notice, as specified in the Price Book.
Kohler Co. 3 1052866-2-D

Roughing-In – K-19034
NOTE: If your vanity/countertop is supplied with a cutout
(specifically K-18598), proceed to the ″Install K-19034″ section at this
time.
Determine the location of the cutout. The cutout must be large
enough for the drain and water supplies to run through the
countertop.
Mark the cutout location on the countertop with a pencil.
Cut the countertop opening along the inside of the marked cutout
location.
11-1/16"
(28.1 cm)
7-3/4"
(19.7 cm)
14-3/16"
(36 cm)
16-3/8"
(41.6 cm)
2-3/16"
(5.6 cm)
6-7/8"
(17.5 cm)
22-1/16" (56 cm)
39-3/4" (101 cm)
20-1/4"
(51.4 cm)
2-1/4"
(5.7 cm)
1052866-2-D 4 Kohler Co.

1. Install Lavatory – K-19034
CAUTION: Risk of personal injury. Vitreous china is heavy.
Do not attempt to lift or install this product without
assistance.
IMPORTANT! For lavatory installations using the K-18598 vanity:
Before installing the lavatory, a temporary support brace must be
placed underneath the vanity. Refer to the installation guide packed
with the vanity for proper instructions.
Position
Install the faucet and drain to the lavatory according to the faucet
and drain manufacturer’s installation instructions.
Align and place the lavatory over the cutout opening.
Mark the two lavatory anchoring hole locations on the finished
wall with a pencil.
Remove the lavatory from the cutout opening and set aside.
Drill mounting holes 1/4″ (6 mm) through the finished wall at the
marked locations.
Place the lavatory over the cutout opening.
Insert a hanger bolt through each anchoring hole of the lavatory
and into the drilled mounting holes.
Connect Supplies
Lavatory
Install hanger
bolts.
Vanity/Countertop
Washer
Cap Nut
Apply silicone
sealant.
Drill mounting
holes.
Kohler Co. 5 1052866-2-D

Install Lavatory – K-19034 (cont.)
CAUTION: Risk of product damage. Do not overtighten the
cap nuts. Overtightening may damage the product.
Thread a cap nut and washer over each hanger bolt until the
washer and the cap nut are tight against the lavatory.
Connect and tighten the P-trap to the drain (not shown).
Complete the water supply connections to the faucet according to
the instructions packed with the faucet.
Run water into the lavatory and check for leaks.
Complete Installation
Wipe the surface around the lavatory to remove water and debris.
IMPORTANT! To avoid breaking or weakening the seal, do not
move or use the lavatory once the silicone sealant is applied.
Apply the silicone sealant around the perimeter of the lavatory.
Allow the silicone sealant to cure according to the silicone sealant
manufacturer’s instructions before using the lavatory.
1052866-2-D 6 Kohler Co.

Roughing-In – K-18691
IMPORTANT! Off-set the hot and cold supply stops according to
the roughing-in information. This will ensure the handles will not
touch the pedestal when fully open.
Install the water supplies and drain pipes according to the
roughing-in information.
Install sufficient backing behind the finished wall to provide a
secure material for the anchoring devices.
Mark the centerline on the floor with a pencil.
Position the pedestal on the floor centerline location and flush
against the finished wall. Refer to the roughing-in information for
the required distance.
11" (28 cm)
20-1/4"
(51.4 cm)
22-1/16" (56 cm)
4-1/16"
(10.3 cm)
6-5/8"
(16.8 cm)
2-1/4"
(5.7 cm)
2-1/4" (5.7 cm)
31-3/4"
(80.6 cm)
10"
(25.4 cm)
14-3/16"
(36 cm)
39-3/4" (101 cm)
1-1/4 OD
3/8" Hot
3/8" Cold
Finished
Wall
8-1/4"
(21 cm)
9-1/2"
(24.1 cm)
1-1/4"
(3.2 cm)
Slotted Anchor
Holes
2-1/4" (5.7 cm)
28-7/8"
(73.3 cm)
Kohler Co. 7 1052866-2-D

1. Position Product – K-18691
CAUTION: Risk of personal injury. Vitreous china is heavy.
Do not attempt to lift or install this product without
assistance.
Align the center of the pedestal on the marked centerline.
Place a 1/8″ (3 mm) piece of cardboard over the top of the
pedestal. This will allow for 1/8″ (3 mm) of leeway to ease the
permanent placement of the pedestal underneath the lavatory.
Place the lavatory on top of the pedestal.
Verify the lavatory and pedestal are plumb and flush against the
finished wall.
Mark the two lavatory anchoring hole locations on the finished
wall with a pencil.
Remove the lavatory from the pedestal. Set the lavatory aside.
Set the pedestal aside and discard the cardboard.
Lavatory
Centerline
Pedestal
Pencil
Mark
anchoring
holes.
Cardboard
Finished Wall
1052866-2-D 8 Kohler Co.

2. Mount Lavatory – K-18691
CAUTION: Risk of personal injury. Vitreous china is heavy.
Do not attempt to lift or install this product without
assistance.
Drill mounting holes 1/4″ (6 mm) through the finished wall at the
marked anchoring hole locations.
Install the hanger bolts through the drilled holes and wood
backing. The hanger bolts must extend a minimum of 1-1/4″ (3.2
cm) beyond the finished wall.
Install the faucet and drain to the lavatory according to the
manufacturer’s instructions.
Carefully install the lavatory to the wall without the pedestal to
the hanger bolts. The hanger bolts must extend through the
lavatory anchoring holes.
IMPORTANT! Select supports that are 28-7/8″ (73.3 cm) in length
and will withstand the weight of the lavatory. The lavatory weighs
approximately 69.1 lbs (31.34 kg).
Immediately place supports underneath the lavatory as shown.
Lavatory
Finished Wall
1-1/4"
(3.2 cm)
Min
Wood
Backing
Hanger
Bolts
Mounting Holes
Supports
Hanger
Bolts
Finished Wall
Kohler Co. 9 1052866-2-D

3. Connect Supplies – K-18691
Thread a cap nut and washer over each hanger bolt. Do not
tighten the cap nuts at this time.
Connect and tighten the P-trap to the drain.
Complete the water supply connections to the faucet according to
the instructions packed with the faucet.
Run water into the lavatory and check for leaks.
Washer
Cap Nut
Lavatory
Finished
Wall
Hanger Bolts
1052866-2-D 10 Kohler Co.

4. Complete Installation – K-18691
CAUTION: Risk of personal injury. Vitreous china is heavy.
Do not attempt to lift or install this product without
assistance.
Remove the supports from underneath the lavatory.
With assistance, gently lift up the front of the lavatory and hold it
at that position.
While the lavatory is being held up, place the pedestal
underneath the lavatory and on the marked centerline. Make sure
the pedestal is flush against the finished wall.
Gently lower the lavatory down onto the pedestal.
CAUTION: Risk of product damage. Do not overtighten the
cap nuts. Overtightening may damage the product.
Fully tighten the cap nuts.
Lavatory
Centerline
Pedestal
Lift front.
Remove
supports.
Remove
supports.
Kohler Co. 11 1052866-2-D
/