Chicco Neptune Owner's manual
- Category
- Car seats
- Type
- Owner's manual
This manual is also suitable for
Page is loading ...

2
Istruzioni d’uso Pag. 3-6
Instructions for use Pag. 7-10
Notice d’instructions Pag. 11-14
Gebrauchsanleitung Pag. 15-18
Instrucciones de uso Pag. 19-22
Instruções de utilização Pag. 23-26
Gebruiksaanwijzing Pag. 27-30
Οδηγίες χρήσης Pag. 31-35
Инструкция по использованию Pag. 36-40
Bruksanvisning Pag. 41-44
Upute Za Uporabu Pag. 45-48
Navodila Za Uporabo Pag. 49-52
Návod K Použití Pag. 53-56
Návod na Použitie Pag. 57-60
Инструкции за употреба Pag. 61-65
Használati Utasítás Pag. 66-70
Instrucţiuni de folosire Pag. 71-75
Instrukcja sposobu użycia Pag. 76-80
Kullanım bilgileri Pag. 81-85
Pag. 86-89
Pag. 90-93
I
GB
F
D
E
P
NL
GR
HR
RUS
SLO
CS
SK
BG
H
R
PL
TR
SA
C
S
Page is loading ...
Page is loading ...
Page is loading ...
Page is loading ...

7
Instructions for use
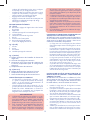
VERY IMPORTANT! TO BE READ IMMEDIATELY
Read these instructions carefully before fi tting and in-•
stalling the product. The product must not be used by
anybody who has not read these instructions.
Keep this manual for future reference.•
WARNING! According to car accident statistics, the •
rear seats of a car are generally safer than the front
seat: it is therefore recommended to fi t the child
car seat into the rear seats of the car. In particular,
the central rear seat is the safest, when fi tted with a
3-point safety strap.
It is recommended to ensure that all passengers •
know how to release the child from the car seat in the
case of an emergency.
If the child car seat is fi tted in the front seat of the •
car with the front airbag installed, in order to ensu-
re maximum safety, it is recommended to push the
seat back as much as possible, bearing in mind the
comfort of the passenger sitting in the seat directly
behind it.
Never use this child car seat fi tted into car seats fa-•
cing sideways or facing rearwards.
Only fi t the child car seat onto seats which are fa-•
stened to the car chassis and facing forwards. Make
sure that all folding or rotating car seats are always
fi rmly fastened in place, otherwise they could be
dangerous.
Pay close attention on how to fi t the child seat into •
the vehicle, to prevent a loose seat or car door from
interfering with it.
Never fi t the child car seat to a seat that is only equip-•
ped with an abdominal/lap safety belt with 2-points.
No child car seat can guarantee the total safety of •
your child in the event of an accident, but the use
of this product reduces the risk of serious injuries or
death.
The risk of serious injuries to the child increases, not •
only in the case of accidents, but also in other circum-
stances (i.e.: sudden braking etc.), if these instructions
are not followed carefully: always check that the child
car seat is fi tted correctly onto the vehicle seat.
If the child car seat is damaged, deformed or worn •
out, it must be replaced, as its original safety features
may have been compromised.
This product must not be modifi ed in any way, unless •
the modifi cation is approved by the manufacturer.
Do not install accessories, spare parts, or any compo-•
nent not supplied by the manufacturer.
Never leave your child unattended in the car seat for •
any reason.
Never place anything except an approved accessory •
between the vehicle seat and the child car seat or
between the child car seat and the child: in the event
of an accident, the child car seat may not operate
correctly.
If the vehicle has been left in the sun, check that the •
different parts of the child car seat are not too hot
before seating the child in it: in such an event, let the
child car seat cool down fi rst before placing the child
into it, in order to avoid burns.
After an accident, even a slight one, the child seat •
could have been damaged, even if it not visible to the
naked eye. it therefore must be replaced.
Never use second-hand child car seats: they may •
have suffered structural damage which is not visible
to the naked eye but however compromise the safety
of the product.
ARTSANA declines all responsibility for the incorrect •
use of this product.
The seat fabric must only be replaced with another •
approved by the manufacturer as it constitutes an
integral part of the child car seat. To ensure the safety
of the child car seat, never use it without its fabric
cover.
Check that the harness straps are not twisted and •
try to prevent them, or any other part of the car
seat from getting trapped in the car door or rubbing
against sharp objects.
The child car seat must be replaced should the har-•
ness be cut or frayed.
When the child car seat is not in use inside the vehicle, •
it should be left secured to the car’s seat, or stowed in
the car’s boot. An unsecured child car seat may be a
source of danger for the passengers in the event of an
accident or sudden braking.
Do not transport loose or unsecured objects or bag-•
gage on the back shelf of the vehicle: in the event, of
an accident or sudden braking, they may injure the
passengers.
Check that the car seat headrest does not interfere •
with the child seat headrest: do not push it forwards.
If this is the case, remove the headrest from the car
seat on which the child seat is fi tted, without resting
it on the luggage rack.
Ensure that all the car passengers fasten their seat •
belt, for their own safety and because, during the
journey, they may injure the child in the event of an
accident or sudden braking of the car.
0n long journeys make frequent stops. Children tire •
easily. Never take your child out of the child seat
whilst the car is moving for any reason. If your child
needs attention, fi nd a safe place and pull over.
INSTRUCTIONS FOR USE
INDEX
Description of the parts•
Product features•
Restrictions and requisites regarding the use of the •
product and car seat
Fitting the child car seat into the car and seating a Gr. •
1 child 1 (9-18 kg)
Fitting the child car seat into the car and seating a Gr. •
2-3 child (15-36 kg) with the backrest
Fitting the child car seat into the car and seating a Gr. •
3 child (22-36 kg) without the backrest
Adjusting the height of the head rest•
Refi tting the harness for seating a Gr. 1 child (9-18 kg)•
GB

8
Cleaning and maintenance•
DESCRIPTION OF THE PARTS
diag. 1 (Front)
A. Adjustment knob for the headrest and restraint
harness
B. Headrest
C. Diagonal belt routing slots
D. Shoulder straps
E. Child car seat restraint harness
F. Buckle
G. Crotch protection strap
H. Restraint harness adjustment button
I. Restraint harness adjustment strap
diag. 2 (Profi le)
J. Backrest
K. Seat
L. Armrests
M. Belt routing
diag. 3 (Back)
N. Plates for locking the shoulder straps and for the
belt routing
O. Harness straps
P. Slots for inserting the car seat belts (only for installation
in Gr. 1)
Q. Plate for locking the belts
diag. 4 (Below)
R. Plates for locking the belts to the seat
S. Plates for locking the buckle to the seat
T. Lever to remove the backrest from the seat
PRODUCT FEATURES
This child car seat is approved for “Group 1, 2 and •
3”, for the transport of children from 9 up to 36 Kg
of weight (from 9 months to approximately 12 years
of age), and conforms to European Standard ECE R
44/04.
This approval is “Universal”, which means that the •
child car seat can be used on all types of cars. WAR-
NING! “Universal” means that it is compatible with
most, but not all car seats.
WARNING
This is a “Universal” child restraint device and is approved to ECE
Regulation No. 44, amendment series 04 standards. It is suita-
ble for use in vehicles and will fit most, but not all car seats.
A correct fit is likely if the vehicle manufacturer has declared that
the vehicle is capable of accepting a “Universal” child restraint for
this age group.
This child restraint has been classified as “Universal” under more
stringent conditions than those that were applied to earlier desi-
gns not displaying this notice.
Only suitable if the vehicle is fitted with a 3-point static or
3-point retractor safety belts approved to UN/ECE Regulation
No.16, or other equivalent standard.
If in doubt, consult either the child restraint manufacturer or
the retailer.
RESTRICTIONS AND REQUISITES REGARDING THE
USE OF THE PRODUCT AND CAR SEAT
WARNING! Read these restrictions and requisites care-
fully to ensure the product and car seat are used safely: if
you don’t the safety levels cannot be guaranteed.
This child seat is approved for seating children weighing
from 9 to 36 kilos only (from 9 months to approxima-
tely 12 yeas of age).
The car seat must be fi tted with a 3-point static or
3-point retractor safety belts approved to UN/ECE Regu-
lation No.16, or other equivalent standards (diag. 5).
Never fi t the child car seat to a seat that is only equipped
with a 2-point safety belt (diag. 6)
The child car seat can be fi tted into the front passenger
seat or any other back seats. Never use this child car seat
fi tted into car seats facing sideways or facing rearwards
(diag. 7)
This product is expressly intended to be used only as a
child car seat; it should not be used indoors.
To ensure correct installation, check that the car seat hea-
drest does not interfere with the child seat’s backrest.
FITTING THE CHILD CAR SEAT INTO THE CAR AND
SEATING A GR. 1 CHILD (9-18 KG)
WARNING! These instructions and diagrams are for the
installation of the child car seat on the right back seat.
To fi t the child car seat in other positions, carry out these
operations in the same order.
Place the child car seat onto the chosen forward fa-1.
cing car seat (diag. 8)
Thread the 3-point car safety belt through slot P on 2.
the back of the child car seat (diag. 9A and 9B), and
pull it out of the slot on the other side of the backrest
(diag. 9C).
Click the car safety belt into the buckle so that both 3.
the abdominal and the diagonal straps pass under the
armrest (diag. 10).
Pull the car safety belt fi rmly, ensuring that the child 4.
car seat adheres correctly to the car seat (diag. 11), if
necessary, carry out this operation exercising some
pressure on the child car seat with your knee.
Check that the child car seat is fi tted fi rmly in place 5.
and adheres correctly to the vehicle seat; check that
the seat belt is tight. If this is not the case, repeat the
fi tting procedure from the beginning (diag. 12).
WARNING! Always check that the seat belt is positioned
correctly and no parts are twisted.
NEVER fi t the car safety belt in any way other than that
indicated in these instructions.
When the child car seat is fi tted correctly, follow the in-
structions below to seat the child:
Press the restraint harnesses adjustment button H 6.
and, at the same time grasp the lower part of the
child seat straps and pull in your direction as far as
possible (diag. 13)
Unfasten the child car seat restraint harness, pressing 7.
the button on the buckle and move them to the sides
(diag.14)
Make sure your child is seated comfortably on the 8.

9
child car seat, adjust the harness straps around the
childs body without pulling them too tight, join the
two harness straps (diag. 15A) and click them into the
buckle (diag. 15B).
Use the adjuster knob A fi tted at the top of the 9.
backrest to adjust the height of the child car seat’s
headrest, it must be fi tted so as to allow the harness
straps to come out at the height of the child’s shoul-
ders (diag. 16)
To tighten the restraint harnesses of the child car seat, 10.
pull the adjustment strap I until it is correctly fi tted to
the child’s body.
Check that the child car seat is fi tted correctly as seen 11.
in the diagram (diag. 18).
To remove the child from the child car seat, press the
button on the buckle and release the restraint harness
(diag.19)
FITTING THE CHILD CAR SEAT INTO THE CAR AND
SEATING A GR. 2 or 3 CHILD (15-36 KG) WITH
THE BACKREST
To change the confi guration of the child car seat from
Gr. 1 to Gr. 2-3, it is necessary fi rst of all to remove the
restraint harness following the instructions below:
Release the child car seat harnesses from the buckle 1.
(diag. 14)
Rotate and release the two belt routing plates R 2.
found under the seat (diag. 20A) sliding them out of
the two slots in the fabric cover (diag. 20B).
Remove the two harness straps from the locking pla-3.
te Q (diag. 21)
Rotate and release the two belt routing plates N from 4.
the backrest (diag. 22)
From the front of the seat, slide out the two sections 5.
of the harness through the two red diagonal belt rou-
ting slots C (diag. 23).
Store these two harness straps in a safe place for 6.
future use.
Now slide the buckle and the fabric crotch strap 7.
through the slot in the centre of the seat, so that it
all fi ts inside the housing on the child seat (diag. 24A,
24B and 24C).
The child car seat is now ready to be installed for Group
2 and 3 children.
Place the child car seat onto the chosen forward fa-8.
cing car seat (diag. 25)
Thread the diagonal car safety belt down behind the 9.
headrest and through the relative red diagonal belt
routing slot C below the headrest. Place your child
carefully into the car seat, and check that the child
is sitting with his back correctly placed against the
backrest of the child car seat (diag. 26)
Click the car safety belt into the buckle so that both 10.
the abdominal and the diagonal straps pass under the
armrest (diag. 27).
Check the height of the head rest and, if it is not 11.
correct, adjust it accordingly: see paragraph “ADJU-
STING THE HEIGHT OF THE HEAD REST”
Pull the diagonal car safety belt strap towards the re-12.
tractor, to ensure the belt is tight and fi tting properly
over the child’s legs and chest (diag. 28).
Check that the child car seat is fi tted correctly as seen 13.
in the diagram (diag. 29).
WARNING!
Always check that the seat belt is positioned correctly •
and no parts are twisted.
Check that the diagonal safety belt fi ts correctly •
across the child’s shoulder and does not press on he
childs neck; adjust the headrest accordingly.
Check that the car safety belt retractor is behind the •
backrest of the car seat (or at least aligned to it).
To remove a child from a Group 2 and 3 child car seat:
Release the car safety belt from its buckle.1.
Remove the car safety belt from the child’s body.2.
Carefully remove the child from the car seat.3.
WARNING! If you do not intend to remove the child car
seat from the vehicle, slot the car safety belts back into
the buckle, so that the child car seat remains fastened sa-
fely inside the vehicle even when not used; this will avoid
danger during an accident or sudden braking of the car.
FITTING THE CHILD CAR SEAT INTO THE CAR AND
SEATING A GR. 3 CHILD (22-36 KG) WITHOUT
THE BACKREST
For Groups 1 (9-18 kg) and 2 (15-25 kg), it is compulsory
to use the child car seat WITH the backrest fi tted onto
the child car seat.
For Group 3 (22-36 kg) the child car seat can be used
in two different ways, WITH the backrest (which is the
safest and therefore the most recommended choice) or
WITHOUT the backrest.
To use the child car seat without the backrest, it must be
removed from the seat:
Place the child car seat on a fl at surface so that the lo-1.
wer part of the seat can easily be accessed (diag. 30).
Rotate the two release levers on the backrest T as seen 2.
in the diagram (diag. 31)
Remove the backrest from the child car seat (diag. 32).3.
Place the seat section of the child car seat so that it adhe-4.
res to the backrest of the seat of the car (diag. 33).
Place the child onto the child car seat and click the car 5.
safety belt into the buckle, sliding the abdominal strap
under the child car seat armrest, and the diagonal strap
over it (diag. 34).
Pull the diagonal safety belt strap so that is slides over 6.
the child’s shoulder (diag. 35).
WARNING! To replace the backrest, repeat the procedure
illustrated above in the reverse order. On completing this
procedure, check that the top and bottom parts of the
seat are appropriately attached to each other.
ADJUSTING THE HEIGHT OF THE HEAD REST
The height of the headrest can be adjusted to a range of
positions to adapt the child car seat to the height of the
child. When it is correctly adjusted, it ensures:
That the child’s head is always held in place and well •

10
protected (Gr. 1-2-3).
That the child car seat restraint harnesses are always •
at the right height, that is the shoulder straps (Gr. 1).
That the diagonal car safety belts are always at the •
right height as the straps are slotted through the he-
adrest C (Gr. 2-3).
To adjust the height of the headrest, turn the knob A fi t-
ted at the top of the backrest until you reach the required
height (diag. 16).
REFITTING THE HARNESS FOR SEATING A GR. 1
CHILD (9-18 KG)
To refi t the restraint harness to the child car seat, proceed
as follows:
Join the two ends of the harness straps, insert them 1.
and connect them to the buckle (diag. 36)
Insert the two locking plates R, sliding them out 2.
through the slots in the fabric cover and pulling them
out from under the seat (diag. 37).
Insert the two shoulder strap and the belt sequence N 3.
locking plates through the two red diagonal belt slots
C and then through the backrest (diag. 38).
Connect the two harness straps to the locking plate 4.
Q (diag. 39).
CLEANING AND MAINTENANCE
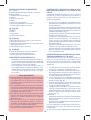
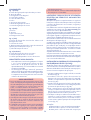
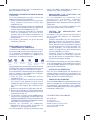
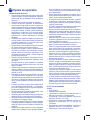
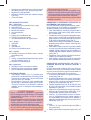
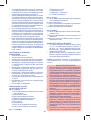
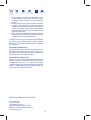
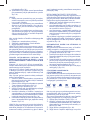
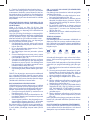
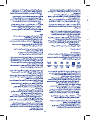
HOW TO CLEAN THE FABRIC COVER•
The child car seat’s fabric cover can be removed and clea-
ned by hand or in a washing machine at 30°C. Please re-
fer to the cleaning instructions on seat fabric label which
illustrates the following washing symbols:
Never use abrasive detergents or solvents. Do not spin
dry the fabric cover, let it dry without wringing.
To remove the various sections of the fabric cover from
the child car seat frame, follow the instructions below:
Release the child car seat harnesses from the buckle 1.
(diag. 14)
Rotate and release the two belt locking plates R found 2.
under the seat (diag. 20A) sliding them out of the two
slots in the fabric cover (diag. 20B).
Pull the cover up over the headrest and remove (diag. 3.
40).
To remove the backrest cover, open the velcro faste-4.
ners and slide out the two harness straps (diag. 41).
Remove the child car seat backrest following the in-5.
structions in the paragraph “FITTING THE CHILD CAR
SEAT INTO THE CAR AND SEATING A GR. 3 CHILD
(22-36 KG) WITHOUT THE BACKREST” (points 1-3).
Remove the seat cover by opening the velcro faste-6.
ners and the two zips (diag. 42).
To replace the parts of the fabric cover, follow the above
instructions in the reverse order.
HOW TO CLEAN THE PLASTIC OR METAL PARTS
Clean the plastic and coated metal parts only with a
damp cloth. Never use abrasive detergents or solvents.
The movable parts of the child car seat must not be lu-
bricated.
CHECKING THE CONDITION OF THE COMPO-
NENTS
It is recommended to check regularly the condition of
the following components to ensure that they are not
damaged or worn out:
Lining: check that the padding does not come out •
from the seams. Check the condition of the seams:
they must always be intact and undamaged.
Harnesses: Check that the fabric weft is not frayed or •
the harness strap worn out in the parts corresponding
to the adjustment strap, crotch, shoulders and har-
ness adjustment plate.
Plastic parts: Check that the plastic parts are not worn •
out, damaged or faded.
WARNING! If the child car seat is deformed or worn out,
it must be replaced: it may no longer comply with the
original safety standards.
STORING THE PRODUCT
When it is not fi tted into the car, it is recommended to
store the child car seat in a dry place, away from sources
of heat and to protect it from dust, humidity and direct
sunlight.
DISPOSING OF THE PRODUCT
When the child car seat no longer complies with the
original safety standards, stop its use and dispose of it at
an appropriate collection point. Dispose of the product
as laid down in the environmental regulations in force in
the Country of use.
FOR FURTHER INFORMATION:
ARTSANA SPA
Customer Care
Via Saldarini Catelli, 1
22070 Grandate COMO-ITALY
Free-phone 800.188.898
http://www.chicco.com
Machine
washable at 30°
Hand
washable
Do not
bleach
Do not dry
clean
Do not
spin dry
Do not
iron
Page is loading ...
Page is loading ...
Page is loading ...
Page is loading ...
Page is loading ...
Page is loading ...
Page is loading ...
Page is loading ...
Page is loading ...
Page is loading ...
Page is loading ...
Page is loading ...
Page is loading ...
Page is loading ...
Page is loading ...
Page is loading ...
Page is loading ...
Page is loading ...
Page is loading ...
Page is loading ...
Page is loading ...
Page is loading ...
Page is loading ...
Page is loading ...
Page is loading ...
Page is loading ...
Page is loading ...
Page is loading ...
Page is loading ...
Page is loading ...
Page is loading ...
Page is loading ...
Page is loading ...
Page is loading ...
Page is loading ...
Page is loading ...
Page is loading ...
Page is loading ...
Page is loading ...
Page is loading ...
Page is loading ...
Page is loading ...
Page is loading ...
Page is loading ...
Page is loading ...
Page is loading ...
Page is loading ...
Page is loading ...
Page is loading ...
Page is loading ...
Page is loading ...
Page is loading ...
Page is loading ...
Page is loading ...
Page is loading ...
Page is loading ...
Page is loading ...
Page is loading ...
Page is loading ...
Page is loading ...
Page is loading ...
Page is loading ...
Page is loading ...
Page is loading ...
Page is loading ...
Page is loading ...
Page is loading ...
Page is loading ...
Page is loading ...
Page is loading ...
Page is loading ...
Page is loading ...
Page is loading ...
Page is loading ...
Page is loading ...
Page is loading ...
Page is loading ...
Page is loading ...
Page is loading ...
Page is loading ...
Page is loading ...
Page is loading ...
Page is loading ...
Page is loading ...
Page is loading ...
Page is loading ...
-
 1
1
-
 2
2
-
 3
3
-
 4
4
-
 5
5
-
 6
6
-
 7
7
-
 8
8
-
 9
9
-
 10
10
-
 11
11
-
 12
12
-
 13
13
-
 14
14
-
 15
15
-
 16
16
-
 17
17
-
 18
18
-
 19
19
-
 20
20
-
 21
21
-
 22
22
-
 23
23
-
 24
24
-
 25
25
-
 26
26
-
 27
27
-
 28
28
-
 29
29
-
 30
30
-
 31
31
-
 32
32
-
 33
33
-
 34
34
-
 35
35
-
 36
36
-
 37
37
-
 38
38
-
 39
39
-
 40
40
-
 41
41
-
 42
42
-
 43
43
-
 44
44
-
 45
45
-
 46
46
-
 47
47
-
 48
48
-
 49
49
-
 50
50
-
 51
51
-
 52
52
-
 53
53
-
 54
54
-
 55
55
-
 56
56
-
 57
57
-
 58
58
-
 59
59
-
 60
60
-
 61
61
-
 62
62
-
 63
63
-
 64
64
-
 65
65
-
 66
66
-
 67
67
-
 68
68
-
 69
69
-
 70
70
-
 71
71
-
 72
72
-
 73
73
-
 74
74
-
 75
75
-
 76
76
-
 77
77
-
 78
78
-
 79
79
-
 80
80
-
 81
81
-
 82
82
-
 83
83
-
 84
84
-
 85
85
-
 86
86
-
 87
87
-
 88
88
-
 89
89
-
 90
90
-
 91
91
-
 92
92
-
 93
93
-
 94
94
-
 95
95
-
 96
96


Chicco Neptune Owner's manual
- Category
- Car seats
- Type
- Owner's manual
- This manual is also suitable for
Ask a question and I''ll find the answer in the document
Finding information in a document is now easier with AI
in other languages
- italiano: Chicco Neptune Manuale del proprietario
- français: Chicco Neptune Le manuel du propriétaire
- español: Chicco Neptune El manual del propietario
- Deutsch: Chicco Neptune Bedienungsanleitung
- русский: Chicco Neptune Инструкция по применению
- Nederlands: Chicco Neptune de handleiding
- português: Chicco Neptune Manual do proprietário
- slovenčina: Chicco Neptune Návod na obsluhu
- polski: Chicco Neptune Instrukcja obsługi
- čeština: Chicco Neptune Návod k obsluze
- Türkçe: Chicco Neptune El kitabı
- svenska: Chicco Neptune Bruksanvisning
- română: Chicco Neptune Manualul proprietarului
Related papers
-
Chicco KEY1 X-PLUS User manual
-
-
Chicco ELETTAELETTA COMFORT Owner's manual
-
-
-
-
-
-
Chicco 2EASY User manual
-
Other documents
-
mothercare Chicco_Car Seat QUASAR PLUS User guide
-
CYBEX SOLUTION X-FIX Short Manual
-
 CYBEX gold PALLAS S-FIX User manual
-
-
Maxi-Cosi AXISS Owner's manual
-
-
CYBEX Solution X2 User guide
-
-
CYBEX SOLUTION X2-FIX User manual
-
