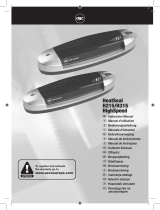
A 180

Olympia A 180 User manual

  • Hello! I am an AI chatbot trained to assist you with the Olympia A 180 User manual. I’ve already reviewed the document and can help you find the information you need or explain it in simple terms. Just ask your questions, and providing more details will help me assist you more effectively!
3
Deutsch 
Wichtige Sicherheitshinweise ...........................................................................6
Haftungsausschluss...........................................................................................7
Bestimmungsgemäße Verwendung ..................................................................7
Leistungsmerkmale ............................................................................................7
Heißlaminieren ....................................................................................................8
Kaltlaminieren .....................................................................................................8
Folienstau beheben ............................................................................................9
Pflege und Reinigung.........................................................................................9
Fehlerbehebung................................................................................................10
Entsorgungshinweis ........................................................................................11
Garantie ...........................................................................................................11
English #
Important Safety Information...........................................................................12
Exemption From Liability .................................................................................13
Intended Use .....................................................................................................13
Features ...........................................................................................................13
Hot Laminating..................................................................................................14
Cold Laminating................................................................................................14
Clearing Foil Jams ............................................................................................15
Cleaning and Servicing ....................................................................................15
Troubleshooting................................................................................................16
Disposal ...........................................................................................................17
Guarantee ..........................................................................................................17
Français 
Consignes de sécurité importantes ................................................................18
Exclusion de la garantie...................................................................................19
Utilisation conforme aux prescriptions ..........................................................19
Caractéristiques de performance ....................................................................19
12
Important Safety Information
Please observe the following information to ensure reliable operation of
the laminator:
1
Read this manual thoroughly and observe the instructions and in-
formation in it when operating the unit.
2
Keep the operating instruction manual available for future refer-
ence
.
3
Prevent damage to the power plug and power cable. Never twist
the power cable. Do not operate the unit if the power cable or
power plug is damaged.
4
Do not use the unit in the vicinity of hot surfaces or in damp
environments and protect it from direct sunlight and dusty condi-
tions.
5
Disconnect the power plug before starting to clean the unit. Never
use any solvents or aggressive cleaning agents.
6
Metallic objects cannot be laminated.
7 Children must not be allowed in the vicinity of the equipment when
it is ready to operate.
8 Disconnect the power plug when the unit is not in use.
9
Always switch the unit off immediately if it emits a strong smell or it
is not in operation.
10
Do not touch the power plug with moist hands.
11
Ensure that the On/Off switch is in the "OFF" position before connect-
ing the laminator to the mains power supply.
12
Only insert foil pockets which comply with the specifications in the
unit; refer to Section "Features". Using foil pockets which are too
large could lead to the unit jamming.
13
Do not laminate heat sensitive materials, such as thermal paper, in
the unit.
14
Lamination of moist documents produces poor results.
15
Do not use foil pockets intended for cold lamination for hot lamina-
tion. This could damage the machine, foil pockets and document.
16 Do not cut foil pockets to size. The resulting cut edges could cause
the foil pockets to jam.
17 Keep loose clothing, ties, jewellery, long hair and other loose
objects away from the insertion slot. Risk of injury!
18 The unit may only be used in dry, indoor rooms.
13
Exemption From Liability
We cannot guarantee that the information which relates to the technical
properties of the product or to the product itself contained in this document is
correct. The product and, where applicable, its accessories, described in this
document are subject to constant improvement and further development.
For this reason, we reserve the right to modify components, accessories,
technical specifications and related documentation of the product described
herein at any time without notice.
Intended Use
This laminator has been conceived for use processing hot and cold laminat-
ing foil. It is possible to laminate pictures, maps, documents, paper etc. up to
a total thickness of 0.5 mm. Any other use is considered unintended use.
Unauthorised modifications or reconstructions are not permitted.
Safety note:
The power socket must be in the immediate vicinity of the unit and easily ac-
cessible. This enables you to disconnect the unit from the power supply
quickly in an emergency.
Features
It provides protection and refinement of your documents.
The laminator can be used to laminate photos, documents, graphics, ID
cards etc. up to A4 size. The unit operates with 2 heating rollers, has a short
warm-up phase and laminates without carriers.
1 LED lamp in the power switch indicates the operational states
"power on" and "ready to operate"
Automatic switch-off in the event of overheating
High quality heating system prevents smudging and blistering
Warm-up phase approx. 3-5 minutes
Cool down phase to room temperature, approx. 30 minutes
Foil thickness, minimum 75 μm and maximal 125 μm
Laminating system: Hot roller technology
Working width: 230 mm (A4)
Maximum foil thickness: 75 – 125 micron
Laminating speed: 230 mm/min
Power supply: 220 - 240 Volt, 50/60 Hz, 1.1 A
Power consumption: 270 W
Dimensions (LxWxH): 358 x 110 x 66 mm
Weight: Approx. 950 g
14
Hot Laminating
1 Connect the power cable to an easily accessible, standard electrical
socket.
Attention: Check that the voltage specifications of the unit corre-
spond to that of your power supply network (220 - 240 V, 50/60 Hz).
2 Switch on the On/Off switch on the right-hand side of the unit: HOT.
The control lamp on the sliding switch lights up red.
3 The drive motor for the transport rollers starts up. The correct operat-
ing temperature is reached after about 4 minutes and the red indicator
lamp turns blue.
4 Insert the document to be laminated in the foil pocket so that there is a
margin of approx. 3 - 5 mm to the edge of the foil on all sides.
Attention: Only use hot laminating pockets.
5 Insert the foil pocket containing the document in the laminator's inser-
tion slot. Insert the ready closed side of the pocket in first.
Note: To prevent the laminating foil from creasing, never feed the
open side of the laminating pocket first in the insertion slot of the lami-
nator. When inserting the foil, observe the instructions on the insertion
slot. The laminating process occurs automatically.
Attention: The foil is very hot and soft when ejected following lamina-
tion. Therefore, handle the laminated product with extreme care.
Note: To flatten the laminated product, place a book or similar heavy,
flat object, on it.
Cold Laminating
1 Connect the power cable to an easily accessible, standard electrical
socket.
Attention: Check that the voltage specifications of the unit corre-
spond to that of your power supply network (220 - 240 V, 50/60 Hz).
2 Switch on the On/Off switch on the right-hand side of the unit: COLD.
3 The drive motor for the transport rollers starts up, the red indicator
lamp in the sliding switch lights up.
Attention: If you have just finished using the laminator for hot laminat-
ing, you must let the laminator cool down. The equipment takes about
30 minutes to cool down.
15
4 Remove the protective foil from the foil pocket.
5 Insert the document to be laminated in the foil pocket so that there is a
margin of approx. 3 - 5 mm to the edge of the foil on all sides.
6 Insert the foil pocket containing the document in the laminator's inser-
tion slot. Insert the ready closed side of the foil in first.
Note: To prevent the laminating foil from creasing, never feed the
open side of the laminating pocket first in the insertion slot of the lami-
nator. When inserting the foil pocket, observe the instructions on the
insertion slot. The laminating process occurs automatically.
Clearing Foil Jams
The laminator is provided with the "Jam Release" function in order to clear
foil jams quickly.
1 If the foil jams, switch the unit off and actuate the Release switch on
the rear of the unit, to the right.
2 Hold the laminator firmly and pull the foil pocket together with the
document to be laminated out of the laminator's insertion slot.
3 It will probably be necessary to then clean the unit several times as
described in the Section "Cleaning and Servicing".
4 If foil jams occur repeatedly or jammed foil cannot be removed from
the laminator, please contact our hotline (refer to Guarantee).
Cleaning and Servicing
Deposits and residual adhesive on the transport rollers can influence the re-
sults of the laminating process. Therefore, the transport rollers must be
cleaned periodically after use:
To do this, insert a folded piece of paper in the insertion slot. Residual adhe-
sive is removed and taken up by the paper when ejected. Repeat the proc-
ess several times.
Disconnect the power plug before starting to clean the unit with a damp
cloth. If necessary, the housing can be cleaned using a cloth moistened with
clean water with a little mild soap applied. Never use any solvents or ag-
gressive cleaning agents.
16
Troubleshooting
Fault Corrective measures
LED does not light up
Unit does not respond
Check that the power plug has been
properly connected to the power
socket.
If the fault cannot be cleared, contact
our hotline.
Foil jam Check the foil pockets being used are
the correct size.
Only use foil pockets of the sizes pre-
scribed.
Ensure that the foil pocket has been
inserted correctly in the unit.
To clear the fault, follow the instruc-
tions in the Section "Clearing Foil
Jams".
Laminated foil is not completely
transparent
Laminate the same foil again to im-
prove the lamination result.
Conformity of the equipment to the EU
directives is confirmed by the CE sym-
bol.
17
Disposal
This symbol (crossed-out bin) indicates that the product should
be returned to a collection point or recycling centre provided by
the local authorities when it has reached the end of its service
life. The icon is only applicable for states within the EEA. EEA
= European Economic Area, which comprises the EU member
states plus Norway, Island and Liechtenstein.
Guarantee
It is essential to retain this guarantee!
Dear Customers,
We are pleased that you have chosen the A 180 laminator from Olympia.
Should a technical problem arise with regard to the equipment, please ob-
serve the following points:
The period of guarantee for the equipment is 24 months.
It is essential to keep the purchase receipt and original packing.
The first line of action if a problem occurs is to contact our hotline.
+49 180 5 007514
Our expert personnel can frequently provide help over the phone.
However, if the problem cannot be solved via telephone, please sent the
equipment to the following address in its original packing:
Service-Center Hattingen
Weg zum Wasserwerk 10
D-45525 Hattingen
Repairs under the terms of guarantee can only be completed when the pur-
chase receipt is enclosed.
We are sorry for any inconvenience.
Yours faithfully
Olympia Business Systems
Vertriebs GmbH
Konformitätserklärung / Declaration of Conformity
Olympia A 180

Der Hersteller erklärt hiermit, dass das Gerät mit den Bestimmungen der
Richtlinien und Normen übereinstimmt:
#
The manufacturer hereby declares that the equipment complies with the
stipulations defined in the following guidelines and standards:

Le fabricant déclare par la présente que l'appareil est conforme aux
règlements et normes en vigueur:
Por medio de la presente, el fabricante declara que este aparato está
conforme a lo dispuesto en las directivas y normas vigentes:

De fabrikant verklaart hierbij dat het apparaat voldoet aan de bepalingen in de
richtlijnen en normen:

Il costruttore dichiara con la presente che la macchina sotto descritta è con-
forme alle norme delle direttive:
Výrobce tímto prohlašuje, že přístroj byl vyroben podle ustanovení
následujících směrnic:
2006/95/EEC EN 60950-1/A11:2004
2004/108/EEC EN 55014-1:2000+A1+A2
EN 55014-2:1997+A1
EN 61000-3-2:2000+A2
EN 61000-3-3:1995+A1
OLYMPIA Business Systems Vertriebs GmbH
Weg zum Wasserwerk 10
D-45525 Hattingen
Phone: 02324 6801-0
Fax: 02324 6801-99
E-Mail: olympia@olympia-vertrieb.de
Hattingen, Februar 2009 Heinz Prygoda, Managing Director
....................................................... ................................................
Ort, Datum Name und Unterschrift
DoC No.: 3103
Version 01
15.1.2009
/