Page is loading ...

Installation
(Optional method with the 41920-HRC Autoswitching Wallplate)
Installation Options
Panel Description
What's Included
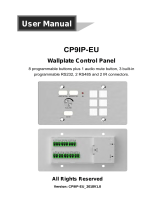
8-Button Control Panel
Cat. No. 41920-C8F
INSTALLATION INSTRUCTIONS
ENGLISH
DI-065-41920-05A
• WARNING: TO AVOID DEATH OR SERIOUS INJURY, never push objects of any kind into this
product through openings, as they may touch dangerous voltages.
• WARNING: TO AVOID DEATH OR SERIOUS INJURY, never touch uninsulated wires or
terminals unless the wiring has been disconnected at the network interface.
• Read and understand all instructions. Follow all warnings and instructions marked on the product.
• Do not use this product near water - e.g., near a tub, wash basin, kitchen sink or laundry tub,
in a wet basement, or near a swimming pool.
• Never install communications wiring or components during a lightning storm.
• Never install communications components in wet locations unless the components are
designed specifically for use in wet locations.
• Use caution when installing or modifying communications wiring or components.
• SAVE THESE INSTRUCTIONS.
SAFETY INFORMATION
This wallplate may be used:
A) with the Leviton HDMI and VGA Autoswitching HDBaseT Extender
Wallplate (41920-HRC)
B) standalone and programmed via supplied software.
(1) 8-Button Control Panel
(4) 6-32 x 1in. screws
(1) adapter cable
(1) IR emitter kit
(1) power supply
Before Installation
• Install the 41920-HRC Autoswitching Wallplate. following the instructions
provided with the unit.
• Run one Cat 6A cable, with appropriately rated cable jacks, from the location
where the Control Panel will be mounted to the location of the Autoswitching
Wallplate.
NOTE: For best performance, twisted pair cable should be installed in
accordance with ANSI/TIA-568 and NEC 300 and field tested using
ANSI/TIA-568 UL testers.
NOTE: Read the software programming instructions before deploying to the
jobsite. This device must be programmed to operate the attached devices using
the software supplied on the USB drive
(1) USB Mini to Type A Cable
(1) USB flash drive
• programming software
• label template
(1) pre-printed label sheet
(10) clear button covers
Features
• Dual gang form factor with matte anodized aluminum finish
• (8) backlit programmable buttons
• IR learning receiver
• (Up to 3) RS232 ports
• (1) RS485 port
• (2) 2A/30UDe relays
• (Up to 3) IR emitters
1. Power Input – Connect to provided 12VDC power supply or to Leviton 41920-
HRC via supplied adapter cable.
2. Relays – Connect to controlled device. 18 to 24AWG cabling recommended,
consult AWG guidelines for wire ampacity. Relays support 2A at 30VDC maximum.
3. RS485 Port – Connect to controlled device. 22 to 24AWG balanced twisted pair
cabling recommended up to 100 ft.
4. IR Ports – Connect to included IR emitters. Emitters can be extended up to
50’ with minimum 24AWG cable, two conductors per emitter. Soldered joints
recommended due to small wire gauge of emitters.
5. RS232 Ports – Connect to controlled devices. 22/2 AWG Stranded/Shielded
cabling recommended. Shielded category cable optional. Connect TX on keypad
to RX on controlled device and RX on keypad to TX on controlled device.
Consult Software Guide for details
NOTE: The IR(2) & RS232(1) port is a single port and can be only used as one or
the other. The IR(3) & RS232(2) port is a single port and can be only used as one
or the other.
NOTE: The RS232(3) port is the default port to be used in conjunction with the
12VDC Power Input Port when connecting to a Leviton 41920-HRC.
6. IR Learn Sensor – Aim IR Remote at this sensor when programming. Software
control of this port via USB is required to activate this function when building or
editing libraries.
7. Mini USB Port – Connect to PC for Software upload and IR Learn functions.
1
2
4
5
6
7
3
Display/
Projector
HDMI RS232
HDMI
HDMI
Audio
Source
Source
Source
VGA
AC
Power
41910-HTR
41920-HRC
41920-C8F
Cat 6A
Cat 6A

DI-065-41920-05A© 2019 Leviton Mfg. Co., Inc.
For Technical Assistance Call: 1-800-824-3005 (USA Only) or 1-800-405-5320 (Canada Only) www.leviton.com
FOR CANADA ONLY
For warranty information and/or product returns, residents of Canada should contact Leviton in writing at Leviton Manufacturing of Canada ULC to the attention of the Quality
Assurance Department, 165 Hymus Blvd, Pointe-Claire (Quebec), Canada H9R 1E9 or by telephone at 1 800 405-5320.
LIMITED 1 YEAR WARRANTY AND EXCLUSIONS
Leviton warrants to the original consumer purchaser and not for the benefit of anyone else that this product at the time of its sale by Leviton is free of defects in materials and workmanship under normal and proper
use for one year from the purchase date. Leviton’s only obligation is to correct such defects by repair or replacement, at its option. For details visit www.leviton.com or call 1-800-824-3005. This warranty
excludes and there is disclaimed liability for labor for removal of this product or reinstallation. This warranty is void if this product is installed improperly or in an improper environment, overloaded, misused,
opened, abused, or altered in any manner, or is not used under normal operating conditions or not in accordance with any labels or instructions. There are no other or implied warranties of any kind, including
merchantability and fitness for a particular purpose, but if any implied warranty is required by the applicable jurisdiction, the duration of any such implied warranty, including merchantability and fitness for
a particular purpose, is limited to one year. Leviton is not liable for incidental, indirect, special, or consequential damages, including without limitation, damage to, or loss of use of, any equipment,
lost sales or profits or delay or failure to perform this warranty obligation. The remedies provided herein are the exclusive remedies under this warranty, whether based on contract, tort or otherwise.
TRADEMARK DISCLAIMER: Use herein of third party trademarks, service marks, trade names, brand names and/or product names are for informational purposes only, such use is not
meant to imply affiliation, sponsorship, or endorsement. HDBaseT and the HDBaseT Alliance logo are trademarks of the HDBaseT Alliance. The terms HDMI and HDMI High Definition
Multimedia Interface, and the HDMI logo are trademarks or registered trademarks of HDMI Licensing LLC in the United States and other countries.
2. Terminate cables at autoswitching wallplate.
Using the supplied adapter cable:
• OUT RS232 - attach 4-position connector
3. Connect controlled device
to the RS232 port on the 41910-HTR. Refer to the instructions
provided with the 41910-HTR for details.
Setup and Programming
1. Terminate cables at panel.
Using the supplied adapter cable:
• PWR - attach 2-position connector
• RS232 (3) CONFIG NET IN - attach 3-position connector
1. Configure software.
Access Leviton Field Configurable Panel Setup software on the USB drive to
configure the keypad. Follow the instructions also included via the USB drive.
2. Upload programming to control panel.
Connect control panel to PC using the provided USB cable. Follow instructions
included on the USB drive for upload.
3. Bench test.
Connect and operate each controlled device before installing the system on site.
Refer to Panel Description section for connections.
5. Confirm proper operation.
4. Complete all connections.
Complete all connections and install the Control Panel into a 2 gang wall opening
or box per local code with four provided screws
Adapter Cable Cat 6A
41920-C8F Control Panel
41920-HRC Autoswitching Wallplate
Installation
(Optional method with the 41920-HRC Autoswitching Wallplate)
NOTE: It is best practice to setup and test the entire system on a bench before deploying
to a jobsite. This makes programming and troubleshooting much easier.
/