Page is loading ...

IN221000208V02_GL
B30-006
EN_IMPORTANT, RETAIN FOR FUTURE REFERENCE: READ CAREFULLY.
FR_IMPORTANT:A LIRE ATTENTIVEMENT ET À CONSERVER POUR CONSULTATION
ULTÉRIEURE.
ES_IMPORTANTE, LEA Y GUARDE PARA FUTURAS REFERENCIAS.
DE_WICHTIG! SORGFÄLTIG LESEN UND FÜR SPÄTER NACHSCHLAGEN AUFBEWAHREN.
IT_IMPORTANTE! CONSERVARE IL PRESENTE MANUALE PER FUTURO RIFERIMENTO E
LEGGERLO ATTENTAMENTE.

These instructions describe the correct operating method to ensure prolonged service life. Please read
and completely understand these instructions before operating your solar light.
Keep these instructions for future reference.
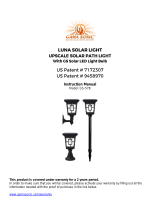
INTRODUCTION
Using LED (Light Emitting Diode) technology and powered by the sun, this solar light is ideal for
highlighting garden contours,pathways and driveways. During the day, the solar panel on top of the
light charge the battery inside. At dusk, the solar light will turn on automatically using the stored
energy from the sun.
The unique High /Low switch is designed to maximise brightness during summer, and maximise
operating time during winter and over extended cloudy periods.
When the switch is in the High position, the brightness can reach up to 60 lumens and will last up to
6 hours each night when the battery is fully charged.
In the Low position, the brightness can reach up to 30 lumens and up to 8 hours working time.
POSITIONING YOUR SOLAR LIGHT
*Your solar light includes a built-in photo sensor, which detects the level of surrounding natural light
and controls when the light will automatically switch on and off. Solar light should be placed away
from other night time light sources including other solar lights, as this might keep the light from
automatically turning on at dusk.
*Solar light must be located in an area where the solar panel will receive a maximum amount of full,
direct sunlight every day. Solar light should be exposed to at least 8 hours of direct sunlight each day
to fully charge the battery inside.
Shady locations will not allow the battery to charge fully and will reduce the hours of night time
light.
The performance of your solar light is dependent on your geographical location, weather
conditions and seasonal lighting availability. On cloudy days and during winter,your solar light
will not receive as much direct sunlight, resulting in reduced brightness and reduced operating
time.

ASSEMBLY
This pack should come with the following.
NB:Some components may come pr-assembled
1 x solar light head (A)
1 x pole piece with female thread (B)
2 x pole pieces with female& male thread (C)
1 x pole piece with male thread (D)
1 x mounting base (E)
1 x ground stake (F)
3 x mounting screws (G)
3 x plastic anchors(H)
OFF
LOW
LIGH
B
C
C
D
E
H
G
F
EF
A

Step 1: Assemble lens section and cover together, by aligning the locking tabs on the side of the lens
section with the slots on the underside of the light head, and twist over in a clockwise direction to
lock it into place.
Step 2: Assemble the poles with threaded ends. Secure the pole pieces by twisting the threaded ends
together.
Step 3: Insert the assembled pole into the opening at the top of the mounting base.
Step 4: Attach assembled light head over the top of the assembled pole to complete installation
FIRST TIME USE
Step 1 : Slide the H/L/OFF switch to the H/L position.
Step 2 : Your solar light will then automatically switch on at dusk and charge during daylight hours.
INSTALLATION
This light can be installed in soft ground or into a hard surface
SOFT GROUND INSTALLATION
Step 1: Locate an area where you wish to place the light and insert stake into the ground. Insert stake
leaving approximately 10cm length above the ground’s surface. If the ground is hard, soften by
soaking area with water first or gently tap the stake into the ground using a rubber mallet.
Step 2: Remove mounting base from the bottom of the assemble pole and gently place light down.
Step 3: Attach mounting base over the centre of the installed ground stake.
Step 4: To complete installation, re-attach the assembled solar light into the opening at the top of the
mounting base.
HARD SURFACE INSTALLATION
Step 1: Remove mounting base from the bottom of the assembled pole and gently place light down.
Step 2: Using a pencil place marks through the 3 holes located around the edge of the mounting base.
Step 3: Remove the base from position and drill a hole at the 3 points marked, large enough to fit the
plastic anchors inside.
NB: Before drilling holes, it is recommended that you first check the light effect at night to
ensure you are happy with the position yo have chosen for installation. Be sure to also check
that the location will receive direct sunlight each day to charge the battery.
Step 4: Place plastic anchors into each hole.
Step 5: Re-position the mounting base onto the surface, aligning the holes with the plastic anchors.
Step 6: Using a screwdriver, insert screws through the 3 holes on the mounting base and into the
plastic anchors. Tighten screws to secure the mounting base onto the surface.
Step 7: To complete installation, re-attach the assembled solar light into the opening at the top of the
mounting base.

NB: If mounting onto a timber surface, plastic anchors are not required. Simply drill the
screws directly into the surface through the holes on the mounting base
BATTERY REPLACEMENT
Step 1: Detach light cover from the top of the lens section by twisting it in an anti-clockwise
direction and gently lifting off.
Step 2: Lift off the battery lid and replace old battery with new rechargeable 3.7V 14500 Lithium-ion
battery.
IMPORTANT : When the battery life is exhausted, the battery must be recycled or disposed of
properly.
DO NOT DISPOSE OF BATTERY IN FIRE
Step 3: Replace battery lid, and replace light cover back onto the lens section.
TROUBLESHOOTING
If your solar light does not automatically turn on at night, it may be caused by one of the following
conditions:
1. H/L/OFF switch is not in H/L position. Slide the switch to H/L position.
2. Battery is not fully charged or needs replacing
3. Battery may not have been installed correctly. Check to ensure that the battery is not loose and
has been installed the correct way
4. Solar light might be positioned in a shaded location, limiting its exposure to the sun and not
allowing the battery to fully charge
5. Solar light might be too close to another night time light source, including another solar light.
6. Solar panel may be dirty, limiting its exposure to the sun and not allowing the battery to fully
charge. Clean the top surface of the solar panel regularly with a dampened cloth or paper towel
If your solar light only lights up for a few hours in stand-by mode, the solar panel may not be
receiving enough sunlight to fully charge the battery
NB : The performance of your Solar Light is dependent
on your geographical location, weather conditions and
seasonal lighting availability. On cloudy days and during
winter, the solar charge panel will not receive as much
direct sunlight resulting in reduced brightness and reduced
operating time


/