
ENG
1150mm - 45.2 inch
Universal Track
TRCA003_REV_A03 © COPYRIGHT 2017 FRONT RUNNER VEHICLE OUTFITTERS
1
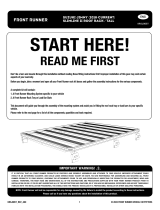
IMPORTANT WARNING!
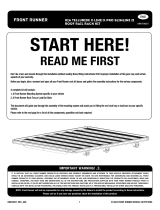
Don’t be a hero and muscle through this without first reading these fitting instructions! Improper installation of this gear may void certain aspects of
your warranty.
Before you begin, take a moment and open all your Front Runner rack kit boxes and gather the assembly instructions for the various components.
A complete kit will contain:
1. A Front Runner Mounting System specific to your vehicle
2. A Front Runner Rack Tray or Load Bar Slats
This document will guide you through the assembly of the mounting system and assist you in fitting the roof rack tray or load bars to your specific
vehicle.
Please refer to the next page for a list of all the components, quantities and tools required.
TRCA003
READ ME FIRST
START HERE!
FRONT RUNNER CAN NOT RECOMMEND A MAXIMUM LOAD CARRYING CAPACITY. PLEASE REFER TO YOUR VEHICLE MANUFACTURER'S RECOMMENDATIONS. IT IS CRITICAL
THAT ALL FRONT RUNNER PRODUCTS BE PROPERLY AND SECURELY ASSEMBLED AND ATTACHED TO YOUR VEHICLE. IMPROPER ATTACHMENT COULD RESULT IN AN
AUTOMOBILE ACCIDENT, AND COULD CAUSE SERIOUS BODILY INJURY OR DEATH. YOU ARE RESPONSIBLE FOR ASSEMBLING AND SECURING ALL FRONT RUNNER PRODUCTS
TO YOUR VEHICLE. CHECKING THE ATTACHMENTS PRIOR TO USE, AND PERIODICALLY INSPECTING THE PRODUCTS FOR ADJUSTMENT, WEAR AND DAMAGE. THEREFORE YOU
MUST READ AND UNDERSTAND ALL OF THE INSTRUCTIONS AND PRECAUTIONS SUPPLIED WITH YOUR FRONT RUNNER PRODUCT PRIOR TO INSTALLATION OR USE. IF YOU
DO NOT UNDERSTAND ALL OF THE INSTRUCTIONS AND CAUTIONS, OR IF YOU HAVE NO MECHANICAL EXPERIENCE AND ARE NOT THOROUGHLY FAMILIAR WITH THE
INSTALLATION PROCEDURES, YOU SHOULD HAVE THE PRODUCT INSTALLED BY A PROFESSIONAL INSTALLER OR OTHER QUALIFIED PERSONNEL.

TRCA003_REV_A03 © COPYRIGHT 2017 FRONT RUNNER VEHICLE OUTFITTERS
2
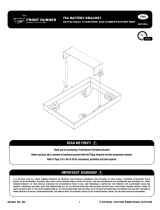
IN THE BOX
FIGURE 1.1
1 8 X M6 x 30 Button Head Bolt
2 8 X M6 x 20 Button Head Bolt
3 4 X Track End Cap
4 2 X 1150mm Canopy Track
5 2 X 1150mm Protective Trim
6 8 X M6x30x1 Flat Washer
7 8 X M6x12x1 Stainless Steel Flat Washer
8 8 X M6 Nyloc Hex Nut
9 8 X M6 Nut Cap
10 8 X M6 Clinch Nut (Alternative Fitment)
IN THE BOX TOOLS NEEDED
10 mm
4mm
Allen Key
Measuring
Tape
IN THE BOX
4
3
2
1
6
5
8
9
10
7
1GET ORGANIZED
Here is what you are looking at for TRCA003
Sealant
Hacksaw
Marker
6.5mm
9mm
4mm
Utility
Knife
Chinch Nut Tool

4
3
2
1
5
6
8
9
10
7
© COPYRIGHT 2017 FRONT RUNNER VEHICLE OUTFITTERS
3
TRCA003_REV_A03
2.1
Remove the canopie's roof rails if fitted. Determine the best possible position for mounting the tracks.
Take care not to drill into or through any reinforcements.
FIT AND SECURE
2
2.8
2.6
Fit and secure the tracks with a
combination of Items 1/2, 6, 7, 8 & 10.
Depending on the thickness of the
material you are bolting through you can
use either M6x20 Button Head or M6x30
Button Head (Items 1 or 2). The bolt
needs to go through the
Nyloc Nut (Item 8).
Install the End-Caps and Protecive Trim
(Items 4 & 5) before you do the final
fitment of the tracks.
Check that all the fasteners are fully
tightened.
Place M6 nut caps (item 9) on all the M6
Nyloc Nuts (item 8) to finish of the
fitment .
10mm
2.3
Once you are happy with the placement of the track, mark all the holes using a suitable marking pen.
2.4
Drill a 4mm pilot hole on all the marks you have made. If you are using the M6 Nyloc nuts (Item 8) for
the fitment, open the pilot holes to 6.5mm. Always take care when drilling.
2.2
Measure and trim the tracks to the desired length.
2.7
Apply a bead of suitable sealant to each hole drilled in step 2.4.
INSTALL OTHER VEHICLE AND RACK ACCESSORIES
4
Now's the time to visit your favorite Front Runner Dealer in person or Online.
COMPLETION
3
Congratulations. You did it. Take a step back and admire your work!
4mm
2.5
When using the Clinch Nuts (item 10) you will need a Clinch nut Tool to crimp and secure the Clinch
nuts.
Should any of the mount points be inaccessible to use nuts, open the hole to 9.5mm and use
the Clinch Nut (Item 10). ONLY TO BE USED WITH METAL CANOPY / CAPS AND TRAILER TOPS.
-
 1
1
-
 2
2
-
 3
3


Front Runner KRRT030T Installation guide
- Type
- Installation guide
Ask a question and I''ll find the answer in the document
Finding information in a document is now easier with AI
Related papers
-
 Front Runner TRCA008 Installation guide
-
 Front Runner KRRT013T Installation guide
-
 Front Runner KRKT002T Installation guide
-
 Front Runner KRFF022T Installation guide
-
 Front Runner KRTF010T Installation guide
-
 Front Runner BBTH004 Installation guide
-
 Front Runner SSAM012 Installation guide
-
 Front Runner KRMP017T Installation guide
-
 Front Runner KRSJ005T Installation guide
-
 Front Runner KRDS003T Installation guide


Other documents
-
Lotus Elise Workshop Manual
-
-
Edelbrock Edelbrock Stage 1 Supercharger #1554 For 2016-18 Mazda MX-5 Miata 2.0L W/ Tune Installation guide
-
Air Lift 57250 Installation guide
-
Ridetech Wilwood Front Dynapro 6 Brake System (Accepts stock 5 x 5.5″ Lug Pattern Wheels) Installation guide
-
-
-
Edelbrock Edelbrock Supercharger #1570 14-19 Corvette Stingray Z51/Grand Sport W/ Dry Sump Installation guide
-
Rhino Rack RLTPMV Operating instructions
-