Page is loading ...

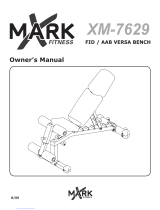
Owner’s Manual
XM-7615.1
ROTARY LEG MACHINE

TABLE OF CONTENTS
IMPORTANT SAFETY INFORMATON Page 2
BEFORE YOU BEGIN Page 2
ASSEMBLY Page 3-8
PARTS LIST Page 9
EXPLODED VIEW Page 10

IMPORTANT SAFETY INFORMATION
Before using this unit or starting any exercise program, consult your physician. This is especially
important for persons over the age of 35 and/or persons with preexisting health problems.
The unit is not intended for use by persons with reduced physical, sensory, or mental
capabilities or lack of experience and knowledge, unless they are given supervision or
instruction about use unit by someone responsible for their safety.
This unit should only be placed on a level surface and is intended for indoor use only. To protect
the floor or carpet, place a mat under the unit.
Inspect and properly tighten all parts each time the unit is used. Replace any worn parts
immediately.
Children under age 16 and pets should be kept away from this unit at all times.
It is the owner’s responsibility to ensure that all users of this unit have read the Owner’s Manual
and are familiar with safety information and precautions.
XMark assumes no responsibility for personal injury or property damage sustained by or through
the use of this product.
BEFORE YOU BEGIN
Prior to assembly, remove components from the box and verify that all the listed parts were
supplied.
Place all parts in a cleared area and remove the packing materials. Do not dispose of the
packing materials until you finish all assembly steps.
Please read this manual completely before beginning the assembly process. Our XMark staff is
here to assist you. Any questions you may have regarding the assembly should be directed to
IMPORTANT: Hand tighten bolts and Nylon Lock nuts until machine have completed the
assembly.
2

ASSEMBLY INSTRUCTIONS
PO: Hand tighten bolts and Nylon Lock nuts until machine is fully assembled.
STEP 2:Attach the rt ase ss to the
ai rae using:
•Two Button Head Cap Screws (#37)
•Four Flat Washers (#32)
•Two Nylon lock Nuts (#34)
STEP 3: Attach the rt rae ss tothe rt ase ss using:
•Two Button Head Cap Screws (#36)
•Two Split Washer (#33)
•Two Flat Washers (#32)
STEP 1:Attach theear ase ss to the ai
rae using:
•Two Button Head Cap Screws (#37)
•Four Flat Washers (#32)
•Two Nylon lock Nuts (#34)
the
rt
ase
ss
ss
using:
Two Button Head Cap Screws (#36)

ASSEMBLY INSTRUCTIONS
IMPORTANT: Hand tighten bolts and Nylon Lock nuts until machine is fully assembled.
STEP 4: Attach the two Frt rae eti Plates
to thert ase ss and the rt rae ss
using:
•Four Button Head Cap Screws (#37)
•Eight Flat Washers (#32)
•Four Nylon lock Nuts (#34)
STEP 5: Apply Lriat inside the i e ss
.
After lubricating, attach the i e ss to
the rt rae ss using:
•One Button Head Cap Screw (#40)
•One Flat Washer (#31)
•One Washer (#22)
STEP 6: Attach the ie le rae to the ai rae using:
•Two Seat Frame Connecting Plate (#6)
•Two Button Head Cap Screws (#38)
•Four Flat Washers (#32)
•Two Nylon lock Nuts (#34)
le rae
to
the
ai
rae
rae
using:
Seat Frame Connecting Plate (#
6)
Two Button Head Cap Screws (#38)
rt rae eti
Button Head Cap Screws (#37)
e
ss
t
o
rt rae eti Plates
rt rae ss

ASSEMBLY INSTRUCTIONS
IMPORTANT: Hand tighten bolts and Nylon Lock nuts until machine is fully assembled.
STEP 8: Attach the eat rae ss ,Let ale ss ,
and it ale ss to the ai rae using:
•Two Button Head Cap Screws (#39)
•One Button Head Cap Screws (#37)
•Six Flat Washers (#32)
•Three Nylon lock Nuts (#34)
Once complete, attached the P Pi to the
eat rae ss .
STEP 9: Pulling outward on the P Pi at the front
of the eat rae ss , slide the stale ller
Pa rae ss ) into the front receiver, then release the
P Pi
STEP 7: Attach the ie le rae to the
rt rae ss using:
•Two Button Head Cap Screws (#37)
•Four Flat Washers (#32)
•One plate (#20)
•Two Nylon lock Nuts (#34)
le rae
to
th
e
(#37)
ale ss
,
using:
the
: Hand tighten bolts and Nylon Lock nuts until machine is fully assembled.

ASSEMBLY INSTRUCTIONS
IMPORTANT: Hand tighten bolts and Nylon Lock nuts until machine is fully assembled.
STEP 10: Pulling outward on the P Pi
towards the back of the eat rae ss , slid the
a stale ar ss into the back
receiver, then release the P Pi .
STEP 11: Insert the ter Pr to the
rt rae ss .
STEP 12: Attach the eat raet toeat
rae ss using:
•One Shaft W/Screw (#25)
•Two Flat Washers (#32)
•Two Nylon lock Nuts (#34)
•One L Pin (#29)
uts
until
m
achine
i
s
f
ully
assembled.
eat raet
t
o
eat
One Shaft W/Screw (#25)
Two Flat Washers (#32)
Two Nylon lock Nuts (#34)

ASSEMBLY INSTRUCTIONS
IMPORTANT: Hand tighten bolts and Nylon Lock nuts until machine is fully assembled.
STEP 13: Attach one ater ss to
Front rae ss with the pre-installed
screw.
STEP 15: Attach one a Pai to the
stale ller Pa rae ss using:
•One Plastic Washer (#24)
•One Metal End Cap (#23).
Repeat, adding the second a Pai
to the other side of the Adjustable Roller Pad
Assy (#8).
STEP 14: Attach the second ater ss to
The ear ase ss with the pre-installed
screw.
: Hand tighten bolts and Nylon Lock nuts until machine is fully assembled.
t
o
stalled

ASSEMBLY INSTRUCTIONS
IMPORTANT: Hand tighten bolts and nylon lock nuts until machine is fully assembled.
Congratulations! You’ve completed the assembly of your XMark Rotary Leg Extension and Curl Machine.
STEP 16: Attach the eat Pa to the eat raet
using:
•Four Flat Washers (#31)
•Four Button Head Cap Screws (#40)
STEP 17: Attach the a Pa to the a
stale ar ss using:
•Two Flat Washers (#31)
•Two Button Head Cap Screws (#40)
STEP 18: Attach the i ller Pa to thei
e ss si
•Two Collars (#30) with the two pre-installed
screws (#35)
STEP 19: Lastly, tighten all bolts and nylon lock nuts.
Hand tighten bolts and nylon lock nuts
until machine is fully assembled.
Button Head Cap Screws (#40)
eat raet

Parts List
3
3
3
3
3
3
3
3 3
3
3 3 3
33 3
3
3
3 3 3
3
3
3
3

10
Exploded View

Customer Service:
service@xmarkfitness.com
1-800-719-4605
Hours: 7:30 AM to 3:00 PM CST
Monday – Friday
Visit xmarkfitness.com for warranty information
/