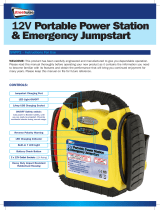
SWPB1

Streetwize SWPB1 Owner's manual

  • Hello! I am an AI chatbot trained to assist you with the Streetwize SWPB1 Owner's manual. I’ve already reviewed the document and can help you find the information you need or explain it in simple terms. Just ask your questions, and providing more details will help me assist you more effectively!
12V 400 Amp (Peak)
Emergency Jumpstarter &
Portable Power Bank
Information For Use
Diesel Engines: Up to 2000cc (2.0L)
Petrol Engines: Up to 2500cc (2.5L)
Emergency Jumpstarts
SWPB1
14000 mAh Battery Capacity
400 AMP (Peak)
200 AMP
(Continuous)
12V
2
Intention for Use
Product Elements
On First Use
Charging the Unit
Charging Via The Mains
Charging Via 12V Socket
Performing Emergency Jumpstarts
Functionality of Smart Jumpstart Cables
Charging Smartphones, Tablets and Laptops
Charging smartphones, tablets and other USB devices
Charging laptops & larger gadgets
LED Torch
Health & Safety Warnings
Manufacturer’s Warranty
Technical Support
Technical Specifications
3
3
3
3
3
3
4
4
5
6
6
7
7
7
8
8
Manual Contents
3
Intention for Use
Thank you for purchasing the 12V 400 Amp (Peak) Emergency Jumpstarter & Portable Power
Bank from Streetwize. This powerful piece of kit can jumpstart 12V vehicles with petrol
engines up to 2.5L and diesel engines up to 2.0L.
This product also acts as a robust power bank that can provide hours of portable power for
smartphones, tablets and laptops.
Product Elements
1. Streetwize 12V 400 Amp (Peak) Emergency Jumpstarter & Portable Power Bank
2. 12V DC Socket Charger
3. 230V AC Mains Charger
4. 3-in-1 USB cable with Type C, Micro USB and Lighting Adapters
5. Smart Jump Start Cables
6. Input/Output Cable
7. 8-piece Laptop Charger Adapter Kit
8. Carry Case
On First Use
Before using this product, we highly recommend that you charge the unit for at least 3 hours.
We also advise that you keep the power bank fully charged whenever possible.
Important: This product is able to jump start vehicles when the LED battery indicator shows
a minimum of 3 LED lights being lit up. However, for optimum performance, we advise that
you fully charge the unit until the LED battery indicator shows all 5 LEDs being lit.
Never perform an emergency jump start when this unit’s LED battery indicator is
showing less than 3 LED lights as this may lead to damage to the product, or cause it to
malfunction.
IMPORTANT – PLEASE NOTE
This product provides a peak output of 400Amps. Please note that the peak output lasts
for a very limited amount of time. The peak output will only activate if you are jumpstarting
engine sizes that exceed the specifications on the front of this manual, so please ensure
you are jumpstarting the correct engine size for this product.
Charging the Unit
This unit comes supplied with two charging cables, a 230V AC mains charging cable and 12V
DC charging cable.
Charging Via The Mains
With the 230V AC mains charging cable,
connect the cable to the Input 15V/1A
socket on the unit. Then connect the cable
to your mains supply and switch on the
mains. Charge until all five LED charge
indicator lights are static. Charge time is
approx. 5 to 6 hours.
Charging Via 12V Socket
Using the 12V charging cable, as before,
connect the cable to the Input 15V/1A
socket on the unit. Then connect the cable
to your vehicle 12V socket, and then turn
your vehicle on to commence charging.
Charge time longer than mains charging.
4
Important: Use the mains charging option as the primary method of charging this power
bank. The 12V charging option should be used as a secondary option as this will risk
depleting your vehicle’s battery.
Performing Emergency Jumpstarts
To perform an emergency jumpstart, please follow the instructions below:
1. Take the smart jumpstart cables and connect it to your vehicle’s 12V battery terminals.
Connect the RED cable to the positive terminal FIRST, then connect BLACK cable to
the negative terminal SECOND. Make sure the clips are well-connected to the battery
terminals.
Caution: Never connect the red & black crocodile clips together at the same time.
2. Then, connect the smart jumpstart cables to the unit. You should see a Green LED
light appear on the smart jumpstart cable’s terminal followed by a single beep sound to
confirm correct connectivity.
3. Place the unit on a steady surface under the bonnet.
4. Attempt to start your vehicle’s engine. DO NOT attempt to start the engine for more
than 4 seconds. The vehicle’s engine should start immediately. If it doesn’t, turn off the
engine and wait for at least 15 seconds
5. Once the engine has been ignited, immediately unplug the battery cable adaptor
from the unit first, and then remove the crocodile clips from the battery. Then, place
everything back into its carry case.
3 4
1 2
56
1 2 3
1 2 3
12 3
12
ON/OFF
3 4
1 2
56
1 2 3
1 2 3
12 3
12
ON/OFF
Figure 1
Please note: The unit will NOT be able to perform an emergency jumpstart if the vehicle has
a voltage rate above 12.3V. If the vehicle does not start, this may indicate another problem
and we advise that you get your vehicle checked by a qualified mechanic or professional.
34
5
Functionality of Smart Jumpstart Cables
The included smart jumpstart cables come with an LED indicator that displays either a red or
green light and it also comes with a warning sound.
3 4
1 2
56
1 2 3
1 2 3
12 3
12
ON/OFF
3 4
1 2
56
1 2 3
1 2 3
1
2 3
12
ON/OFF
Charging Smartphones, Tablets and Laptops
This unit comes with two charging outputs, one 19V/3.5Amp and one 12V/2Amp; and a
single input 15V/1Amp. See figure 2 below.
It also comes with a single USB charge port (5V/2Amp).
IMPORTANT: Do not charge the unit and charge an
electronic device at the same time. This will shorten
the power bank’s battery life.
LED Light / SoundFault/Functionality
Solid Red LED w/ continuous short beeps
Flashing Red LED light
Green/Red LED flashing
Green LED after beep
Reverse polarity connection
Short-circuit protection
Overheat protection
Over-discharging protection
Searching for status connection
Correct connection
Figure 2
6
Charging smartphones, tablets and other USB devices
For charging smartphones, tablets and other USB devices, please use the 5V/2Amp USB
output and the follow the instructions below:
1. Connect the provided 3-in-1 USB charging cable plug into the 5V/2A USB output port.
2. Insert the correct adaptor for the device to be charged.
3. When the cable is connected Press the “On” button once to commence charge.
Charging laptops & larger gadgets
Please Note: Laptops & larger gadgets generally require a 19V power supply.
This product comes supplied with an 8-piece adaptor kit for charging laptops and larger
gadgets. The adapter kit does not include an adaptor for charging Apple laptops.
For charging laptops and larger gadgets, please use either the 19V/3.5Amp or 12V/2Amp
output and the follow the instructions below:
1. Plug in the supplied Input/Output cable into either the 19V/3.5Amp or 12V/2Amp
output port on the unit.
2. Choose the correct adaptor for your laptop/gadget and then connect this adaptor to the
Input/Output cable.
3. Connect to the laptop and then press the “On” button.
3 4
1 2
56
1 2 3
1 2 3
12 3
12
ON/OFF
3 4
1 2
56
1 2 3
1 2 3
12 3
12
ON/OFF
Figure 3
Figure 4
7
LED Torch
To turn on the LED torch, press and hold the
“On” button to turn on the LED torch. Then,
press again to select either SOS FLASHING
or STROBE (fast) mode.
Press the “On” button again to switch off.
Health & Safety Warnings
The power bank will generate heat when charging. Charge it in a well ventilated area.
Keep the power bank away from heat sources, direct sunlight, humidity, water or other
liquids.
Do not operate the power bank if it is wet or damaged to prevent electrical shock,
explosion and/or injury. Improper repairs of this device may place the user at risk.
Do not use the power bank with wet hands. Do not use this unit for anything other than
its intended use.
The power bank is not a toy. Keep out of reach of children.
Do not charge under pillows, blankets or any other fabric.
Do not store in a car during hot weather.
Short-circuiting a Li-ion battery can cause it to ignite or explode.
Never open a Li-ion battery’s casing. Li ion batteries contain safety devices that protect
the cells inside from abuse, if damaged these can cause the battery to ignite or
explode.
DO NOT use or store at temperatures above 50°C or below -10°C.
Do not charge the power bank and charge an electronic device at the same time. This
will shorten the power bank’s battery life.
Technical Support
If you require any technical support within the warranty period, please contact us on
suppor[email protected] and provide product name and supplier code (see
Technical Specifications) along with the technical query and proof of purchase.
3 4
1 2
56
1 2 3
1 2 3
12
3
12
ON/OFF
Product Code
AC/DC Input
Input
Output
USB Output
Output Current
Output for Jumpstart
Capacity
LED Saving
Operating temp
Cycle life
LED life
Charging Time (Mains)
Size
SWPB1
230V AC & 12V DC
15V/1Amp
19V/3.5Amp & 12V/2Amp
5V 2.0Amp
12V/200 Amp (Continuous)
12V/400 Amp (Peak)
14000mAh
1Watt
-10°C to +50°C
1000 recharges
50,000 hours
Approx. 5 to 6 hours
158mm x 75mm x 30mm
Streetwize: Ashburton Road West, Trafford Park, Manchester M17 1RY
For Product Support:
T: +44 (0)161 447 8597
For Trade Enquiries:
T: +44 (0)161 447 8580
www.streetwizeaccessories.com
Technical Specifications
Product Streetwize 12V 400 AMP (Peak)
Emergency Jumpstarter &
Portable Power Bank
EU Registered address: Ace Supply Co (Europe) Ltd. 25 Herbert Place, Dublin 2, D02 A098 Republic of Ireland.
/