Page is loading ...

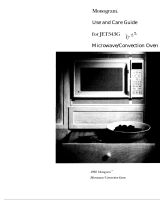
USEandCARE
GUIDE
MODEL RJM 7500
OVEN CAVITY
I 1‘
MODE MIXER COVER
VENTS
PANEL
DOOR HANDLE
MODEL AND SERIAL NUMBER PLATE

SAFETY PRECAUTIONS TO
AVOID POSSIBLE EXPOSURE
TO EXCESSIVE MICRO
WAVE
ENERGY
l
Do not attempt to operate this oven with the door open since
open-door operation can result in harmful exposure to mlcrowave
energy. It IS Important not to defeat or tamper with the safety
Interlocks.
l
Do not place any object between the oven front face and the door or
allow soil or cleaner residue to accumulate on sealing surfaces.
l
Do not operate the oven if it is damaged. It is particularly important
that the oven door close properly and that there is no damage to the:
(1) Door (bent), (2) hinges and latches (broken or loosened). (3) door
seals and sealing surfaces.
l
The oven should not be adjusted or repaired by anyone except
properly qualified service personnel
l
The oven should be checked for microwave leakage by qualified
personnel after a repair is made.
l
Do not operate the oven
I{
the door glass is broken
l
Do not operate the microwave oven with the outer cabinet removed.
l
Do not
attempt to cook eggs in the shell in the microwave
I
oven. Steam
build-up within the egg will cause it to burst.
Damage to the oven or injury to the user may result.
Before You Use Your
Microwave Oven
Whirlpool MIcrowave Ovens are built to last. It IS up to you to make
sure your mlcrowave oven IS properly Installed. used and maintained.
You have to be sure that your WhIrlpool Microwave Oven is
l
installed according to Installation InstructIons
l
installed where it IS protected from the weather
l
Installed on a counter. cart or shelf strong enough for Its weight
l
connected to dn electrlcal circuit according to the Installation
instructlons
l
grounded accor,llnq to the lnstallatlon InstructIons
l
used only for the jot: expected of a home mlcrowave oven
0 not used by !
-lkIferl or others who might not understand how to use
It proper;y

lntroductton
Safety Precautions
Before You Use Your Microwave Oven
Installation Instructions
How a Microwave Oven Works
How to Use Your Microwave Oven
l
To Star.t or Stop Yol~r Microwave Oven
l
Setting the Timer 07 Your r\;llcrowave Oven
l
Cook Power Control
l
To Defrost With Your Mlcrowave Oven
Tips on Microwave Oven Use
l
Do’s, Don Is and Hunts
o Using thr MEAL SENSOR’temperature probe
l
Repiaclng the Over, Light Bulb
0 Care and Cleaning
l
Before Calling for Service
l
If you need service
First
Now
MODEL NL.’
SERIAL N 1
P u R c H A ~5 1
D 4 i i
SERVICE c‘:In,lPAN\i ‘tLLPt1ONt NO
3

lnstalla tion Instructions
First: Take everything out of the oven. Wipe out the inside with a damp
cloth.
Second: Put the microwave oven on a counter, cart, table or shelf
which has enough strength to hold it. For ventilation, leave two inches
between the back of the oven and the wall. Do not block the vents on
top. They are needed for air flow and even cooking.
This oven can be built into a wall or cabinet. Kits RCK703 and RCK707
are available from your dealer for recessed installation. It can also be
installed, with those kits, above Whirlpool RDE, REE and RGE series
single ovens, or Hardwick 7200 single gas ovens. Follow the manufac-
turer’s installation instructions. The RCK710, RCK711 and RCK713 kits
can be used for surface mounting on a wall. The MICRO SHELF’Hood,
Model RJH 3330, is available for mounting the microwave oven above a
range or cooktop.
Third: For your safety, this oven must be grounded. Its cord has the
3-prong grounding plug. DO NOT CUT THE ROUND GROUNDING
PRONG FROM THE PLUG. If the wall receptacle doesn’t have the right
plug-in, or if the plug-in isn’t grounded according to the National
Electrical Code and local codes or ordinances, you must have a
qualrfied electrician put in the right outlet.
Fourth: The outlet must supply 120 volts, 60 Hz., A.C. The microwave
oven will use about 1450 watts when it is operating, so no other major
household appliance should share the circuit.
Fifth: Fill a glass container with about one cup (250 mL) of cold water
and put it in the oven. Turn the oven on full power for 1 to 1% minutes
(see page 7). When the time is up, the water should be heated.
Sixth: If the microwave oven has been stored in a cool room, the fan
may run slower than usual until the oven warms up to room
temperature.
‘Tmk.
How a Microwave Oven Works
Microwaves are like radio waves or radar waves. They will pass
through glass, plastic, paper and most other types of containers that
are not metal. Microwaves bounce off metal and are absorbed by food.
ON When food absorbs microwaves, heat is created because water
molecules in the food are disturbed and bounce around colliding with
each other. Heat is created by this bouncing and colliding like when
you warm your hands by rubbing them together.
When all safety systems are secure (door shut completely and the
START button pushed), electric current is allowed to reach the
magnetron tube. The magnetron tube uses electricity to create
microwaves. They pass through a metal tunnel called the waveguide,
past the wavetuner, into the oven cavity.
Just at the point where the microwaves are about to go into the oven
cavity, Whirlpool Microwave Ovens use a mode mixer (a slow-moving
metal fan) to scatter them. If all the microwaves went in the same
direction, they’d all bounce in the same direction, like water from a
hose. Some parts of the food wouldn’t be touched. The mode mixer
works like a sprinkler to spread microwaves all around.
4

MODE
tiN%ER
,
;I. @lThL
. .(’ l’
‘#f-P :$SjJTTOM
“&IICR~WAVE~
13ouNcE up FROM
THE BOTTOM
How a Microwave Oven Works (cont’d)
The walls, top and bottom of the oven cavity are metal. Mrcrowaves will
*
bounce around inside the oven until they are absorbed by food.
3
5
The food container rests on a sealed-in shelf above the metal bottom of
g
the oven cavity. Because the food is above the metal bottom, s
microwaves can get under it, through the shelf, to bounce up from the b
bottom into the food.
2
The screen in the door is designed to keep microwaves in the oven, yet
allow you to see inside.
2
There are three safety interlock switches designed to make sure that
r
the microwave oven will not operate unless the door is closed and g
microwaves are sealed inside. Do not tamper with any of these g
interlock switches.
w
How to Use
Your Micro wave Oven
TIMER
COOK POWER -
Display
Control Knob
MEAL SENSOR*
TEMPERATURE
CONTROL
Temperature
Control Knob
Probe Indicator.
START BUTTON.
ON INDICATOR
-
‘Tmk.

To Start Your Microwave Oven
1. Push in button on the handle and open the door.
2. Place the food in the oven and close the door. Door will
automatically latch.
3. Set the MEALTIMER’ to the desired cooking time. The light inside
the oven will come on.
4. Turn the Cook Power control until the desired power level shows in
the window. (See page 7 for directions on how to set Cook Power
control.)
5. Push the Start Button. The “On” indicator will glow. At the end of
the cooking time a bell will ring and the microwave oven will
automatically turn off.
To Stop the Oven.. .
1. Turn the timer to 0O:OO.
or
2. Push in button on door handle and open door.
To Restart the Oven.. .
l
Close the oven door.
l
Set MEALTIMER’ to desired cooking time.
l
Push the Start button.
l Tm k.
Setting The Timer On Your
Microwave Oven
Use the digital timer to set your microwave oven to cook with time.
l
Push and turn the knob clockwise to set cooking times for less than
10 minutes.
NOTE: When setting cooking times for less than 20 seconds, turn the
timer knob to 20 seconds first, and then back to the desired
time.
l
Turn both the wheel and knob to set cooking times longer than 10
minutes. The timer wheel advances the timer 10 minutes at a time. Set
the wheel after the timer knob is set at 15 seconds or more.
l
Turn timer wheel up to set 10, 20,30,40 or 50 minutes. Turn the wheel
down to decrease time. Turn the timer knob counterclockwise to
decrease times set for less than 10 minutes.
EXAMPLE: To set timer for 22 minutes and 30 seconds (22:30):
1. Push and turn knob until 2 minutes and 30 seconds
appear in the display.
2. Turn timer wheel up until the display shows 22 minutes
and 30 seconds (22:30).
6

Cook Power Control
Sin,r
YOL, i\,
probat~Ny use ‘:lIcrQwave oven recipes from magaztnes
or othe: cookbooks the followng InformatIon about tne COOK
POWER s~~t~~ncls WI/I t’p useftj
HI
lOOa of /.1/i poiber
MED HI
YOoo of ~&III power
MED
50”~ of fL,II power
MED LO
30”~ of full power (DEFROST)
LO
15”: of f!ilI power
To Defrost With Your
Microwave Oven
To defrost foods In your mlcrowave oven, follow these simple steps.
1. Place food to be defrosted In the oven and close door securely.
2 Set timer for amount of defrost time desired
3 Turn Cook Power knob to Medium-Low and Defrost’ WIII appear in
display above the Cook Power knob.
4. Push Start button The microwave oven will automatically turn off at
the end of the time Indicated
5. Some standing time
IS
usually necessary for complete thawing of
foods before cooking

Some
Do’s, Don’ts, and Hints
DON’T
l
.,I ltir mlc-owave ot,e~i ~,sei 1450 \~al!c !I 71.11 i o\;f‘r
i:
~II t snare an outlet with another operating
-!;pliance
l
tip careful that food or utensils do not push against the, plastic mode mixer cover Don t remove the cover.
9 &i,irsh abrasives may scratch the oven flnls’i
l
.:on t use dishes or Lltensls wth metal tr#m staples
losures or liners
‘cletals should not be used in
the
over- unless espcic ;‘lly dlrected IV the cookbook
l
:?ways have food In the microwave oven
nefore oper,iting it to avoid possible damage to the oven
l
‘5tore nothing in the rnlcrowave oven
l
scorched or burned foods are overcooked Continut‘d cooking
can only burn them further and may cause
*hem to flame
especially potatoes corn-on-the-cob and snacks
*Eon t operate oven by holding Start button In
HINTS:
1 Most of the oven’s weight
IS on
one side ;the side with the controls) and It may be awkward to move.
2 INDICATOR may flicker when the mlcrowave oven
IS
on This
IS
normal
3 ‘f your line voltage
IS
low (less than 120 volts). heating and cooklng times may have to be longer
4 Uhen using recipes other than those from the MICRO MENUS’ Cookbook, you may have to experiment
w!?? cooklng times and power level settings Cook foods according to the times and quantities given in the
Whirlpool cookbook As In conventlonai
cooklng. over-cooking can burn food and may flame Shorten
cooking time for smaller quantltles
5 Popcorn should be made only In a popper deslgned tor microwave use Follow InstructIons received with
!hr popper The results are the responsltllty of the popcorn popper manufacturer
6 L;qulds heated In certain containers may :)verheat and flash into vapor Water can splash out of the
ci Ttalner and make a loud noise This IS not dangerot.s and wlli 701 harm the oven You may wish to avoid
us f g such containers for heating Ilquids
zqd1’1
7 DO NOT OVERCOOK POTATOES. At tklt e-15 of The ecommended cooking time the potatoes shouid be
s~~.~htlv firm Wrap potatoes In foI and set asIce for flvt ,nlnutes Potatoes
WI//
flnlsn cooking while standing
S, 1-e potato varieties may cook faster thi- s’heri 0,
c’rcoo+lnq may result In poor flavor and texture and
pc V,:toes may scorch 01 flame
8
‘, not store utenslis !rl the o:t7n
9
‘#e hot pads
sor-7.0 utensils ~dri be r ,-:
’ k?
riot block the vrr;!s Nor~;a~ ?xhaoL* ~v:.I:I cc’ k,’ :I I‘, vt:rltec r’<lt the top anti back Dependlng on the
6 !., I /
-exhaust may be ‘1 -t
.

Using the MEAL SENSOR*
Temperature Probe
The temperature probe helps you cook foods to the temperature you
set. The microwave oven turns off automatically when the probe
senses the temperature you set.
When you use the probe, you do not need to set a time. The recipes
include temperature settings.
To use the Probe:
1. Put the temperature sensor end of the MEAL SENSOR temperature
probe into the food you are heating or cooking. It is important to place
l/3 of the probe in the center of the thickest part of the food. The oven
may turn off too fast or too slow when using the probe if the probe is
placed near a bone, in fat, in an air pocket or away from the center of
the food. It may be necessary to relocate the probe and restart the
oven.
2. Place the food and the probe into the microwave oven. Plug the
probe into the side of the oven. Close the door.
3. Set Cook Power, if desired.
_
4. Turn the MEAL SENSOR control to the final cooking temperature.
5. Push Start button. The Probe indicator and the On indicator will
glow.
When the probe senses the final temperature, a buzzer will sound, and
the oven will turn off.
Remove the food and the probe from the microwave oven using hot
pads.
‘Tmk.
Cleaning and Storing the Probe
1. Wipe the probe with a hot. sudsy cloth. Use a plastic scouring pad
to
remove stubborn foods. Do not immerse the probe in water or wash in
the dishwasher. Be careful not to kink the cord.
2. Store the probe carefully when not in use. Protect the sensor with
the shielding tube.
3. Do not store probe in microwave oven.
4. Rough handling may cause damage to the probe and result in
inaccurate temperature readings.

Probe Use Hints
DO:
l
Do use hot pads when removing the MEAL SENSOR probe from the
microwave oven after cooking.
l
Do stir foods when recommended during cooking so they will cook
more evenly. Reiocate the probe in center of dish after stirring.
l
Do stir soups, casseroles, and drinks before serving.
l
Do let roasts stand, covered with foil after cooking.
Remove foil before returning roast to microwave oven if additional
cooking is needed.
l
Do use clip on probe to shorten cable when needed.
DON’T:
l
Don’t use metal cooking utensils when using the probe.
l
Don’t let MEAL SENSOR probe touch sides, bottom, or door of oven
interior when in operation.
i Don’t use paper, plastic wrap, or plastic containers in the oven when
using the probe.
* Don’t use probe in conventional oven.
w Don’t force probe into frozen foods.
*Don’t use MEAL SENSOR probe for foods like stews that require
simmering.
l
Don’t let foil used for shielding touch the probe. (Do keep foil at least
34 inch (6mm) away from probe. Secure foil with wooden picks.
Remove foil if arcing occurs.)
* Don’t let the cable of the MEAL SENSOR temperature probe touch
the plastic mode mixer cover in the top of the oven.
10

.
Tips
l Cass;~~ de ,
ooke : using the MEAL SENSOR probe should be made
from ~)r-~::sook.eci foods Do not use raw meats, raw vegetables and
cream
sa~lces III
casseroles.
l
Dry i-asseri)les Jc, ?ot work well
l
tlr ca%seroiez fo, even cooking -the liquid heats faster than solid
foods
01 haw !~o;‘c’l I‘~IS~ ,rc/tis !n th? mlcrowave oven before Inserting the
21 i-lbe
.!f yi:,.. :‘F’
.oh 171.; I?C!IL dual servtngs such as mugs of soup, check
:Ih;‘ (jr;)f;f. y,k,‘~lni-; I:\
Yr~r>r.-il of th+ Items - all the mugs may not heat at
I,;? cja,*ic> ,.Z!.‘.
. For :;o.,py “yxicll. 5
:laiar>ce :QC probe on a wooden spoon placed
3’ ‘OS5 tilt+
GlSh
0 _7r\q medt i::;jf ‘IIIX’ I~C eon t vVork well
l
_c’cate !he lalt,f ar 1 bony areas of roasts Be sure the probe IS placed
: the cer-~!e-r r)f the argest muscle (meat area), not touching bone or
fat
l
L,,oast> .>ri(i~ld be .?efrosted before roasting (see the defrost chart in
-your
Micrz
Menus Cook Book).
l
FiememDer that roasts may varv tn size, shape and compositlon. Use
the timl?ys
for rnlnotes per pound as a guldeltne as well as the MEAL
SENSOR pr-c:,be
@ Starchv veiletable; tend to stlcic to the MEAL SENSOR probe.
l
30 not else the ME.4.L SENSOR probe when cooklng poultry. Because
af the
hioh nroport~,,n of bone and the shape of poultry, there is no
ri 11.e ,.~h~re “!tt? moat ;j, ‘risk enough to place the probe proper!y
11

Mea8 Sensor Temperarure Probe
Food
Canned Food
Casseroles
Chowders
DIPS
Meat Loaf
(beef)
Poultry
Sandwiches
-soup
MEAL SENSOR
Probe
Setting
165 F to
170 F
Tlps
Place probe into center of mug or
dish. Set Cook Power control at
HIGH
and MEAL SENSOR control at
165°F to 170°F.
170 F
Place probe in center of food. Set
Cook Power control at
HIGH
and
MEAL SENSOR control at 170°F.
Use
MEDIUM
for very thick
foods such as baked beans.
170 F to
175 F
Place probe into center of casserole.
Set Cook Power control at
MEDIUM
HIGH
and MEAL SENSOR control at
170°F to 175°F. Use
MEDIUM
for very
thick mixtures. Stir once or twice.
180 F
140 F
Place probe in center of chowder.
Set Cook Power control at
MEDIUM
HIGH
and MEAL SENSOR control
at 180°F. Stir once or twice.
Place probe in center of dip.
Set Cook Power control at
MEDIUM
and MEAL SENSOR control at 140°F.
170 F
Place probe into center of meat
loaf. Set Cook Power control at
MEDIUM HIGH
and MEAL SENSOR
control at 170°F.
Do not use the MEAL SENSOR probe when cooking poultry Because
of the high proportlon of bone and shape of poultry, there IS no
place where the meat IS thick enough to place the probe properly
110 F
Place sandwich on paper napkin.
Insert probe from side so tip is in
.
center of filling. Set Cook Power
.:, __”
control
at MEOlUlvl and MEAL SENSOR
,s c : T’~ I
\ . . ; :
control at 110°F.
_.
_-
. I
@$y~~ .:’ ‘:,..:‘;,
Thick sandwiches work best.
165 F to
Place probe, balanced on wooden spoon,
;. ~
:.
170 F
in center
of
soup. Set Cook Power
control at
HIGH
and MEAL SENSOR control
at 165°F to 170°F. Stir once or twice.
12

ROASTING
Beef Standing Rib Roast
1, Tie 4 to 6-pound roast with heavy string. Cover ends of bones with
foil. Place roast, bone side up, on microwave roasting rack or inverted
saucers in 12 x 7% x 2-inch baking dish.
2. Calculate approximate cooking time (10 to 11 minutes per pound).
Cook at MEDIUM HIGH for half the cooking time.
3. Turn roast fat side up and give baking dish a half turn.
4. Insert MEAL SENSOR temperature probe into center of largest
muscle, not touching fat or bone (see diagram at left). Set MEAL
SENSOR control at 125°F.
5. Cook at MEDIUM HIGH till MEAL SENSOR control registers 125°F.
6. Cover with foil and let stand 5 to 10 minutes. Using a separate
thermometer, temperature should read 130°F to 135°F.
Beef Rolled Rib Roast
1. Tie 4 to 5-pound roast with heavy string. Place roast, fat side down,
on microwave roasting rack or inverted saucers in a 12 x 7’/2 x 2-inch
baking dish.
2. Calculate approximate cooking time (12 to 13 minutes per pound).
Cook at MEDIUM HIGH for half the cooking time.
3. Turn roast fat side up and give baking dish a half turn.
4. Insert MEAL SENSOR temperature probe into center of largest
muscle, not touching fat or bone (see diagram at left). Set MEAL
SENSOR control at 125°F.
5. Cook at MEDIUM HIGH till MEAL SENSOR control registers 125°F.
6. Cover with foil and let stand 5 to 10 minutes. Using a separate
thermometer, temperature should read 130°F to 135°F.
Pork Bone-In Loin Roast
1. Place 4 to 5-pound roast, fat side down, on microwave roasting rack
or inverted saucers in 12 x 7’/2 x 2-inch baking dish.
2. Calculate approximate cooking time (10 to 11 minutes per pound).
Cook at MEDIUM for half the cooking time.
3. Turn roast fat side up. Brush with kitchen bouquet.
4. Insert MEAL SENSOR temperature probe into center of largest
muscle, not touching fat or bone (see diagram at left). Set MEAL
SENSOR control at 165°F.
5. Cook at MEDIUM till MEAL SENSOR control registers 165°F.
6. Cover with foil. Let stand for 5 to 10 minutes. Using a separate
thermometer, temperature should read 170°F.
13

_ _.. - ----
Pork tione~ess Loin Roast
or 1rlbt~:;t'g .,a,j:.<-is :1 12 >
7’2 x 2-Inch bakrng drstI
2. Caiculate approximate
coGkIng time (14 to 15 mrnutes per pound).
Cook at
MEDIUM
for half the CGGklng time.
3. Turn roast fat side up Brush with kitchen bouquet
4 Insert MEAL SENSOR temperature probe into center of largest
muscle
not
touching fat or bone (see dtagram at left). Set MEAL
SENSOR control at 165 F
5.
Cook at
MEDIUM
till MEAL SENSOR control registers 165 F.
6 Cover with foli. Let stand for 5 to 10 minutes. Using a separate
thermometer. temperature should read 170 F.
Leg of Lamb
1, Place 4 to 6-pourlo roast fat sile dovvn. on mrcrGwave roasting rack
or Inverted saucers in 12 x 7’2 x 2-Inch baking dish Cap shank end with
fGli
2
CalcLltate approximate :;0oklng
time 115 to 16 minutes per pound).
Cook at
MEDIUM
for half the cooking time
3 Turn rGast over and give baking dish a half turn. Brush with kitchen
bouquet
4 Inser? MEAL SENSOR Temperature
probe
into center of largest
muscle nGf
?Guchlng
fat zr bone (see diagram at left) Set MEAL
SENS0R control at 175 F
5.
COG” at
MEDIUM till
MEAL SENSOR controi registers 175 F.
6. Cover *Jith foil Let stand 5 t,
r. IO minutes A separate thermometer
should read ‘80 F
Canned Ham
1. Tie 3 to 5-pound ham with heavy stnng Cap top and bottom edges of
ham with strips of foil Place ham fat srde down. on microwave oven
roasting rack or inverted saucers In 12 x 71% x 2-inch baking dish.
2. Calculate the approximate cooklng time (9 to 10 minutes per pound).
Cook at
MEDIUM
for half the cooking time.
3. Turn ham over; give dish half turn.
4. Insert MEAL SENSOR temperature probe Into center Gf largest
muscle, not touching fat or bone (see diagram at left). Set MEAL
SENSOR control at 120 F.
5.
Cook at
MEDIUM
hII MEAL SENSOR control regrsters 120 F.
6. Cover with foil Let stand 5 to 10 minutes. A separate thermometer
should read 130 F.
14

OVEN REAR
ACCESS PANEL
SCREW
I
LOCATION
OF
LIGHT BULB
HOW TO REPLACE
OVEN LIGHT BULB
1. Unplug the oven power cord
2 Remove screw and access panel shown in rllustratron
3. Replace bu!b with a 40 watt appliance bulb only. (Bulb can be seen
with the access panel removed.)
4. Replace the access panel. The panel has tabs at the top. Insert the
tabs In the top of the opemng (behind the enclosure) to hold the panel
In place
5. Reolace the screw
CLEANING
YOUR MICRO WAVE OVEN
Your microwave oven is designed for easy cleaning. Most soils require
only wiping with warm sudsy water. For cooked-on or other stubborn
soils, boil a cup of water (250 mL) in the oven for 2 or 3 minutes. The
steam will condense and soften the soils. They should be less stubborn
after this treatment.
Do not operate the microwave oven with soil or any other objects
between the door and the oven frame.
Do not use abrasive cleansers or scouring pads to clean the
microwave oven interior or inside of the door.
15

If you need service or help, we suggest you
follow these three steps:
1. Before calling for service.. .
Performance problems are sometimes
caused by little things you can correct
without tools. Before you call for service,
check this list.
A. If the oven and control panel lights
won’t turn on at all:
. Is the unit plugged into the outlet
firmly?
. Have you checked to be sure a fuse or
circuit breaker is not open?
6. If microwave power won’t come on:
. Are all the controls set properly?
. Have you pressed the START button?
l
Is the door firmly closed3
C. If the cooking times seem too long:
. Is the line voltage to your home low or
lower than normal? The public utility
in your area may be able to tell you if
the voltage is low.
. Are you allowing more cooking time
when you increase the quantity (or
number) of food being cooked In the
microwave oven?
. Is the Cook Power set at the desired
power?
D. If the oven turns off too fast or too slow
when using the probe:
. Is the sensing end of the probe (first
l/3) placed in the center of the food or
beverage?
. In meats, is the probe placed in the
center of the largest muscle (meat
area), not touching bone or fat and
have you allowed for standing trme?
(It may be necessary to relocate the
probe and restart the oven )
. Is the Cook Power set at the desired
number?
. Is the probe plugged securely Into the
side of the oven?
. Has the proper Cook Temp been set?
Whirlpool
CORPORATION
Benton Harbor, Mlchlgan Aulomarlc Washers, Clothes Dryers,
FWZi?U,
Refrigerator Freezers. Ice Makers, Dishwashers,
Eudt I” Ovens and Surface Units, Ranges. Microwave Ovens.
Compactors, Room AII Condlttoners, Oehumldlflers, Central
Hearmg and AN Condlrmnlng Systems
2. If you need service.. .
Whirlpool Franchised TECH-CARE’ Service
It’s reassurrng to know
that Whrrlpool stands be-
hind your new appliance
with its network of
franchised TECH-CARE”
servtce
companies.
TECH-CARE service IS
desrqned to fulflff your
SYMBOL ”
warranty and provrde the
OF OUALITY
after-warranty servrce
SERVICE
and maintenance to keep
your new appliance In
top notch condrtron. anywhere In the Unrted
States. WhIrlpool wants you to get the servrce
that you would expect on qualrty home
appliances
If you move..
To make sure that your applrance is correctly
installed and to Insure its continued satisfactory
operation. please telephone your nearest TECH-
CARE’ service company for installation or to get
the name of a qualified Installer. (Installatron cost
will, of course, be pard by you.)
Or, if you need service..
1.
Call the dealer from whom you purchased the
appliance or a WhIrlpool franchised TECH-
CARE service company. He is In the Yellow
Pages of your telephone drrectory listed under
Refrigerators and Freezers - Reparrrng or Ser-
vrcrng. (Also under Washers, Dryers - Reparr-
ing or Servrcing.)
2. Should you not find a listing, dial free, the
Whirlpool COOL-LINE” service assistance tele
phone number (600) 253-1301. When calling
from:
Michigan Dial (600) 632-2243
Alaska&Hawaii......... Dial(600)253-1121
3. If you have a problem.. .
Call WhIrlpool Corporatron in Benton Harbor at
the COOL-LINE service assistance telephone
number (see step 2) or write.
Mr. Stephen E. Upton,
Vrce Presrdent
Whirlpool Corporatron
Admlnrstratrve Center
2000 US 33, North
Benton Harbor, Michigan 49022
FSP IS o regrstered trademark
0
of Whirlpool corporation for
quollty parts took for this
FSP
symbol of quoltty whenever
you need a replacement part
for your Whlrlpoo appliance
FSP replacement parts
WIII fit right and work rrght. because they are
made to the same exacting speclkcatlons
used to build every new WhIrlpool appliance
REMEMBER.. . If you must
call or write, please provide: your name, address, telephone number, type
of appliance. brand, model. serial number, date of purchase, the dealer’s name, and a complete
description of the problem. This Information is needed in order to better respond to your request for
assistance.
Part No.
310037 Rev C
/