Page is loading ...

Animo
A 100 W/A 200 W09/99
fig. 4
Animo
aromatic
Animo
A 100 W
0
1
0
1
Animo
Coffeemakers
Animo
Coffeemakers
D1=490
D=370
40
H=600
B=385
135
255
120
H=455
E
W

Animo
09/99A 100 W/A 200 W
Dit apparaat voldoet aan de EMC-richtlijn 89/336/EEG, 92/31/EEG en de
laagspanningsrichtlijn 73/23/EEG.
This appliance is in accordance with the EMC-Directive 89/336/EEC,
92/31/EEC and the low voltage directive 73/23/EEC.
Dieses Gerät wurde in Übereinstimmung gemäß EMV-Richtlinie 89/336/EWG,
92/31/EWG und Niederspannung-Richtlinie 73/23/EWG gebaut.
Cet appareil est conforme à la directive d'EMC 89/336/CEE, 92/31/CEE et à
la directive de basse tension 73/23/CEE.
Animo behoudt zich het recht voor om onderdelen op elk gewenst moment te wijzigen, zonder voorafgaande of directe kennisgeving aan de afnemer.
De inhoud van deze handleiding kan eveneens gewijzigd worden zonder voorafgaande waarschuwing. Deze handleiding is geldig voor de machine in
standaarduitvoering. Animo kan derhalve niet aansprakelijk worden gesteld voor eventuele schade voortvloeiende uit van de standaard uitvoering
afwijkende specificaties van de aan u geleverde machine. Voor informatie betreffende afstelling,onderhoudswerkzaamheden of reparaties waarin
deze handleiding niet voorziet, wordt u verzocht contact op te nemen met de technische dienst van uw leverancier. Deze handleiding is met alle
mogelijke zorg samengesteld, maar Animo kan geen verantwoording op zich nemen voor eventuele fouten in dit boek of de gevolgen daarvan.
Animo has the right to change parts of the machine at any time without advice or direct announcements to the client. The contents of this manual can
also be changed without any announcements. This manual is to be used for the standard model/type of the machine. Thus Animo cannot be held
responsible for any damage resulting from the application of this manual to the version delivered to you. For extra information on adjustments
maintenance and repair, contact the technical department of your supplier. This manual has been written very carefully. However ,Animo cannot be
held responsible neither for mistakes in the book nor for their consequences.
Animo behält sich das Recht vor, Einzelteile ohne vorherige Bekanntgabe an den Kunden zu ändern. Der Inhalt dieser Anleitung kann ebenfalls ohne
vorherige Bekanntgabe geändert werden. Diese Anleitung gilt für die Standardausführung der Maschine. Animo haftet daher nicht für Informationen
über Einstellungen, Wartungsarbeiten oder Reparaturen, die nicht in dieser Anleitung enthalten sind. Wenden Sie sich bitte gegebenenfalls an den
Kundendienst Ihres Händlers. Diese Anleitung wurde mit größtmöglicher Sorgfalt zursammengestellt. Animo haftet jedoch nicht für etwaige Fehler in
dieser Anleitung oder für die Folgen solcher Fehler.
Animo se réserve le droit de modifier les pièces à n’importe quel instant, sans avis préalable et sans obligation de notification au client. Le contenu de
ce manuel est également sujet à modification sans avis préalable. Ce manuel s’applique au modèle standard de la machine. Par conséquent, Animo
n’est past responsable pour les dommages éventuels découlant de l’application de ce manuel aux modèles non standard. Pour les renseignements
sur certains réglages, les travaux d’entretien ou réparations qui ne seraient pas traités dans ce manuel, Animo ne peut ètre tenu responsable des
erreurs éventuelles ni des dommages qui en dècouleraient.

Animo
A 100 W/A 200 W09/99
1
GB
TABLE OF CONTENTS
1. GENERAL DESCRIPTION ........................................................................................ 2
2. TECHNICAL DETAILS ............................................................................................. 2
3. INSTALLATION ....................................................................................................... 3
4. CONTROL PANEL ................................................................................................... 4
5. PREPARATION BEFORE USE ................................................................................. 4
5.1 A100 W (manual filling) ..................................................................... 4
5.2 A200 W (automatic filling) ................................................................ 5
6. HOW TO PREPARE FILTER COFFEE ..................................................................... 5
7. HOW TO DRAW OFF HOT WATER ........................................................................ 6
7.1 A100 W (manual filling) ..................................................................... 6
7.2 A200 W (automatic filling) ................................................................ 6
8. MAINTENANCE ....................................................................................................... 6
8.1 How to descale the filter coffee unit ................................................ 6
8.2 How to descale the hot water unit ................................................... 6
9. TEMPERATURE SECURITY .................................................................................... 7

Animo
2
09/99A 100 W/A 200 W
These operating instructions should be read carefully to ensure that your coffee machine is operated
correctly and safely.
1. GENERAL DESCRIPTION
The Aromatic A100 W is a semi-automatic coffee machine. It operates on the principle of instantaneous
water heating thus eliminating warm-up time. The machine consists of a filter coffee unit and a separate
water heater with a tap. The machine’s hot water unit can be used to make tea, coffee, cocoa, cup-a-soup
etc. The Aromatic A200 W is an automatic model with a permanent connection to the water supply.
Figure 1.
A -Lower hot plate F - Water reservoir for hot water unit
B -Glass jug 2x (art.nr. 08208) G -Hot water reservoir
C - Removable filters (90/250) 2x (art.nr. 08635) H -Switch panel
D -Upper hot plate I -Hot water tap
E -Water reservoir for filter coffee unit
The machine is supplied with the following accessories:
- Measuring spoon
- Approx. 50x paper coffee filters 90/250 (art.nr.01088 1000 pcs.)
- Water supply hose approx. 1.25 m long * A200 W
- 2 sachet coffee detanning agent (100 sachets for 10 grams art.no. 49009)
- 2 sachet descaling agent ( 48 sachets for 50 grams art.no. 49007)
- Manual
Plastic and stainless steel, or completely stainless jugs can be supplied at an additional charge
on request. A matching drip tray is also available (art.nr. 13020).
2. TECHNICAL DETAILS
Type: A100 W/A200 W : 1N~ or 2N~ (two phase)
Approx. hourly capacity coffee : ± 15 L/h ± 20 L/h
Approx. hourly capacity hot water : ± 15 L/h ± 20 L/h
Buffer supply coffee : 3.6 L 3.6 L
Buffer supply hot water (approx) : 3 L 3 L
Warm up time hot water (15-98˚C) : 15 min 11 min
Coffee preparation time (1.8 Liter) : ± 7 min ± 5.5 min
Minimum amount of coffee : 1/2 jug 1/2 jug
Level detection : elektronic elektronic
Paper filter size : 90/250 90/250
lenght of electric cable : 1.4 m 1.4 m
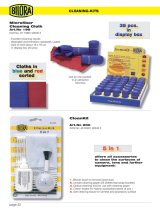
Dimension : See fig.4 See fig.4
A200 W only
Water connection : G 3/4" G 3/4"
Min. - Max. water pressure : 1-8 bar 1-8 bar
Power supply (50/60 Hz)
Capacity Fuse Capacity Fuse
220V 1 live/neutral 3100W 16A 380V 2 live/neutral 4000W 16A
230V 1 live/neutral 3375W 16A 400V 2 live/neutral 4375W 16A
240V 1 live/neutral 3675W 15A 415V 2 live/neutral 4750W 15A
Technical alterations are reserved

3. INSTALLATION
Before installing the machine, carry out the
following steps:
• Position the machine on a firm and even
surface so that it can be connected to the
electricity and water supplies.
• The A200 W with automatic filling should
be positioned near a manually-operated
water tap. The water supply hose is 1.25
metres long.
• When positioning the machine, bear in
mind that it is equipped with an overflow
device.
The machine should be connected as
demonstrated in the diagrams shown below,
depending on the machine’s electrical fittings.
• (Fig. 5) For 220V-240V 1 live/neutral with
plug socket.
• (Fig. 5) For 220V -240V 1 live/neutral
(3 core electric cable).
• (Fig. 6) For 380V-415V 2 live/neutral
(4 core electric cable).
The following remarks apply to figure 5:
• If the plug fitted on the machine cable
does not fit in your socket, replace it with
a new plug that does fit.
• The replaced plug should be disposed of
as it can be dangerous if plugged in a socket.
The following points should be observed when
wiring a new plug:
• The green/yellow-coloured wire
(“EARTH”) should be connected to the
terminal which is either marked with the
letter “E”, the “earth” symbol ( ), or
coloured green or green/yellow.
• The blue-coloured wire (“NEUTRAL”)
should be connected to the terminal which
is either marked with the letter “N” or
coloured black.
• The brown-coloured wire (“LIVE”) should be
connected to the terminal which is either
marked with the letter “L” or coloured brown.
IMPORTANT !
The three core mains cable (fig. 5) has the
following wiring code:
Green/Yellow - Earth
Blue - Neutral
Brown - Live
Animo
A 100 W/A 200 W09/99
3
fig. 5
Green/Yellow - Earth (E)
Blue - Neutral (N)
Brown - Live (L)
fig. 6
Green/Yellow - Earth (E)
Blue - Neutral (N)
Brown - Live 1 (L1)
Black - Live 2 (L2)
WARNING
* Make sure that the mains cable does not come into contact with the hot plates which become
extremely hot when is use.
* Always remove the plug from the socket if the machine has to be opened for repair or
maintenance.
* Do not position the machine in areas where the temperature drops below freezing point
because there is always water left in the system.
* Always plug the machine into an earthed wall socket.
* Do not submerge or spray the machine.
* Have all repairs carried out by a specially trained technician.
* If the machine is not used it is advisable to remove the plug from the socket and the tum off
the water tap *. (* model A200 W).
!

Animo
4
09/99A 100 W/A 200 W
4. CONTROL PANEL
A100 W (manual filling) (fig. 2)
• filter coffee unit
A - Alarm lamp for heating element
B - On/off switch
E - On/off switch for upper hot plate
F - On/off switch for lower hot plate
• hot water unit
G - Alarm lamp for filling up
H - Alarm lamp for heating element
I - On/off switch
A200 W (automatic filling) (fig. 3)
• filter coffee unit
A - Alarm lamp for heating element
B - On/off switch
C - Selection switch for full or half jug
D - Start switch
E - On/off switch for upper hot plate
F - On/off switch for lower hot plate
• hot water unit
H - Alarm lamp for heating element
I - On/off switch
5. PREPARATIONS BEFORE USE
Before operating the machine, carry out the
following steps:
5.1A100 W (manual filling)
• For the filter coffee unit:
1. Pour a jug of cold water in the cold water
reservoir (fig. 1E).
2. Wait for 3 minutes until the water has
entered the entire system.
3. Slide the removable filter into the machine
and place an empty jug on the lower hot
plate.
• For the hot water unit:
4. Remove the round black and stainless steel
safety lid from the hot water reservoir
(fig. 1G).
5. Fill the hot water reservoir with 2 jugs of
water. The water will rise into the cold
water reservoir (fig. 1F). Then fill the rear
cold water reservoir with one more jug of
water. There is an overflow device in this
reservoir to prevent the hot water reservoir
from being overfilled.
6. After you have followed the instructions
above, place the plug in the socket and
turn the machine on using the main switch
(fig. 2B) in the filter coffee unit.
7. The orange alarm lamp (fig. 2A) on the
filter coffee unit will now light up until the
machine has emptied. When the light goes
out again the coffee unit is ready for use.
8. Switch on the hot water unit using the main
switch (fig. 2I);
9. The orange alarm lamp (fig. 2H) on the hot
water unit will now light up until the hot
water reservoir has reached the correct
temperature. If the round orange alarm light
(fig. 2G) lamp lights up, the cold water
reservoir (fig. 1F) needs refilling. Refill until
the lamp goes out.
10. Replace the lids on the hot water reservoir in
the reverse order.
11. The machine is now ready for use.

5.2A200 W (automatic filling)
• For the filter coffee unit:
1. Connect the supplied water hose to the
coupling nut swivel joint at the rear of the
machine and to a manually-operated
water tap. ATTENTION! Use cold water only.
2.. Pour a jug of cold water in the cold water
reservoir (fig. 1E).
3. Wait for 3 minutes until the water has
entered the entire system.
4. Slide the removable filter into the machine
and place an empty jug on the lower hot
plate.
• For the hot water unit:
5. Remove the round black and stainless steel
safety lid from the hot water reservoir
(fig. 1G).
6. Fill the hot water reservoir (fig. 1G) with 2
jugs of water.
7. After you have followed the instructions
above, place the plug in the socket.
8. Turn on the filter coffee unit using the
switch (fig. 3B).
9. Turn the selection switch (fig. 3C) to the
desired amount.
10. Press the start switch (fig. 3D) and the water
reservoir will fill up.
11. The orange alarm lamp (fig. 3A) on the filter
coffee unit will now remain lit until the water
has run through. The filter coffee unit is
ready for use when the lamp has gone out
again.
12. Switch on the hot water unit using the main
switch (fig. 3I).
13. The water reservoir will fill up with water.
14. The orange alarm lamp (fig. 3H) in the hot
water unit will light up until the hot water
has reached the appropriate temperature.
15. Replace the lids on the hot water reservoir
in the reverse order.
16. The machine is now ready for use.
6. HOW TO PREPARE FILTER
COFFEE
General
1. Place a paper coffee filter (90/250) with the
appropriate amount of coffee (fine ground
for filter coffee units) in the removable filter.
The amount can be measured with the
supplied measuring spoon. Generally
speaking, you will need about 70 - 80 gram
per 1.8 l jug.
2. Place an empty jug on the lower hot plate.
3. Check that the machine is switched on, main
switch on (fig. 2B & 3B), and switch on the
lower hot plate (fig. 2F & 3F).
A100 W (manual filling)
4. Fill the reservoir with a jug of cold water.
Position the jug with lid on the hot plate
under the filter.
A200 W (automatic filling)
4. Turn the selection switch (fig. 3C) to the
required amount.
5. Press the start switch (fig. 3D).
General (continue)
6. The orange alarm lamp (fig. 2A & 3A) on
the filter coffee unit will now light up and
the filter coffee will be prepared.
7. When the alarm lamp goes out again, the
hot water supply will stop. After about 1
minute, all of the coffee will have poured
through the filter.
8. Stir the coffee in the jug briefly and pour,
or place the full jug on the upper hot plate.
The upper hot plate can be switched on
separately using the appropriate switch
(fig. 2E & 3E).
9. The machine is ready to be used again after
the removable filter has been cleaned.
Animo
A 100 W/A 200 W09/99
5

Animo
6
09/99A 100 W/A 200 W
7. HOW TO DRAW OFF HOT
WATER
7.1 A100 W ( manual filling)
1. Check that the rear water reservoir is filled
with water.
2. Switch on the heating using the main switch
(fig. 2I).
3. The orange alarm lamp (fig. 2H) will light
up when the heating process has begun.
4. When the alarm lamp (fig. 2H) goes out, the
water has reached the correct temperature
and the hot water tap can be used.
5. When the round alarm lamp lights up
(fig. 2G), the cold water reservoir should be
filled until the round alarm lamp goes out
again.
Attention! The hot water heating
reservoir will turn off when the round
alarm lamp lights up. The heating will
switch back on again as soon as the rear
reservoir has been refilled.
7.2 A200 W ( automatic filling)
1. Switch on the heating using the main
switch (fig. 3I).
2. If the cold water reservoir contains
insufficient water, it will always refill
automatically to the correct level.
3. The orange alarm lamp (fig. 2H) lights up
when the heating process starts.
4. When the alarm lamp (fig. 2H) goes out, the
water has reached the correct temperature
and the hot water tap can be used.
8. MAINTENANCE
• The machine can be cleaned with a clean,
damp cloth.
• The jug and removable filter can be
cleaned in the same way.
Attention! The removable filter should not
be placed in a dishwasher.
• Coffee stains in the jugs can be removed
using Animo coffee stain remover.
• The machine can leave lime deposits
during use. The machine should be descaled
regularly in order to ensure that it functions
efficiently. Animo scale remover is recom
mended.
It is advisable to descale both the filter coffee
unit and the hot water unit at the same time.
Animo supplies both products in the
following quantities:
- Coffee detanning agent
100 sachets for 10 grams art.no. 49009
- Descaling agent
48sachets for 50 grams art.no. 49007
8.1 How to descale the filter coffee
unit
General
1. Switch off the machine (fig. 2B & 3B).
2. Slide the removable filter into the machine
3. Place an empty jug under the lower hot
plate.
4. Dissolve 1 sachet for 50 grams of Animo
descaling agent remover in 1 litre of
lukewarm 60 -70˚C water (see instructions
for use on the labelling).
WARNING
- Stay near the machine while
maintenance is being carried out.
- When descaling the machine, always
observe the instructions for use
provided with the descaling agent.
- When descaling the machine, it is
advisable to wear safety goggles and
protective gloves.
- Allow the machine to run through at
least three times after it has been descaling.
- Wash your hands thoroughly after
descaling.
- The machine should not be submerged
or sprayed.
- Have all repairs carried out by a
specially trained technician.
!

A100 W (manual filling)
1. Pour 1 litre of Animo descaling agent into
the reservoir (fig. 1E) and switch on the
machine (fig. 2B). The solution will now
begin to flow through the system.
2. Leave the reservoir lid open!
A200 W (automatic filling)
1. Pour 1 litre of Animo descaling agent
remover into the reservoir (fig. 1E) and
switch on the machine (fig. 3B).
2. Turn the selection switch (fig. 3C) to the
half position and press the start button
(fig. 3D). The solution will now begin to
flow through the system.
3. Leave the reservoir lid open!
* Attention! If the machine begins to
steam heavily, switch it off immediately
(fig. 2B & 3B). Wait for 1 minute.
The solution will flow through
automatically. Switch the machine back
on. In the case of the A200 W, press the
start button (fig. 3D) as well.
General (continue)
5. When half of the solution has run through
the machine, switch it off for about 2
minutes (fig. 2B & 3B). The solution will
now undergo a reaction with the lime
scale.
6. After the pause, switch the machine back
on and allow the rest of the solution to
flow through the machine. In the case of
the A200 W, press the start button again
(fig. 3D).
* Attention! Keep an eye on the reservoir
while the solution is running through
the machine. Turn the machine off as
soon as the reservoir is empty. Then rinse
clean the metal contacts in the cold water
reservoir with water or a wet cloth.
7. After descaling the machine, rinse
thoroughly by carrying out the normal
coffee preparation process 3 times
(without paper filters and coffee).
8. Clean the removable filter and jug
thoroughly. The filter coffee unit is now
ready to be used again.
8.2 How to descale the hot water
unit
1. Remove the round black and the stainless
steel lid from the hot water reservoir
(fig. 1G).
2. Remove the larger pieces of deposit by
holding the machine upside down above
the sink so that the water and the loose
pieces of scale fall out.
Attention! The coffee unit will also empty!
(see unit 5, “Prepation before use”).
3. Use a descaling agent to remove the
remaining scale. The hot water unit should
be refilled as described in unit 5,
“Prepation before use”.
4. As soon as the hot water unit has heated
up, draw off one third (approx. 1.5L) of the
hot water.
Attention! When the reservoir has
reached the correct temperature, it should
be switched off (fig. 2I & 3I). It should not
be switched on again during the
descaling process.
5. Add two sachets for 50 grams Animo
descaling agent into the water. This will
now undergo a (frothing) reaction with the
scale deposits.
6. Allow the solution to soak in for about 10
minutes until the frothing has stopped.
7. Allow the hot water reservoir to drain until
no more water comes out of the tap.
8. Switch on the machine (fig. 2I & 3I) and
allow the hot water reservoir to return to
the correct temperature.
A100 W (manual filling)
9. * Fill the cold water reservoir with fresh
water until the orange alarm lamp goes
out again (fig. 2G).
10. * Allow the hot water reservoir to drain
again through the tap.
11. Repeat the lines marked with * at least 3
times.
12. Fill the cold water reservoir until the
orange lamp goes out (fig. 2G).
13. The hot water unit is now ready to be
used again.
A200 W (automatic filling)
9. The cold water reservoir fills itself
automatically to the correct level.
10. Draw off at least 3 jugs of water through
the tap.
11. The hot water unit is now ready to be
used again.
Animo
A 100 W/A 200 W09/99
7

9. TEMPERATURE SECURITY
The hot water unit is supplied with a temperature
security that can be accessed from the outside.
The security is installed at the back of the device,
next to the electricity cable connection. The
security is activated when the temperature gets
too high.
In case the security was activated, do the
following:
1. Make sure the machine is cooled down.
2. Unscrew the black protective cover.
3. A button becomes visible. Press it and
tighten the cover.
If you find the technical malfunction not to be
caused by the temperature security, contact your
dealer.
Animo
8
09/99A 100 W/A 200 W

Animo B.V. Headoffice
Dr. A.F. Philipsweg 47
P.O. Box 71
9400 AB Assen
The Netherlands
Tel. no. +31 (0)592 376376
Fax no. +31 (0)592 341751
E-mail: [email protected]
Internet: http://www.animo.nl
Accredited by
the Dutch Council
for Certification
0498 Rev. 1 070999 Animo 09913
/