Page is loading ...

PRODUCT INSTALLATION
TANYA COLLECTION
REV 111715
PRODUCT INSTALLATION
1
30in VANITY COMBO
PRE-INSTALLATION
Tools Required
Rubber mallet Safety goggles
Phillips
screwdriver
Level
Silicone
Compound
AA
Hardware Included
Part Description Quantity
AA Leg levelers (pre-installed on legs) 4
BB Round pegs for shelf 4
Description Quantity
Wood screws 2
2” x 6” lumber (cut to t between studs) 1
5/16” Lag Bolts (min. 250lbs) load bearing 2
Washers for Lag Bolts 2
Materials Required
WHAT IS COVERED
All products in the package carry a One-Year Limited Lifetime warranty. This warranty applies only to the original
purchaser and to the original installation of the product.
WHAT IS NOT COVERED
Damage caused during moving or during installation is not a defect or warranty issue and will not be considered as such.
This warranty does not cover product failure caused by abusive treatment, surface scratches, misuse, neglect or damage
due to handling or faulty installations. All wood naturally ages, darkens, changes in color, and mellows over time due
to exposure to light. While this color change is imperceptible from day to day, it may be signicant over a long period of
time, or due to amount of light the wood is exposed to. Imperfections such as small surface splits, small dark holes or
darker mineral streaks are natural and are not considered defects.
Toll free Customer Assistance at 877.659.2128
M - F: 7:30AM - 4:30PM PST.
LIMITED LIFETIME WARRANTY
MODEL: D25130
BB

PRODUCT INSTALLATION
TANYA COLLECTION
REV 111715
PRODUCT INSTALLATION
2
Package Contents
A
D
Part Description Quantity
A Cabinet body 1
B Backsplash 1
C Stone vanity top 1
D Vitreous china sink 1
INSTALLATION
1
Tracing the outline of the vanity
Determine the ideal location for your new bath furniture.
□ Trace its outline on the wall.
□ Use a stud nder to locate the studs to which you
will attach the vanity.
□ With a level, draw lines along the studs from the
oor to the top of the vanity. These lines will help
you spot where to place the screws in Step 3.
PRE-INSTALLATION (continued)
B
C

PRODUCT INSTALLATION
TANYA COLLECTION
REV 111715
PRODUCT INSTALLATION
3
INSTALLATION (continued)
2
Installing support for vanity
Provide 2x6 backing material behind the nished wall to
properly support the vanity.
□ To properly secure the vanity, the middle of the
required 2x6 backing material must be 32” (814mm)
from the nished oor.
□ Extend the backing material beyond the width of the
vanity to the nearest stud. This will ensure proper
support for the vanity.
□ Front-notch the studs to ensure the 2x6 backing
material is ush against the studs.
□ Secure the 2x6 backing material to the studs with
framing nails.
□ Rough-in the water supply and drain lines into the
rough-in plumbing areas of the vanity.
3
Attaching the vanity
□ Verify the vanity is level and back rail is plumb
against the wall. If necessary, turn the leg levelers
(AA) to adjust the vanity.
□ Using drill bit, drill two pilot holes through the back
rail and the nished wall. Verify the pilot holes are
positioned to ensure the lag bolts will engage the
2x6 backing material.
□ Secure the vanity to the nished wall with two 5/16”
lag bolts and washers (not provided).
32” (814mm)
2”x6” backing material
AA
A

PRODUCT INSTALLATION
TANYA COLLECTION
REV 111715
PRODUCT INSTALLATION
4
INSTALLATION (continued)
4
Installing the faucet to the vanity top
Follow the manufacturer's instructions to install the faucet
and drain assembly to the vanity top.
5
Securing the vanity top
□ Place the vanity top (C) with the pre-installed sink
(D) over the vanity (A).
□ Make sure the wall is straight and there are no gaps
between the wall and vanity top (C).
□ Remove the top (C) and apply a small bead of
silicone compound to the top of the vanity before
the vanity top is set into position.
□ Firmly press the vanity top (C) into position; check
the level and evenness across the front of the vanity
(A), and make sure the vanity top (C) is ush to the
wall.
□ Apply silicone compound to the back and bottom
of the backsplash (B). Firmly press the backsplash
(B) to the vanity top (C) to set into place, then rmly
press the backsplash (B) to the wall.
6
Reconnecting the water supply
□ Install the 4 round pegs (BB) into the pre-drilled
holes inside the vanity.
□ Slide the wooden shelf over the round pegs (BB).
□ Reconnect the faucet supply lines to the water
supply and reconnect the p-trap.
□ Install the pop-up drain.
□ Turn on the water supply or the home’s main water
supply and test for leaks.
D
A
C
B

PRODUCT INSTALLATION
TANYA COLLECTION
REV 111715
PRODUCT INSTALLATION
5
DOOR ADJUSTMENT
LEFT TO RIGHT
FRONT TO BACK
UP AND DOWN
door
door
door
vanity side panel
vanity side panel
vanity side panel
If the gap between the door and vanity side panel needs
adjustment, turn the screw closest to the door clockwise
or counter clockwise.
Make sure to adjust both the top and bottom hinges to
keep the door level.
If the door is not aligned perfectly with the vanity frame,
turn the screw closest to the vanity side panel clockwise
or counter clockwise.
Make sure to adjust both the top and bottom hinges to
keep the door level.
If the gap above or below the door needs adjustment,
turn the screw that is mounted to the hinge plate of the
vanity side panel.
Loosening the screw allows the door to move up or
down.
Both hinges of the door need to be loosened to adjust
the door.
Remember to tighten the hinges after the door is in
place.

PRODUCT INSTALLATION
TANYA COLLECTION
REV 111715
PRODUCT INSTALLATION
6
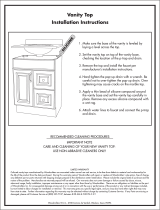
CARE AND CLEANING
WOOD DOORS AND PANELS
Dust cabinets frequently with a soft, lint-free cloth. You may dampen the cloth with water or with a spray-type dust
remover. Clean up spills immediately. Use a clean, damp cloth if necessary. Wipe dry with another clean soft cloth. Cloth
is better than paper towels for this purpose.
For maintenance cleaning of your cabinet, there are a number of products available for your wood cleaning needs,
typically promoted as furniture care products. We suggest using mild soap with a damp cloth to remove any build up
on cabinets. Any product used should be applied and then quickly and completely removed with a damp cloth. Dry the
cabinet completely after cleaning as excess moisture can be damaging to any ne wood nish. In addition, do not drape
wet or damp cloths over the edge of doors.
Do not use detergents, soap pads, steel wool or any other type of abrasive pad on your cabinet. These products will
damage the wood nish. We also suggest not using citrus oils, wax, or polishes that contain silicone because they leave
a residue that is sometimes dicult to remove and attracts dust. Finally, do not use solvents such as ammonia, bleach,
acetone, lacquer thinner or cleaners such as goof-o or WD40, all of which may damage or dissolve some or all of the
nish.
LAMINATES
You can clean all laminated surfaces by using a damp, soft cloth. Do not use excessive amounts of water, it will seep into
the seams of the cabinet. Sink base cabinets are the most common cabinet to have water damage and can usually be
protected with a plastic liner or pan.
PREVENTING HEAT OR HUMIDITY DAMAGE
The bathroom environment is very common place for humidity. It is very important to dissipate the humidity in the room
and not let it stay for long periods of time. If higher temperature settings are used for extended periods of time, the
heat may be excessive and the doors and drawer fronts should be removed. This is particularly important on laminated
panels, which cannot be exposed to extended temperatures beyond 160 degrees Fahrenheit without risking permanent
damage.
SUNLIGHT AND AGING
Over time, exposure to sunlight, smoke and chemicals may cause some materials to face or vary from their original color.
Cabinets or accessories added at a later date may not match cabinets previously installed. For the same reason, nish
samples on displays may not represent the exact color of cabinets received at the time of shipment.
VITREOUS CHINA
Vitreous china vanity tops and sinks are very durable. The glazing process provides years of enjoyment if cared for
correctly. Rinse thoroughly and use a soft cloth to wipe the product dry after each use to prevent hard water stains. Soft
abrasive cleaners may be used when necessary to clean vitreous china products.
GRANITE OR MARBLE TOPS
Natural stone is a porous material. Therefore, it may stain if not properly cared for. Granite counter tops should be sealed
before using. Follow the instructions on the sealer label. The easiest way to clean granite counter tops is to simply use
warm water and mild liquid dish soap, preferably without aromatics. This is a gentle way to clean the grease and grime
from your granite counters without damaging them. If you use plain soap and water, this can lead to soap build up and
over time, will dull the glossy nish of your polished granite. After cleaning you should rinse the counter top thoroughly
and dry with a soft cotton cloth.
QUARTZ TOPS
Quartz is easy to maintain. It is a non-porous material that is highly resistant to stain, scratches and heat. However, it is
not stain, scratch, or heat proof. Spills should be cleaned as soon as possible with soap and water on a regular basis
to keep the polished quartz looking like new. Use warm water and a damp cloth with a small amount of non-abrasive
cleaner that does not contain bleach.
/