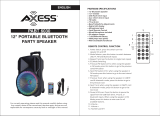
iON Total PA Prime User guide

Category
Bluetooth music receivers
Type
User guide
TOTAL PA
PRIME
User Guide English ( 3 – 10 )
Guía del usuario Español ( 11 – 22 )
Guide d’utilisation Français ( 23 – 33 )
Appendix English ( 34 )
2
3
User Guide (English)
Introduction
Thank you for purchasing the Total PA
Prime. At ION, your entertainment is as important to us as it is
to you. That’s why we design our products with one thing in mind—to make your life more fun and
more convenient.
Box Contents
Total PA
Prime
Power Cable (5 ft. / 150 cm)
Microphone with cable (15 ft. / 450 cm)
Speaker Stand
Quickstart Guide
Support
For the latest information about this product (documentation, technical specifications, system
requirements, compatibility information, etc.) and product registration, visit ionaudio.com.
For additional product support, visit ionaudio.com/support.
Setup
1. Make sure all items listed in the Box Contents are included in the box. Look in the box under the
foam sheet for the power cable and microphone.
2. Read the Safety & Warranty Manual before using the product.
3. Study the Connection Diagram.
4. Make sure all input devices (such as microphones, CD players, or digital media players) are turned
off with their volume settings set to “zero.”
5. Connect all devices as shown in the Connection Diagram.
6. Switch everything on in the following order:
a. Audio input devices (e.g. microphones, instruments, CD players)
b. Total PA
Prime
7. When you are finished using Total PA
Prime, switch everything off in the following order:
a. Total PA
Prime
b. Audio input devices
Speaker Stand Installation
1. Extend the speaker stand tripod legs on a flat, stable surface. Fully extend the legs until the plastic
bracket is stopped by the bumps on the center pole. Insert the lower pin directly above the lower
adjustment knob and tighten the lower adjustment knob.
2. Raise the mounting pole up to the appropriate height needed and tighten the side adjustment knob.
When raising the mounting pole, make sure the end with the upward pointing arrow is on the top.
3. Insert the upper pin into the upper pin-hole so the mounting pole stays at your set height, and
tighten the side adjustment knob.
4. On Total PA
Prime, adjust the bottom knob counter-clockwise so the screw is not blocking the
opening.
5. Line up the Total PA
Prime mounting hole with the speaker stand pole and place on the pole.
6. Tighten the mounting knob clockwise on Total PA
Prime.
Note: Remove Total PA
Prime prior to moving the stand for maximum safety.
4
Connection Diagram
Items not listed under the Box Contents are sold separately.
Tablet
Microphones
SD Card
(16 GB limit and only MP3
files supported)
USB drive
(16 GB limit and only MP3
files supported)
Smartphone
Power
Smartphone
5
Features
Rear Panel
1. Media Panel Buttons: Controls for the USB/SD, FM
radio, and Bluetooth
©
audio sources. These controls
include mode selection and music playback options.
See Media Panel for more information.
2. USB Port: Connect your USB flash drive here to play
music. You can also use this port for charging the
USB device, such as a tablet or smartphone. To
charge a device that is streaming music via
Bluetooth, pause the music first and then wait for it to
reconnect after the USB cable is inserted.
3. SD Card Slot: Insert your SD card here to play music.
4. Display: This screen shows information relevant to
Total PA
Prime’s current operation.
Note: The Display comes with a plastic protector on
it. Remove this for optimal viewing.
5. Mic Inputs (1/4” / 6.35 mm & XLR): Connect a
microphone or mic-level source to these inputs.
6. Aux Inputs (1/8” & XLR): These inputs can be used
to connect a CD player, MP3 player, or other audio
source.
7. Mix Out (XLR): Connect this output to a speaker,
mixer, or recorder.
8. Control Knob: Turn this knob to adjust the main
volume (overall output) of the loudspeaker. Push this
knob to select and make adjustments to the mic 1
volume, the mic 2 volume, source volume (radio,
USB, SD, Bluetooth signal, and aux input), echo
effect, high EQ, and low EQ. The volume of Total PA
Prime does not affect your Bluetooth device volume.
For the best sound quality, set your input source
volume to 100% and use the Source and Main
Volume control of the speaker to adjust the volume.
9. Repeat/Link: In USB or SD mode, press this button
to repeat a single track, folder, or all tracks. Press and
hold this button to start stereo linking to another
compatible ION speaker (see ionaudio.com for a list of
compatible speakers).
10. Mode: Press this button to select the audio source to use: USB, SD, FM radio, Aux (available to
select when the USB port and SD card slot are empty), or Bluetooth.
11. Acoustic Optimization
: Use these presets to select the Venue/Event and the speaker will
automatically jump to an appropriate volume level mix, EQ setting, light mode, and mic echo
setting. For best results, set your music source at 100% volume. See Acoustic Optimization for a
chart of the specific settings.
12. Clip LED: The Clip LED will flash red if the signal from the input jacks or Media Panel audio source
is clipping (distortion from an overly loud signal). If this happens, decrease the setting of the Main
Volume knob or the volume for the Aux/Mic Input (if a loud device is plugged into either).
8
15
1
2
1
4
1
3
1
6
9
10
1
1
1
7
12
1
5
14
11
13
6
13. Light Mode Button: Press this button to toggle between one of these five modes for the lights on
the front panel:
Color Cycle: The lights slowly glow and cycle through colors. This is the default mode when
Total PA
Prime is first powered on. Press and hold the light mode button to freeze the lights on
one color. Press and release the button to unfreeze.
Beat Sync: The lights flash and change colors according to the tempo of the music playing on
the speaker. For the best lighting effect, you may need to adjust the volume of your device, the
source volume, and/or the main volume.
Color Wheel: The lights rotate in a wheel of all colors.
Color Beat Sync: The lights rotate in a wheel of all colors and change direction and speed
according to the tempo of the music playing on the speaker. For the best lighting effect, you
may need to adjust the volume of your device, the source volume, and/or the main volume.
Off: The lights turn off.
14. Power Cable Input (IEC): Insert the included power cable here to charge the unit.
15. Power Switch: Flip this switch to toggle the speaker’s power on or off.
Note: Total PA
Prime will power off after 15 minutes with no audio playing.
Media Panel
Use the following buttons on the Media Panel to control the USB/SD, FM Radio, and Bluetooth
audio sources.
Mode: Press this button to switch the audio source between USB/SD, FM radio, Aux (available to
select when the USB port and SD card slot are empty) and Bluetooth. The default mode when
powering on Total PA
Prime is Bluetooth. The USB/SD mode is only selectable if a USB drive or
SD card is plugged into Total PA
Prime; otherwise, the Mode button will toggle between
Bluetooth, Aux, and FM radio only.
Note: Your USB drive or SD card cannot be more than 16 GB and it must contain playable files
in order for its data to appear properly in the Display. It can have MP3 files. When you connect a
USB drive or SD card with playable files, Total PA
Prime will order the files alphabetically by
folder on the root directory and then by track name in the folder.
Play/Pause: When USB/SD is selected as the audio source, press this button to play/pause the
currently selected track. Double press this button to stop playback and return to the beginning
of the track list.
When Bluetooth is selected as the audio source, press this button to play/pause the currently
selected track or press and hold this button to turn voice prompts on/off.
Repeat: Press this button to cycle through the five repeat/shuffle options:
Play the USB/SD folder’s tracks in order with repeat/shuffle off (OFF).
Play the tracks in random order (Rd0).
Play the current USB/SD track on repeat (ONE).
Play all the tracks on the USB drive or SD card on repeat (ALL).
Play the current folder’s tracklist on repeat (F0d). The folder used is based on what song is
playing when it is activated. For instance, if a song playing is on the root level, selecting
F0d will repeat only songs at the root level. If a song is in folder “A”, then only songs in
folder “A” will be repeated.
Previous: When USB/SD or Bluetooth is selected as the audio source, press this button to go to
the previous track in the playlist.
Next: When USB/SD or Bluetooth is selected as the audio source, press this button to go to the
next track in the playlist.
Note: In some apps on Bluetooth devices, pressing the < (Previous) or > (Next) buttons may
change the playlist or music genre rather than the track.
7
Operation
Using the Control Knob
The Control Knob defaults to controlling the Main Volume for all channels. Press the Control
Knob to toggle through different functions: Mic Channel, Source, Echo effect level, and EQ.
Press the Control Knob to select the Mic channel 1 or 2. Rotate the Control Knob to raise or
lower the volume of the Mic input independently of the other channels.
Press the Control Knob again to select Source. Rotate the Control Knob to raise or lower the
volume of the Aux/BT/USB/Radio signal independently of the Mic channels.
Press the Control Knob again to control the Echo effect level for the Mic channel.
Press the Control Knob again to select Low EQ adjustment. Rotate the Control Knob to raise
or lower the low frequencies on all channels.
Press the Control Knob again to select High EQ adjustment. Rotate the Control Knob to
raise or lower the high frequencies on all channels.
Press the Control Knob again to return to Main Volume adjustment.
If there is no activity on the Control Knob for 5 seconds, the function will go back to Main
Volume.
Pairing with a Bluetooth Device
1. Power on the Total PA
Prime by flipping the power switch on/off. Total PA
Prime will
automatically enter Bluetooth pairing mode indicated by the Bluetooth LED flashing blue.
2. Navigate to your device’s Bluetooth setup screen, find Total PA Prime, and connect. Do
not connect to Total PA Prime_BLE; this is reserved exclusively for connecting to the ION
Sound XP
app. When connected, the Bluetooth icon on the display will flash and you will
hear “Connected”.
Note: If you experience trouble in connecting, select “Forget this Device” on your Bluetooth
device and try to connect again.
3. To disconnect, turn off Bluetooth from your device’s Bluetooth settings.
Connecting Two Speakers
Linking Two Compatible Speakers (Stereo-Link 2.0
TM
)
1. Power on both Total PA
TM
Prime speakers by flipping their on/off switches. Make sure they
are in Bluetooth pairing mode and not connected to a device.
2. Press and hold the Repeat/Link button on one speaker (the primary speaker which will
control both) to enter Stereo Link mode. Once a link has been established, the word LINK
will appear on both speaker displays.
3. Connect to the primary speaker via Bluetooth.
To disconnect, double press the Repeat/Link button.
Note: The speakers should be within 100’ (33.3 m) of each other to properly link.
Note: Total PA
TM
Prime is not compatible with previous ION PA models. To link to a previous
model, use an XLR cable (not included) and link from the newer PA to the previous one via the
XLR Out on Total PA
TM
Prime and the XLR Aux In on the previous model.
8
SD/USB Mode
Press the Mode button to toggle through to select SD or USB mode. Total PA
Prime will
automatically play the first compatible file. Files are played in alphabetical order of what is
on the root level, then alphabetical by folder, and then alphabetical by track name. Media
playback will stop when all media has been played on the SD card or USB drive. Press
and hold the Next and Previous buttons to fast forward or rewind within the song.
Note: The SD card or USB drive must have playable files for it to appear on the media
panel’s display. If there is no USB drive or SD card inserted into the media panel, press
and release the Mode button will toggle through Bluetooth and radio.
Repeat settings (abbreviations will show on the display):
ALL: Repeat all of the tracks in the folder.
FOLd: Repeat all of the tracks in the folder.
OnE: Repeat the current playing USB track.
rAn: Shuffle the track order.
App Control
IMPORTANT: To ensure the best possible experience with the app, use the most
current Android OS or iOS on your device.
Follow these steps to download the free app on your device:
1. Open the Apple App Store or Google Play on your device. Then, search for the ION
Sound XP app.
2. Follow the on-screen instructions to download and install the app. Once
downloaded, the ION Sound XP app will appear on your device's home screen.
3. Connect your device to Total PA
Prime via Bluetooth. See the Pairing with a
Bluetooth Device to learn how to do this.
4. Open the ION Sound XP
TM
app. If prompted, allow the app to access your device's
Bluetooth and Location Services.
5. Tap to select Add A Product on the screen. The app will scan and find Total PA
Prime.
If you are having issues connecting, tap Help with setting up? for additional tips.
6. Select the Total PA
Prime icon to go to the next screen, where you can use the app
to control various functions of the speaker such as:
Radio: Play the radio, change stations, and edit presets.
EQ: Adjust the speaker's equalization, and enable or disable Bass Boost.
Volume: Adjust the speaker volume and microphone volume.
Voice Prompts: Enable or disable the voice prompts.
Support: Visit ionaudio.com, contact Technical Support, and view Warranty
information and Frequently Asked Questions.
9
Acoustic Optimization
The Acoustic Optimization
feature allows you to set the Venue and Event (see below for details) and
the speaker will jump to an appropriate volume level, EQ setting, light mode, and effect setting. Once a
Venue/Event is selected, the parameters will gradually change to the new settings.
Venue/Event Main
Volume
Source
Volume
Mic 1&2
Volume
Mic
Echo
Light
Mode
EQ Settings
Outdoor/Dancing 11 25 10 0 Color
Wheel
Beat
Sync
Lo: 3, Mid: -1,
Hi: 0
Outdoor/Listening 11 25 5 0 Color
Cycle
Lo: 0, Mid: 0,
Hi: 0
Outdoor/Karaoke 11 20 25 5 Beat
Sync
Lo: 1, Mid: 2,
Hi: 3
Outdoor/Live
Music
11 20 25 3 Color
Wheel
Lo: 2, Mid: -1,
Hi 2
Outdoor/Speech 11 15 25 0 Off Lo: -3, Mid: 2,
Hi: -2
Hall/Dancing 9 25 10 0 Color
Wheel
Beat
Sync
Lo: 3, Mid: -1,
Hi: 0
Hall/Listening 9 25 5 0 Color
Cycle
Lo: 0, Mid: 0,
Hi: 0
Hall/Karaoke 9 20 25 5 Beat
Sync
Lo: 1, Mid: 2,
Hi: 3
Hall/Live Music 9 20 25 3 Color
Wheel
Lo: 2, Mid: -1,
Hi: 2
Hall/Speech 9 15 25 0 Off Lo: -3, Mid: 2,
Hi: -2
Large Room/
Dancing
7 25 10 0 Color
Wheel
Beat
Sync
Lo: 3, Mid: -1,
Hi: 0
Large Room/
Listening
7 25 5 0 Color
Cycle
Lo: 0, Mid: 0,
Hi: 0
Large Room/
Karaoke
7 20 25 5 Beat
Sync
Lo: 1, Mid: 2,
Hi: 3
Large Room/
Live Music
7 20 25 3 Color
Wheel
Lo: 2, Mid: -1,
Hi: 2
Large
Room/Speech
7 15 25 0 Off Lo: -3, Mid: 2,
Hi: -2
Small Room/
Dancing
5 25 10 0 Color
Wheel
Beat
Sync
Lo: 3, Mid: -1,
Hi: 0
Small Room/
Listening
5 25 5 0 Color
Cycle
Lo: 0, Mid: 0,
Hi: 0
Small Room/
Karaoke
5 20 25 5 Beat
Sync
Lo: 1, Mid: 2,
Hi: 3
Small Room/
Live Music
5 20 25 3 Color
Wheel
Lo: 2, Mid: -1,
Hi: 2
Small
Room/Speech
5 15 25 0 Off Lo: -3, Mid: 2,
Hi: -2
10
Troubleshooting
If the sound is distorted: Try lowering the volume control of your sound source, musical
instrument, or microphone. Also, try to reduce the overall volume of Total PA
Prime using
the Main Volume knob.
If there is too much bass: Try adjusting the tone or EQ control on your sound source to
lower the bass level. This will allow you to play the music louder before clipping (distortion)
occurs.
If there is a high-pitched whistling noise when using microphones: This is probably
feedback. Point the microphone away from the speaker.
If you can’t hear the microphone over the music volume: Turn down the music volume
from your source.
The Display shows NONE: If a USB drive or SD card is already properly inserted, make
sure it contains playable files (MP3).
If you cannot connect your audio device to Total PA
Prime via Bluetooth:
Have your audio device (e.g., smartphone or tablet) and Total PA
Prime as close
together as possible while trying to connect. Make sure both the audio device and
Total PA
Prime are unobstructed by walls, furniture, etc.
Reset the Bluetooth connection on Total PA
Prime to disconnect Total PA
Prime
from any other audio device and restart the search process. If this does not work
right away, power off Total PA
Prime and then power it back on. See Pairing with a
Bluetooth Device for more information.
Reset the Bluetooth connection on your audio device by turning Bluetooth off and
back on. You can find this under the Bluetooth menu in the Settings for your phone
or other audio device.
If this does not work, and you have connected to Total PA
Prime before, find Total
PA
Prime in the list of available or previously connected devices in your audio
device's Bluetooth menu, tap the "gear" or “i” icon located next to it and then select
Unpair or Forget. Turn Total PA
Prime off and back on and try pairing again once it
reappears in your available devices list.
Note: If Total PA
Prime has been paired to another audio device recently that is still
within range, you may need to repeat this process with that audio device to fully
disconnect.
If you experience audio dropouts while playing music from a Bluetooth device, this
may be happening because your unit is trying to link to another speaker. This can occur if
you power off a speaker that was linked to your unit or if you have just turned on your unit
and it is in Stereo-Link mode. To stop the audio dropouts, exit Stereo-Link mode by
double-pressing the Repeat/Link button. Alternatively, you can wait for your unit to link to
another speaker if there is one within range.
If you would like to stop your speaker from automatically linking when you power it
on, make sure you double-press the Repeat/Link button to exit Stereo-Link mode before
you power it off.
11
Guía del usuario (Español)
Introducción
Gracias por comprar el Total PA
Prime. En ION, su entretenimiento es tan importante para nosotros
como para usted. Por eso es que diseñamos nuestros productos con una sola cosa en mente—hacer
que su vida sea más divertida y cómoda.
Contenido de la caja
Total PA™ Prime
Cable de alimentación (5 pies / 150 cm)
Micrófono con cable (15 pies / 450 cm)
Soporte de altavoz
Guía de inicio rápido
Soporte
Para obtener la información más reciente acerca de este producto (documentación, especificaciones
técnicas, requisitos de sistema, información de compatibilidad, etc.) y registrarlo, visite ionaudio.com.
Para obtener soporte adicional del producto, visite ionaudio.com/support.
Instalación
1. Asegúrese de que todos los artículos indicados en Contenido de la caja estén incluidos en ella.
Localice el cable de alimentación y el micrófono en la caja bajo la hoja de espuma de poliestireno.
2. Lea el Manual sobre la seguridad y garantía antes de utilizar el producto.
3. Estudie el Diagrama de conexión.
4. Asegúrese de que todos los dispositivos de entrada (tales como micrófonos y reproductores de
CD o reproductores de otros medios digitales) estén apagados y con sus ajustes de volumen en
“cero”.
5. Conecte todos los dispositivos como se muestra en el Diagrama de conexión.
6. Encienda todo en el siguiente orden:
a. Dispositivos de entrada de audio (por ejemplo, micrófonos, instrumentos, reproductores de
CD)
b. Total PA
Prime
7. Cuando haya terminado usar el Total PA
Prime, apague todo en el siguiente orden:
a. Total PA
Prime
b. Dispositivo de entrada de audio
12
Instalación del soporte de altavoz
1. Extienda las patas del trípode del soporte del altavoz sobre una superficie plana y estable. Extienda
las patas completamente hasta que el soporte plástico haga tope con las protuberancias del poste
central. Inserte el pasador inferior directamente por encima de la perilla de ajuste inferior y luego
apriete dicha perilla.
2. Extienda el poste de montaje hasta la altura necesaria y apriete la perilla de ajuste del costado. Al
elevar el poste de montaje, asegúrese de que el extremo que tiene la flecha apuntando hacia arriba
quede del lado de arriba.
3. Inserte la clavija superior en el orificio superior de manera que el poste de montaje permanezca a la
altura necesaria y apriete la perilla de ajuste del costado.
4. En el Total PA
Prime, ajuste la perilla inferior en el sentido contrario a las agujas del reloj de manera
tal que el tornillo no bloquee la apertura.
5. Alinee el orificio de montaje del Total PA
Prime con el poste del soporte del altavoz y colóquelo en
el poste.
6. Apriete la perilla de montaje en el Total PA
Prime en el sentido de las agujas del reloj.
Nota: Retire el Total PA
Prime antes de mover el soporte para mayor seguridad.
13
Diagrama de conexión
Los elementos que no se enumeran en Contenido de la caja se venden por separado.
Tableta
Micrófonos
Tarjeta SD
(límite de 16 GB y solo se
admiten archivos MP3)
Unidad flash USB
(límite de 16 GB y solo se
admiten archivos MP3)
Teléfono inteligente
(smartphone)
Alimentación
Teléfono
inteligente
(smartphone)
14
Características
Panel trasero
1. Botones del panel de medios: Controles
para las fuentes de audio USB/SD, radio FM y
Bluetooth. Estos controles incluyen selección
del modo y opciones para reproducción de la
música. Consulte en Panel de medios a
continuación las descripciones de los
controles.
2. Puerto USB: Conecte su unidad flash USB
para reproducir música. También puede
utilizar este puerto para cargar un dispositivo
USB, como una tableta o un teléfono
inteligente. Para cargar un dispositivo que
está transmitiendo música por Bluetooth,
primero ponga en pausa la música y luego
espere a que se reconecte tras insertar el
cable USB.
3. Ranura para tarjeta SD: Inserte su tarjeta SD
aquí.
4. Pantalla: Esta área muestra información
relevante para las funciones de Total PA
Principal.
Nota: La pantalla viene con un protector de
plástico adherido. Quítelo para visualizar el
LCD de manera óptima.
5. Entradas micrófono (6,35 mm/1/4 pulg. y
XLR): Conecte un micrófono o una fuente de
nivel de micrófono a estas entradas.
6. Entradas auxiliar (3,5 mm/1/8 pulg. y XLR):
Estas entradas se pueden usar para conectar
un reproductor de CD, reproductor de MP3 u
otra fuente de audio.
7. Salida de mezcla (XLR): conecte esta salida
a un altavoz, mezclador o grabadora.
8. Perilla de control: Gire esta perilla para
ajustar el volumen principal (salida general) del
altavoz. Presione esta perilla para seleccionar y
realizar ajustes en el volumen del micrófono 1,
el volumen del micrófono 2, el volumen de la
fuente (radio, USB, SD, señal Bluetooth y
entrada auxiliar), el efecto de eco, el EQ alto y
el EQ bajo. El volumen del Total PA
Principal
no afecta el volumen de su dispositivo
Bluetooth. Para lograr la mejor calidad de
sonido, ajuste del volumen de su fuente de
entrada al 100% y utilice el control de fuente
y volumen principal del altavoz para ajustar el
volumen.
9. Repetir / Vincular: en modo USB o SD, presione este botón para repetir una sola pista, carpeta o
todas las pistas. Mantenga presionado este botón para iniciar la vinculación estéreo a otro altavoz
ION compatible (consulte ionaudio.com para obtener una lista de altavoces compatibles).
10. Modo: Presione este botón para seleccionar la fuente de audio a usar: USB, SD, radio FM, Aux
(disponible para seleccionar cuando el puerto USB y la ranura para tarjeta SD están vacíos) o
Bluetooth.
8
15
1
2
1
4
1
3
1
6
9
10
1
1
1
7
12
1
5
14
11
13
15
11. Optimización acústica
TM
: Utilice estos presets para seleccionar el lugar/evento y el altavoz se
ajustará automáticamente a una mezcla de nivel de volumen, ajustes de EQ, modo de iluminación
y ajustes de eco del micrófono apropiados. Para obtener mejores resultados, ajuste su fuente de
música al 100% de volumen. Consulte Optimización acústica para obtener un cuadro de los
ajustes específicos.
12. LEDs de recorte ("clip"): El LED de recorte destella con luz roja si la señal de las entradas o de la
fuente del panel de medios se está recortando (distorsión causada por una señal demasiado alta).
Si esto ocurre, disminuya el ajuste de la Main Volume (volumen principal) para la entrada
Aux/Mic (si se conecta un dispositivo de volumen elevado en cualquiera de ellos).
13. Botón de modo de luz: Presione este botón para alternar entre uno de estos cinco modos para
las luces del panel frontal.
Color Cycle (Ciclo de color): Las luces brillan suavemente y cambian de un color a otro. Este
es el modo predeterminado la primera vez que se enciende el Total PA
Prime. Mantenga
pulsado el botón de modo para congelar las luces en un color. Pulse y suelte este botón
alternar los colores.
Beat Sync (sincronizado con el ritmo): La luz parpadea y cambia de color en función del
ritmo de la música que se reproduce por el altavoz. Para obtener el mejor efecto de
iluminación, es posible que deba ajustar el volumen de su dispositivo, el volumen de la fuente
y el volumen principal.
Color Wheel (Rueda de colores): Las luces giran en una rueda de todos los colores.
Color Beat Sync: las luces giran en una rueda de todos los colores y cambian de dirección y
velocidad de acuerdo con el tempo de la música que se reproduce en el altavoz. Para obtener
el mejor efecto de iluminación, es posible que deba ajustar el volumen de su dispositivo, el
volumen de la fuente y el volumen principal.
Off: Las luces se apagan.
14. Entrada del cable de corriente (IEC): Inserte aquí el cable de corriente incluido para cargar la
unidad.
15. Interruptor de encendido/apagado: Mueva este interruptor para encender o apagar el altavoz.
Nota: Total PA
Prime se apagará tras 15 minutos si no se reproduce audio.
16
Panel de medios
Utilice los siguientes botones del panel de medios para controlar las fuentes de audio USB/SD,
radio FM y Bluetooth.
Modo: Pulse este botón para conmutar la fuente de audio entre USB/SD, radio FM, Aux
(disponible para seleccionar cuando el puerto USB y la ranura de la tarjeta SD están vacíos), y
Bluetooth. El modo predeterminado al encender el Total PA
Prime es Bluetooth. El modo
USB/SD solo es seleccionable si hay una unidad de memoria USB o tarjeta SD insertada en el
Total PA
Prime; de lo contrario, el botón Mode (modo) conmutará solo entre Bluetooth, Aux, y
radio FM.
Nota: Su unidad de memoria USB o tarjeta SD no puede superar los 16 Gb de capacidad y
debe contener archivos reproducibles para que sus datos aparezcan correctamente en la
pantalla. Pueden almacenar archivos MP3. Cuando conecte una unidad de memoria USB o
tarjeta SD con archivos reproducibles, el Total PA
Prime ordenará los archivos alfabéticamente
por carpeta en el directorio raíz y luego por el nombre de la pista en la carpeta.
Reproducción/Pausa: Cuando seleccione USB/SD como la fuente de audio, pulse este botón
para reproducir/poner en pausa la pista actualmente seleccionada. Presione dos veces este
botón para detener la reproducción y volver al principio de la lista de pistas.
Cuando seleccione Bluetooth como la fuente de audio, pulse este botón para reproducir/poner
en pausa la pista actualmente seleccionada o manténgalo pulsado para activar o desactivar las
indicaciones de voz.
Repetir: Pulsado este botón para alternar entre las cinco opciones de repetir/aleatorio:
Reproducir las pistas de la carpeta USB/SD en orden con repetición/reproducción
aleatoria desactivado (OFF).
Reproducir las pistas en orden aleatorio (Rd0).
Reproducir la pista USB/SD actual con repetición (ONE).
Reproducir todas las pistas en la unidad flash USB drive o tarjeta SD con repetición (ALL).
Reproducir la lista de pistas de la carpeta actual con repetición (F0d). La carpeta utilizada
se basa en la canción que se está reproduciendo cuando se activa. Por ejemplo, si la
reproducción de una canción está en el nivel raíz, al seleccionar F0d solo se repetirán las
canciones en el nivel raíz. Si una canción está en la carpeta "A", solo se repetirán las
canciones en la carpeta "A".
Anterior: Cuando se seleccione USB/SD o Bluetooth como la fuente de audio, pulse este botón
para pasar a la pista anterior en la lista de reproducción.
Siguiente: Cuando se seleccione USB/SD o Bluetooth como la fuente de audio, pulse este
botón para pasar a la siguiente pista en la lista de reproducción.
Nota: En algunas aplicaciones de dispositivos Bluetooth, al pulsar los botones < (Previous) o >
(Next) es posible que se cambie la lista de reproducción o género musical en lugar de la pista.
17
Funcionamiento
Uso de la perilla de control
La perilla de control controla por defecto el volumen principal para todos los canales.
Pulse la perilla de control para alternar entre las diferentes funciones: Canal de micrófono,
fuente, nivel del efecto de eco y ecualizador.
Pulse la perilla de control para seleccionar el canal de micrófono 1 o 2. Gire la perilla
de control para subir o bajar el volumen de la entrada de micrófono
independientemente de los otros canales.
Pulse la perilla de control nuevamente para seleccionar la fuente. Gire la perilla de
control para subir o bajar el volumen de la señal Aux/BT/USB/Radio
independientemente de los otros canales.
Pulse la perilla de control nuevamente para controlar el nivel del efecto de eco para el
canal de micrófono.
Pulse la perilla de control nuevamente para seleccionar el ajuste de ecualización de
graves. Gire la perilla de control para subir o bajar las frecuencias bajas de todos los
canales.
Pulse la perilla de control nuevamente para seleccionar el ajuste de ecualización de
agudos. Gire la perilla de control para subir o bajar las frecuencias altas de todos los
canales.
Pulse la perilla de control nuevamente para volver al ajuste del volumen principal.
Si no hay ninguna actividad proveniente de la perilla de control durante 5 segundos, la
función regresará al volumen principal.
Cómo aparear un dispositivo de Bluetooth
1. Encienda Total PA
Prime accionando el interruptor de encendido. Total PA
Prime
entrará automáticamente en el modo de emparejamiento Bluetooth indicado por el
LED de Bluetooth parpadeando en azul.
2. Navegue a la pantalla de configuración de Bluetooth de su dispositivo, busque Total
PA Prime y conéctese. No se conecte a Total PA Prime_BLE; esto está reservado
exclusivamente para conectarse a la aplicación ION Sound XP
. Una vez establecida
la conexión, el icono de Bluetooth en la pantalla parpadeará y escuchará el mensaje
"Connected".
Nota: Si tiene problemas para conectarse, seleccione "Olvidar este dispositivo" en su
dispositivo Bluetooth e intente conectarse nuevamente.
3. Para desconectarse, apague Bluetooth desde la configuración de Bluetooth de su
dispositivo.
18
Conexión de dos altavoces
Vinculación de dos altavoces compatibles (Stereo-Link 2.0
)
1. Encienda ambos parlantes Total PA
Prime accionando sus interruptores de encendido
/ apagado. Asegúrese de que estén en modo de emparejamiento Bluetooth y no estén
conectados a un dispositivo.
2. Mantenga presionado el botón Repeat / Link en un altavoz (el altavoz principal que
controlará ambos) para ingresar al modo Stereo Link. Una vez que se ha establecido un
enlace, la palabra LINK aparecerá en ambas pantallas de altavoces.
3. Conéctese al altavoz principal mediante Bluetooth.
Para desconectarse, presione dos veces el botón Repeat / Link.
Nota: Los altavoces deben estar a una distancia máxima de 100 pies (33,3 m) entre sí
para que se vinculen correctamente.
Nota: Total PA
Prime no es compatible con los modelos ION PA anteriores. Para enlazar
a un modelo anterior, use un cable XLR (no incluido) y enlace desde el PA más nuevo al
anterior a través de XLR Out en Total PA
Prime y XLR Aux In en el modelo anterior.
Modo SD / USB
Presione el botón Mode para alternar y seleccionar el modo SD o USB. Total PA
Prime
reproducirá automáticamente el primer archivo compatible. Los archivos se reproducen
en orden alfabético según el nivel raíz, luego alfabéticamente por carpeta y luego
alfabéticamente por nombre de pista. La reproducción de medios se detendrá cuando se
hayan reproducido todos los medios en la tarjeta SD o unidad USB.
Nota: La tarjeta SD o la unidad USB debe tener archivos reproducibles para que aparezca
en la pantalla del panel de medios. Si no hay una unidad USB o tarjeta SD insertada en el
panel de medios, presione y suelte el botón Modo para alternar entre Bluetooth y radio.
Repita la configuración: (las abreviaturas aparecerán en la pantalla)
TODAS: repite todas las pistas de la carpeta.
FOLd: repite todas las pistas de la carpeta.
OnE: repite la pista USB que se está reproduciendo actualmente.
rAn: cambia el orden de las pistas.
19
Control de aplicación
IMPORTANTE: Para asegurarse la mejor experiencia posible con la aplicación, utilice el
Android OS o IOS más actualizado en su dispositivo.
Siga los pasos indicados a continuación para descargar la aplicación a su
dispositivo:
1. En su dispositivo, vaya a la tienda de aplicaciones respectiva de Apple o Google Play.
Luego busque la aplicación gratuita ION Sound XP
TM
.
2. Siga las instrucciones que aparecen en la pantalla para descargar e instalar la
aplicación. Una vez descargada, la aplicación ION Sound XP
TM
aparecerá en la
pantalla de inicio de su dispositivo.
3. Conecte su dispositivo al altavoz Total PA
Prime mediante Bluetooth. Consulte
Cómo aparear un dispositivo de Bluetooth para saber cómo hacer esto.
4. Abra la aplicación ION Sound XP
TM
. Si se le pide elegir, permita a la aplicación acceder
a los servicios de Bluetooth y ubicación de su dispositivo.
5. Toque para seleccionar Add A Product en la pantalla. La aplicación escaneará y
encontrará Total PA
Prime.
Si tiene problemas para conectarse, toque ¿Necesita ayuda para la configuración?
Para obtener consejos adicionales.
6. Seleccione
li cono Total PA
Prime para pasar a la próxima pantalla, en donde podrá
utilizar la aplicación para controlar diversas funciones del altavoz tales como:
Radio: Reproducir la radio, cambiar estaciones y editar presets.
Ecualización: Ajustar la ecualización del altavoz y activar o desactivar el
refuerzo de graves.
Volumen: Ajustar el volumen del altavoz y el del micrófono.
Avisos de voz : Activar o desactivar los avisos de voz.
Soporte: Visite ionaudio.com, contáctese con soporte técnico y obtenga
información sobre la garantía y preguntas frecuentes.
20
Optimización acústica
La característica Acoustic Optimization
le permite ajustar el lugar y la ocasión (vea los detalles a
continuación) y el altavoz cambiará al nivel de volumen, ajuste de actualización, modo de iluminación y
ajuste de efectos apropiados. Una vez seleccionado un lugar/evento, los parámetros se modificarán
gradualmente hasta igualar los ajustes nuevos.
Lugar/Evento Volumen
principal
Volumen
de la
fuente
Volumen
del
micrófono
1
y
2
Eco del
micrófono
Modo de
iluminación
Ajustes del
ecualizador
Exteriores/Para
bailar
11 25 10 0 Sincronizado
con el ritmo
de la rueda
de color
Graves: 3,
medios: -1,
agudos: 0
Exteriores/Para
escuchar
11 25 5 0 Ciclo de
color
Graves: 0,
medios: 0,
agudos: 0
Exteriores/Para
karaoke
11 20 25 5 Sincronizado
con el ritmo
Graves: 1,
medios: 2,
agudos:3
Exteriores/Música
en vivo
11 20 25 3 Rueda de
color
Graves: 2,
medios -1,
agudos 2
Exteriores/Para
discursos
11 15 25 0 Off
(Desactivado)
Graves: -3,
medios: 2,
agudos: -2
Salón/Para bailar 9 25 10 0 Sincronizado
con el ritmo
de la rueda
de color
Graves: 3,
medios: -1,
agudos: 0
Salón/Para
escuchar
9 25 5 0 Ciclo de
color
Graves: 0,
medios: 0,
agudos: 0
Salón/Para
karaoke
9 20 25 5 Sincronizado
con el ritmo
Graves: 1,
medios: 2,
agudos:3
Salón/Música en
vivo
9 20 25 3 Rueda de
color
Graves: 2,
medios -1,
agudos 2
Salón/Para
discursos
9 15 25 0 Off
(Desactivado)
Graves: -3,
medios: 2,
agudos: -2
Sala grande/Para
bailar
7 25 10 0 Sincronizado
con el ritmo
de la rueda
de color
Graves: 3,
medios: -1,
agudos: 0
Sala grande/Para
escuchar
7 25 5 0 Ciclo de
color
Graves: 0,
medios: 0,
agudos: 0
Sala grande/Para
karaoke
7 20 25 5 Sincronizado
con el ritmo
Graves: 1,
medios: 2,
agudos:3
Sala
grande/Música en
vivo
7 20 25 3 Rueda de
color
Graves: 2,
medios -1,
agudos 2
  • Page 1 1
  • Page 2 2
  • Page 3 3
  • Page 4 4
  • Page 5 5
  • Page 6 6
  • Page 7 7
  • Page 8 8
  • Page 9 9
  • Page 10 10
  • Page 11 11
  • Page 12 12
  • Page 13 13
  • Page 14 14
  • Page 15 15
  • Page 16 16
  • Page 17 17
  • Page 18 18
  • Page 19 19
  • Page 20 20
  • Page 21 21
  • Page 22 22
  • Page 23 23
  • Page 24 24
  • Page 25 25
  • Page 26 26
  • Page 27 27
  • Page 28 28
  • Page 29 29
  • Page 30 30
  • Page 31 31
  • Page 32 32
  • Page 33 33
  • Page 34 34
  • Page 35 35

iON Total PA Prime User guide

Category
Bluetooth music receivers
Type
User guide

Ask a question and I''ll find the answer in the document

Finding information in a document is now easier with AI