Kodak C140 User manual

Category
Camera flashes
Type
User manual

This manual is also suitable for

www.kodak.com/go/c140support 1
ENGLISH
Installing the software
Loading the batteries
See the Extended user guide www.kodak.com/go/c140support
After installing the software, return to this user guide.
Before connecting any cables, install the software
that was included with your camera. Follow the
on-screen instructions.
urg_00993.book Page 1 Monday, June 15, 2009 8:55 AM
2 www.kodak.com/go/easysharecenter
ENGLISH
Turning on the camera
Setting the language and date/time
See the Extended user guide www.kodak.com/go/c140support
to change current field.
for previous/next field.
OK
to accept.
At the prompt, press OK.
to change.
OK
to accept.
Language:
Date/Time:
urg_00993.book Page 2 Monday, June 15, 2009 8:55 AM
www.kodak.com/go/c140support 3
ENGLISH
Taking a picture
Learn about Auto and other modes See page 10
See the Extended user guide www.kodak.com/go/c140support
Press the Mode button, then
then press OK.
1
2
Press the Shutter button halfway to focus and set exposure.
When the framing marks turn green, press the Shutter
button completely down.
,
Framing
marks
Mode
button
to highlight Auto
urg_00993.book Page 3 Monday, June 15, 2009 8:55 AM
4 www.kodak.com/go/easysharecenter
ENGLISH
Reviewing pictures/videos
See the Extended user guide www.kodak.com/go/c140support
View previous/next
picture/video.
Press the Review
button to enter/exit Review.
Play a video.
OK
Review
urg_00993.book Page 4 Monday, June 15, 2009 8:55 AM
www.kodak.com/go/c140support 5
ENGLISH
Transferring pictures/videos
See the Extended user guide www.kodak.com/go/c140support
Purchase accessories www.kodak.com/go/c140accessories
Turn off the camera.
1
2
Connect the KODAK
USB Cable, Model
U-8 (may be
included).
Turn on the camera.
3
urg_00993.book Page 5 Monday, June 15, 2009 8:55 AM
6 www.kodak.com/go/easysharecenter
ENGLISH
Getting help from your camera
You want the most from your camera. You want to understand:
What it can do for you
And how to take the best possible pictures and videos
Great news!
Your camera offers a built-in Help system. It describes every setting for every menu
choice. If you learn nothing else about your camera, learn how to use on-camera Help.
Because the more you know your camera, the more confident you become.
See the Extended user guide www.kodak.com/go/c140support
Press the Menu button
Scroll through a Help topic.
then highlight a menu choice.
Press the Info
1
2
button.
,
urg_00993.book Page 6 Monday, June 15, 2009 8:55 AM
www.kodak.com/go/c140support 7
ENGLISH
Keep learning about your camera!
See the Extended user guide www.kodak.com/go/c140support
Visit www.kodak.com/go/c140support:
• the extended user guide
• interactive troubleshooting and repairs
• interactive tutorials
• FAQs
• downloads
• accessories
• printing information
• product registration
Congratulations!
You have:
• set up your camera
• taken pictures
• transferred pictures to your computer
Keep learning!
Finish reading this book, so you can take and share your best pictures!
urg_00993.book Page 7 Monday, June 15, 2009 8:55 AM
8 www.kodak.com/go/easysharecenter
ENGLISH
Front View
1 Shutter button 5 Self-timer light
2 Mode button 6 Lens
3 Power button 7 USB/AV Out
4 Flash 8 Microphone
3
1
4
8
2
5
6
7
urg_00993.book Page 8 Monday, June 15, 2009 8:55 AM
www.kodak.com/go/c140support 9
ENGLISH
Back View
1 LCD 5 , OK button
2 Delete, Info, Menu, Review buttons 6 Share button
3 Zoom (Telephoto/Wide Angle) button 7 SD/SDHC Card/Battery compartment
4 Strap post 8 Tripod socket
3
1
4
5
6
2
7
8
urg_00993.book Page 9 Monday, June 15, 2009 8:55 AM
10 www.kodak.com/go/easysharecenter
1 Doing more with your camera
Use this mode For
Auto
General picture taking—it offers excellent image quality and ease of use.
Faces are detected.
The scene is analyzed for other content and for lighting.
You can choose the best picture size and aspect ratio for your needs—just
press the Menu
button and choose Picture Size.
3:2 (the best choice when making 4 x 6 prints)
16:9 (wide screen)
4:3 (the default setting)
Video
Capturing video with sound. (See page 11.)
NOTE: Sound cannot be played on the camera. Sound is heard after the video is
transferred to your computer.
Scene
Point-and-shoot simplicity when taking pictures in practically any situation.
(See
page 11.)
Press the Mode button, then
to highlight a mode, then OK.
urg_00993.book Page 10 Monday, June 15, 2009 8:55 AM
Doing more with your camera
www.kodak.com/go/c140support 11
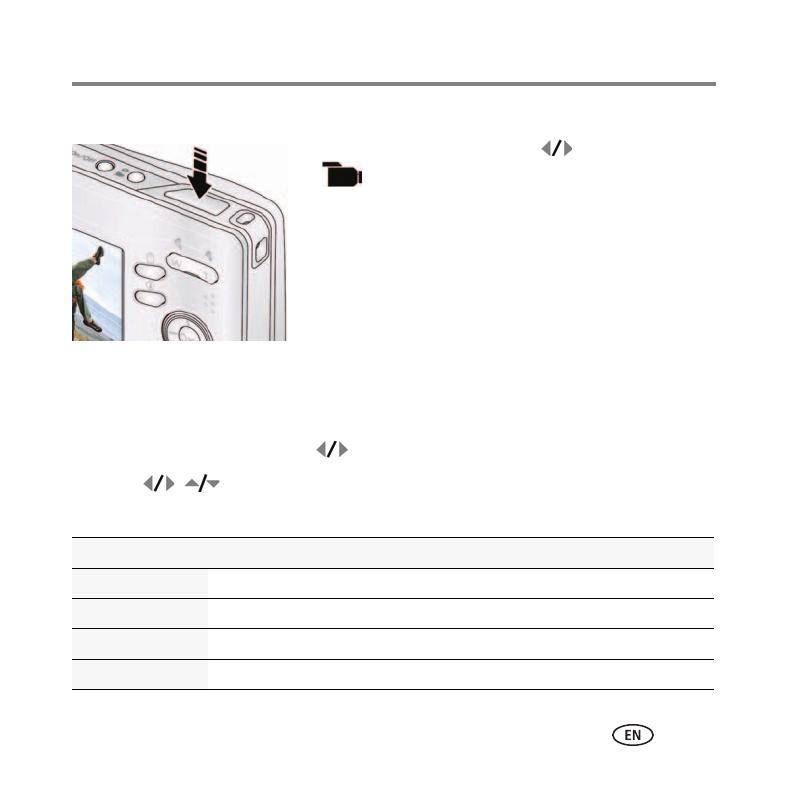
Taking a video
1 Press the Mode button, then to highlight Video
, then press OK.
2 Press the Shutter button completely down,
then release it. To stop recording, press and release
the Shutter button again.
To review and work with videos, see page 4.
NOTE: Sound cannot be played on the camera. Sound is heard after
the video is transferred to your computer.
Using Scene (SCN) modes
Choose a Scene mode—for great pictures in practically any situation.
1 Press the Mode button, then to highlight SCN.
2 Press to view Scene mode descriptions, then press OK.
If the mode description turns off before you finish reading it, press OK.
SCN mode For
Portrait Full-frame portraits of people.
Landscape Distant scenes.
Close-up Close range. Use available light instead of flash, if possible.
Flower Close-ups of flowers or other small subjects in bright light.
urg_00993.book Page 11 Monday, June 15, 2009 8:55 AM
Doing more with your camera
12 www.kodak.com/go/easysharecenter
Sunset Subjects at dusk.
Backlight Subjects that are in shadow (when light is behind the subject).
Candle Light Subjects illuminated by candle light.
Children Action pictures of children in bright light.
Manner/
Museum
Quiet occasions, like a wedding or lecture. Flash and sound are disabled.
Place the camera on a steady surface or tripod.
Text Documents. Place the camera on a steady surface or tripod.
Beach Bright beach scenes.
Snow Bright snow scenes.
Fireworks Fireworks. Place the camera on a steady surface or tripod.
Self-Portrait Close-ups of yourself. Assures proper focus, minimizes red eye.
Night Portrait Reduces red eye of people in night scenes or low-light conditions.
Night Landscape Distant scenery at night. Flash does not fire.
High-ISO People indoors, in low-light scenes.
Sport Action pictures.
Blur Reduction Reducing blur caused by camera shake or subject motion.
SCN mode For
urg_00993.book Page 12 Monday, June 15, 2009 8:55 AM
Doing more with your camera
www.kodak.com/go/c140support 13
Using the optical zoom
1 To zoom in picture-taking mode, press Telephoto (T).
To zoom out, press Wide Angle (W).
2 Take the picture.
Using digital zoom
In video mode, press the Telephoto (T) button.
In picture-taking mode, press the Telephoto (T) button until the slider on the LCD is
at the maximum optical zoom range. Release Telephoto (T), then press it again.
NOTE: You may notice decreased image quality when using digital zoom. The slider pauses and turns red
when the picture quality reaches the limit for an acceptable 4 x 6-in. (10 x 15 cm) print.
urg_00993.book Page 13 Monday, June 15, 2009 8:55 AM
Doing more with your camera
14 www.kodak.com/go/easysharecenter
Using the flash
1 Press the Info button to show shortcuts on the
LCD.
2 Press to highlight the Flash icon on the LCD.
Press to choose a Flash mode.
NOTE: You can also press to choose a Flash mode when
shortcuts are not visible.
Flash modes Flash fires
Auto When the lighting conditions require it.
Fill (Flash On) Every time you take a picture, regardless of the lighting
conditions. Use when the subject is in shadow or is “backlit”
(when the light is behind the subject).
Red Eye
To turn the red eye
feature on/off,
press the Menu
button, then see
the Setup menu.
If Red-eye Pre-flash is turned off, the flash fires once and the
camera automatically corrects red-eye in the picture.
If Red-eye Pre-flash is turned on, the flash fires once so the eyes
become accustomed to the flash, then fires again when the
picture is taken.
Off
urg_00993.book Page 14 Monday, June 15, 2009 8:55 AM
Doing more with your camera
www.kodak.com/go/c140support 15
Using shortcuts
Shortcuts give quick access to the most popular functions.
1 Press the Info button to show shortcuts on the LCD.
2 Press to access functions like Flash, Exposure Compensation, Self-timer, and
Auto focus. (You’ll see different functions in different modes.)
3 Press to choose a setting. To hide the shortcuts again, press .
Press to show/hide shortcuts.
Shortcuts
urg_00993.book Page 15 Monday, June 15, 2009 8:55 AM
Doing more with your camera
16 www.kodak.com/go/easysharecenter
Using the menu button to change settings
IMPORTANT:
Your camera offers a built-in Help system. To get the most from your camera,
see page 6.
You can change settings to get the best results from your camera.
1 Press the Menu button.
2 Press to highlight a tab:
Capture/Video for the most common picture/video-taking settings
Setup for other camera settings
3 Press to highlight a setting, then press OK.
4 Highlight an option, then press OK. (Some options let you use .)
NOTE: Some modes offer limited settings. Some settings remain until you change them; others, until you
change modes or turn off the camera.
urg_00993.book Page 16 Monday, June 15, 2009 8:55 AM
Doing more with your camera
www.kodak.com/go/c140support 17
Understanding the picture-taking icons
Battery level
Capture mode
Pictures/time remaining
Date stamp
Zoom slider
Tag name
Self timer
Flash mode
Exposure compensation
urg_00993.book Page 17 Monday, June 15, 2009 8:55 AM
18 www.kodak.com/go/easysharecenter
2 Working with pictures/videos
Deleting pictures/videos
1 Press the Review button.
2 Press for previous/next picture/video.
3 Press the Delete button.
4 Follow the screen prompts.
Understanding the review icons
urg_00993.book Page 18 Monday, June 15, 2009 8:55 AM
www.kodak.com/go/c140support 19
3 Share your stories!
Prints
Photo gifts
Digitally
• 4 x 6 pictures
• Enlargements, posters
• Collages
• Photo books
• Cards
• Calendars
• Mugs
• Ties
• Shirts
• EASYSHARE Digital Picture Frame
• HDTV devices
• Email
...and much more!
How do you tell yours?
A thousand ways to tell a story...
and each begins with a picture.
urg_00993.book Page 19 Monday, June 15, 2009 8:55 AM
Share your stories!
20 www.kodak.com/go/easysharecenter
Transfer
pictures
to your
computer.
Pictures start here!
1 2
3
Load
KODAK
EASYSHARE
Software.
Take pictures.
Pictures become stories here!
KODAK All-in-One
Printers
At home Online At a local photo retailer
KODAK Picture Kiosk
www.kodak.com/go/tips
urg_00993.book Page 20 Monday, June 15, 2009 8:55 AM
1 / 1

Kodak C140 User manual

Category
Camera flashes
Type
User manual
This manual is also suitable for

Ask a question and I''ll find the answer in the document

Finding information in a document is now easier with AI

Ask the document