Page is loading ...

AMPLIFIER
OWNER’S MANUAL
ELITE

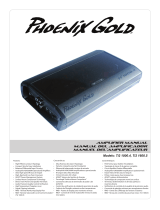
Elite Amplier Owner’s Manual
© 2012 Phoenix Gold • www.phoenixgold.com
© 2012 Phoenix Gold • www.phoenixgold.com
Elite Amplier Owner’s Manual
ELITE.1
• Class D Topology
• Overbuilt Quad Unregulated Power Supplies
• Handwound Power Supply Transformers
• Isolated Pre-Amp Section
• Crossovers have 41 Detents for Exact Frequency Selection
• Aluminum Shaft Potentiometers
• Panel Mounted RCAs
• Clip Indicators
• Extruded Aluminum Heatsink with Evenow Technology
• Integrated Cooling via Endcap Vents
• Each Amp is Shipped in its Own Soft Felt Protective Cover
• High Temperature Plexiglass Cover
• RMD - Remote Voltage Display Ready
• Remote Level Control with Clip Indicator Included
• Linkable or strappable to an additional Elite.1
• Audio Precision Quality Control Verication
• Power Output Birth Certicate
ELITE.2/4
• Class A/B Topology
• Burr Brown Operational Ampliers
• Monolithic Signal Capacitors
• Massive Dual Package Sanken Output Devices
• Overbuilt Dual Unregulated Power Supplies
• Handwound Power Supply Transformers
• Triple Darlington Output Stage
• Isolated Pre-Amp Section
• Crossovers have 41 Detents for Exact Frequency Selection
• Aluminum Shaft Potentiometers
• Panel Mounted RCAs
• Clip Indicators
• Extruded Aluminum Heatsink with Evenow Technology
• User Adjustable Temperature Controlled Fan Cooling System
• Integrated Cooling via Endcap Vents
• Each Amp is Shipped in its Own Soft Felt Protective Cover
• High Temperature Plexiglass Cover
• RMD - Remote Voltage Display Ready
• Remote Level Control with Clip Indicator Included
• Audio Precision Quality Control Verication
• Power Output Birth Certicate
FEATURES
ELITE.1
Frequency Response: ± 1dB from 20Hz to 300Hz
Signal to Noise Ratio: >100dB
Low Pass Crossover: 24dB per Octave
Subsonic Filter: 24dB per Octave
Low Pass Crossover Range: 30Hz to 300Hz
Subsonic Crossover Range: 10Hz to 55Hz
Bass Boost @ 45Hz: 0 to +18dB
Low Level Input Range: 200 millivolts to 8 volts
Lowest Recommend Load: 1 ohm
Typical Eciency: 85%
Damping Factor: Greater than 200
ELITE.2
Frequency Response: ± 1dB from 10Hz to 50kHz
Signal to Noise Ratio: >110dB
High and Low Pass Crossovers: 18dB per Octave
High Pass Crossover Range: 20Hz to 4kHz
Low Pass Crossover Range: 40Hz to 4kHz
Low Level Input Range: 200 millivolts to 8 volts
Lowest Recommend Load: 2 ohms Bridged or 1 ohm Stereo
Typical Eciency: 55%
Damping Factor Greater than 200
RMS Power 14.4Vdc ≤ 1% THD 2400 x 1 @ 2 ohms
3200 x 1 @ 1 ohm
Note: A power birth certicate is included for each amplier. Elite
ampliers are VERY CONSERVATIVELY rated and will exceed the
RMS power rating by up to 30%.
Recommended Fuse Size: 300 amp
Power/Ground Wire Size: 1/0 Gauge
Dimensions: 23.3” L x 10.5” W x 2.6” H
592mm L x 267mm W x 66mm H
RMS Power 14.4Vdc ≤1% THD 250 x 2 @ 4 ohms Stereo
400 x 2 @ 2 ohms Stereo
500 x 2 @ 1 ohm Stereo*
800 x 1 @ 4 ohms Bridged
1000 x 1 @ 2 ohms Bridged*
Note: A power birth certicate is included for each amplier. Elite
ampliers are VERY CONSERVATIVELY rated and will exceed the
RMS power rating by up to 30%.
*Reactive Load Measurement
Recommended Fuse Size: 100 amp
Power/Ground Wire Size: 1/0 Gauge
Dimensions: 23.3” L x 10.5” W x 2.6” H
592mm L x 267mm W x 66mm H
SPECIFICATIONS
ELITE.4
Frequency Response: ± 1dB from 10Hz to 50kHz
Signal to Noise Ratio: >110dB
High and Low Pass Crossovers: 18dB per Octave
High Pass Crossover Range: 20Hz to 4kHz
Low Pass Crossover Range: 40Hz to 4kHz
Low Level Input Range: 200 millivolts to 8 volts
Lowest Recommend Load: 2 ohms Bridged or 1 ohm Stereo
Typical Eciency: 55%
Damping Factor Greater than 200
RMS Power 14.4Vdc ≤1% THD 150 x 4 @ 4 ohms Stereo
250 x 4 @ 2 ohms Stereo
300 x 4 @ 1 ohm Stereo*
500 x 2 @ 4 ohms Bridged
600 x 2 @ 2 ohms Bridged*
Note: A power birth certicate is included for each amplier. Elite
ampliers are VERY CONSERVATIVELY rated and will exceed the
RMS power rating above by up to 30%.
*Reactive Load Measurement
Recommended Fuse Size: 100 amp
Power/Ground Wire Size: 1/0 Gauge
Dimensions: 23.3” L x 10.5” W x 2.6” H
592mm L x 267mm W x 66mm H
A NOTE ABOUT SPECIFICATIONS....
Elite ampliers were engineered to be the best sounding mobile ampliers on the
planet. Numbers on this sheet of paper can not truly convey the dynamics and
realism these ampliers can deliver. Enjoy
!
INTRODUCTION:
Thank you for purchasing a Phoenix Gold Elite amplier, we are condent it will be the nest amplier you have
ever owned.
The Elite ampliers feature only the highest grade of audio components such as Burr Brown op-amps,
Monolithic signal capacitors, and dual-package Sanken output transistors. The result is unparalleled sonic
performance in a mobile audio amplier. With proper installation this amplier is overbuilt to last a lifetime,
thank you for choosing Phoenix Gold.

© 2012 Phoenix Gold • www.phoenixgold.com
INTERNAL BREAKDOWN
High density extruded aluminum heatsink
features 13 grams per mm of mass. Most normal
ampliers have only 6 grams per mm.
Nickel plated panel mount RCA
connections ensure signal purity
and a high quality connection.
Exhaust vents are built into the endcaps.
Airow from the cooling system is pushed
across the internal heatsink ns and
exhausts out these side vents.
High temperature and heavy duty
“Tombstone” balancing resistors
buer the Sanken output devices.
High current nickel plated buss
bars connections ensure proper
energy transfer.
Ultra low ESR and high energy
secondary capacitors deliver
maximum dynamic performance.
The power supply is loaded with 16 units
of IRF-3205 high current/speed MOSFETs.
They are clamped to the heatsink using
precision aluminum extrusions for dual
heatsinking and lower power supply
operating temperatures.
Legendary Phoenix Gold massive dual
unregulated power supplies are built
for dynamic headroom and to drive
low 1 ohm impedance loads.
Audiophile monolithic signal capacitors
provide frequency response past 50kHz,
well past the ability of human hearing.
Burr Brown op-amps provide ultra low
distortion and maximum resolution in
the pre-amp circuitry.
All crossovers feature aluminum shaft
precision potentiometers with 41 detents
for exact crossover frequency selection.
The dual package Sanken output devices are usually only
reserved for the highest end of home ampliers. They are
more than 12 times faster compared to most competitor’s
output devices (40MHz vs 3MHz). The Sanken devices are
rated at higher power levels, drive lower impedance loads
better and have 2.5 times the surface mounting area to
transfer heat. The end result is the highest possible sound
quality, dynamic performance and reliability.
Power supply transformers are hand
wound and feature a third winding
(nearly all ampliers only have two)
for
higher eciency and lower operating
temperatures.
The fan cooling system is ultra quiet and its speed is
temperature controlled. Air is forced across the internal
heatsink and exhausts out the sides. The end user has
the option to manually control the fan mode via the
endpanel switch.
Clip indicators light when the
amplier reaches maximum
output.
Competitor’s “High End”
125w Output Device
Mid to Low Level
100w Output Device
Elite Dual Package Sanken
200w Output Device
Dual Heatsink
MOSFET Clamp
Note: Elite.4 internals are shown above. Elite.1 and .2 internals will vary.
Subwoofer level control
featuring clip and power
indicators is included with each
Elite amplier.

Elite Amplier Owner’s Manual
© 2012 Phoenix Gold • www.phoenixgold.com
© 2012 Phoenix Gold • www.phoenixgold.com
Elite Amplier Owner’s Manual
INPUT
Connect preamp signal cables from the head unit to these terminals.
200mV to 8v is the input voltage range.
FAN
The internal fan is nearly inaudible but the end user can control the fan’s
mode via the endpanel switch.
ON:
Fan runs at full speed at all times regardless of the heatsink
temperature. This is recommended for heavy users or low impedance
loads such as 1 ohm stereo/2 ohms bridged.
OFF:
Internal fan is o. This is only recommended for short periods of
time. For example, a sound quality competition.
AUTO:
Best setting for most users. Internal fan is o until the heatsink
temperature reaches 50°C/120°F then the variable fan turns on and its
speed is controlled by the heatsink temperature.
REMOTE LEVEL CONTROL
This port is for connecting the subwoofer remote level control. This is not a bass
boost, it controls the level of the low pass signal
only. Cong switch must be set to
“LP/BP” for the remote to operate.
HP AND LP CROSSOVER FREQUENCY
Controls the crossover point for the speaker outputs. See page 8 for exact crossover
settings.
LEVEL
Used to reach maximum amplier power with a wide variety of headunits.
CONFIG
FLAT:
Crossovers are turned o
HP:
High pass crossover is on
LP/BP:
Low and High Pass crossovers are on, creating a Bandpass (BP) setting for
midbass drivers or subwoofers. For a standard subwoofer system, the high pass
frequency now becomes a subsonic lter. To turn subsonic lter o, turn the HP
FREQ (Subsonic Filter) to 20Hz.
+12V
This must be connected to the fused positive terminal (+12V) of the car’s
battery. The fuse must be located within 18 inches of the battery.
REMOTE
This must be connected to switched +12V, usually a trigger wire coming
from the head unit or ignition.
GROUND
This must be connected to the negative terminal of the car’s battery or
bolted to a clean, unpainted part of the chassis of the vehicle.
RMD
Optional RMD Voltage Display plugs into this port. Sold separately.
CLIP INDICATOR
Lights when the amplier reaches near maximum output. Under normal
operation the clip indicator should be ashing during the peaks of the
music. The clip indicator should not stay lit for long periods of time (more
than 2 or 3 seconds), if this is the case you need to reduce system volume
or level of the amplier.
PROTECT INDICATOR
Lights red if there is a problem with the audio system. For example, speaker
wire is pinched/shorted, the amplier is running too low of an impedance
or reached an unsafe temperature.
SPEAKER OUTPUTS
Used to connect the amplier to speakers. Minimum impedance is 2 ohms
bridged or 1 ohm stereo. Minimum speaker wire size is 16 gauge. Use Left
+ and Right - to bridge the channels.
ELITE.2 FUNCTIONS
INPUT
Connect preamp signal cables from the head unit to these terminals.
LP CROSSOVER FREQUENCY
Controls the lowpass crossover point for the speaker outputs. See page 8 for
exact crossover settings.
BASS BOOST
Variable bass boost from 0 to +18dB @ 45Hz.
REMOTE LEVEL CONTROL
This port is for connecting the subwoofer remote level control. This is not
a bass boost, it controls the level of the low pass signal. This control is not
compatible with the Phoenix Gold LPL or RBC level controls.
OUTPUT MASTER/INPUT SLAVE
See page 11 for details how to link two Elite.1s together.
IMPORTANT: FOR
NORMAL USE, MAKE SURE THE SWITCH IS SET TO OUTPUT MASTER.
If its set
to INPUT SLAVE during normal use the amplier will have no output.
LEVEL
Used to reach maximum amplier power with a wide variety of headunits.
SUBSONIC CROSSOVER FREQUENCY
Controls the highpass crossover point for the speaker outputs to eliminate
extreme low frequencies.
CLIP INDICATOR
Lights when the amplier reaches near maximum output. Under normal
operation the clip indicator should be ashing during the peaks of the
music. The clip indicator should not stay lit for long periods of time (more
than 2 or 3 seconds), if this is the case you need to reduce system volume
or level of the amplier.
PROTECT INDICATOR
Lights red if there is a problem with the audio system. For example, a speaker
wire is pinched/shorted, the amplier is running too low of an impedance or
reached an unsafe temperature.
+12V
This must be connected to the fused positive terminal (+12V) of the car’s
battery. The fuse must be located within 18 inches of the battery.
REMOTE
This must be connected to switched +12V, usually a trigger wire coming
from the head unit or ignition.
GROUND
This must be connected to the negative terminal of the car’s battery or
bolted to a clean, unpainted part of the chassis of the vehicle.
SPEAKER OUTPUTS
Used to connect the amplier to subwoofers. Minimum impedance is 1
ohm. Minimum speaker wire size is 12 gauge.
RMD
Optional RMD Voltage Display plugs into this port. Sold separately.
PHASE
This allows the phase of the amplier output to be adjusted from 0 to 180
degrees. This adjustment can help achieve better “up front” subwoofer
bass and resolve subwoofer cancellation problems in certain installations.
Each installation is dierent, slowly adjust and listen for best results.
ELITE.1 FUNCTIONS

Elite Amplier Owner’s Manual
© 2012 Phoenix Gold • www.phoenixgold.com
© 2012 Phoenix Gold • www.phoenixgold.com
Elite Amplier Owner’s Manual
All crossover frequency potentiometers have 41 detents or “clicks” so the end user can set the exact crossover frequency desired.
ELITE.1
clicks
Subsonic
(10~55Hz)
LPF
(30~300Hz)
1 12 30
2 12 30
3 12 30
4 12 30
5 12 30
6 12 31
7 13 32
8 13 33
9 14 35
10 15 37
11 16 39
12 16 42
13 18 45
14 19 49
15 20 52
16 22 56
17 24 62
18 26 69
19 28 77
20 31 87
21 32 102
22 34 114
23 35 120
24 36 126
25 38 134
26 39 143
27 40 152
28 42 163
29 44 214
30 45 230
31 47 248
32 47 251
33 48 253
34 48 260
35 49 273
36 49 280
37 49 289
38 49 295
39 50 304
40 50 305
41 50 306
CROSSOVER SETTINGS
ELITE.2
clicks
LPF
(40Hz~4khz)
HPF
(20Hz~4kHz)
1 37 23
2 37 24
3 38 24
4 38 25
5 41 27
6 44 29
7 48 30
8 51 31
9 56 33
10 62 37
11 68 40
12 76 44
13 88 50
14 96 55
15 110 58
16 130 67
17 160 78
18 180 99
19 190 120
20 220 121
21 250 150
22 290 170
23 330 200
24 360 220
25 430 260
26 480 360
27 560 390
28 620 430
29 720 450
30 970 631
31 1.18k 790
32 1.3k 890
33 1.5k 1k
34 1.7k 1.18k
35 2k 1.4k
36 2.45k 1.7k
37 2.7k 2.2k
38 3.2k 3.2k
39 3.5k 4.15k
40 3.85k 4.2k
41 3.9k 4.4k
ELITE.4
clicks
LPF
(40Hz~4kHz)
HPF
(20Hz~4kHz)
1 36 24
2 37 25
3 38 27
4 41 30
5 44 33
6 48 38
7 52 41
8 55 46
9 61 51
10 65 60
11 67 71
12 73 83
13 86 96
14 93 106
15 99 122
16 107 129
17 127 134
18 162 143
19 186 155
20 220 170
21 251 187
22 282 207
23 317 235
24 365 264
25 430 286
26 517 330
27 666 353
28 860 393
29 1.05k 434
30 1.12k 455
31 1.32k 514
32 1.49k 583
33 1.65k 693
34 1.77k 876
35 2k 1k
36 2.3k 1.2k
37 2.5k 1.4k
38 2.9k 1.8k
39 3.2k 2.6k
40 3.6k 3k
41 3.9k 4.2k
FRONT AND REAR INPUTS
Connect preamp signal cables from headunit to these inputs. The front
and rear inputs must be used, if only the front input is used then the rear
speaker outputs will have no output signal.
FAN
The internal fan is nearly inaudible but the end user can control the fan’s
mode via the endpanel switch.
ON:
Fan runs at full speed at all times regardless of the heatsink
temperature. This is recommended for heavy users or low impedance
loads such as 1 ohm stereo/2 ohms bridged.
OFF:
Internal fan is o. This is only recommended for short periods of
time. For example, a sound quality competition.
AUTO:
Best setting for most users. Internal fan is o until the heatsink
temperature reaches 50°c/120°F then the variable fan turns on and its
speed is controlled by the heatsink temperature.
REMOTE LEVEL CONTROL
This port is for connecting the subwoofer remote level control. This is not a bass
boost, it controls the level of the low pass signal of
rear channels only
. Rear channels’
cong switch must be set to “LP/BP” for the remote to operate.
CROSSOVER FREQUENCY
Controls the crossover point for the speaker outputs. See page 8 for exact crossover
settings.
LEVEL
Used to reach maximum amplier power with a wide variety of headunits.
CONFIG
FLAT:
Crossovers are turned o
HP:
High pass crossover is on
LP/BP:
Low and High Pass crossovers are on, creating a Bandpass (BP) setting for
midbass drivers or subwoofers. For a standard subwoofer system, the high pass
frequency now becomes a subsonic lter. To turn subsonic lter o, turn the HP
FREQ (Subsonic Filter) to 20Hz.
+12V
This must be connected to the fused positive terminal (+12V) of the car’s
battery. The fuse must be located within 18 inches of the battery.
REMOTE
This must be connected to switched +12V, usually a trigger wire coming
from the head unit or ignition.
GROUND
This must be connected to the negative terminal of the car’s battery or
bolted to a clean, unpainted part of the chassis of the vehicle.
RMD
Optional RMD Voltage Display plugs into this port. Sold separately.
CLIP INDICATOR
Lights when the amplier reaches near maximum output. Under normal
operation the clip indicator should be ashing during the peaks of the
music. The clip indicator should not stay lit for long periods of time (more
than 2 or 3 seconds), if this is the case you need to reduce system volume
or level of the amplier.
PROTECT INDICATOR
Lights red if there is a problem with the audio system. For example, speaker
wire is pinched/shorted, the amplier is running too low of an impedance
or reached an unsafe temperature.
SPEAKER OUTPUTS
Used to connect the amplier to speakers. Minimum impedance is 2 ohms
bridged or 1 ohm stereo. Minimum speaker wire size is 16 gauge. Use Left
+ and Right - to bridge the channels.
ELITE.4 FUNCTIONS

Elite Amplier Owner’s Manual
© 2012 Phoenix Gold • www.phoenixgold.com
© 2012 Phoenix Gold • www.phoenixgold.com
Elite Amplier Owner’s Manual
1. Install all system fuses.
2. Set the amplier’s input sensitivity controls to their minimum positions
(full counterclockwise).
3. Set all amplier crossover switches according to your system’s design.
4. Make preliminary adjustments to the crossover frequency, usually 80Hz
is good starting point for high and low pass. It may be necessary to ne
tune the crossover frequency later for the best overall sound quality.
5. If using a Remote Subwoofer Level Control, set it to maximum (full
clockwise).
6. Turn the headunit on with the volume set to minimum.
7. Visually check the amplier’s has turned on by the power LED.
8. Check the condition of all other components to make sure they are
powered up.
9. Set the headunit’s tone controls, balance, and fader to the center (at)
position. Turn o any loudness or other signal processing features.
10. Set the volume control of the headunit for maximum undistorted output
(on most headunits this will be approximately 7/8 of maximum volume).
Use a very clear and dynamic recording.
11. Turn up the sensitivity or input level control on the amplier until the
speakers reach maximum undistorted output.
12. Repeat sensitivity level adjustments for all other ampliers.
13. Reduce the headunit’s volume to a comfortable level.
14. Listen to various musical selections to check overall system balance.
Compare front to rear, midbass to midrange, etc. If one speaker set is
too loud compared to another, then its level must be lowered to blend
correctly with the other speakers.
Note: For subwoofers controlled by the Remote level control, keep the
level setting from step 11 or 12. Use the control to blend subwoofers
with the rest of the system. The correct subwoofer volume will change
depending on road noise and dierences in recordings.
15. Fine tune crossover frequencies to achieve the smoothest possible
blending of each speaker set.
16. Adjust the Bass Equalization Controls on the amplier, headunit or
processor upstream if necessary to increase output.
Note: Use these controls sparingly. Every 3dB of boost requires double the
power at 45Hz. If your subwoofer system requires a lot of boost to sound
good, there may be a problem. Look for out-of-phase woofers, a leaking
subwoofer box, or incorrect box size.
17. With all levels set correctly, the system will reach overall maximum
undistorted output at the volume level set in step 10.
No power: Check voltage at the amplier with a DMM (volt meter), +12v
and R (with head unit on) the voltage should register between 11.5V and
14.4V when using the attached ground lead of the amplier. Check fuse at
the battery. Use a meter to verify connection from one end of the fuse to the
other, breaks may not always be visible. If the fuse is blown, check the power
wire and also the amplier for a short. If the short is in the amplier itself, see
your Phoenix Gold dealer. If no short is present, replace the fuse.
Power without sound: Turn the amplier o and check all input and output
signal cables and power connections. Check the speakers for shorts with
a DMM (volt meter) or by connecting them to another audio source. After
making sure everything is correct, turn the amplier on again.
Power without sound and the PROTECT LED is lit: The red PROTECT LED
lights when the amplier shuts down for either thermal or over-current
protection. A high internal amplier operating temperature will trigger
thermal shutdown: after it cools about 5°C, the amplier will restart. A
shorted speaker lead or operation into unusually low impedance loads will
trigger over-current shutdown: cycle power at the amplier R terminal to
restore operation. Check for shorted speaker wiring or damaged speakers or
crossover systems if over-current shutdown occurs.
No sound from one or more channels: Check for overvoltage on +12V and
ground terminals. Check the balance control in the head unit. Check speaker
connections. Check signal input connection.
Very low output: Check your head unit’s fader control or the amplier’s input
sensitivity level. Make sure subsonic frequency control is not set too high and
LP frequency control is not set too low at the same time.
Frequent amplier shutdown with automatic recovery: This indicates
chronic amplier thermal shutdown because of operation at consistently
high internal temperatures. High operating temperature can be caused
by inadequate ventilation. Make sure you are not running a lower than
recommend impedance. Also check for damaged speakers or passive
crossover systems. Finally, chronic thermal shutdown may result from
otherwise normal operation of the amplier at elevated output power levels,
which can be resolved by providing additional amplier cooling, installing a
higher-power amplier, or reducing amplier output level.
Its critical that Elite ampliers have the proper power and ground wiring
from the vehicle’s electrical system. Too small of power wire or improper
terminations can cause voltage drops and the amplier to engage its
protection.
“Motor Boating”: The power indicator going o repeatedly when the audio
system is on. Check the amplier’s connection to the battery. Check battery
voltage. If low, recharge or replace the battery. Check all ground connections.
SYSTEM TUNING
TROUBLESHOOTING
LINKING OR STRAPPING TWO ELITE.1s
Strapping or linking two ampliers allows you to deliver a ton of power into a single voice coil commonly used in SPL
competitions. The example below shows two Elite.1s delivering a total of 6,400 watts RMS into a single 2 ohm voice coil.
• DO NOT STRAP AMPLIFIERS INTO A 1 OHM LOAD. Minimum load strapped is 2 ohms.
• The “Master” amplier’s preamp section controls both ampliers. “Slave” amplier’s pre-amp controls are disabled.
• The negative or (-) speaker output terminals are connected together using 12 gauge wire as shown.
OUTPUT
MASTER
FROM
HEADUNIT
+
-
INPUT
SLAVE
INPUTS
NOT USED
CONNECT THE TWO
AMPLIFIERS VIA A
SINGLE CHANNEL
RCA CONNECTION
USE 12 GAUGE FOR
ALL SPEAKER WIRING
SLAVE AMPLIFIER’S PREAMP
SECTION IS DISABLED
MASTER AMPLIFIER’S PREAMP
SECTION CONTROLS BOTH AMPLIFIERS
MASTER
AMPLIFIER
SLAVE
AMPLIFIER

Phoenix Gold
A Division of AAMP of America™
13190 56th Court
Clearwater, Florida 33760
P: 888-228-5560
www.phoenixgold.com
© 2012 AAMP of Florida, Inc
Designed and Engineered in the USA
LIMITED WARRANTY ON AMPLIFIERS
Phoenix Gold warrants this product to be free of defects in materials and workmanship for a period of one (1) year from the original date of purchase. This
warranty is not transferable and applies only to the original purchaser from an authorized Phoenix Gold dealer in the United States of America only. Should service
be necessary under this warranty for any reason due to manufacturing defect or malfunction, Phoenix Gold will (at its discretion), repair or replace the defective
product with new or remanufactured product at no charge. Damage caused by the following is not covered under warranty: accident, misuse, abuse, product
modication or neglect, failure to follow installation instructions, unauthorized repair attempts, misrepresentations by the seller. This warranty does not cover
incidental or consequential damages and does not cover the cost of removing or reinstalling the unit(s). Cosmetic damage due to accident or normal wear and
tear is not covered under warranty.
INTERNATIONAL WARRANTIES:
Products purchased outside the United States of America are covered only by that country’s Authorized Phoenix Gold reseller and not by Phoenix Gold. Consumers
needing service or warranty information for these products must contact that country’s reseller for information.
/