Page is loading ...

2010 BARSKA® | La Verne, CA 91750 | (t) 888.666.6769 | (f ) 909.445.8169
www.barska.com
BC149 1
40x, 400x, 1600x 3MP Digital Microscope with Screen
Introduction
Thank you for purchasing the LCD Digital Microscope (LDM) with a 3.5” monitor. Your
microscope is a precision optical instrument, made of the highest quality materials to
ensure durability and long life.
Before attempting to use your microscope, read through the instructions to familiarize
yourself with the functions and operations to maximize your enjoyment and usage. See
the microscope diagrams to locate the parts discussed in this manual.
This microscope provides high powers from 40x up to 400x (up to 1600x with digital
zoom). This microscope is ideally suited for examining specimen slides of yeasts and
molds, cultures, plant and animal parts, fibers, bacteria, etc. You can also examine small
objects such as coins, stamps, PC boards, insects, and other objects especially at the
lower powers.
This microscope does not have an eyepiece that is used in traditional microscopes.
You will view specimens on the LCD screen which are easy to see and enjoy them with
others. You can also take snapshots or short videos with the built-in digital camera.
The final section provides simple care and maintenance tips for you to follow to
ensure that your microscope provides you with years of quality performance, usage, and
enjoyment.

2010 BARSKA® | La Verne, CA 91750 | (t) 888.666.6769 | (f ) 909.445.8169
www.barska.com
BC149 2
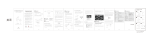
Figure 1
Included Accessories
AC Adapter 110V~ 240V 7 Prepared Slides, 3 blank
Mini USB Cable
Carrying Case

2010 BARSKA® | La Verne, CA 91750 | (t) 888.666.6769 | (f ) 909.445.8169
www.barska.com
BC149 3
Specifications
Stage Mechanical Stage (91mmX91mm)
Digital Camera 5MP CMOS; 10x Magnification in lieu of an Eyepiece; 2560x
1920 pixel array
LCD Monitor 3.5” with 4x Digital Zoom – High definition digital TFT display
Resolution – 320x240 pixels.
Focuser Smooth, single motion
Objectives Achromatic 4x, 10x and 40x
Flash Memory 128M Flash Memory (Support the highest 8G SD Card, not included)
Snapshots in JPEG format and MP4 files for Video
USB Cable
Mini USB 2.0
PC Camera
Directly observed through the computer screen
Filter Wheel
Blue/Green/Red/1mm/3mm/6mm
Illuminators Built-in electric – both are LED 3.4Volt and 5Watt
AC Adapter Input Universal 100 to 240Volt 50/60HZ
Weight/Dimensions
1.65kg
Magnification (Power) Table
Objective Lens
4x 10x 40x
Digital Image -- normal
40X 100X 400X
Maximum with 4x digital zoom
160X 400X 1600X
Setting up Microscope
1. Carefully remove the microscope and
other parts from the carrying case and
set them on a flat surface.
2. Remove the dust cover from the
microscope.
3. Plug the small cable from the AC
adapter into the socket on the back of
the base.
4. Insert the plug end of the AC adapter
into the proper power source

2010 BARSKA® | La Verne, CA 91750 | (t) 888.666.6769 | (f ) 909.445.8169
www.barska.com
BC149 4
Microscope Operation
Before looking at specimens you must turn the LCD on, turn on the illumination, and
understand how to use the mechanical stage and then you are ready to begin viewing.
Figure 3
LCD Module
This digital microscope is different than traditional microscopes --- instead of using
eyepieces to look at a specimen in a traditional microscope, the LCD monitor replaces the
eyepieces so you can look at the specimen on the screen by yourself or share the view
with others. To begin to view specimens with your microscope, you will have to turn the
LCD monitor on by turning the Power Button “Power” (see Figure 3). Push and hold the
button down until the Red LED comes on indicating the LCD monitor is “On.” That is
basically all you need to do to use the LCD screen for viewing specimens. The various
keys on the LCD Module are mainly used for taking images (snapshots and video) and will
be discussed later in this manual.
Illumination
To get the sharpest and best views, the proper illumination (lighting) must be chosen.
1. To turn the illuminator(s) on, see Figure 4 below which shows the following four
positions on the Illuminator Switch --- OFF, I (Bottom Illuminator), II (Top Illuminator), and
III (Both Bottom & Top Illuminators).
2. The top illuminator (II) is normally for solid objects (not specimen slides) so light shine
down onto the object. The top illuminator was designed to be used at low power (4 x
objectives) as higher power objective lenses (10x & 40x) will block the light. If you need to

2010 BARSKA® | La Verne, CA 91750 | (t) 888.666.6769 | (f ) 909.445.8169
www.barska.com
BC149 5
use high power to observe solid objects, use a secondary light (desk lamp, etc.) for
Illumination.
3. The bottom illuminator (I) is used for specimen slides where the light shines up through
the hole in the stage through the slide.
4. Having both illuminators on at the same time can provide enough light for thick and
irregular specimens.
Figure 4
Adjusting the Lighting
Specimens of different size, thickness, and color variations will require different levels of
illumination. There are two ways to change the amount of illumination when viewing a
specimen; adjusting the brightness on the dial shown above in Figure 5 and changing the
EV function on the LCD monitor. The EV (exposure value for brightness) function
increases or decreases the brightness level by using the “left” or “right” arrow keys on the
LCD monitor. When viewing a specimen that is not transparent or dark in color, you may
need to increase the amount of light to resolve certain features or details. This is best
done by simply increasing the brightness of the illuminator by rotating the brightness
control dial all the way to its highest setting. Optimum lighting will be found by
experimenting with adjustments as each specimen may require slightly different
illumination as well as the same specimens viewed under different powers.

2010 BARSKA® | La Verne, CA 91750 | (t) 888.666.6769 | (f ) 909.445.8169
www.barska.com
BC149 6
Digital Imaging
You can take snapshots or a short video with your microscope with the built-in digital
camera. With the internal storage memory, you do not need to use a PC or any other
devices to do imaging. Transferring of images to your PC for saving and or printing them is
easy and will be discussed later in this manual.
Settings and Information for the Digital Camera
After power on the LCD monitor, there are three choice menus.
Camera:
1. In the Top right of the LCD screen (Figure 5-4), mean we are in the camera mode.
2. In the Top left of the LCD screen (Figure 5-1) is the EV (Exposure Value) which
adjusts the brightness level. The normal position is 0.0 and this can be adjusted in
increments up to -2 to +2 by pushing the Left/Right directional keys.
3. In the screen(Figure 5 – 2) is the digital zoom feature, using the directional keys
(up/down) to zoom out/in,
Maximum with 4x digital zoom feature.
4. The picture setting Mode (Figure 5 – 3) – the normal (default setting) is “Single” for
taking snapshots one at a time as you choose. You can Choose “Continuous” to take
consecutive picture.
a)
Size (Figure 5 – 5) – this sets the resolution you want for the image. The camera
itself uses the
2560x1920 pixel arrangement (5MP) but you can use digital
interpolation to increase the resolution or you can use lower resolutions to
increase the number of images you can save in your internal storage memory.
b) Quality – The quality can provide fine, standard, economy image,
c) White balance– you can change the different white balance to observe different
slice.
5. In the bottom right of the screen (Figure 5 – 6) is shown an estimate of the remaining
snapshot images left in the internal memory or SD card

2010 BARSKA® | La Verne, CA 91750 | (t) 888.666.6769 | (f ) 909.445.8169
www.barska.com
BC149 7
Figure 5

2010 BARSKA® | La Verne, CA 91750 | (t) 888.666.6769 | (f ) 909.445.8169
www.barska.com
BC149 8
DV Record:
1. In the Top right of the LCD screen (Figure 6-3), mean we are in the DV record mode.
2. In the Top left of the LCD screen (Figure 6-1) is the EV (Exposure Value) which
adjusts the brightness level. The normal position is 0.0 and this can be adjusted in
increments up to -2 to +2 by pushing the Left/Right directional keys.
3. In the screen(Figure 6 – 2) is the digital zoom feature, using the directional keys
(up/down) to zoom out/in,
Maximum with 4x digital zoom feature.
4.
The DV Record can save in VGA or QVGA MP4 movie record (Figure 6 – 4).
5. In the bottom right of the screen (Figure 6 – 5) is shown an estimate of the remaining
snapshot images left in the internal memory or SD card
Figure 6
Picture View:
1. Into the “Picture View”, the picture is Recent photographs.
2. Using the “MENU” key.
a) Delete – delete single, all the picture or delete your select picture.
b) Copy to card – you can copy the picture from the build-in memory card to SD
card.
c) File Protect
d) Thumbnail – view the picture in nine.

2010 BARSKA® | La Verne, CA 91750 | (t) 888.666.6769 | (f ) 909.445.8169
www.barska.com
BC149 9
System Setup:
In camera or DV record mode. Press the “MENU” key, and press right key into
system setup.
1. Format- formats the memory card.
2. Language – this LCD Digital Microscope is in multiple languages: ENGLISH,
FRENCH, DEUTSCH, ITALIAN, SPANISH, PORTUGUESE, JAPANESE,
CHINESE_CN, and CHINESE_TW.
3. Auto off – set the auto off time, 1min,3min,5min,or never.
4. System reset.
5. Light Frequency. 60Hz, 50Hz.
6. TV output – using DV-OUT line, we can transport the image to TV.
7. USB setting- the “Disk Drive” can transport the built-in data to computer. “PC cam”
allow us to observe the slice in computer.
8. PC Camera - Directly observed through the computer screen.
a) Step 1; Insert the CD-ROM in the computer, then setup the software “Digital
Microscope Drive.exe” and “Digital Microscope Driver patch.exe”.
b) Step 2, setting “USB” to “PC cam” (view system setup point 7)
c) Step 3, Using Mini USB cable connect to computer. After the Automatic
Identification Equipment. Run the software “AMCap2.exe”
d) Using the software AMCap to Viewing a Specimen. When viewing from computer
the image can not be seen in on the screen of the LCD Digital Microscope.
Transferring Your Images

2010 BARSKA® | La Verne, CA 91750 | (t) 888.666.6769 | (f ) 909.445.8169
www.barska.com
BC149 10
Maintenance
Your LCD Digital Microscope is a precision optical instrument and should be treated with
care at all times. Follow these care and maintenance suggestions and your microscope
will need very little maintenance throughout its lifetime.
z When not microscope is not in use, remove any specimens left on the stage.
z Turn off the illuminator switch.
z Turn off the LCD monitor.
z Unplug the power cord.
z Always place the dust cover over the microscope when not in use.
z Store the microscope in a dry and clean place.
z Be very careful if using your microscope in direct sun light to prevent damage to the
microscope or your eyes.
z When moving your microscope, carry it by the “arm” with one hand and not by the
focuser knob, LCD monitor, etc. Then, put your other hand under the base for
support.
z Clean the outside surfaces (metal and plastics) with a moist cloth.
z Always unplug any cords before cleaning.
z Never clean optical surfaces with cloth or paper towels as they can scratch optical
surfaces easily.
z Remove dust with a camel’s hair brush or an air blower from optical surfaces.
z To clean fingerprints off of optical surfaces, use a lens cleaning agent and lens tissue
available at most retail photo stores and when cleaning do not rub in circles as this
may cause sleeks or scratches to occur.
z Never disassemble or clean internal optical surfaces. This should be done by
qualified technicians at the factory or other authorized repair facilities.
z When handling glass specimen slides, use care as the edges can be sharp.
/