Prodvx GM-75 User manual

Type
User manual

ProDVX GM-75: Securely mount your 10" display onto glass surfaces with ease. Its sturdy construction and adhesive backing ensure a stable installation, while the included safety screws provide additional peace of mind. Whether for commercial or personal use, the ProDVX GM-75 offers a versatile solution for various applications, including retail displays, interactive kiosks, and home automation systems.

ProDVX GM-75: Securely mount your 10" display onto glass surfaces with ease. Its sturdy construction and adhesive backing ensure a stable installation, while the included safety screws provide additional peace of mind. Whether for commercial or personal use, the ProDVX GM-75 offers a versatile solution for various applications, including retail displays, interactive kiosks, and home automation systems.

www.prodvx.com
ProDVX GM-75
Instruction manual
For more information,
scan the QR code:
ProDVX GM-75
Glass Mount
Thank you for choosing the ProDVX GM-75 Glass Mount. This is a step-by-step
instruction manual to successfully install the ProDVX GM-75 Glass Mount for your
10" display. The ProDVX GM-75 Glass Mount contains the following parts:
1 x Glass Mount Cover Sticker
1 x ProDVX GM-75 Mount frame
1 x adhesive strip
4 x short VESA screws
2 x safety screws
Please contact [email protected] if you need additional support.
1. Clean the surface, preferably with Pro-Screen Cleaner spray.
2. Affix the Glass Mount Cover Sticker to the glass where the tablet will
be placed.
3. Use a solid straight item to even out the Glass Mount Cover Sticker.
4. Even out big bubbles with the straight item (little bubbles will
disappear in time).
5. Gently pull down the paper from the front side.
6. Clean the Glass Mount Cover Sticker with Pro-Screen Cleaner spray
and let it dry for ten minutes
Applying the Glass
Mount Cover Sticker
Mounting your device
71011
7. Remove the white paper from the adhesive strip and attach it to the backside of the
ProDVX GM-75 Mount frame. Then wait for 15 minutes.
8. Remove the red paper from the adhesive strip and press the ProDVX GM-75 Mount
frame firmly onto the Glass Mount Cover Sticker. Hold it for one minute.
Note: Before mounting and turning on the device, wait for 2-3 hours to allow the
adhesive to take hold. At room temperature, approximately 50% of the ultimate
strength will be achieved after 20 minutes, 90% after 24 hours, and 100% after 72 hours.
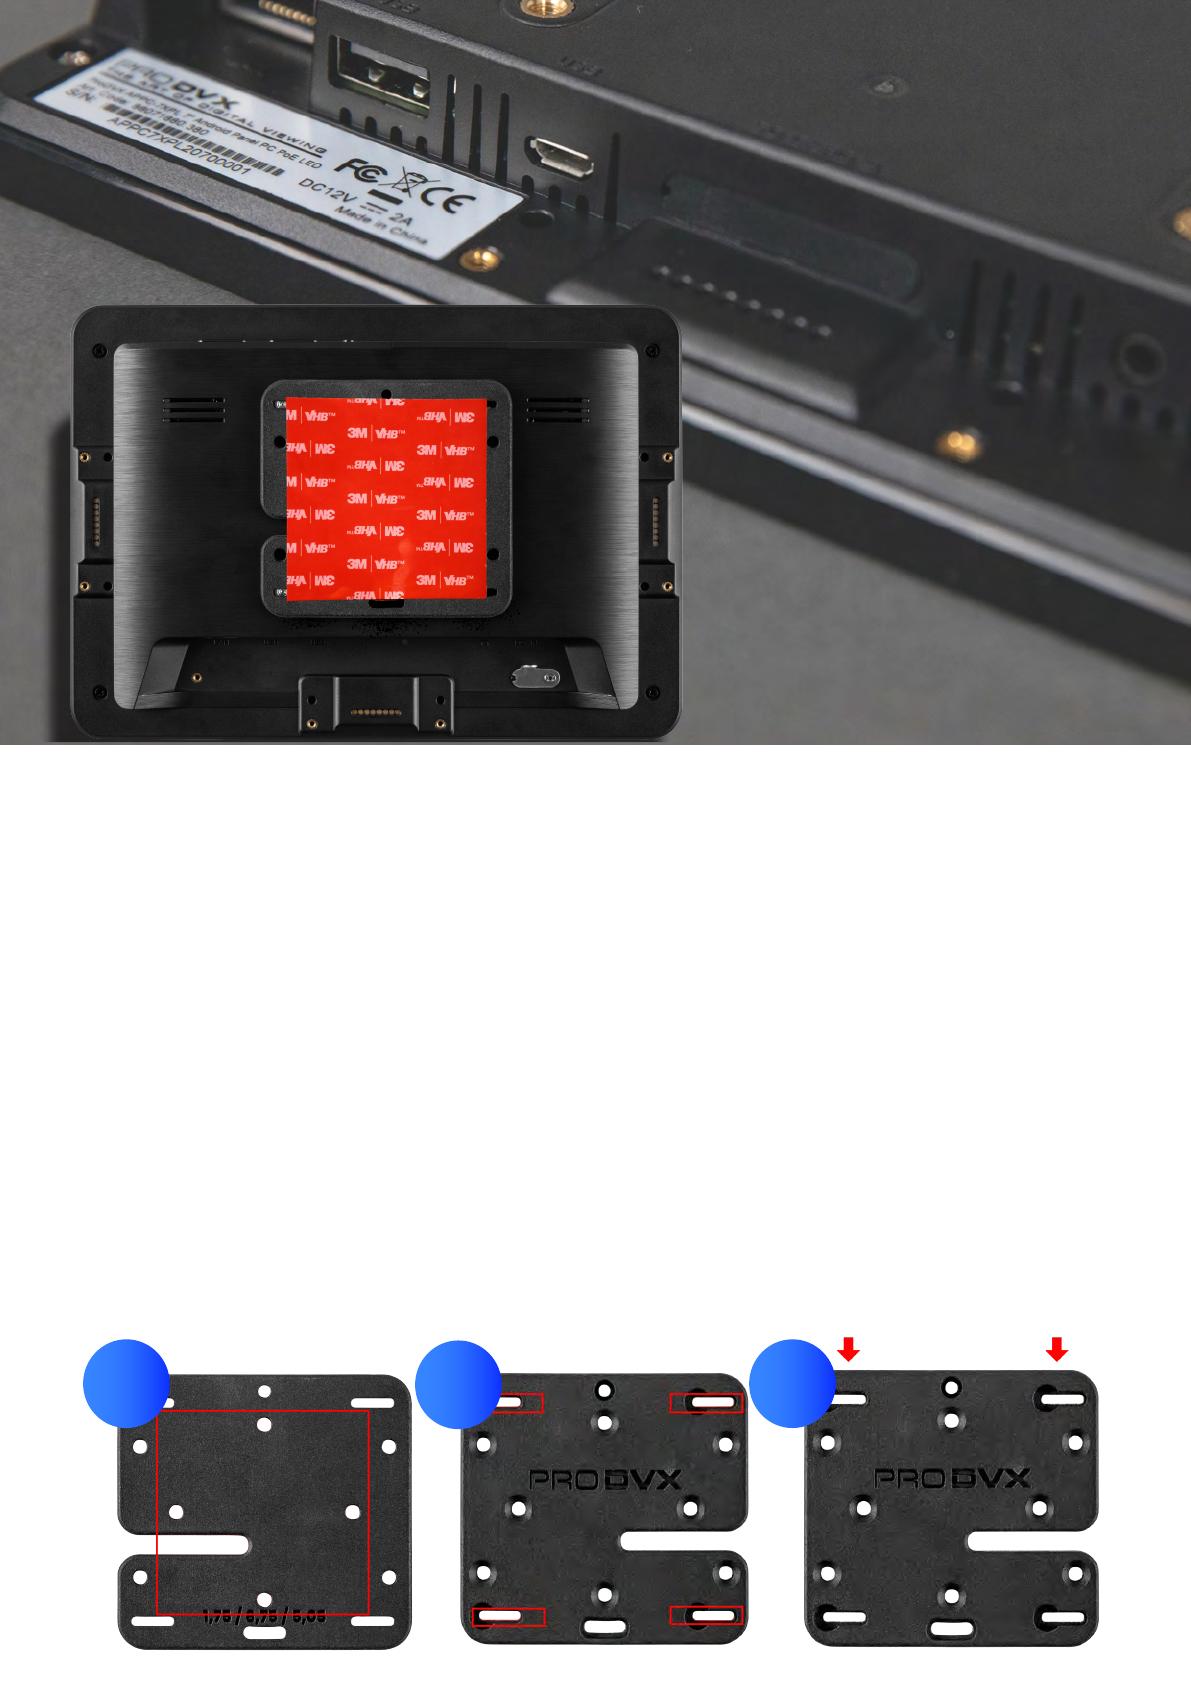
9. Screw the four VESA screws into the VESA holes of your 10" display. Tighten them by
hand so that they stick out a few millimeters for affixing into the keyholes.
10. Align the screws on the back of the device with the four large keyholes on the ProDVX
GM-75 Mount frame and slide from left to right until you hear a click!
11. Insert the two included safety screws into the top of the mounting plate. This will lock
the mounting screws into place.
  • Page 1 1
  • Page 2 2
  • Page 3 3
  • Page 4 4

Prodvx GM-75 User manual

Type
User manual

ProDVX GM-75: Securely mount your 10" display onto glass surfaces with ease. Its sturdy construction and adhesive backing ensure a stable installation, while the included safety screws provide additional peace of mind. Whether for commercial or personal use, the ProDVX GM-75 offers a versatile solution for various applications, including retail displays, interactive kiosks, and home automation systems.

Ask a question and I''ll find the answer in the document

Finding information in a document is now easier with AI