Sony α 560 User manual

Category
Camcorders
Type
User manual
DSLR-A560/A580 4-207-863-11 (1)
Printed on 70% or more recycled paper using
VOC (Volatile Organic Compound)-free
vegetable oil based ink.
Additional information on this product and
answers to frequently asked questions can be
found at our Customer Support Website.
A-mount
Instruction Manual
Interchangeable Lens
Digital Camera
Preparing the camera
Before your operation
Shooting images
Using the shooting function
Using the viewing function
Changing your setup
Viewing images on a
computer
Printing images
Others
Index
2
Owner’s Record
The model and serial numbers are located
on the bottom.
Record the serial number in the space
provided below.
Refer to these numbers whenever you call
upon your Sony dealer regarding this
product.
Model No. DSLR-A580/A560
Serial No. __________________________
To reduce fire or shock hazard, do
not expose the unit to rain or
moisture.
IMPORTANT SAFETY
INSTRUCTIONS
SAVE THESE
INSTRUCTIONS.
DANGER - TO
REDUCE THE RISK
OF FIRE OR
ELECTRIC SHOCK,
CAREFULLY
FOLLOW THESE
INSTRUCTIONS.
If the shape of the plug does not fit the
power outlet, use an attachment plug
adaptor of the proper configuration for the
power outlet.
Battery pack
If the battery pack is mishandled, the
battery pack can burst, cause a fire or even
chemical burns. Observe the following
cautions.
Do not disassemble.
Do not crush and do not expose the
battery pack to any shock or force such as
hammering, dropping or stepping on it.
Do not short circuit and do not allow
metal objects to come into contact with
the battery terminals.
Do not expose to high temperature above
60°C (140°F) such as in direct sunlight or
in a car parked in the sun.
Do not incinerate or dispose of in fire.
Do not handle damaged or leaking
lithium ion batteries.
Be sure to charge the battery pack using a
genuine Sony battery charger or a device
that can charge the battery pack.
WARNING
Caution
3
Keep the battery pack out of the reach of
small children.
Keep the battery pack dry.
Replace only with the same or equivalent
type recommended by Sony.
Dispose of used battery pack promptly
described the instructions.
Battery charger
Even if the CHARGE lamp is not lit, the
battery charger is not disconnected from the
AC power source (mains) as long as it is
connected to the wall outlet (wall socket).
If some trouble occurs while using the
battery charger, immediately shut off the
power by disconnecting the plug from the
wall outlet (wall socket).
The supplied power cord can be used only
with this charger. The power cord cannot
be used with other devices.
RECYCLING LITHIUM-ION
BATTERIES
Lithium-Ion batteries are
recyclable.
You can help preserve
our environment by
returning your used
rechargeable batteries to
the collection and
recycling location nearest you.
For more information regarding recycling
of rechargeable batteries, call toll free
1-800-822-8837, or visit http://
www.rbrc.org/
Caution: Do not handle damaged or
leaking Lithium-Ion batteries.
Battery pack
This device complies with Part 15 of the
FCC Rules, Operation is subject to the
following two conditions:
(1) This device may not cause harmful
interference, and (2) this device must
accept any interference received, including
interference that may cause undesired
operation.
This Class B digital apparatus complies
with Canadian ICES-003.
UL is an internationally recognized safety
organization.
The UL Mark on the product means it has
been UL Listed.
For Customers in the U.S.A.
and Canada
For Customers in the U.S.A.
4
If you have any questions about this
product, you may call:
Sony Customer Information Services
Center
1-800-222-SONY (7669)
The number below is for the FCC related
matters only.
Regulatory Information
CAUTION
You are cautioned that any changes or
modifications not expressly approved in
this manual could void your authority to
operate this equipment.
Note:
This equipment has been tested and found
to comply with the limits for a Class B
digital device, pursuant to Part 15 of the
FCC Rules.
These limits are designed to provide
reasonable protection against harmful
interference in a residential installation.
This equipment generates, uses, and can
radiate radio frequency energy and, if not
installed and used in accordance with the
instructions, may cause harmful
interference to radio communications.
However, there is no guarantee that
interference will not occur in a particular
installation. If this equipment does cause
harmful interference to radio or television
reception, which can be determined by
turning the equipment off and on, the user
is encouraged to try to correct the
interference by one or more of the
following measures:
Reorient or relocate the receiving
antenna.
Increase the separation between the
equipment and receiver.
Connect the equipment into an outlet
on a circuit different from that to which
the receiver is connected.
Consult the dealer or an experienced
radio/TV technician for help.
The supplied interface cable must be used
with the equipment in order to comply with
the limits for a digital device pursuant to
Subpart B of Part 15 of FCC Rules.
Declaration of Conformity
Trade Name: SONY
Model No.: DSLR-A580
Responsible Party: Sony Electronics
Inc.
Address:16530 Via Esprillo,
San Diego, CA 92127 U.S.A.
Telephone No.: 858-942-2230
This device complies with Part 15 of the
FCC Rules. Operation is subject to the
following two conditions: (1) This
device may not cause harmful
interference, and (2) this device must
accept any interference received,
including interference that may cause
undesired operation.
Declaration of Conformity
Trade Name: SONY
Model No.: DSLR-A560
Responsible Party: Sony Electronics
Inc.
Address:16530 Via Esprillo,
San Diego, CA 92127 U.S.A.
Telephone No.: 858-942-2230
This device complies with Part 15 of the
FCC Rules. Operation is subject to the
following two conditions: (1) This
device may not cause harmful
interference, and (2) this device must
accept any interference received,
including interference that may cause
undesired operation.
5
Notice for the customers in the
countries applying EU Directives
The manufacturer of this product is Sony
Corporation, 1-7-1 Konan Minato-ku
Tokyo, 108-0075 Japan. The Authorized
Representative for EMC and product safety
is Sony Deutschland GmbH, Hedelfinger
Strasse 61, 70327 Stuttgart, Germany. For
any service or guarantee matters please
refer to the addresses given in separate
service or guarantee documents.
This product has been tested and found
compliant with the limits set out in the
EMC Directive for using connection cables
shorter than 3 meters (9.8 feet).
Attention
The electromagnetic fields at the specific
frequencies may influence the picture and
sound of this unit.
Notice
If static electricity or electromagnetism
causes data transfer to discontinue midway
(fail), restart the application or disconnect
and connect the communication cable
(USB, etc.) again.
Disposal of Old Electrical &
Electronic Equipment (Applicable in
the European Union and other
European countries with separate
collection systems)
This symbol on the product or on its
packaging indicates that this product shall
not be treated as household waste. Instead it
shall be handed over to the applicable
collection point for the recycling of
electrical and electronic equipment. By
ensuring this product is disposed of
correctly, you will help prevent potential
negative consequences for the environment
and human health, which could otherwise
be caused by inappropriate waste handling
of this product. The recycling of materials
will help to conserve natural resources. For
more detailed information about recycling
of this product, please contact your local
Civic Office, your household waste
disposal service or the shop where you
purchased the product.
For Customers in Europe
6
Disposal of waste batteries
(applicable in the European Union
and other European countries with
separate collection systems)
This symbol on the battery or on the
packaging indicates that the battery
provided with this product shall not be
treated as household waste.
On certain batteries this symbol might be
used in combination with a chemical
symbol. The chemical symbols for mercury
(Hg) or lead (Pb) are added if the battery
contains more than 0.0005% mercury or
0.004% lead.
By ensuring these batteries are disposed of
correctly, you will help prevent potentially
negative consequences for the environment
and human health which could otherwise be
caused by inappropriate waste handling of
the battery. The recycling of the materials
will help to conserve natural resources.
In case of products that for safety,
performance or data integrity reasons
require a permanent connection with an
incorporated battery, this battery should be
replaced by qualified service staff only.
To ensure that the battery will be treated
properly, hand over the product at end-of-
life to the applicable collection point for the
recycling of electrical and electronic
equipment.
For all other batteries, please view the
section on how to remove the battery from
the product safely. Hand the battery over to
the applicable collection point for the
recycling of waste batteries.
For more detailed information about
recycling of this product or battery, please
contact your local Civic Office, your
household waste disposal service or the
shop where you purchased the product.
A moulded plug complying with BS 1363
is fitted to this equipment for your safety
and convenience.
Should the fuse in the plug supplied need to
be replaced, a fuse of the same rating as the
supplied one and approved by ASTA or
BSI to BS 1362, (i.e., marked with an or
mark) must be used.
If the plug supplied with this equipment has
a detachable fuse cover, be sure to attach
the fuse cover after you change the fuse.
Never use the plug without the fuse cover.
If you should lose the fuse cover, please
contact your nearest Sony service station.
Notice for customers in the
United Kingdom
7
Notes on using your camera
Shooting procedure
This camera has two modes for shooting:
the Live View mode using the LCD
monitor, and the viewfinder mode using
the viewfinder (OVF).
There may be differences between an
image recorded in Live View mode and
an image recorded in viewfinder mode,
such as exposure, white balance, or D-
range optimizer, depending on the
method used of metering or the exposure
mode.
In Live View or focus check Live View
mode, the recorded image may be
different from the image you monitored
with the LCD monitor.
Notes on the functions available with
the camera
To check whether it is a 1080 60i-
compatible device or 1080 50i-
compatible device, check for the
following marks on the bottom of the
camera.
1080 60i-compatible device:60i
1080 50i-compatible device:50i
You may feel uncomfortable symptoms
such as eyestrain, nausea, or a tired
feeling while watching 3D-images
recorded with the camera on 3D-
compatible monitors. When you watch
3D-images, we recommend that you take
a break at regular time intervals. Since
the need for or frequency of break times
varies between individuals, please set
your own standards. If you feel sick, stop
watching 3D-images, and consult a
doctor as needed. Also, refer to the
operating instructions of the connected
device or the software used with the
camera. A child’s vision is always
vulnerable (especially for children under
six years of age). Before allowing them
to watch 3D-images, please consult with
an expert, such as a pediatric or
ophthalmic doctor. Be sure to make sure
your children follow the precautions
above.
No compensation for contents of the
recording
The contents of the recording cannot be
compensated for if recording or playback is
not possible due to a malfunction of your
camera or a memory card, etc.
Back up recommendation
To avoid the potential risk of data loss,
always copy (back up) data to other
medium.
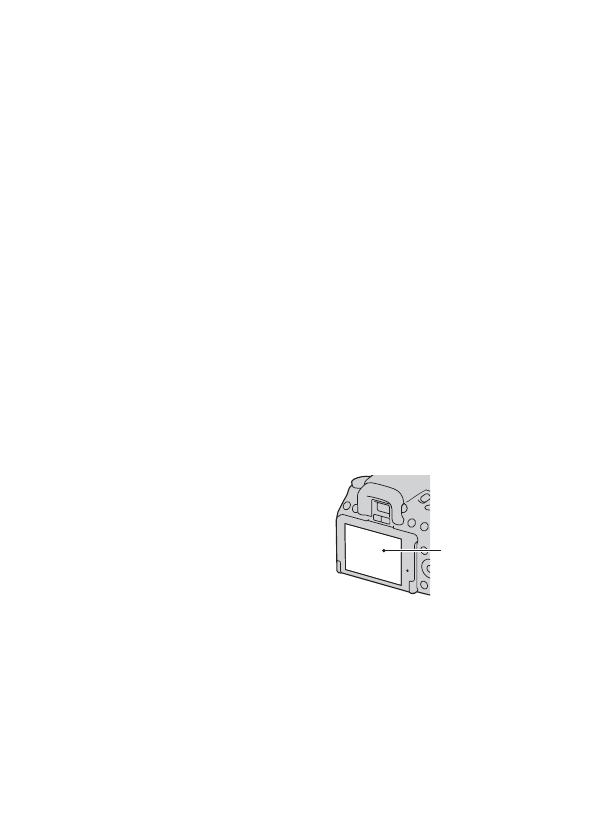
Notes on the LCD monitor and lens
The LCD monitor is manufactured using
extremely high-precision technology so
over 99.99% of the pixels are operational
for effective use. However, there may be
some tiny black points and/or bright
points (white, red, blue or green in color)
that constantly appear on the LCD
monitor. These points are normal in the
manufacturing process and do not affect
the images in any way.
To deal with such issues that may appear
in Live View mode, you may reduce the
effect by using the “Pixel mapping”
function (page 182).
Do not hold the camera by taking hold of
the LCD monitor.
Do not expose the camera to sunlight or
shoot sunward for a long time. The
internal mechanism may be damaged. If
sunlight is focused on a nearby object, it
may cause a fire.
Black, white, red,
blue and green
points
8
Images may trail across on the LCD
monitor in a cold location. This is not a
malfunction. When turning on the camera
in a cold location, the LCD monitor may
become temporarily dark. When the
camera warms up, the monitor will
function normally.
Do not press against the LCD monitor.
The monitor may be discolored and that
may cause a malfunction.
Notes on long-time recording
When you continue to shoot for a long
time, the temperature of the camera rises.
If the temperature reaches above a certain
level, the mark is indicated on the
screen and the camera is turned off
automatically. If the power is turned off,
leave the camera for 10 minutes or longer
to allow the temperature inside the
camera to decrease to a safe level.
Under high ambient temperatures, the
temperature of the camera rises quickly.
When the temperature of the camera
rises, the image quality may deteriorate.
It is recommended that you wait until the
temperature of the camera drops before
continuing to shoot.
The surface of the camera may get hot.
This is not a malfunction.
Notes when playing movies on other
devices
This camera uses MPEG-4 AVC/H.264
High Profile for AVCHD format
recording. Movies recorded in AVCHD
format with this camera cannot be played
with the following devices.
Other devices compatible with
AVCHD format that does not support
High Profile
Devices incompatible with the
AVCHD format
This camera also uses MPEG-4 AVC/
H.264 Main Profile for MP4 format
recording. For this reason, movies
recorded in MP4 format with this camera
cannot be played on devices other than
those that support MPEG-4 AVC/H.264.
Discs recorded with HD image quality
(high definition) can be played back only
on AVCHD format-compatible devices.
DVD-based players or recorders cannot
play back HD image quality discs, as
they are incompatible with the AVCHD
format. Also, DVD-based players or
recorders may fail to eject HD image
quality discs.
Warning on copyright
Television programs, films, videotapes, and
other materials may be copyrighted.
Unauthorized recording of such materials
may be contrary to the provisions of the
copyright laws.
The pictures used in this manual
The photographs used as examples of
pictures in this manual are reproduced
images, and are not actual images shot
using this camera.
On the data specifications described
in this Instruction Manual
The data on performance and specifications
is defined under the following conditions,
except as described in this Instruction
Manual: at an ordinary ambient
temperature of 25ºC (77°F), and using a
battery pack that is charged for about an
hour after the CHARGE lamp goes out.
9
Table of Contents
Notes on using your camera .............................................. 7
Preparing the
camera
Checking the accessories supplied .................................. 13
Identifying parts .............................................................. 14
Preparing the battery pack ............................................... 18
Attaching a lens ............................................................... 25
Inserting a memory card .................................................. 27
Preparing the camera ....................................................... 31
Using the accessories supplied ........................................ 33
Checking the number of recordable images .................... 35
Cleaning ........................................................................... 37
Before your
operation
Switching between the LCD monitor and viewfinder (OVF)
..................................................................................... 40
Adjusting the focus of the finder (diopter adjustment)
............................................................................ 40
The status of the screen in Live View mode ................... 42
Switching the status of the LCD monitor ................... 42
Recording information display ................................... 43
The status of the screen in viewfinder (OVF) mode ....... 45
Switching the status of the LCD monitor ................... 45
Recording information display on the LCD monitor
............................................................................ 46
Viewfinder .................................................................. 48
Selecting a function/setting ............................................. 49
Selecting a function with the Fn (Function) button ... 50
The functions selected by the Fn (Function) button ... 51
The functions selected by the MENU button ............. 52
Shooting images
Shooting an image without camera shake ....................... 58
Correct posture ........................................................... 58
Using the SteadyShot function ................................... 59
Using a tripod ............................................................. 60
Shooting with the automatic setting ................. 61
Shooting with a suitable setting for the subject ............... 63
Shooting with preset settings according to the scene
(Scene Selection) ............................................... 63
Shooting panoramic images (Sweep Panorama)
............................................................................ 66
10
Shooting 3D-panoramic images (3D Sweep
Panorama) ......................................................... 69
Shooting an image the way you want it (Exposure mode)
..................................................................................... 70
Shooting with program auto .................................. 71
Shooting by controlling the blur of the background
(Aperture priority) ............................................. 72
Shooting a moving subject with various expressions
(Shutter speed priority) ..................................... 75
Shooting with the exposure adjusted manually
(Manual exposure) ............................................ 77
Shooting trails with long exposure (BULB) .......... 79
Recording movies ............................................................ 81
Available recording time for a movie ........................ 83
Notes on continuous movie recording ........................ 84
Using the
shooting function
Selecting the focus method .............................................. 85
Using autofocus .......................................................... 85
Shooting with your desired composition (Focus-lock)
............................................................................ 87
Selecting the focus method to suit the movement of the
subject (Autofocus Mode) ................................. 88
Selecting the focus area (AF area) ............................. 89
Adjusting the focus manually (Manual focus) ........... 90
Composing your shot using the image sensor (Focus
check Live View) .............................................. 91
Checking the focus by enlarging the image ............... 93
Detecting faces ................................................................ 95
Using the Face Detection function ............................. 95
Capturing smiling faces (Smile Shutter) .................... 96
Using the flash ................................................................. 98
Performing wireless flash shooting .......................... 101
Adjusting the brightness of the image (Exposure, Flash
compensation, Metering) .......................................... 102
Shooting with fixed brightness (AE Lock) .............. 102
Using brightness compensation for the entire image
(Exposure compensation) ................................ 103
Adjusting the amount of flash light (Flash
Compensation) ................................................ 105
11
Selecting the flash control mode to set the amount of
flash light (Flash control) ................................ 106
Selecting the method for measuring the brightness of a
subject (Metering Mode) ................................. 107
Setting ISO .................................................................... 108
Compensating for the brightness and contrast automatically
(D-Range) ................................................................. 109
Correcting the brightness of the image (D-Range
Optimizer) ....................................................... 109
Compensating automatically with rich gradation (Auto
High Dynamic Range) .................................... 110
Image processing ........................................................... 112
Selecting your desired image processing (Creative Style)
.......................................................................... 112
Changing the range of color reproduction (Color Space)
.......................................................................... 113
Adjusting the color tones (White balance) .................... 114
Adjusting the white balance to suit a specific light source
(Auto/Preset white balance) ............................ 114
Setting the color temperature and a filter effect (Color
Temperature/Color Filter) ............................... 115
Registering the color tones (Custom white balance) 116
Selecting the drive mode .................................. 118
Shooting single shot ................................................. 118
Shooting continuously .............................................. 118
Using the self-timer .................................................. 119
Shooting images with the exposure shifted (Exposure
bracket) ............................................................ 120
Shooting with white balance shifted (WB bracket)
.......................................................................... 122
Shooting with the Wireless Remote Commander .... 122
Using the viewing
function
Playing back images ...................................................... 123
Checking the information of recorded images .............. 129
Protecting images (Protect) ........................................... 133
Deleting images (Delete) ............................................... 134
Viewing images on a TV screen .................................... 136
12
Changing your
setup
Setting image size and image quality ............................ 140
Setting the method for recording on a memory card ..... 144
Changing the noise reduction setting ............................ 148
Changing the function of the buttons ............................ 149
Changing other settings ................................................. 150
Setting the LCD monitor ............................................... 152
Confirming the version of the camera ........................... 154
Resetting to the default .................................................. 155
Viewing images
on a computer
Using with your computer ............................................. 158
Using the software ......................................................... 160
Connecting the camera to the computer ........................ 164
Creating a movie disc .................................................... 167
Printing images
Specifying DPOF ........................................................... 171
Others
Specifications ................................................................ 173
Troubleshooting ............................................................. 178
Warning messages ......................................................... 187
Precautions .................................................................... 190
AVCHD format ............................................................. 193
3D-shootings .................................................................. 194
Index .............................................................................. 195
Preparing the camera
13
Preparing the camera
Checking the accessories supplied
The number in parentheses indicates the number of pieces.
BC-VM10 Battery charger (1)/
Power cord (mains lead) (1)
Rechargeable battery pack NP-
FM500H (1)
USB cable (1)
Shoulder strap (1)
Eyepiece cover (1)
Body cap (1) (Attached on the
camera)
Eyecup (1) (Attached on the
camera)
CD-ROM (Application Software
for α camera) (1)
Instruction Manual (This manual)
(1)
14
Identifying parts
See the pages in parentheses for details of operation.
A Shutter button (61)
B Power switch (31)
C Control dial (73)
D Self-timer lamp (119)
E Remote sensor
F Lens contacts*
G Mirror*
H Preview button (74)
I Mount
J Built-in flash* (98)
K Mode dial (61 – 80)
L (Flash pop-up) button (98)
M Lens release button (26)
N Focus mode switch (85, 90)
* Do not directly touch these
parts.
Front side
15
Preparing the camera
A Diopter-adjustment dial (40)
B Microphone**
C Auto-lock Accessory shoe
(101)
D Viewfinder* (40)
E Eyepiece sensors (41)
F MENU button (52)
G DISP (Display) button (42, 45,
123)
H MOVIE button (81)
I For shooting: (Exposure)
button (103)
For viewing: (Zoom out)
button (126)/ (Image index)
button (127)
J LCD monitor (42, 123, 129)
You can adjust the angle of the
LCD monitor to meet various
shooting situations.
K Light sensor (152)
L (Playback) button (123)
M LIVE VIEW/OVF switch (40)
N FOCUS CHECK LV (Live
View) button (91, 93)
O D-RANGE (Dynamic range)
button (109)
P (Drive) button (118)
Rear side
16
Q ISO button (108)
R Image sensor position
mark (87)
S For shooting: AEL (AE lock)
button (78, 102)/Focus
Magnifier button (93, 149)
For viewing: (Zoom in)
button (126)
T For shooting: Fn (Function)
button (50, 51)
For viewing: (Image
rotation) button (125)
U Access lamp (28)
V Controller (v/V/b/B button)
(49)
W Controller (Enter) (49)/AF
button (89)
X (Delete) button (134)
* Do not directly touch these
parts.
** Do not cover this part
during movie recording.
17
Preparing the camera
A HDMI terminal (136)
B (USB) terminal (164)
C Speaker
D REMOTE terminal
When connecting the RM-
S1AM/RM-L1AM Remote
Commander (sold separately) to
the camera, insert the plug of
the Remote Commander into
the REMOTE terminal,
aligning the guide of the plug
with the guide of the REMOTE
terminal. Make sure that the
cord of the Remote Commander
faces forward.
E MIC (PLUG IN POWER) jack
When an external microphone
is connected, the internal
microphone is turned off
automatically. When the
external microphone is a plug-
in-power type, the power of the
microphone is supplied by the
camera.
F Hooks for shoulder strap (33)
G DC IN terminal
When connecting the AC-
PW10AM AC Adaptor (sold
separately) to the camera, turn
the camera off, then plug the
connector of the AC Adaptor to
the DC IN terminal on the
camera.
H Memory card switch
I SD memory card insertion slot
(27)
J “Memory Stick PRO Duo”
media insertion slot (27)
K Memory card cover
L Battery cover (22)
M Tripod receptacle
Use a tripod with a screw length
of less than 5.5 mm (7/32 inch).
You will be unable to firmly
secure the camera to tripods
having screws longer than 5.5
mm (7/32 inch), and may
damage the camera.
Sides/Bottom
18
Preparing the battery pack
When using the camera for the first time, be sure to charge the NP-
FM500H “InfoLITHIUM” battery pack (supplied).
The “InfoLITHIUM” battery pack can be charged even when it has not
been fully depleted.
It can also be used when it has not been fully charged.
Notes
The charging time differs depending on the remaining capacity of the battery back or
charging conditions.
We recommend charging the battery pack in an ambient temperature of between
10°C to 30°C (50°F to 86°F). You may not be able to efficiently charge the battery
pack outside of this temperature range.
Connect the battery charger to the nearest wall outlet (wall socket).
Do not try to charge the battery pack again right after it has been charged, or when it
has not been used after being charged. Doing so will affect the performance of the
battery pack.
Charging the battery pack
1 Insert the battery pack on the
battery charger.
Push the battery pack until it clicks.
2 Connect the power cord (mains
lead).
Light on: Charging
Light off: Charge completed
The CHARGE lamp turns off when
charging is finished.
Time required to charge a fully
depleted battery pack at a temperature
of 25°C (77°F) is about 175 minutes.
CHARGE lamp
To a wall outlet
(wall socket)
19
Preparing the camera
Do not charge any battery pack other than the “InfoLITHIUM” M series battery
pack in the battery charger (supplied) with your camera. Batteries other than the
specified kind may leak, overheat, or explode if you attempt to charge them, posing a
risk of injury from electrocution and burns.
When the CHARGE lamp flashes, this may indicate a battery error or that a battery
pack other than the specified type has been installed. Check that the battery pack is
the specified type. If the battery pack is the specified type, remove the battery pack,
replace it with new one or another one and check if the battery charger operates
correctly. If the battery charger operates correctly, a battery error may have
occurred.
If the battery charger is dirty, charging may not be performed successfully. Clean the
battery charger with dry cloth, etc.
To use your camera abroad — Power sources
You can use your camera and the battery charger and the AC-PW10AM
AC Adaptor (sold separately) in any country or region where the power
supply is within 100 V to 240 V AC, 50/60 Hz.
Note
Do not use an electronic transformer (travel converter), as this may cause a
malfunction.
20
Representative plug of power supply cord of countries/regions around the
world.
The representative supply voltage and plug type are described in this chart.
Depend on an area, Different type of plug and supply voltage are used.
Attention: Power cord meeting demands from each country shall be used.
-For only the United States
Use a UL Listed, 1.5-3 m (5-10 ft.), Type SPT-2 or NISPT-2, AWG no. 18 power
supply cord, rated for 125 V 7 A, with a non-polarized NEMA 1-15P plug rated for
125 V 15 A.”
Europe
Asia
A Type
(American
Type)
B Type
(British
Type)
BF Type
(British
Type)
B3 Type
(British
Type)
C Type
(CEE
Type)
SE Type
(CEE
Type)
O Type
(Ocean
Type)
Countries/regions Voltage Frequency (Hz) Plug type
Austria 230 50 C
Belgium 230 50 C
Czech 220 50 C
Denmark 230 50 C
Finland 230 50 C
France 230 50 C
Germany 230 50 C
Greece 220 50 C
Hungary 220 50 C
Iceland 230 50 C
Ireland 230 50 C/BF
Italy 220 50 C
Luxemburg 230 50 C
Netherlands 230 50 C
Norway 230 50 C
Poland 220 50 C
Portugal 230 50 C
Romania 220 50 C
Russia 220 50 C
Slovak 220 50 C
Spain 127/230 50 C
Sweden 230 50 C
Switzerland 230 50 C
UK 240 50 BF
Countries/regions Voltage Frequency (Hz) Plug type
China 220 50 A
Hong Kong 200/220 50 BF
India 230/240 50 C
Indonesia 127/230 50 C
Japan 100 50/60 A
Korea (rep) 220 60 C
Malaysia 240 50 BF
Philippines 220/230 60 A/C
  • Page 1 1
  • Page 2 2
  • Page 3 3
  • Page 4 4
  • Page 5 5
  • Page 6 6
  • Page 7 7
  • Page 8 8
  • Page 9 9
  • Page 10 10
  • Page 11 11
  • Page 12 12
  • Page 13 13
  • Page 14 14
  • Page 15 15
  • Page 16 16
  • Page 17 17
  • Page 18 18
  • Page 19 19
  • Page 20 20
  • Page 21 21
  • Page 22 22
  • Page 23 23
  • Page 24 24
  • Page 25 25
  • Page 26 26
  • Page 27 27
  • Page 28 28
  • Page 29 29
  • Page 30 30
  • Page 31 31
  • Page 32 32
  • Page 33 33
  • Page 34 34
  • Page 35 35
  • Page 36 36
  • Page 37 37
  • Page 38 38
  • Page 39 39
  • Page 40 40
  • Page 41 41
  • Page 42 42
  • Page 43 43
  • Page 44 44
  • Page 45 45
  • Page 46 46
  • Page 47 47
  • Page 48 48
  • Page 49 49
  • Page 50 50
  • Page 51 51
  • Page 52 52
  • Page 53 53
  • Page 54 54
  • Page 55 55
  • Page 56 56
  • Page 57 57
  • Page 58 58
  • Page 59 59
  • Page 60 60
  • Page 61 61
  • Page 62 62
  • Page 63 63
  • Page 64 64
  • Page 65 65
  • Page 66 66
  • Page 67 67
  • Page 68 68
  • Page 69 69
  • Page 70 70
  • Page 71 71
  • Page 72 72
  • Page 73 73
  • Page 74 74
  • Page 75 75
  • Page 76 76
  • Page 77 77
  • Page 78 78
  • Page 79 79
  • Page 80 80
  • Page 81 81
  • Page 82 82
  • Page 83 83
  • Page 84 84
  • Page 85 85
  • Page 86 86
  • Page 87 87
  • Page 88 88
  • Page 89 89
  • Page 90 90
  • Page 91 91
  • Page 92 92
  • Page 93 93
  • Page 94 94
  • Page 95 95
  • Page 96 96
  • Page 97 97
  • Page 98 98
  • Page 99 99
  • Page 100 100
  • Page 101 101
  • Page 102 102
  • Page 103 103
  • Page 104 104
  • Page 105 105
  • Page 106 106
  • Page 107 107
  • Page 108 108
  • Page 109 109
  • Page 110 110
  • Page 111 111
  • Page 112 112
  • Page 113 113
  • Page 114 114
  • Page 115 115
  • Page 116 116
  • Page 117 117
  • Page 118 118
  • Page 119 119
  • Page 120 120
  • Page 121 121
  • Page 122 122
  • Page 123 123
  • Page 124 124
  • Page 125 125
  • Page 126 126
  • Page 127 127
  • Page 128 128
  • Page 129 129
  • Page 130 130
  • Page 131 131
  • Page 132 132
  • Page 133 133
  • Page 134 134
  • Page 135 135
  • Page 136 136
  • Page 137 137
  • Page 138 138
  • Page 139 139
  • Page 140 140
  • Page 141 141
  • Page 142 142
  • Page 143 143
  • Page 144 144
  • Page 145 145
  • Page 146 146
  • Page 147 147
  • Page 148 148
  • Page 149 149
  • Page 150 150
  • Page 151 151
  • Page 152 152
  • Page 153 153
  • Page 154 154
  • Page 155 155
  • Page 156 156
  • Page 157 157
  • Page 158 158
  • Page 159 159
  • Page 160 160
  • Page 161 161
  • Page 162 162
  • Page 163 163
  • Page 164 164
  • Page 165 165
  • Page 166 166
  • Page 167 167
  • Page 168 168
  • Page 169 169
  • Page 170 170
  • Page 171 171
  • Page 172 172
  • Page 173 173
  • Page 174 174
  • Page 175 175
  • Page 176 176
  • Page 177 177
  • Page 178 178
  • Page 179 179
  • Page 180 180
  • Page 181 181
  • Page 182 182
  • Page 183 183
  • Page 184 184
  • Page 185 185
  • Page 186 186
  • Page 187 187
  • Page 188 188
  • Page 189 189
  • Page 190 190
  • Page 191 191
  • Page 192 192
  • Page 193 193
  • Page 194 194
  • Page 195 195
  • Page 196 196
  • Page 197 197
  • Page 198 198
  • Page 199 199

Sony α 560 User manual

Category
Camcorders
Type
User manual

Ask a question and I''ll find the answer in the document

Finding information in a document is now easier with AI