MANUFACTURERS OF ELECTRONIC CONTROL AND MONITORING SYSTEMS
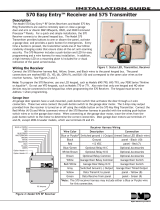
AKRX62-S Receiver Instructions
Description
The AKRX62-S is a self-contained 433.92MHz rolling key receiver designed to be directly
interfaced with any devices or controllers able to utilise a dry contact relay signal. With it’s 2
on-board 1 Amp (maximum resistive) 125 VAC rated dry contact relay outputs, this receiver
can be connected across existing push buttons connected to various door and gate
controllers or used to switch power directly to a vast number of electrical or electronic
products.
Power Supply Configuration
This receiver is capable of being powered with voltages ranging from 12 – 28 volts AC or DC.
To operate receiver on 12-28VAC or >=12VDC, place the power link (near the heatsink) on
HV. To operate on a 12V battery, place the power link on LV. This will enable the relays to
continue operating with a supply voltage down to 10V.
Channel and Relay output Setting
The AKRX62-S can learn up to 340 unique (2, 4, or 6 button) transmitters and can be used in
either one or two relay output configurations. The table below shows all possible configuration
options that can be set by selectively placing links across the L1, L2, L3 and L4 and FF pins.
The factory default setting of the AKRX62-S with all links removed is a two relay mode with
the top left hand button of an AKTX2 or AKTX4 or button 1 of an AK2TX4 or AK2TX6
activating the left hand relay and the top right hand button of an AKTX2 or AKTX4 or button 2
of an AK2TX4 or AK2TX6 activating the right hand relay.
For operations that describe a momentary output, the output relay is triggered for 300
milliseconds.
Where the output is Flip-Flop, the relay will maintain it’s new state indefinitely until triggered
by another button press.
For Hold modes, the relay will remain active for up to 20 seconds as long as the button of the
Airkey is held on and the Airkey is transmitting.
Where a relay is timed, it will stay on until the timer has timed out - unless the same button is
pressed in which case the time value will be refreshed and the time will count down from then
on.
Example: If the 16
th
option (ON, ON, OFF, ON, OFF) were selected, then button 1 would turn
on the left hand relay, while button 2 would turn off the left hand relay. Button 3 would turn on
the right hand relay, while button 4 would turn off the right hand relay.

MANUFACTURERS OF ELECTRONIC CONTROL AND MONITORING SYSTEMS
Links Operating Function Output
L1 L2 L3 L4 FF
Left Relay Right Relay
OFF
OFF
OFF
OFF
OFF 1 2
ON
OFF
OFF
OFF
OFF Momentary Pulse 3 4
OFF
ON
OFF
OFF
OFF 5 6
ON
ON
OFF
OFF
OFF 1,2,3,4,5,6
OFF
OFF
OFF
OFF
ON
1 2
ON
OFF
OFF
OFF
ON
Flip - Flop 3 4
OFF
ON
OFF
OFF
ON
5 6
OFF
OFF
ON
OFF
ON
1 (Mom) 2 (FF)
ON
OFF
ON
OFF
ON
Momentary & Flip-Flop 3 (Mom) 4 (FF)
OFF
ON
ON
OFF
ON
5 (Mom) 6 (FF)
OFF
OFF
ON
OFF
OFF Hold Output 1 2
ON
OFF
ON
OFF
OFF (20 sec maximum) 3 4
OFF
ON
ON
OFF
OFF 5 6
ON
ON
ON ON
OFF Momentary & Hold 1 (Mom) 2 (Hold)
ON
ON
ON ON ON
3 (Mom) 4 (Hold)
ON
ON
OFF
ON
OFF ON / OFF 1 (on), 2(off) 3 (on), 4 (off)
ON
ON
OFF
ON ON
3 (on), 4 (off) 5 (on), 6 (off)
ON
ON
ON
OFF
OFF Momentary + Short Timed 1 (Mom) 2 (5 min)
ON
ON
ON
OFF
ON
Momentary + Long Timed 1 (Mom) 2 (10 min)
ON
ON
OFF
OFF
ON
Momentary + Duress (4sec) 1,2,3,4,5,6 (Mom)
1 & 2 (Duress)
OFF
OFF
OFF
ON
OFF Short Timed 1 (1 min), 2 (off) 1 (5 min), 2 (off)
ON
OFF
OFF
ON
OFF (Button press activates both relays) 3 (1min), 4 (off) 3 (5 min), 4 (off)
OFF
ON
OFF
ON
OFF 5 (1 min), 6 (off) 5 (5 min), 6 (off)
OFF
OFF
OFF
ON ON
Long Timed 1 (15 min), 2 (off)
1 (60 min), 2 (off)
ON
OFF
OFF
ON ON
(Button press activates both relays) 3 (15 min), 4 (off)
3 (60 min), 4 (off)
OFF
ON
OFF
ON ON
5 (15 min), 6 (off)
5 (60 min), 6 (off)
OFF
OFF
ON ON
OFF UP / DN + Nudge + Stop 1 (R1 on, R2 off)
2 (R2 on, R1 off)
ON
OFF
ON ON
OFF (Short press » nudge) 3 (R1 on, R2 off)
4 (R2 on, R1 off)
OFF
ON
ON ON
OFF (Long press » 2 minutes) 5 (R1 on, R2 off)
6 (R2 on, R1 off)
OFF
OFF
ON ON ON
1 (R1 on, R2 off)
2 (R2 on, R1 off)
ON
OFF
ON ON ON
Alternate Latching 3 (R1 on, R2 off)
4 (R2 on, R1 off)
OFF
ON
ON ON ON
5 (R1 on, R2 off)
6 (R2 on, R1 off)

MANUFACTURERS OF ELECTRONIC CONTROL AND MONITORING SYSTEMS
Programming
The AKRX62-S has a remote learning function allowing users to add new Airkeys into a receiver
without direct access to the receiver itself. This function is invoked when the 5 pin green socket is
plugged into the 5 pin ICSP header with the bevelled end pointing towards the centre of the receiver
as below:
The remote learning socket must be removed before connecting an Airkey Programmer, Airkey
Manager or using the manual ADD or CLEAR buttons.
The remote learning socket comes pre-fitted in the factory and can be removed at any time to either
disable the remote learning feature of the Airkey receiver or when connecting other peripherals. The
learning socket should be fitted when power to the receiver has been disconnected. If this is not
convenient, simply press and hold the ADD button while carefully installing the remote programming
socket.
Local programming with the remote learning socket removed
Before any transmitters are learnt into the receiver for the first time, press and hold the CLR button
on the receiver for about 5 seconds. The red light on the receiver will illuminate to indicate that all
memory locations have been cleared and the receiver is ready to accept transmitters.
Next press and hold the ADD button. The red light will illuminate for as long as the ADD button is
depressed. To learn in transmitters, simply press one of the buttons of the transmitters to be added.
If the transmitter is newly learnt, the red light will blink off for half a second to indicate a successful
learn. If the transmitter has already been learnt or is faulty, the light will not blink and that transmitter
will not be added. Up to 340 transmitters in total can be added if and when required. A new
transmitter can be added at any time by simply pressing the ADD button and one of the transmitter's
buttons. An alternative method of adding transmitters is to fit a jumper or dry contact switch across
pins 2 and 3 (labelled A) on the ICSP connector.
Remote programming with the remote learning socket fitted
Once at least one Airkey has been learnt into the receiver by the local programming method as
above, it and any other learnt Airkeys can be used to facilitate the learning-in of additional Airkeys
without having to gain direct access to the receiver.
While within the operational range of the Airkey receiver, simultaneously (and briefly) press buttons 1
and 2 of an already learnt Airkey and then press any one button of a new Airkey within 2 seconds to
learn the new key into the receiver. If further Airkeys need to be programmed, simply repeat the fore
mentioned procedure until all the Airkeys are learned.
Antenna
An ideal antenna for this receiver is an insulated wire 160mm in length connected to the ANT
terminal of the receiver.
/