Page is loading ...

English
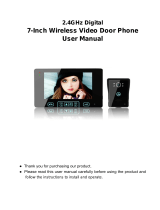
B&W Video Doorphone
High Resolution Intercom
Safely see who’s at the door before you answer it
Installation Guide
www.swannsecurity.com
Help Desk / Support Details
Swann Technical Support
Telephone Helpdesk
All Countries E-mail:
UNITED STATES toll free
USA Exchange & Repairs
AUSTRALIA toll free
International
877-274-3695
(Sun-Thurs, 2pm-10.30pm PST)
800-627-2799
(Mon-Fri, 9am-1pm PST)
562-777-2551
(Mon-Fri, 9am-5pm PST)
1300 13 8324
(Mon-Fri, 9am-5.30pm Aus EST)
+61 3 8412 4610
(Mon-Fri, 9am-5.30pm Aus EST)
See http://www.worldtimeserver.com for information on different time
zones and the time in Melbourne Australia compared to your local time.
Warranty Information
Swann Communications warrants this product against defects in workmanship and material for a
period of one ( ) year from it’s original purchase date. You must present your receipt as proof of
date of purchase for warranty validation. Any unit which proves defective during the stated period
will be repaired without charge for parts or labour or replaced at the sole discretion of Swann. The
repair or replacement will be warranted for either ninety days or the remainder of the original one
year warranty period, whichever is longer. The end user is responsible for all freight charges
incurred to send the product to Swann’s repair centres. The end user is responsible for all shipping
costs incurred when shipping from and to any country other than the country of origin. The
warranty does not cover any incidental, accidental or consequential damages arising from the use of
or the inability to use this product. Any costs associated with the fitting or removal of this product
by a tradesman or other person or any other costs associated with its use are the responsibility of
the end user. This warranty applies to the original purchaser of the product only and is not
transferrable to any third party.
Unauthorised end user or third party modifications to any component or evidence of misuse or
abuse of the device will render all warranties void.
1
12

Firstly check if the monitor is getting power, make sure the 16VDC 1A power supply is
firmly connected to the power socket. Then make sure you have correctly wired the
Doorphone system by referring to the Wiring Diagram illustrations on page 8.
Test by pressing the “Talk/Monitor” button on the monitor. You should see an image from
the intercom unit if the system has been correctly installed.
During times of low light, if you find your visitors are standing too far from the intercom
to be seen, we recommend providing an additional light source to help illuminate the
entrance area.
A. Firstly make sure you have followed the steps in the Quick User Guide above. Now try
pressing the “Call” button on the front of the intercom unit. Once the monitor unit
chimes, press the “Talk/Monitor” button to test communications. If you can not hear the
other person, try moving closer to the microphone on the intercom and monitor units.
A. Firstly make sure you have followed the steps in the Quick User Guide above. To
activate the door chime, press the “Call” button on the front of the intercom unit.
However you can use the TV Output to view the images on your TV. Please refer to
page 3 for more information.
Q.Whycan’tIseethepersonatthedoor?
Q.Whycan’tIhearthepersonatthedoor?
Q. Why hear the doorbell ring?
Q. How do I extend the length of the cable from the monitor to intercom unit?
Q. What type of cable should I use to connect the intercom unit
my electronic door latch?
Q. Can I use more than one monitor with my Doorphone system?
A. Firstly make sure you have followed the steps in the Quick User Guide above. Then try
adjusting the camera location, viewing direction of the camera, and contrast to improve
the picture.
A. You can extend the length of the cable by using (2 x 0.75mm ) copper cable in PVC
insulation. For example figure 8 speaker cable.
A. We recommend using (2 x 0.15mm ) copper cable. For example telephone cable.
A. No.
can’t I
2
2
DVR4NET - PLUS
4 Camera Digital Video Recorder
DIY Security Kit
2Real&2ImitationCameras
Security Monitoring System
CCTV Professional 4 Camera Pack
Professional Security Camera
Night Hawk
Wireless Outdoor Camera
Microcam II
Wireless Security Camera
Imitation Dome Cam
Imitation Security Camera
AV Power Cable - 18m/60ft
Camera Accessory
Quick User Guide
11
Frequently Asked Questions
2

Table of Contents ............................................ 3
Functions .......... .............................................4
Package Contents ...........................................5
Monitor Features ............................................ 6
Camera Features ............................................ 6
Installation .....................................................7
Wiring diagram ............................................... 8
Operation ........................................................9
Specifications .................................................10
Quick User Guide ............................................11
Frequently Asked Questions ............................11
Help Desk / Support Details .............................12
Warranty Information ......................................12
Power supply
Power consumption
Operation temperature
Conversation System
Calling Tone
Conversation Time
Scanning Frequency
External dimension
DC16V
About10Winoperation;about0.5Winstandby
5 ~ 122 °F /-15~50°C
Bi-directional conversation through the receiver
¡¡Ding Dong chime
Automatic cut off after about 2 minutes
Horizontal:15.625KHz Vertical: 50Hz
8 x6 x2in/225x170x52mm(LxWxH)4/6 1/2
Power supply
Power consumption
Operation temperature
Picture Sensor
FieldofView
Min. Lighting
DC12V , 0.25A (supplied by the monitor)
About 2.0W in operation
5 ~ 122 °F /-15~50°C
1/4” CMOS
Diagonal: about 53°
0.1 lux @ about 11.8in/30cm
Indoor-monitor
Camera
Lighting
External dimension
6 Infrared illuminators
4 x3 x1 in/127x95x35mm(LxWxH)5/67/121/4
“Ding Dong” chime
Table of Contents
310
Specifications
FCC NOTICE
This device complies with Part 15 of FCC Rules.
Operation is subject to the following conditions:
(1) This device may not cause harmful interference, and
(2) This device must accept any interference received,
Including interference that may cause undesired operation.

Hands free Communication
Automatic Display
Unlock Button
Night Vision
This device provides hands free communication between the black and white monitor
and the outdoor intercom unit. With a press of a button, you can communicate
with the visitor at the door.
When the visitors press the doorbell button , the bell will ring and a picture of the
visitor will be automatically displayed . You can safely identify the visitor before talking
or opening the door.
With a button for opening an electronic door latch, you are able to open the door from the
LCD monitor without going directly to the door.
* Note: This is an optional extra available from Swann. (SW-D-LOCK)
* Night vision distance will vary with the amount of available light.
The 6 infrared LEDs on the camera allows you to recognize the visitor during times of low light.
Calling by the Visitor
Other operations
A visitor presses the
"call" button on the
intercom.
The
visitor
the
door phone will ring and
the is displayed on
monitor.
Press " ” button
communicate with the visitor.
the talk to
Once ress "talk” button to
in 2 minutes
he picture will be displayed on the monitor. I
you p communicate with the visitor, the monitor will be shut down
automatically .
When the visitor presses the “call” button, t f no one
answers, the monitor will automatically go back into standby mode after 60 seconds.
Warning button
Adjustable volume/contrast
If you get malice visitors, you can press warning button. The intercom unit will give an audible alarm
and bring attention to area around the intercom unit.
If you think the monitor volume is not loud enough or the picture shown on the screen is too bright,
you can alter this by adjusting the volume or contrast wheel found underneath the monitor
.
Operation
9
Functions
4
FCC Notice
SW244-BVD
CE Notice
We, Swann Communications of 10612 Shoemaker Avenue, Bldg A, Santa Fe Springs, CA 90670 USA, declare under
our sole responsibility that the product:
This product meets the requirement specified in Part 15 of FCC Regulation. Operation rests with the following two
conditions:
(1) The equipment should not cause any harmful interference;
(2) The equipment must receive and process any interference, including any possible interference caused by
operation mistakes. After testing the product, we confirm that it complies with the provision for class C digital
equipment in the 15th part in FCC regulation; and the receiver complies with the limitation for class B digital
equipment in Part 15 of FCC regulation. The product generates, applies and emits radio waves. It might cause
harmful interferences to wireless communication if not be installed and used following the description of the manual.
The product may interference in residential area, and the customer should take remedies to eliminate the
interference at their own costs. If the product causes any harmful interference to wireless equipment of disturbs the
receiving of TV signals (it can be identified by turning on and off the product), you can solve the trouble by following
methods:
(1) Re-adjust the product or put it in another place;
(2) Extend the distance between the equipment interfered and the product; and
(3) Refer to dealers or experienced radio electrician for help
This product complies with standards including Low Voltage Device Directive 73/23/EEC; Directive 89/336/EEC
and Directive 1999/5/EC. It passed the subject tests by authority concerned and it authorized to bear mark.
EMC
R&TTE CE

Package Contents
5
Wiring Diagram
8
Camera
Monitor
* Lock
A B
C
D
1 26345
DC 16V
Please disconnect the power supply from the monitor before connecting the monitor to the
intercom unit.
Open the door with the touch of a button by installing
Swann’s Electric Door Strike (SW-D-LOCK).*
Non-Polarity cable
*Sold separately
Monitor
Intercom Unit
Camera Bracket
Support for Wall-mount
Installation guide
Screws
Installation and
Operation Manual
TWO
W
IRE HANDFREEB/W
VIDEO D
OORPHONE
TWO
W
IRE HANDFREEB/W
VIDEO DOORPHONE
Turn off the power if not use for a long time.
Do not place unit in direct sunlight or expose it
to rain.
There may be high voltage inside the system,
do not under any circumstances disassemble
this device.
Do not spray water directly on the video
doorphone.
Do not put the doorphone near strong
magnetic fields, such as a television
or video recorder .
Do not damage the video doorphone.
Important Informations

AC:110~240V
A good to place
4.7-5.2ft/
height the monitor
is 145cm~160cm from the ground.
Fix the wall mount on the wall using the supplied
screws and then attach the monitor.
Location:
Standard h
of the camera
eight
Horizontal angle
the cameraof
Move it up
Move it down
50cm
50cm
50cm
66¡
23¡
53¡
43¡
4.7-5.2ft / 145 - 160cm
4.7-5.2ft / 145 - 160cm
4.7-5.2ft / 145 - 160cm
4.7-5.2ft / 145 - 160cm
Screen
Warning Button
Talk /Monitor
Button
Doorlatch Unlock
Button
Loud Speaker
A B
C
D
Contrast
wheel
Volume
wheel
A/V OUT
Mic ophoner
Loud Speaker
Infrared LEDs
Lens of the Camera
Light
Call button
Mic ophoner
Audio/Video wire
audio
(white and red)
video(yellow)
VCR, TV or MONITOR
OUT
IN
V
ID
E
O
V
ID
E
O
A
U
D
IO
AUDIO
AV INPUT
To view the image on your TV, connect the Audio/Video wire from the AV OUT on the
LCD monitor to an AV INPUT on your TV.
Switch for adjusting camera angle
(move up to tilt camera down and
move down to tilt camera up)
Positioning the lens using the switch on the back
of the camera to adjust the angle of the lens:
Keep the camera away from direct sunlight
and the effects of poor weather.
Installation of the monitor
7
Monitor Features
6
Installation of the camera
Camera Features
/