• If you cannot find the settings for a special recipe, look for the one that is almost the
same.
• Baking time can be extended by 10 - 15 minutes, if you bake cakes on more than one
level.
• Cakes and pastries at different heights do not always brown equally at first. If this oc-
curs, do not change the temperature setting. The differences equalize during the baking
procedure.
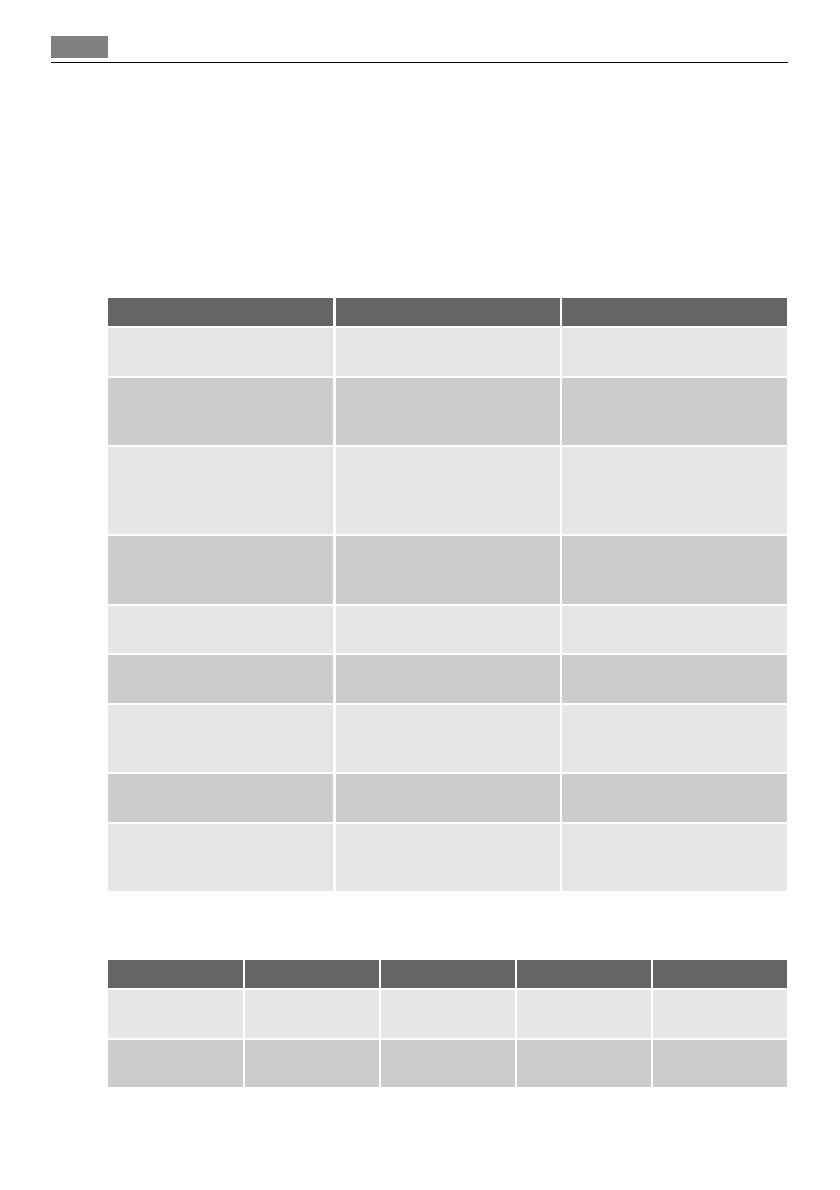
Tips on baking
Baking results Possible cause Remedy
The cake is not browned
enough underneath.
Wrong shelf position. Place the cake lower.
The cake sinks (becomes soggy,
lumpy, streaky).
The oven temperature is too
high.
The next time you bake set a
slightly lower oven tempera-
ture.
The cake sinks (becomes soggy,
lumpy, streaky).
The baking time is too short.
Set a longer baking time. Bak-
ing times cannot be reduced
by setting higher tempera-
tures.
The cake sinks (becomes soggy,
lumpy, streaky).
There is too much liquid in the
mixture.
Use less liquid. Pay attention to
mixing times, especially if you
use a mixing machine.
The cake is too dry.
The oven temperature is too
low.
The next time you bake set a
higher oven temperature.
The cake is too dry. The baking time is too long.
The next time you bake set a
shorter baking time.
The cake browns unevenly.
The oven temperature is too
high and the baking time is too
short.
Set a lower oven temperature
and a longer baking time.
The cake browns unevenly.
The mixture is unevenly distrib-
uted.
Spread the mixture evenly on
the baking tray.
The cake is not ready in the
baking time given.
The oven temperature is too
low.
The next time you bake set a
slightly higher oven tempera-
ture.
Baking on one level:
Baking in tins
Type of baking Oven function Shelf position Temperature °C Time in min.
Ring cake or brio-
che
True Fan Cooking 1 150 - 160 50 - 70
Madeira cake /
fruit cakes
True Fan Cooking 1 140 - 160 70 - 90
14 Helpful hints and tips


