Assembly Instructions
Remove all contents from carton. Inspect the ice
bin for any damage prior to installing. Damaged
units should not be installed.
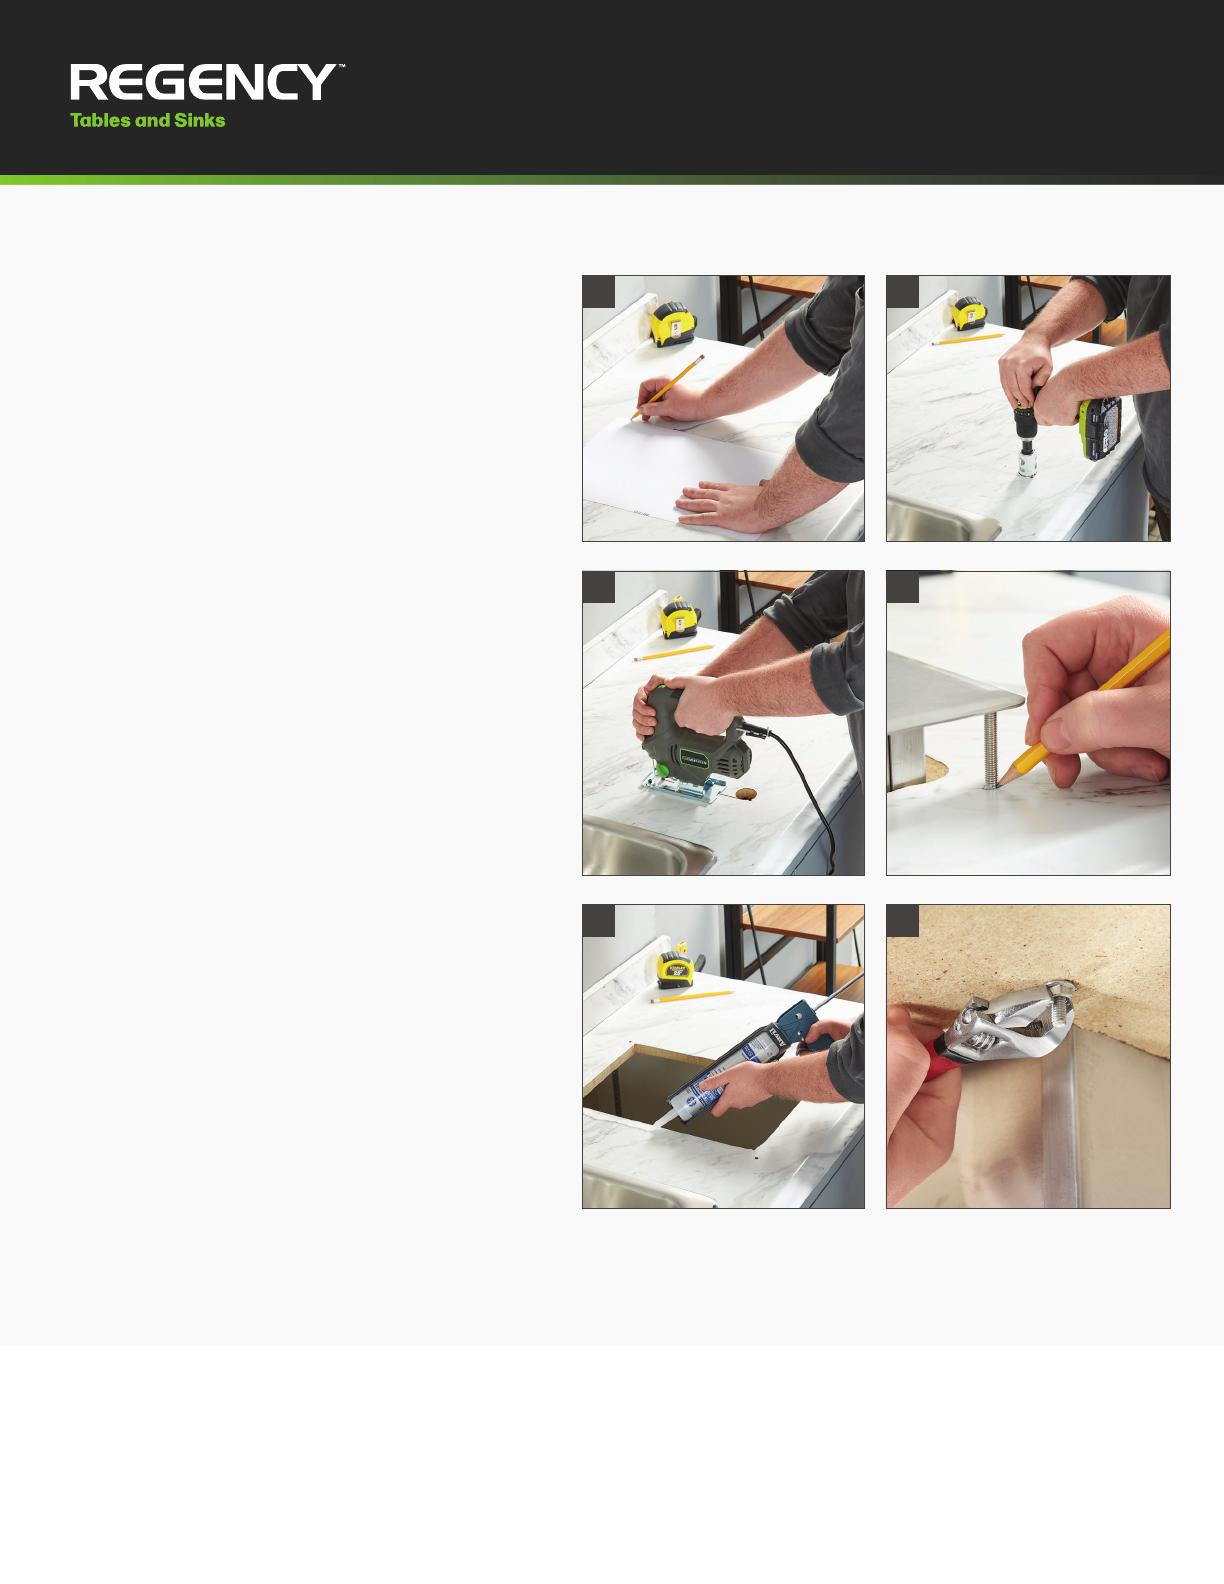
1. Place ice bin cutout template (available on
webstaurantstore.com) at desired locaon on
countertop. This should be cut out along the
indicated cut line. Ensure front edge of the
ice bin is parallel to the countertop edge.
2. Using a pencil, carefully trace along the
cutout template cut line onto the countertop.
Remove the template from the countertop.
3. Drill a pilot hole inside the cut line.
4. Place the saw inside of the pilot hole and
carefully saw along the cut line.
5. Remove the countertop cutout secon.
6. Align the ice bin in the open space to mark
where the four weld studs need to be drilled
into the counter.
7. Aer marking, drill through the counter for
each corner of the ice bin.
8. Apply sealant around the perimeter of the ice
bin cutout. Carefully place the ice bin in the
cutout hole.
9. Slide the brackets over each weld stud and
screw on the nuts.
Use a wrench to ghten each nut to secure
the ice bin to the countertop.
10. Clean away any excess caulk or debris with
a cloth.
Install drain(s).
3. 4.
5. 6.
8. 9.
www.RegencyTablesandSinks.com


