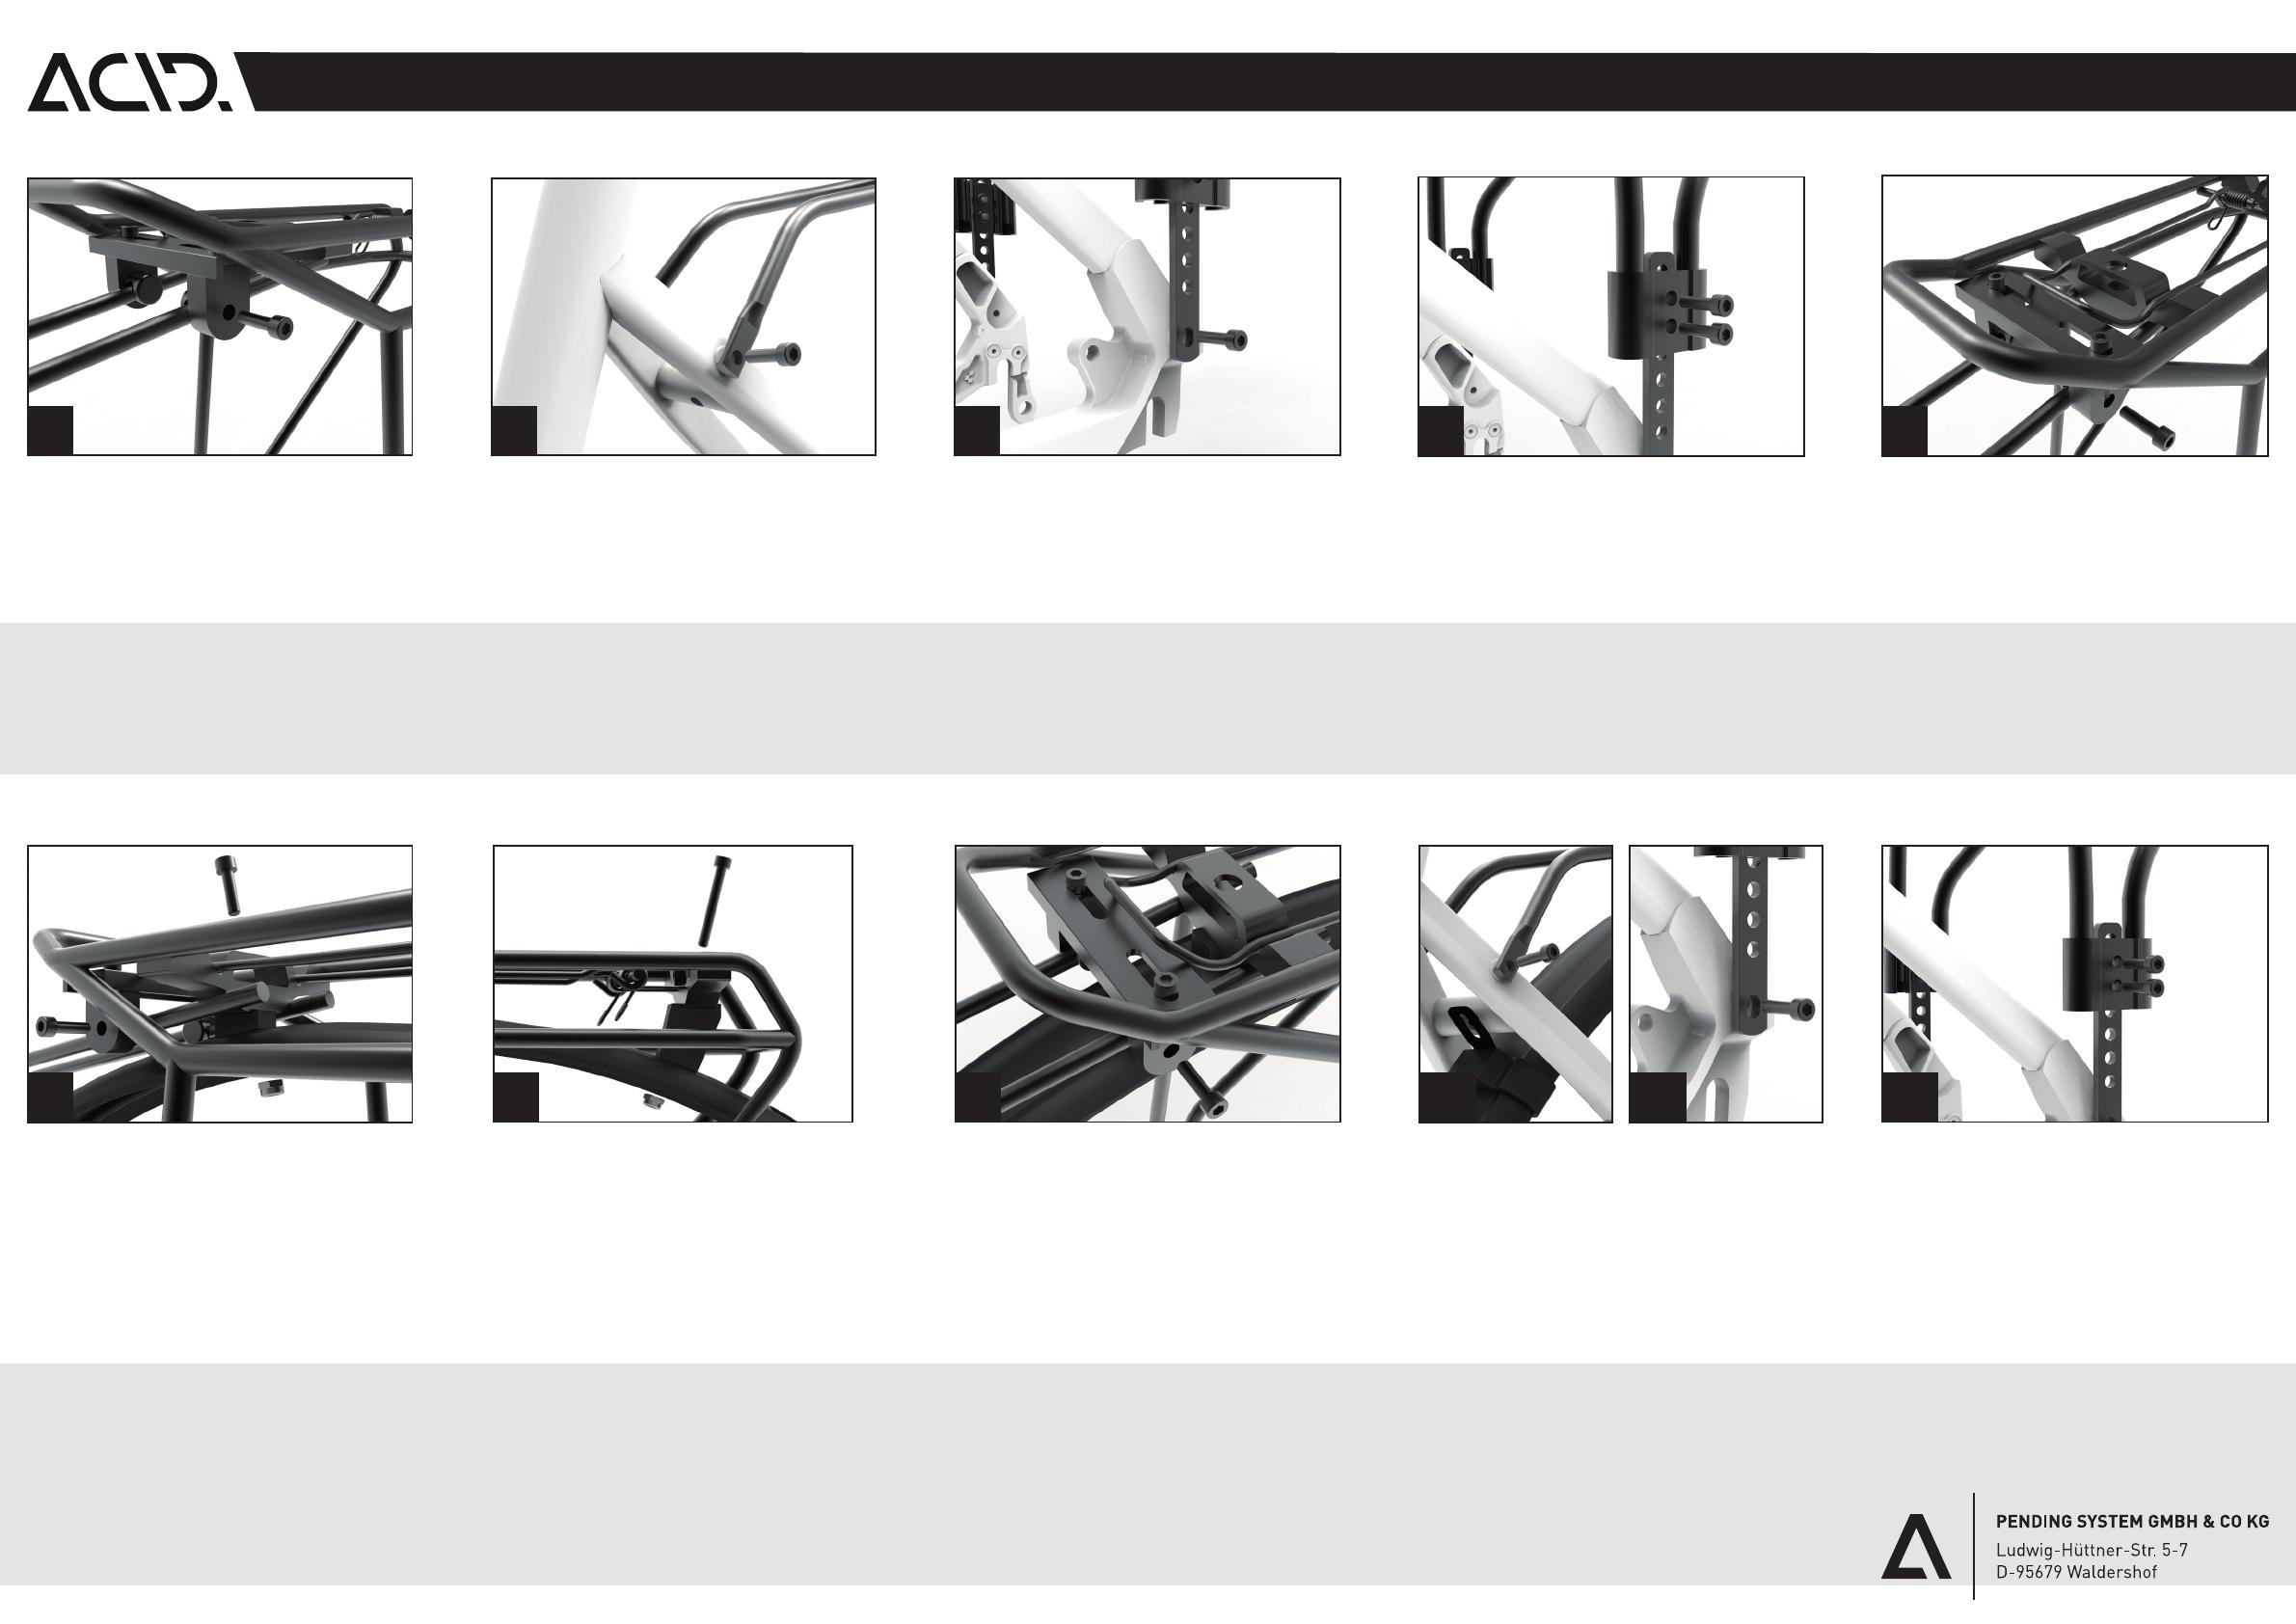
ohne Schutzblech / without mudguard
1
1 2 3 4.1 4.2 5
2 3 4 5
mit Schutzblech / with mudguard
1. Lösen Sie die Schrauben der Besfestigungen für
die oberen Verbindungsstreben. Drehen Sie diese
jedoch nicht komplett heraus.
1. Loosen the screws of the construction of the ad-
justable top railings. But do not loosen the screws
completely.
1. Connect the upper front end of the carrier to
the fender by using the attached carrier adapter
(please see overview!). The mudguard needs to be
drilled with a 7mm driller. Keep attention that the
position of the drilled hole is in the middle of the
fender profi le!
The mudguard needs to be adjusted togehter with
the carrier on the bike. The drilling position needs
to be marked with a pen!
1. Verbinden Sie das obere vordere Teil des Ge-
päckträgers mit Hilfe des mitgelieferten Adapters
(siehe Übersicht!) mit dem Schutzblech. Hier-
zu muss ein Loch mit 7mm Druchmesser in das
Schutzblech gebohrt werden. Mittigkeit der Boh-
rung beachten!
Das Schutzblech muss hierfür entsprechend im
voraus mit dem Gepäckträger auf dem Rad aus-
gerichtet werden. Den Bohrpunkt mit einem Stift
markieren!
2. Schrauben Sie die oberen Verbindungsstreben
an die vorhergesehenen Rahmen-Anschraub-
punkte. Verwenden Sie hierzu die mitgelieferten
Schrauben M5x16mm.
2. Install the upper connection railings to the
appropriate interface of the frame. Use the atta-
ched screws M5x16mm.
2. Connect the upper rear end of the carrier
to the mudguard by using the attached carrier
adapter (please see overview!). The mudguard
needs to be drilled with a 7mm driller. Keep at-
tention that the position of the drilled hole is in
the middle of the mudguard profi le!
4.1 Schrauben Sie die oberen Verbindungsstreben
an die vorhergesehenen Rahmen-Anschraubpunkte.
Verwenden Sie hierzu die mitgelieferten Schrauben
M5x16mm.
4.2 Schrauben Sie die beiden unteren Enden des
Gepäckträgers an das Ausfallende des Fahrradrah-
mens. Verwenden Sie hierzu die Schrauben M5x-
16mm.
3. Schrauben Sie die beiden unteren Enden des
Gepäckträgers an das Ausfallende des Fahrrad-
rahmens. Verwenden Sie hierzu die Schrauben
M5x16mm.
3. Install the lower end of the carrier to the dropout
screw-mount hole of the frame. Use the attached
screws M5x16mm.
4.1 Install the upper connection railings to the
appropriate interface of the frame. Use the atta-
ched screws M5x16mm.
4.2 Install the lower end of the carrier to the dro-
pout screw-mount hole of the frame. Use the atta-
ched screws M5x16mm.
2. Verbinden Sie das hintere obere Ende des
Gepäckträgers mit dem Schutzblech. Verwen-
den Sie hierzu den mitgelieferten Adapter
(siehe Übersicht!). Hierzu muss ein Loch mit
7mm Druchmesser in das Schutzblech gebohrt
werden. Mittigkeit der Bohrung beachten!
4. Passen Sie die Höhe des Gepäckträgers an die
Radgröße ihre Fahrrads an. Lösen Sie hierfür die
M5x16mm Schrauben von den M5 Muttern und
Schieben Sie anschliend den Gepäckträger in die
passende Höhe.
4. Adjust the hight of the carrier so it fi ts your
wheelsize perfectly. Unscrew the M5x16mm
screws from the M5 nuts and set the carrier in the
correct hight.
3. Loosen the screws of the construction of the ad-
justable top railings. But do not loosen the screws
completely.
3. Lösen Sie die Schrauben der Besfestigungen für
die oberen Verbindungsstreben. Drehen Sie diese
jedoch nicht komplett heraus.
5. Richten Sie den Gepäckträger horizontal aus und
ziehen Sie alle Schrauben an den oberen Streben-
befestigungen fest. Gegebenenfalls müssen bei
großen Rahmengrößen die oberen Einstellstreben
gekürzt werden um eine optimale Anpassung an
das Rad zu gewährleisten.
5. Orient the carrier horizontal and tighten the
screws of the adjustable railing construction. To fi t
bigger frame sizes perfectly the top adjustable rai-
lings may have to be cut.
5. Adjust the hight of the carrier so it fi ts your wheel-
size perfectly. Unscrew the M5x16mm screws from
the M5 nuts and set the carrier in the correct hight.
5. Passen Sie die Höhe des Gepäckträgers an die
Radgröße ihre Fahrrads an. Lösen Sie hierfür die
M5x16mm Schrauben von den M5 Muttern und
schieben Sie anschliend den Gepäckträger in die
passende Höhe.
UNIVERSAL GEPÄCKTRÄGER / UNIVERSAL CARRIER
A N LEITUN G / M A NUA L D E/E N


