Atherion ATH74-526.2 User guide

Type
User guide

Atherion ATH74-526.2 is a Packaged Ventilation/Dedicated Outside Air System (DOAS) that offers precise control over temperature, humidity, and air quality in commercial and industrial spaces. Its advanced features include customizable scheduling, easy-to-use controls, and the ability to integrate with Building Management Systems (BMS). With its energy-efficient operation and ability to maintain a comfortable indoor environment, the Atherion ATH74-526.2 is an ideal choice for those seeking improved air quality and energy savings.

Atherion ATH74-526.2 is a Packaged Ventilation/Dedicated Outside Air System (DOAS) that offers precise control over temperature, humidity, and air quality in commercial and industrial spaces. Its advanced features include customizable scheduling, easy-to-use controls, and the ability to integrate with Building Management Systems (BMS). With its energy-efficient operation and ability to maintain a comfortable indoor environment, the Atherion ATH74-526.2 is an ideal choice for those seeking improved air quality and energy savings.

Improper installation, adjustment, alteration, service or maintenance can
cause property damage, injury or death, and could cause exposure to
substances which have been determined by various state agencies to cause
cancer, birth defects or other reproductive harm. Read the installation,
operating and maintenance instructions thoroughly before installing or
servicing this equipment.
Controller
Buttons
Function
Description Controller
Buttons
Function
Description
ALARM
When one or more alarms are active the ALARM
button will blink/ash red. Pressing the ALARM
button once will indicate information regarding any
active alarms. Pressing the ALARM button twice
will reset any active manual-reset alarms.
UP
Pressing the UP button can either:
Scroll through the various display screens,
provided the cursor is in the top left position.
Increase the value of a setpoint adjustment.
PRG Pressing the PRG button will select the main
navigation menu. ENTER
Pressing the ENTER button will conrm any
setpoint adjustments and move the cursor to
the next available setpoint.
ESC Pressing the ESC button will return the user to the
main display screen showing unit status. DOWN
Pressing the DOWN button can either:
Scroll through the various display screens,
provided the cursor is in the top left position.
Decrease the value of a setpoint adjustment.
Controls System Quickstart Guide
Packaged Ventilation/Dedicated Outside Air System (DOAS)
model MPR
a. Install unit in desired location in accordance with the Installation and Maintenance Manual that shipped with the unit. Note: Controller will not be powered
until unit has appropriate electrical connections and disconnect switch in “ON” position.
b. If display module is not unit mounted, connect pGD1 handheld module using RJ-12 communication cable provided in port J10 as shown on unit mounted
wiring diagram.
a. The main
screen (shown at right) is the default navigation page, and can always be recalled by pressing . This may
need to be pressed more than once depending on which menu is active.
b. By pressing you are able to scroll through the display screens which provide information about the current system
operation (examples include temperatures, output status, and space demand).
a. Enter the main menu by pressing and scroll down to line ‘A. On/Off Unit’ and press .
b. Press to move cursor, to ‘Power By Display’ line and the or arrow to change the value between
‘ON’ and ‘OFF’. This parameter must be ‘ON’ for unit to have any functionality (shown at right).
a. Customizing the 7-Day Schedule
i. For units running without BMS communication, the controller has a preset 7-day schedule dened by the internal
timeclock. The unit will run in occupied mode from 6:00am to 4:00pm, Monday through Friday, with no holidays.
ii. Enter the main menu by pressing and scroll down to line ‘C. Clock/Scheduler (shown at right) and press .
iii. The rst screen displays the current date and time. If this is not correct press to highlight the eld that needs
to be changed. Use the or arrows to adjust the number as needed.
iv. Press to move through adjustable setpoints until cursor is at the upper left corner of the screen. Use the arrow to scroll to the next page.
Begin
Navigating the Display Module Screen
Main Screen and System Status
Turning Unit On / Off
Schedule
1
2
3
4
5
(CONTINUED ON OTHER SIDE)
ATH74-526.2
5H0844520001
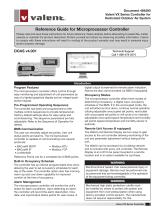
This guide is designed to walk through the basics of establishing unit setpoints and scheduling for the unit using the integrated keypad and LCD screen on the unit
controller or pGD1 display module. All settings can be made directly on the unit controller, which features an integrated keypad and LCD screen. For cases where
remote access is preferred or the unit controller is difcult to reach when the unit is mounted on taller roof curbs or stands, the pGD1 handheld controller is an
excellent alternative that has the same functionality as the unit controller keypad and LCD screen while allowing remote or more convenient access.
Every unit is designed for either standalone or networked operation. For units communicating on a BMS, the guide will also explain how to adjust your unit’s device
instance to allow proper communication.
W
ARNING
These instructions must also be used in conjunction with the Installation and
Service Manual and the Controls Manual that shipped with the model MPR
unit, in addition to any other accompanying component supplier literature.
IMPORTANT pCO5+ Controller
pGD1 Display Module
a. Units can utilize one of three different BMS system protocols; LonWorks® FTT-10, BACnet® MS/TP, or BACnet® TCP/IP. Please refer to both the
Network Interface Card Instruction Manual and Controls Manual that shipped with the unit for additional information.
Modine Manufacturing Company
1500 DeKoven Avenue
Racine, WI 53403
Phone: 1.800.828.4328 (HEAT)
www.modinehvac.com
ATH74-526.2
Schedule (CONTINUED FROM OTHER SIDE)
Changing Setpoints
v. Select the amount of schedules desires by pressing to highlight ‘Number of Schedules’ eld and adjust
the number. Press until cursor is at the upper left corner of the screen. Use the arrow to scroll to the
next page.
vi. The screen to the right will be the rst programmable schedule.
vii. Highlight the elds and adjust as needed to schedule the time and days of desired unit operation. To move
to the next time period, highlight the ‘Schedule #’ eld and adjust this number by pressing .
b. Customizing Holiday Schedules
i. Scroll to the ‘Holidays’ screen in the ‘Clock/Scheduler’ menu. Use the or arrows to adjust the number of holidays as needed up to 16.
ii. Press to move the cursor to each date range and use the or arrows to adjust the number as needed. If not all four holiday ranges are
required, the unused ranges can be left as ‘0/0-0/0’.
6
a. Enter the main menu by pressing and scroll down to line ‘G. Service’ and press . This menu allows access to several parameters for advanced
setup or control. This includes BMS Setup, Control Settings such as temperature lockouts or stage delays, and manual control of controller inputs/outputs.
b. Refer to the Controls Manual that shipped with the unit for additional information.
Service
7
BMS Setup
8
a. The manufacturer menu provides access to parameters not typically required to be changed in the eld. These parameters include unit conguration,
controller input/output conguration, and reboot sequences. Please contact Technical Service for assistance with this section if required.
Advanced Information
9
Viewing / Clearing Alarms
10
a. Enter the main menu by pressing and scroll down to line B. Setpoint and press .
b. Occupied Setpoints without Space pAD
i. Press to highlight ‘Neutral Air’. Use the or arrows to adjust the setting as needed. This setting will reect the temperature of the Supply Air
entering the space.
c. Occupied Setpoints with Space pAD
i. Press until cursor is at the upper left corner of the screen. Use the arrow to scroll to the ‘pAD Thermostat’ page.
ii. Press to highlight the ‘Temperature’. Use the or arrows to adjust the setting as needed. This setting will reect the space cooling setpoint.
The space heating setpoint is determined by a default heating/cooling band of 4°F. (For example, if the temperature is set at 74°F, the heating
setpoint will automatically be set to 70°F.) Refer to the Controls Manual that shipped with the unit for additional adjustments.
d. Unoccupied Setpoints (requires Space pAD)
i. Press until cursor is at the upper left corner of the screen. Use the arrow to scroll to the ‘pAD Thermostat’ page.
ii. Press to highlight ‘Unoccupied Cool’. Use the or arrows to adjust the setting as needed.
iii. Press to highlight ‘Unoccupied Heat’. Use the or arrows to adjust the setting as needed.
e.DehumidicationSetpoints,Dewpoint&SpacepAD
i. Press until cursor is at the upper left corner of the screen. Use the arrow to scroll to the ‘DeHum Setpoint
Dewpt’ page, for dewpoint dehumidication control.
ii. Press to highlight ‘OA Dewpoint’ under Occupied. Use the or arrows to adjust the setting as needed.
iii. Press to highlight ‘Space Dewpoint’ under Unoccupied. Use the or arrows to adjust the setting as
needed (only applicable with Space pAD).
iv. Press until cursor is at the upper left corner of the screen. Use the arrow to scroll to the ‘DeHum Setpoint
pAD’ page, Space dehumidication control requires Space pAD.
v. Press to highlight ‘Space Humidity’ under Occupied. Use the or arrows to adjust the setting as needed.
vi. Press to highlight ‘Space Humidity’ under Unoccupied. Use the or arrows to adjust the setting as
needed.
Note: The occupied and unoccupied settings can be changed from the Space pAD as well.
a. If the unit is sending an alarm signal, the alarm icon on the display module will ash continuously:
i. Press to display the active system alarms. If there are multiple alarms, they may be viewed by pressing the or arrows.
ii. Details of the unit’s running conditions when the alarm occurred may be viewed by pressing after reaching the end of the alarm list.
iii. Pressing and holding the button will clear the ashing icon and all active alarms, and indicate there are no active alarms in the system.
iv.
The alarm log can be viewed by pressing . Press to return to the main screen. If an alarm is persisting, the alarm light will begin to ash again.
© Modine Manufacturing Company 2021
  • Page 1 1
  • Page 2 2

Atherion ATH74-526.2 User guide

Type
User guide

Atherion ATH74-526.2 is a Packaged Ventilation/Dedicated Outside Air System (DOAS) that offers precise control over temperature, humidity, and air quality in commercial and industrial spaces. Its advanced features include customizable scheduling, easy-to-use controls, and the ability to integrate with Building Management Systems (BMS). With its energy-efficient operation and ability to maintain a comfortable indoor environment, the Atherion ATH74-526.2 is an ideal choice for those seeking improved air quality and energy savings.

Ask a question and I''ll find the answer in the document

Finding information in a document is now easier with AI