Page is loading ...

2/10/50 Amp 6V/12V
Fully Automatic Battery
Charger With Engine
Start
OPERATOR’S MANUAL
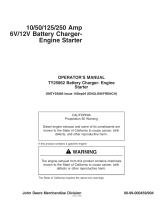
TY25865 Battery Charger
OMTY25888 Issue 16Sep04 (ENGLISH/FRENCH)
CALIFORNIA
Proposition 65 Warning
Diesel engine exhaust and some of its constituents are
known to the State of California to cause cancer, birth
defects, and other reproductive harm.
If this product contains a gasoline engine:
WARNING
The engine exhaust from this product contains chemicals
known to the State of California to cause cancer, birth
defects or other reproductive harm.
The State of California requires the above two warnings.
John Deere Merchandise Division 00-99-000457/904
Litho in U.S.A.

Introduction
OUOD006,0000033 –19–29JUN04–1/2
Foreword
THANK YOU for purchasing a John Deere product.
READ THIS MANUAL carefully to learn how to operate
and service your battery charger correctly. Failure to
do so could result in personal injury or equipment
damage. This manual and safety signs on your battery
charger may also be available in other languages.
(See your John Deere dealer to order.)
THIS MANUAL SHOULD BE CONSIDERED a
permanent part of your battery charger and should
remain with the charger when you sell it.
MEASUREMENTS in this manual are given in both
metric and customary U.S. unit equivalents. Use only
correct replacement parts and fasteners.
WRITE PRODUCT INFORMATION in the Specification
section. Accurately record all the numbers to help in
tracing the battery charger should it be stolen. Your
distributor also needs these numbers when you order
parts. File the product information in a secure place.
WARRANTY is provided as part of John Deere’s
support program for customers who operate and
maintain their equipment as described in this manual.
The warranty is explained in the Warranty section at
the end of this manual.
OUOD006,0000033 –19–29JUN04–2/2
TYB4786 –UN–07SEP04
TY25865 Battery Charger
This warranty provides you the assurance that John
Deere will back its products where defects appear within
the warranty period. In some circumstances, John Deere
also provides field improvements, often without charge to
the customer, even if the product is out of warranty.
Should the equipment be abused, or modified to change
its performance beyond the original factory specifications,
the warranty will become void and field improvements
may be denied.
091604
PN=2

Contents
Page
Safety ................................05-1
Controls and Operation
Preparing Battery ........................10-1
Positioning Battery Charger ................10-2
Understanding Automatic Charging ..........10-3
Checking Battery State-of-Charge ...........10-4
Identifying Battery Reserve Capacity
(RC) Rating...........................10-4
Estimating Battery Recharge Time ...........10-5
Activating and Charging a Dry Battery ........10-6
Using DC Amps Meter During Charging .......10-7
Charging Battery Installed in Vehicle .........10-7
Charging Battery Outside of Vehicle.........10-10
Starting Engine.........................10-13
Troubleshooting
Troubleshooting Battery Charger ............15-1
Storage
Storing Battery Charger ...................20-1
Specifications
Battery Charger Specifications ..............25-1
Record Product Information ................25-1
Warranty
Warranty...............................30-1
All information, illustrations and specifications in this manual are based on
the latest information available at the time of publication. The right is
reserved to make changes at any time without notice.
COPYRIGHT
©
2004
DEERE & COMPANY
Moline, Illinois
All rights reserved
A John Deere ILLUSTRUCTION
®
Manual
i
091604
PN=1

Contents
ii
091604
PN=2

Safety
DX,ALERT –19–29SEP98–1/1
Recognize Safety Information
T81389 –UN–07DEC88
This is a safety-alert symbol. When you see this symbol
on your machine or in this manual, be alert to the
potential for personal injury.
Follow recommended precautions and safe operating
practices.
DX,SIGNAL –19–03MAR93–1/1
Understand Signal Words
TS187 –19–30SEP88
A signal word—DANGER, WARNING, or CAUTION—is
used with the safety-alert symbol. DANGER identifies the
most serious hazards.
DANGER or WARNING safety signs are located near
specific hazards. General precautions are listed on
CAUTION safety signs. CAUTION also calls attention to
safety messages in this manual.
DX,READ –19–03MAR93–1/1
Follow Safety Instructions
TS201 –UN–23AUG88
Carefully read all safety messages in this manual and on
your machine safety signs. Keep safety signs in good
condition. Replace missing or damaged safety signs. Be
sure new equipment components and repair parts include
the current safety signs. Replacement safety signs are
available from your John Deere dealer.
Learn how to operate the machine and how to use
controls properly. Do not let anyone operate without
instruction.
Keep your machine in proper working condition.
Unauthorized modifications to the machine may impair the
function and/or safety and affect machine life.
If you do not understand any part of this manual and need
assistance, contact your John Deere dealer.
05-1
091604
PN=5

Safety
DX,SPARKS –19–03MAR93–1/1
Prevent Battery Explosions
TS204 –UN–23AUG88
Keep sparks, lighted matches, and open flame away from
the top of battery. Battery gas can explode.
Never check battery charge by placing a metal object
across the posts. Use a voltmeter or hydrometer.
Do not charge a frozen battery; it may explode. Warm
battery to 16°C (60°F).
DX,POISON –19–21APR93–1/1
Prevent Acid Burns
TS203 –UN–23AUG88
Sulfuric acid in battery electrolyte is poisonous. It is strong
enough to burn skin, eat holes in clothing, and cause
blindness if splashed into eyes.
Avoid the hazard by:
1. Filling batteries in a well-ventilated area.
2. Wearing eye protection and rubber gloves.
3. Avoiding breathing fumes when electrolyte is added.
4. Avoiding spilling or dripping electrolyte.
5. Use proper jump start procedure.
If you spill acid on yourself:
1. Flush your skin with water.
2. Apply baking soda or lime to help neutralize the acid.
3. Flush your eyes with water for 15—30 minutes. Get
medical attention immediately.
If acid is swallowed:
1. Do not induce vomiting.
2. Drink large amounts of water or milk, but do not
exceed2L(2quarts).
3. Get medical attention immediately.
05-2
091604
PN=6

Safety
DX,WEAR2 –19–03MAR93–1/1
Wear Protective Clothing
TS206 –UN–23AUG88
Wear close fitting clothing and safety equipment
appropriate to the job.
Operating equipment safely requires the full attention of
the operator. Do not wear radio or music headphones
while operating machine.
DX,MSDS,NA –19–03MAR93–1/1
Handle Chemical Products Safely
TS1132 –UN–26NOV90
Direct exposure to hazardous chemicals can cause
serious injury. Potentially hazardous chemicals used with
John Deere equipment include such items as lubricants,
coolants, paints, and adhesives.
A Material Safety Data Sheet (MSDS) provides specific
details on chemical products: physical and health hazards,
safety procedures, and emergency response techniques.
Check the MSDS before you start any job using a
hazardous chemical. That way you will know exactly what
the risks are and how to do the job safely. Then follow
procedures and recommended equipment.
(See your John Deere dealer for MSDS’s on chemical
products used with John Deere equipment.)
05-3
091604
PN=7

Safety
DX,DRAIN –19–03MAR93–1/1
Dispose of Waste Properly
TS1133 –UN–26NOV90
Recycle Waste
Improperly disposing of waste can threaten the
environment and ecology. Potentially harmful waste used
with John Deere equipment include such items as oil, fuel,
coolant, brake fluid, filters, and batteries.
Use leakproof containers when draining fluids. Do not use
food or beverage containers that may mislead someone
into drinking from them.
Do not pour waste onto the ground, down a drain, or into
any water source.
Air conditioning refrigerants escaping into the air can
damage the Earth’s atmosphere. Government regulations
may require a certified air conditioning service center to
recover and recycle used air conditioning refrigerants.
Inquire on the proper way to recycle or dispose of waste
from your local environmental or recycling center, or from
your John Deere dealer.
05-4
091604
PN=8

Safety
OUOD006,0000016 –19–16JUN04–1/1
IMPORTANT SAFETY INSTRUCTIONS- SAVE THESE INSTRUCTIONS
CAUTION: RISK OF EXPLOSIVE GASES.
Working in the vicinity of lead-acid batteries
is dangerous. Batteries generate explosive
gases during normal battery operation. Read
this manual and follow the instructions
exactly EACH TIME you use this battery
charger.
To reduce risk of battery explosion, follow
these instructions and the instructions
published by battery manufacturer. Review
the cautionary markings on the battery,
battery charger, and engine compartment.
WARNING: Battery posts, terminals, and related
accessories contain lead and lead compounds,
chemicals known by the State of California to cause
cancer and reproductive harm. Wash hands after
handling.
1. SAVE THESE INSTRUCTIONS. This manual
contains important safety and operating instructions
for your battery charger. Read and understand this
manual before using the battery charger.
2. To reduce risk of electric shock, do not operate
battery charger when unit is exposed to water. Do
not expose battery charger to rain or snow.
3. Use of an attachment not recommended or sold by
the battery charger manufacturer may result in a
risk of fire, electric shock or injury to persons.
4. To reduce the risk of damage to electric plug and
cord, pull by plug rather than cord when
disconnecting battery charger.
5. Use of an extension cord is not recommended. Use
of an improper extension cord could result in fire or
electric shock. If an extension cord must be used,
make sure:
a. the pins on plug of extension cord are the same
number, size, and shape as those on plug of
charger,
b. the extension cord is properly wired and in good
electrical condition, and
c. the wire size is large enough for the length of
cord for the ampere rating of this battery charger
as specified below.
Length of Cord (Ft.) 25 50 100 150
AWG Size of Cord 18 18 16 14
6. Never alter AC cord or grounding plug provided. If
temporary adapter must be used to plug battery
charger into a two pole outlet, connect the
grounding hardware on the adapter to a properly
grounded outlet using the center screw of the outlet
plate. Be sure the center screw of the outlet plate is
grounded. Use of adapter plug NOT ALLOWED in
Canada.
7. Locate battery power cord so it cannot be stepped
on, tripped over, or subjected to damage or stress.
Do not operate battery charger with damaged cord
or plug. Replace cord or plug immediately.
8. Do not operate battery charger if it has received a
sharp blow, been dropped, or otherwise damaged
in any way. Take it to a qualified service technician.
9. Do not disassemble battery charger. Take charger
to a qualified service technician when service or
repair is necessary. Incorrect assembly may result
in electric shock or fire.
10. To reduce risk of electric shock, unplug battery
charger from outlet before attempting any
maintenance or cleaning.
05-5
091604
PN=9

Safety
OURGP12,000010C –19–02JUN04–1/1
Personal Precautions
1. Wear complete eye protection and clothing
protection. Avoid touching eyes when working near
batteries.
2. Have plenty of fresh water and soap nearby, in
case battery acid contacts skin, clothing, or eyes.
3. Someone should be within range of your voice or
close enough to come to your aid when you work
near a lead-acid battery.
4. Avoid touching eyes while working with battery. If
acid enters eye, immediately flood eye with running
cold water for 15—30 minutes and get medical
attention immediately. If battery acid contacts skin
or clothing, wash immediately with soap and water.
5. Batteries generate explosive gases! NEVER smoke
or allow a spark or flame in the vicinity of battery or
engine. Always operate battery charger in an open,
well ventilated area.
6. Do not drop a metal tool onto the battery. It might
spark or short-circuit the battery or other electrical
part that may cause an explosion.
7. Remove personal metal items such as rings,
bracelets, necklaces, and watches when working
near a lead-acid battery.
8. Use the battery charger for charging LEAD-ACID
batteries only. The charger is not intended to supply
power to a low voltage electrical system other than
in a starter-motor application. Do not use the
battery charger for charging dry-cell batteries that
are commonly used with home appliances. These
batteries may burst and cause injury to persons or
damage to property.
9. NEVER charge a frozen battery.
10. Never allow battery acid to drip on charger when
reading specific gravity or filling battery.
11. Never set battery on top of battery charger.
12. Neutralize acid spills thoroughly with baking soda
before attempting to clean up.
OURGP12,000010E –19–02JUN04–1/1
Battery Charger Connection Precautions
CAUTION: Connect and disconnect DC
clamps only after removing AC cord from
electrical outlet.
Never allow battery charger clamps to touch
each other.
Do not connect both battery charger clamps
directly to the battery.
1. Locate battery charger as far from battery as cables
permit.
2. When connecting battery charger, attach one clamp
to battery and the other clamp to a grounding point
away from the battery.
3. Read the Controls and Operation section before
connecting the battery charger.
4. When connecting each clamp, rock or twist the
clamp back and forth several times to make a good
connection. Do not twist or rock the first clamp after
the second clamp has been connected.
05-6
091604
PN=10

Safety
OUOD006,0000034 –19–29JUN04–1/1
Safety Sign
TYB4787 –UN–08SEP04
Safety Decal Location
TYB4787A –UN–07SEP04
Safety Decal
NOTE: Safety decal (A) is located on back of battery
charger.
05-7
091604
PN=11

Controls and Operation
OUOD006,000000E –19–15JUN04–1/1
Preparing Battery
CAUTION: A marine (boat) battery must be
removed and charged on shore. To charge it
onboard requires equipment specially
designed for marine use.
1. Make sure battery is a 6 volt or 12 volt lead-acid
battery.
2. Make sure all vehicle accessories are off.
3. If battery must be removed from vehicle to charge,
always remove grounded terminal from battery first.
4. Make sure area around battery is well ventilated.
Gases can be forcefully blown away using a piece
of cardboard or other nonmetallic material as a fan.
5. Study battery manufacturer’s specific precautions,
such as removing or not removing cell caps while
charging, and recommended rates of charge.
6. For batteries with removable vent caps, add distilled
water to each cell until battery acid reaches level
specified by battery manufacturer. Do not overfill.
7. Clean battery terminals.
10-1
091604
PN=12

Controls and Operation
OURGP11,00001A5 –19–27MAY04–1/1
Positioning Battery Charger
TS204 –UN–23AUG88
Risk of Battery Explosion
CAUTION: Risk of explosion. Battery gases
produced during charging can explode.
Ventilate area. Keep sparks and flames away.
1. Position the battery charger in a clean, dry, well
ventilated place as far from the battery as cables
permit.
2. Never place the battery charger directly above battery
being charged. Gases from battery will corrode and
damage charger.
3. Never allow battery acid to drip on battery charger
when reading gravity or filling battery.
4. Do not operate battery charger in a closed area, or
restrict ventilation in any way.
5. Do not set battery on top of battery charger or battery
charger on top of battery.
6. Position battery charger at least 46 cm (18 inches)
above floor.
10-2
091604
PN=13

Controls and Operation
OURGP12,0000053 –19–13AUG04–1/1
Understanding Automatic Charging
NOTE: Automatic charging applies to 6 volt and 12
volt batteries.
In automatic charge mode, the battery charger will
monitor battery charge voltage and stop charging when
full charge voltage is sensed. If the battery voltage
drops below full charge, then the charger will start
again. The charger does not select charge rate. High
charge rates may damage smaller batteries.
Low charge rates will produce the most complete
recharge, but will take longer than high charge rates.
Higher charge rates will recharge the battery faster,
but there is a risk of battery damage due to
overcharge.
A charge current that is 3% of the battery’s CCA rating
is a good starting charge rate. For example, a battery
with a 500 CCA rating would have a charge rate of 15
amps (500 amps x 3% = 15 amps).
A charge current that is 1% of the battery’s CCA rating
will not produce overcharge, and the battery can be
charged for extended time periods without damage.
For example, a battery with a 950 CCA rating could
have a charge rate of approximately 10 amps (950 x
1% = 9.5 amps) for extended periods without risk of
overcharge.
The charge current that a battery will accept is
dependent on the charge rate setting and the battery’s
state of charge and history.
A battery that has been recently and rapidly
discharged (lights left on overnight) will readily accept
recharge and will exhibit high recharge currents that
decline steadily as the battery recharges.
A battery that has been slowly discharged over a long
time period (slow discharge over a number of months,
also known as sulfated), will not initially accept high
charge currents. Even at high charge rate settings, the
charge currents will start low and then increase to a
peak before tapering off as the battery recharges.
10-3
091604
PN=14

Controls and Operation
OUOD006,0000057 –19–17AUG04–1/1
Checking Battery State-of-Charge
TYK275 –UN–08OCT96
Checking State-of-Charge
A—Hydrometer
Use a voltmeter or hydrometer (A) to determine state-of
charge. Refer to chart to obtain percent of charge.
Voltmeter Reading Hydrometer Battery Test
Reading Reading
12 Volt Battery* Specific Gravity Percent of Charge
12.4 or greater 1.265 100%
12.39 to 12.25 1.225 75%
12.24 to 12.10 1.190 50%
12.09 to 11.96 1.155 25%
11.95 to 0 1.120 0%
* 6 volt battery voltmeter readings are one-half of 12 volt
battery readings shown.
CAUTION: Do NOT attempt to charge a frozen
battery.
NOTE: Any battery 25% charged or less may readily
freeze and should be charged at once.
OUOD006,0000059 –19–18AUG04–1/1
Identifying Battery Reserve Capacity (RC) Rating
Typical Group Sizes Auto, LGC, etc. 3ET, 47, 48, 49 31, 30H 1, 2 5D, 4 4D, 3EH, 8D
Reserve Capacity 80 or less 81-125 126-180 181-260 261 or more
Rating
Time needed to completely recharge a battery
depends on the battery’s electrical capacity and
present state of charge. Battery electrical reserve (RC
rating) is given in minutes, and is needed when
estimating recharge time.
Most batteries have a label attached showing the
battery’s type and/or reserve capacity rating. If this
information is not found on the battery, use the above
chart to determine reserve capacity (RC) rating.
10-4
091604
PN=15

Controls and Operation
OUOD006,000005A –19–18AUG04–1/1
Estimating Battery Recharge Time
TYB4797 –19–18AUG04
Estimating Recharge Time
1. Use table to determine time needed to completely
recharge battery based on battery type, present state
of charge, and charging rate (amps).
2. If recharge time cannot be estimated from the table,
calculate recharge time using the following formula:
Recharge capacity (minutes) x 0.6 x 1.25 ÷ charge rate
(amps) = approximate hours needed to recharge a
totally discharged battery.
EXAMPLE:
80 x 0.6 x 1.25 ÷ 10 = 6 hours
NOTE: Example uses an 80 minute reserve capacity
battery and 10 amp charge rate.
When battery is not totally discharged, adjust charge
time estimate using % DISCHARGED figure for
calculation.
EXAMPLE:
6 hours x 0.75 = 4.5 hours
NOTE: Example shows adjusted time when battery is
25% charged (75% discharged). If battery was
75% charged, discharged figure of 0.25 would be
used in adjusted calculation to arrive at 1.5 hours.
10-5
091604
PN=16

Controls and Operation
OUOD006,0000058 –19–17AUG04–1/1
Activating and Charging a Dry Battery
Listed below are six steps to activate a dry-charged
battery.
1. Remember Safety. Always wear protective
glasses, gloves, and clothing when handling
batteries and sulfuric acid electrolyte.
2. Prepare the Battery. Remove vents and date code
punch outs. If the battery or electrolyte is below
60°F, activation will be slower.
3. Add Electrolyte. Fill each cell with electrolyte until
the level just touches the bottom of the “split vent”
at the bottom of the vent well. Do not over fill by
covering the split. If the split is covered, the gases
created during charging will not escape properly,
and will cause increased splashing and acid loss.
Under filling can reduce the performance and life of
the battery.
4. Let the Battery Absorb the Acid. It takes time for
the battery plates and separators to absorb the
acid. A 15 to 30 minute stand time before charging
is recommended. Gentle rocking of the battery will
help dislodge trapped air bubbles.
5. Charge the Battery. Charge the activated battery
to ensure that it starts its life at 100%
state-of-charge. Activated batteries should be
charged at no more than 1% of CCA for 30
minutes, and up to 6 hours in cases of extremely
high humidity storage. For example, a 625 CCA
battery should be charged at 6 amps. Reduce the
charging rate if excessive gassing occurs.
Charging is recommended when:
a. The voltage of the activated battery is below
12.4 volts, even after 15 minutes stand time.
b. The battery will not be installed within the next
30 days.
c. The outside temperature is below 32°F.
d. The battery has been in storage for more than
two years.
6. Top off the Electrolyte Level. Add electrolyte as
required to bring the level back up to the bottom of
the split vent in the bottom of the vent well. The
acid level may have dropped due to absorption into
the plates and separators. Replace the service
vents.
Service hints for longer battery life:
• Add only pure drinking water or distilled water to the
battery after it is placed in service.
• Disconnect the ground cable when the vehicle is
stored for more than three months. Cleaning the
battery top, adding water, and charging the battery
before vehicle storage will reduce discharge and
sulfation battery failures.
• Specific gravity is the best indicator of battery
state-of charge.
10-6
091604
PN=17

Controls and Operation
OURGP12,0000052 –19–12AUG04–1/1
Using DC Amps Meter During Charging
TYB4796 –UN–31AUG04
DC Amps Meter
A—Green LED
The DC Amps Meter indicates amount of amperes being
drawn by the battery. When initially charging a battery at
the 10 amp charging rate, the reading will be high, with
the needle near 10 amps. As the battery charges, the
needle will begin to fall. When the battery is fully charged,
the needle will point to 0 and the “FULL CHARGE” green
LED (A) will glow.
The “CHARGE %” scale simplifies reading the battery
state of charge. It is scaled for use with the 10 amp
charge rate. Percent of charge is based on current drawn
by the battery. Accuracy will vary with battery size and
type.
For the 2 amp charge rate, use the small red triangle for
reference. When initially charging at the 2 amp rate, the
needle will begin at the right side of the triangle, and will
fall to the left side, pointing to 0 when the battery is fully
charged.
OUOD006,0000035 –19–29JUN04–1/4
Charging Battery Installed in Vehicle
CAUTION: Risk of explosion. Battery gases
produced during charging can explode.
Ventilate area. Keep sparks and flames
away.
Stay clear of fan blades, belts, pulleys, and
other parts that can cause injury.
NEVER charge a frozen battery.
A marine (boat) battery must be removed
and charged on shore. To charge it onboard
requires equipment specially designed for
marine use.
WARNING: Battery posts, terminals, and related
accessories contain lead and lead compounds,
chemicals known by the State of California to cause
cancer and reproductive harm. Wash hands after
handling.
IMPORTANT: DO NOT plug battery charger into
power receptacle or set any charger
controls until ALL connections have
been made.
Turn all vehicle switches OFF
(ignition, lights, radio, etc.) before
connecting battery charger.
1. Position AC and DC cords to reduce risk of damage
by hood, door, or moving engine parts.
2. Determine which battery terminal is the POSITIVE
terminal. (The Positive terminal may be identified
with a POS, P, or +, and usually has a larger
diameter than the Negative terminal (NEG, N, —).
3. Determine which battery terminal is grounded
(connected) to the chassis.
10-7
091604
PN=18
Continued on next page

Controls and Operation
OUOD006,0000035 –19–29JUN04–2/4
TYB4726 –UN–25JUN04
Negative Ground Connections
A—Positive (Red) Clamp
4. Connect one clamp of the battery charger to the
UNGROUNDED battery terminal using (a) or (b) below:
a. Negative-Grounded Vehicles: Connect Positive
(red) clamp (A) of battery charger to Positive
(Ungrounded) battery terminal.
b. Positive-Grounded Vehicles: Connect Negative
(black) clamp of battery charger to Negative
(Ungrounded) battery terminal.
NOTE: Rock or twist clamp back and forth several times
to make a good connection.
IMPORTANT: Do not connect ground clamp to the
carburetor, fuel lines, or sheet metal
body parts.
5. Connect remaining battery charger clamp to a
heavy-gauge metal part of vehicle chassis or engine
block, as far from battery as possible.
6. Plug battery charger AC power cord into 120-volt AC
receptacle.
Continued on next page
10-8
091604
PN=19

Controls and Operation
OUOD006,0000035 –19–29JUN04–3/4
TYB4788 –UN–07SEP04
TY25865 Control Panel
B—Battery Type Selector Switch
C—Charge Rate Selector Switch
D—DC Amps Meter
7. Select 6 volts or 12 volts to match battery type with
battery type selector switch (B).
8. Select charging amps with charge rate selector switch
(C) as follows:
• 2 amps (2A)- for small batteries commonly used in
garden tractors, snow mobiles, and motorcycles. Not
for use as trickle charger or for larger batteries.
• 10 amps (10A)- for automotive, marine, and deep
cycle batteries. Not for industrial applications.
9. Observe DC Amps meter (D) to determine charging
progress after charging has begun. (See “Using DC
Amps Meter During Charging” near beginning of this
section.)
Refer to following Charge Rate Table for approximate
charging time for charge rate selected
NOTE: When charging is completed, the needle will point
to 0, the “FULL CHARGE” green LED will glow,
and battery charger will turn off. Battery charger
turns back on if battery voltage falls below 6.5/13
volts on 6V/12V batteries respectively.
CHARGE RATE/CHARGE TIME
BATTERY SIZE/RATING
(HOURS)*
2 AMP 10 AMP
SMALL 6-12 AH 2 - 4 NR
BATTERIES 12-32 AH 4 - 10 NR
200-315 CCA 40-60 RC 11 - 14 2 - 2-7/8
315-550 CCA 60-85 RC 14 - 18 2-7/8 - 3-3/4
550-1000 18 - 35 3-3/4 - 7
85-190 RC
CCA
80 RC 18 3-1/2
MARINE/ 140 RC 27 5-1/2
DEEP CYCLE 160 RC 30 6
180 RC 33 7
* - Based on battery at 50% charge.
AH - Amp Hours
NR - Not Recommended
CCA - Cold Cranking Amps
RC - Reserve Capacity
10-9
091604
PN=20
Continued on next page
/