UTStarcom GzOne Type S User manual
- Category
- Mobile phones
- Type
- User manual
This manual is also suitable for

User Guide
Guíadel Usuario
OMC211VW VER 1.1
Manual_Cover_15mm 2007.2.13 6:45 PM 페이지1

Contents
G’zOne TYPE-S
1
Phone Overview ............5
Menus Overview..........12
Getting Started with Your
Phone...........................15
The Battery.....................15
Charging the Battery ......17
Battery Charge Level ......19
Turning the Phone On
and Off ...........................19
Making Calls...................20
Redialing Calls................20
Receiving Calls ...............20
Screen Icons ..................21
Quick Access to
Convenient Features...23
Vibrate Mode ..................23
Lock Mode......................23
Mute Function ................23
Volume Quick Adjustment
........................................24
Call Waiting ....................24
Caller ID ..........................25
Voice Command.............25
Speed Dialing .................25
Entering and Editing
Information ..................27
Text Input .......................27
Text Input Modes ...........27
Contacts in Your Phone’s
Memory........................31
The Basics of Storing
Contacts Entries .............31
Options to Customize Your
Contacts .........................32
Editing Contacts Entries.36
Deleting ..........................39
Phone Numbers With
Pauses............................41
Searching Your Phone’s
Memory ..........................43
Making a Call From Your
Phone’s Memory ............44
Menu Access..................48
GET IT NOW ................49
1. Tunes & Tones............50

2.4 Alarm Clock..............99
2.5 World Clock ...........100
2.6 Notepad.................100
2.7 Countdown Timer...100
2.8 Stop Watch ............101
3. Bluetooth Menu ........102
3.1 Add New Device.....103
4. Sounds Settings .......108
4.1 Master Volume .......109
4.2 Call Sounds............109
4.3 Alert Sounds...........110
4.4 Keypad Volume......111
4.5 Earpiece Volume ....111
4.6 Service Alerts .........112
4.7 Power On/Off .........113
4.8 Alarm Sounds.........113
4.9 Folder On / Off .......114
5. Display Settings........114
5.1 Banner ...................115
5.2 Backlight ................116
5.3 Contrast .................117
5.4 Wallpaper...............117
5.5 Display Themes......118
5.6 Dial Fonts ...............118
5.7 Clock Format..........118
5.8 Power Saver...........119
6. Phone Settings .........120
6.1 Standalone Mode...121
6.2 Set Shortcut Keys ..122
6.3 Language ...............122
6.4 Security..................123
6.5 System Select ........128
6.6 NAM Selection .......129
7. Call Settings .............130
7.1 Answer Options......130
7.2 Auto Retry ..............131
7.3 TTY Mode ..............132
7.4 One Touch Dial.......132
7.5 Voice Privacy..........133
7.6 Call Restrictions......133
7.7 Data Settings..........134
7.8 DTMF Tones...........134
7.9 Ringer ID ................135
7.0 Picture ID ...............135
Contents
G’zOne TYPE-S
3
1.1 Get New Ringtones ..51
1.2 My Ringtones ...........51
1.3 My Sounds...............52
2. Picture & Video ...........53
2.1 Get New Pictures .....54
2.2 My Pictures ..............54
2.3 My Videos ................55
2.4 Take Picture .............57
2.5 Record Video ...........58
2.6 PIX Place..................59
3. Games ........................59
4. News & Info ................59
5. Tools on the Go..........63
6. Extras..........................63
MESSAGING................64
1. New Message.............65
2. Inbox...........................71
3. Sent ............................74
4. Drafts ..........................76
5. Voicemail ....................77
6. Mobile IM....................78
7. E-mail .........................78
8. Chat ............................78
Message Settings...........79
Message Settings Sub-
Menu Descriptions..........80
Message Erase ...............82
CONTACTS..................83
1. New Contact...............83
2. Contact List ................84
3. Groups........................85
4. Speed Dials ................86
RECENT CALLS...........87
1. Missed ........................88
2. Received.....................88
3. Dialed..........................89
4. All................................90
5. View Timers ................91
SETTINGS & TOOLS....92
1. My Account ................92
2. Tools...........................93
2.1 Voice Commands.....94
2.2 Calculator.................97
2.3 Calendar...................97
G’zOne TYPE-S
2

Phone Overview
G’zOne TYPE-S
5
8. Memory ....................136
8.1 Memory Usage.......136
8.2 My Pictures ............136
8.3 My Videos ..............137
8.4 My Sounds.............137
9. Phone Info ................138
9.1 My Number ............138
9.2 SW Version ............138
9.3 Icon Glossary .........139
Inbox Items................140
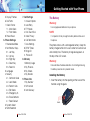
Safety.........................141
TIA Safety Information..141
Tips on Efficient Operation
....................................141
Driving..........................141
Electronic Devices ........142
Pacemakers .................142
Hearing Aids.................143
Other Medical Devices..143
Hospitals and Health Care
Facilities .......................144
Vehicles........................144
Posted Facilities ...........144
Aircraft..........................144
Blasting Areas ..............145
Potentially Explosive
Atmospheres................145
Safety Information for FCC
RF Exposure.................146
Body-Worn Operation ..146
SAR information ...........147
FDA information............149
Accessibility..................174
12 MONTH LIMITED
WARRANTY ...............179
G’zOne TYPE-S
4
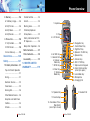
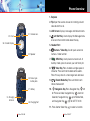
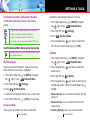
2. Flip
3. LCD Screen
4. Left Soft Key
5. Headset Port
6. Camera /
Video Key
7. SEND Key
9. Vibrate
Mode Key
8. Clear Key
1. Earpiece
11. Center Select Key
10. Navigation Key
12. Right Soft Key
13. Speaker / FLASH Key
14. Speaker Key
16. END / PWR Key
17. Alphanumeric Keypad
15. Volume Keys
19. Lock Mode Key
20. Microphone
28. Charging Port
18. Voice Command Key
(when flip is open)
5. Headset Port
15. Volume Keys
14. Speaker Key
18. Countdown Timer,
Stop Watch
(when flip is closed)

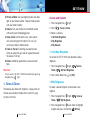
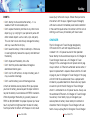
1. Earpiece
2. Flip Open the case to answer an incoming call and
close to end the call.
3. LCD Screen Displays messages and indicator icons.
4. Left Soft Key Use to display the Message menu
or access the function listed above the key.
5. Headset Port
6. Camera / Video Key Use for quick access to
Camera / Video function.
7. SEND Key Use to place or answer calls. In
standby mode, press to access your call history list.
8. Clear Key Press to delete a single space or
character. Press and hold to delete entire words.
Press this key once in a menu to go back one level.
9. Vibrate Mode Key Press and hold to turn
Vibrate mode on/off.
10. Navigation Key Press Navigation Key left
for Picture & Video, Navigation Key down for
Calender, Navigation Key up for Mobile Web,
and Navigation Key right for GET IT NOW.
11. Press Center Select Key to select a function.
Phone Overview
G’zOne TYPE-S
7
G’zOne TYPE-S
6
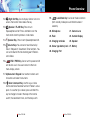
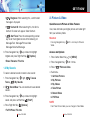
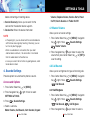
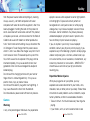
23. Outside Display
22. Flash
21. Camera Lens
25. Speaker
24. Charging
terminals
26. Screw type
battery lock
27. Battery
28. Charging Port

19. Lock Mode Key Use to set the lock function
(from standby mode press and hold for about 2
seconds).
20. Microphone 21. Camera Lens
22. Flash 23. Outside Display
24. Charging terminals 25. Speaker
26. Screw type battery lock 27. Battery
28. Charging Port
Phone Overview
G’zOne TYPE-S
9
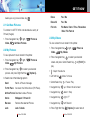
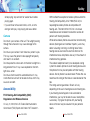
12. Right Soft Key Use to display Contact List or to
access the function listed above the key.
13. Speaker / FLASH Key Press to turn
Speakerphone on/off. Press and hold to turn the
flash on/off when the phone is in idle mode.
14. Speaker Key Press to turn Speakerphone on/off.
15. Volume Keys You can set or reset Volume Up /
Down / Stopwatch / Countdown Timer functions. You
can set to Sound Off while incoming alert if Folder is
set to Close
16. END / PWR Key Use to turn the power on/off
and to end a call. Also use to return to the main
menu display screen.
17. Alphanumeric Keypad Use to enter numbers and
characters and select menu items.
18. Voice Command Key Use this key as Voice
Command/Voice Recorder function if Folder is set as
open. In case the flip is closed, press and hold this
key to change its mode in the loop of the normal
watch, the countdown timer, and the stop watch.
G’zOne TYPE-S
8

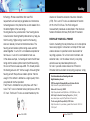
NOTE
In order to maintain your phone's resistance it is
recommended that you rinse any parts which may appear
blocked with pure water.
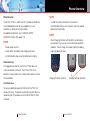
NOTE
Clean Charging Terminals with dry cloths or cotton buds
occasionally. Dust may cause some electrical connection
problems. Do not change the shapes of ports by rubbing,
wiping or poking too much.
Phone Overview
G’zOne TYPE-S
11
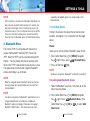
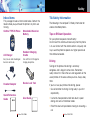
Water Resistant
The G'zOne TYPE-S is water resistant. The device provides the
most reliable performance for your outdoor life, in such
conditions as driving rain or high humidity.
For additional information, see 12 MONTH LIMITED
WARRANTY section (from page 179).
NOTE
To keep water resistant;
• Fasten down the headset and charging port cover.
• Install the battery and screw the battery lock on tightly.
Shock Resistant
The rugged construction of the G'zOne TYPE-S allows for
shock and vibration resistance. The G'zOne TYPE-S can
perform in those environments where a phone needs to sustain
these conditions.
Dust Resistance
To give you additional peace of mind the G'zOne TYPE-S is
also dust resistant. The device was tested using silica flour at a
temperature of 95F and bears up to the MIL-STD-810F (Dust)
standard.
G’zOne TYPE-S
10
Charging Terminals (internal) Charging Terminals (external)

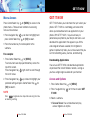
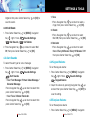
SETTINGS &
TOOLS
1. My Account
2. Tools
1. Voice Commands
2. Calculator
3. Calendar
4. Alarm Clock
5. World Clock
6. Notepad
7. Countdown Timer
8. Stop Watch
3. Bluetooth Menu
1. Add New Device
4. Sounds Settings
1. Master Volume
2. Call Sounds
2.1. Call Ringtone
2.2. Call Vibrate
3. Alert Sounds
3.1. Text Message
3.2. Picture-Video
Message
3.3. Voicemail
Message
4. Keypad Volume
5. Earpiece Volume
6. Service Alerts
6.1. ERI
6.2. Minute Beep
6.3. Call Connect
7. Power On/Off
7.1. Power On
7.2. Power Off
8. Alarm Sounds
8.1. Tone
8.2. Vibrate
9. Folder On/Off
5. Display Settings
1. Banner
1.1. Personal Banner
1.2. ERI Banner
2. Backlight
2.1. Display
2.2. Keypad
3. Contrast
4. Wallpaper
4.1. My Pictures
4.2. My Videos
Menus Overview
G’zOne TYPE-S
13
GET IT NOW
1. Tunes & Tones
1. Get New Ringtones
2. My Ringtones
3. My Sounds
2. Picture & Video
1. Get New Pictures
2. My Pictures
3. My Videos
4. Take Picture
5. Record Video
6. PIX Place
3. Games
4. News & Info
5. Tools on the Go
6. Extras
MESSAGING
1. New Message
2. Inbox
3. Sent
4. Drafts
5. Voicemail
6. Mobile IM
7. E-mail
8. Chat
CONTACTS
1. New Contact
2. Contact List
3. Groups
4. Speed Dials
RECENT CALLS
1. Missed
2. Received
3. Dialed
4. All
5. View Timers
G’zOne TYPE-S
12

The Battery
Warning!
Use only approved batteries for your phone.
NOTE
It is important to fully charge the battery before initial use of
the phone.
The phone comes with a rechargeable battery. Keep the
battery charged while not in use in order to maximize talk
and standby time. The battery charge level appears at
the top of the LCD screen.
Warning!
Failure to follow the below directions for installing/removing
the battery could result in product failure.
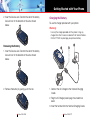
Installing the Battery
1. Insert the battery into the opening on the back of the
handset using the guide.
Getting Started with Your Phone
G’zOne TYPE-S
15
5. Display Themes
6. Dial Fonts
7. Clock Format
7.1. Main Clock
7.2. Front Clock
8. Power Saver
6. Phone Settings
1. Standalone Mode
2. Set Shortcut Keys
2.1. Left Key
2.2. Up Key
2.3. Right Key
2.4. Down Key
2.5. Reset All
3. Language
4. Security
4.1. Common Code
4.2. Lock Mode
4.3. Restrict Calls
4.4. Edit Code
4.5. Emergency #s
4.6. Erase Contacts
4.7. Reset Default
5. System Select
6. NAM Selection
7. Call Settings
1. Answer Options
2. Auto Retry
3. TTY Mode
4. One Touch Dial
5. Voice Privacy
6. Call Restrictions
7. Data Settings
8. DTMF Tones
9. Ringer ID
0 . Picture ID
8. Memory
1.Memory Usage
2. My Pictures
3. My Videos
4. My Sounds
9. Phone Info
1. My Number
2. SW Version
3. Icon Glossary
G’zOne TYPE-S
14
Guide

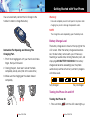
Charging the Battery
To use the charger provided with your phone:
Warning!
Use only the charger provided with the phone. Using any
charger other than the one included with the Verizon Wireless
G’zOne TYPE-S may damage your phone or battery.
1. Connect the AC Charger to the Handset Charging
Cradle.
2. Plug the AC Charger power plug into an electrical
outlet.
3. Insert the handset into the Handset Charging Cradle.
Getting Started with Your Phone
G’zOne TYPE-S
17
2. Insert the Device Lock Tool into the slot of the battery
lock and turn in the direction of the arrow shown
below.
Removing the Battery
1. Insert the Device Lock Tool into the slot of the battery
lock and turn in the direction of the arrow shown
below.
2. Remove the battery by pulling up on the tab.
G’zOne TYPE-S
16

Warning!
Failure to completely reseal the AC port on the phone after
charging may result in damage if exposed to water.
NOTE
The charge time varies depending upon the battery level.
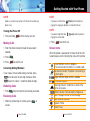
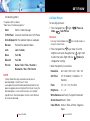
Battery Charge Level
The battery charge level is shown at the top right of the
LCD screen. When the battery charge level becomes
low, the low battery sensor alerts you in three ways:
Sounding an audible tone, blinking the battery icon, and
displaying LOW BATTERY WARNING! If the battery
charge level becomes exceedingly low, the phone
automatically switches off and any function in progress
will not be saved.
Fully Charged Fully Discharged
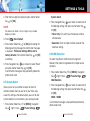
Turning the Phone On and Off
Turning the Phone On
1. Press and hold until the LCD screen lights up.
Getting Started with Your Phone
G’zOne TYPE-S
19
You can also directly connect the AC Charger to the
handset in order to charge the battery.
Instruction For Opening and Closing The
Charging Port.
1. Pinch the charging port with your thumb and index
finger, then pull it forward.
2. Closing the port, insert each side of the hook
completely one by one. (Not at the same time)
3. Make sure the chaging port has been closed
completely.
G’zOne TYPE-S
18

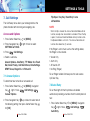
NOTE
If you press Left Soft Key [Quiet] while the phone is
ringing, the ringing or vibration is muted for that call.
NOTE
If you press Right Soft Key [Ignore] while the phone is
ringing, the call will end.
2. Press to end the call.
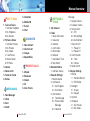
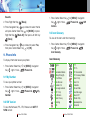
Screen Icons
When the phone is powered on, the top line of the LCD
screen displays icons indicating the status of the phone.
Getting Started with Your Phone
G’zOne TYPE-S
21
NOTE
Avoid any unnecessary contact with the antenna while your
phone is on.
Turning the Phone Off
1. Press and hold until the display turns off.
Making Calls
1. Enter the phone number (include the area code if
needed).
2. Press
.
3. Press to end the call.
Correcting Dialing Mistakes
If you make a mistake while dialing a number, press
once to erase the last digit entered, or hold
down for at least 1 second to delete all digits.
Redialing Calls
1. Press twice to redial the last number you dialed.
Receiving Calls
1. When the phone rings or vibrates, press to
answer.
G’zOne TYPE-S
20
In use indicator. A call is in progress.
* No icon indicates the phone is in standby mode.
No Service indicator. The phone is not receiving a
system signal.
Digital indicator. Digital service is available.
1X Service indicator.
Roaming indicator. The phone is outside of the
home service area.
Battery indicator. Indicates battery charge level.
New messages indicator or Web Message.
New Voicemail indicator.
Speaker Phone.
Voice Privacy.

Location On Mode.
E911 Only Mode.
TTY.
SSL. Secure Sockets Layer is a protocol
developed by Netscape Communications that
uses encryption to secure data through the
public Internet from client to server.
Data Session.
Vibrate Mode.
Alarm Only.
Sounds Off.
Missed Calls.
Calendar
Alarm On.
Message Locked.
Standalone Mode.
Bluetooth On.
Bluetooth Device Connected.
BT Discovery Mode.
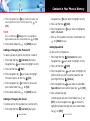
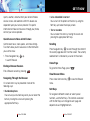
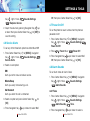
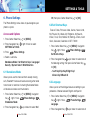
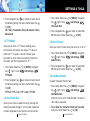
Vibrate Mode
Vibrate Mode mutes key tones and activates the vibration
mode to alert you of an incoming call or message. To
activate Vibrate Mode from standby mode, press and
hold .
Lock Mode
Use Lock Mode to prevent others from using your phone.
When Lock Mode is set, your four-digit password is
required to use the phone.
NOTE
The lock code/password is the last 4 digits of your phone
number.
1. To lock your phone from standby mode, press and
hold .
2. To unlock your phone press Right Soft Key
[Unlock], then enter your 4-digit password and press
Center Select Key for [OK].
Mute Function
If you press Mute during a call, the person you are
speaking with cannot hear you or any sounds from your
side of the conversation. However, you can still hear
Quick Access to Convenient Features
G’zOne TYPE-S
23
G’zOne TYPE-S
22

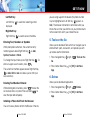
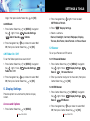
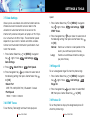
Caller ID
Caller ID displays the number of the person calling when
your phone rings. If the caller’s identity is stored in
Contacts, the name appears on the screen.
Voice Command
Voice Commands allow you to do things by verbal
command (e.g., make calls, confirm Voicemail, etc.).
Press Voice Commands Key and follow the prompts
to set up your voice command(s).
NOTE
Voice Commands can also be started with the designated
key on your Bluetooth
®
device. Please check the manual of
the Bluetooth
®
device for further instructions.
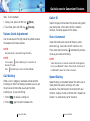
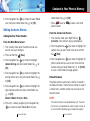
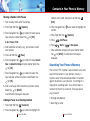
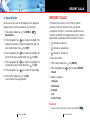
Speed Dialing
Speed Dialing is a convenient feature that allows you to
make phone calls quickly and easily with a few
keystrokes. Your phone recalls the number from your
Contacts, displays it briefly, and then dials it. Speed Dial
number 1 is automatically set for Voicemail.
Quick Access to Convenient Features
G’zOne TYPE-S
25
them. To activate Mute:
1. During a call, press Left Soft Key [Mute].
2. To unmute, press Left Soft Key [Unmute].
Volume Quick Adjustment
Use the side keys on the right side of the phone to adjust
the earpiece and master volumes.
NOTE
Key pad volume is adjusted through the Menu.
NOTE
You can press (Down Side Key) for 1 second to set
Sounds Off mode.
Press (Up Side Key) to switch to Normal Mode.
Call Waiting
While a call is in progress, two beeps indicate another
incoming call. When Call Waiting is enabled, you may put
the active call on hold while you answer the other
incoming call. To use Call Waiting:
1. Press to receive a waiting call.
2. Press again to switch between calls.
G’zOne TYPE-S
24

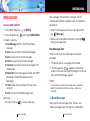
Entering and Editing Information
G’zOne TYPE-S
27
NOTE
You will need to turn One-Touch Dialing on to use Speed
Dialing. (see page 132).
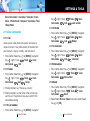
Dialing Single Digit Speed Dials (from 1 to 9)
Press and hold the Speed Dial number.
Or Enter the speed dial number and press .
Dialing Double Digit Speed Dials (from 10 to 99)
Press the first digit and then press and hold the key of
the last digit.
Or Enter the first and second digits and press .
For more information on adding an entry to Speed Dial,
see page 46.
G’zOne TYPE-S
26
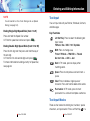
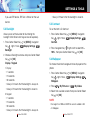
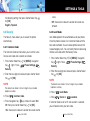
Text Input
You can input and edit your Banner, Schedule, Contacts,
and Messages.
Key Functions
Left Soft Key: Press to select the following text
input modes:
T9Word / Abc / ABC / 123 / Symbols
Shift: Press to change case.
T9 text: T9Word -> T9WORD -> T9word
Abc text: Abc -> ABC -> abc
Next: In T9 mode, press to display other
matching words.
Space: Press to complete a word and insert a
space.
Clear: Press to delete a single space or
character. Press and hold to delete entire words.
Punctuation: In T9 mode, press to insert
punctuation in a word and complete a sentence.
Text Input Modes
There are five modes for entering text, numbers, special
characters, and punctuation. Press Left Soft Key in a

G’zOne TYPE-S
28
Entering and Editing Information
G’zOne TYPE-S
29
text entry field to display a pop-up list of text modes.
Using Abc (Multi-tap) Text Input
To enter words in this mode, you need to press each key
repeatedly until the desired letter appears. It can also be
used to add words to the T9 database.
1. Press Left Soft Key to change to Abc mode, then
press to change to ABC Caps Lock.
2. Press , . UT is displayed.
Using T9 Mode Text Input
T9 mode incorporates a built-in-dictionary to determine a
word based on the entered characters. A word can be
entered more quickly by pressing each key once per
character.
To type the message “Call the office.” follow these
steps:
1. Press Left Soft Key to change to T9Word mode.
2. Press .
3. Press to complete the word and add a space.
4. Press
.
Call the office. is displayed.
Using the NEXT Key
After you have finished entering a word, if the word
displayed is not the one you want, press to
display additional word choices.
1. Press .
Good is displayed.
2. Press .
The display gives you additional choices such as:
Home, Gone, Hood, etc.
Adding Words to the T9 Database
If a word is not in the T9 database, add it by using Abc
(Multi-tap) mode text entry. To add a new word:
1. Press Left Soft Key to change to Abc (multi-tap)
mode.
2. Press .
Kop is displayed.
3. Press Left Soft Key to change to T9 Word mode to
add the word Kop to the T9 database.
4. Press to erase the existing word.
5. Press .
Kop is displayed.

Contacts in Your Phone’s Memory
G’zOne TYPE-S
31
G’zOne TYPE-S
30
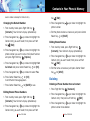
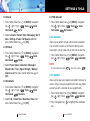
Using 123 (Numbers) Text Input
Use to type numbers using one keystroke per number.
1. Press Left Soft Key to change to 123 mode.
2. Press
.
5551212 is displayed.
Using Symbol Text Input
Use to insert special characters or punctuation. There are
36 special characters including “SP” which inserts a
space and “LF” which moves the text to the next line.
1. Press Left Soft Key to change to Symbols mode.
2. Press Right Soft Key [Next] to view the next 12
symbols or Left Soft Key [Prev] to view the
previous 12 symbols.
3. Press Navigation Key to highlight the special
character you want to insert and press Center Select
Key
for [OK]
to select it.
4. Press Left Soft Key to return to another text mode.
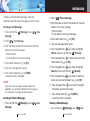
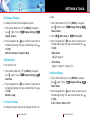
Contacts Entries
This provides easy access to your most frequently dialed
phone numbers. You may store up to 500 entries with up
to 4 phone numbers each. Each entry may be up to 48
characters.
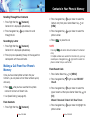
The Basics of Storing Contacts Entries
1. From standby mode, enter the phone number you
want to save.
2. Press Left Soft Key [Save].
3. Press Navigation Key up or down to select
Create New or Update Existing and press Center
Select Key
for [OK]
.
4. Press Navigation Key up or down to select the
type of phone number and press Center Select Key
for [OK]
.
Mobile 1/ Mobile 2/ Home / Work
NOTE
Use Update Existing to add another phone number to a
contact already stored in memory.
5. Enter a name for the phone number (up to 32
characters) and press Center Select Key
for
[SAVE]
.

Contacts in Your Phone’s Memory
G’zOne TYPE-S
33
G’zOne TYPE-S
32
6. The phone number reappears on screen. Press
to exit, press to call the number, or Right Soft
Key [Options].
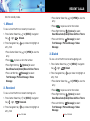
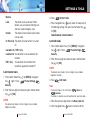
Options to Customize Your Contacts
Once the basic phone number and name information is
stored in your Contacts, you can edit and/or customize
the entries.
1. Press Right Soft Key [Contacts] then press
Navigation Key up or down to highlight the
Contact entry you want to edit.
2. Press Left Soft Key [Edit] to access the Edit
Contact screen.
3. Press Navigation Key up or down to highlight the
information field you want to customize.
4. Change the data as necessary, then press Center
Select Key
for [SAVE]
to save.
Adding or Changing the Group
Allows you to manage your Contacts entries by
organizing them into groups.
1. Press Right Soft Key [Contacts] then press
Navigation Key up or down to highlight an entry.
2. Press Left Soft Key [Edit].
3. Press Navigation Key up or down to highlight
Group then press Left Soft Key [Set].
4. Press Navigation Key up or down to select the
Group and press Center Select Key
for [OK]
.
No Group / Club / Family / Friends / Work
5. Press Center Select Key
for [SAVE]
to save.
NOTE
You can change the name of the group, add groups, and
delete groups (see page 85).
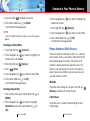
Changing the Call Ringtone
Allows you to identify who is calling by setting different
ringtones for different phone numbers in your Contacts. It
is automatically set to the default ringtone when the
Contact is saved.
1. Press Right Soft Key [Contacts] then press
Navigation Key up or down to highlight an entry.
2. Press Left Soft Key [Edit].
3. Press Navigation Key up or down to highlight
Default under Ringtone and press Left Soft Key
[Set].

Contacts in Your Phone’s Memory
G’zOne TYPE-S
35
G’zOne TYPE-S
34
4. Press Navigation Key up or down to select the
new ringtone and press Center Select Key
for
[OK]
.
NOTE
Press Left Soft Key [Play] to listen to a highlighted
ringtone before you press Center Select Key
for [OK]
.
5. Press Center Select Key
for [SAVE]
to save.
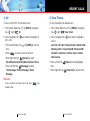
Adding or Changing the Pictures ID
To select a picture or graphic to assign to a Caller ID:
1. Press Right Soft Key [Contacts] then press
Navigation Key up or down to highlight an entry.
2. Press Left Soft Key [Edit].
3. Press Navigation Key up or down to highlight
Picture and press Left Soft Key [Set].
4. Press Navigation Key to select a picture and
press Center Select Key
for [OK]
.
5. Press Center Select Key
for [SAVE]
to save.
Adding or Changing the E-mail
To enter or add an E-mail address to a Contact entry:
1. Press Right Soft Key [Contacts] then press
Navigation Key up or down to highlight an entry.
2. Press Left Soft Key [Edit].
3. Press Navigation Key up or down to highlight E-
mail 1 or E-mail 2.
4. Enter an E-mail address and press Center Select Key
for [SAVE]
to save.
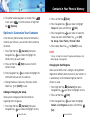
Adding Speed Dial
To add an entry to Speed Dial:
1. Press Right Soft Key [Contacts] then press
Navigation Key up or down to highlight an entry.
2. Press Left Soft Key [Edit].
3. Press Navigation Key up or down to highlight the
phone number you want to add to Speed Dial and
press Right Soft Key [Options].
4. Press Navigation Key up or down to select Set
Speed Dial and press Center Select Key
for [OK]
.
5. Enter a Speed Dial digit.
Use the keypad and press Center Select Key
for
[SET]
, or press Navigation Key up or down to
highlight the Speed Dial digit and press Center Select
Key
for [SET]
.

Contacts in Your Phone’s Memory
G’zOne TYPE-S
37
G’zOne TYPE-S
36
6. Press Navigation Key up or down to select Yes to
save, then press Center Select Key
for [OK]
.
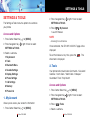
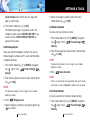
Editing Contacts Entries
Adding Another Phone Number
From the Main Menu Screen
1. From standby mode, enter the phone number you
want to save (up to 48 digits).
2. Press Left Soft Key [Save].
3. Press Navigation Key up or down to highlight
Update Existing and press Center Select Key for
[OK].
4. Press Navigation Key up or down to highlight the
existing Contact entry and press Center Select Key
for [OK].
5. Press Navigation Key up or down to highlight the
type of phone number and press Center Select Key
for [OK].
Mobile 1/Mobile 2/ Home / Work
6. If the entry is already assigned, press Navigation Key
up or down to select Yes or No, then press
Center Select Key for [OK].
7. Press to exit or to place a call to the
phone number.
From the Contact List Screen
1. From standby mode, press Right Soft Key
[Contacts]. Your Contacts display alphabetically.
2. Press Navigation Key up or down to highlight the
Contact entry you want to edit, then press Left Soft
Key [Edit].
3. Press Navigation Key up or down to highlight the
phone number field you want to add, then enter the
number and press Center Select Key for [SAVE]
to save. A confirmation message appears.
Default Numbers
The phone number saved when a Contact is created is
the Default Number. If more than one number is saved in
a Contact entry, another number can be saved as the
Default Number.
NOTE
The Default Number cannot be deleted by itself. The entire
Contact entry can be deleted or another number can be set
as the Default Number allowing you to delete the original
Page is loading ...
Page is loading ...
Page is loading ...
Page is loading ...
Page is loading ...
Page is loading ...
Page is loading ...
Page is loading ...
Page is loading ...
Page is loading ...
Page is loading ...
Page is loading ...
Page is loading ...
Page is loading ...
Page is loading ...
Page is loading ...
Page is loading ...
Page is loading ...
Page is loading ...
Page is loading ...
Page is loading ...
Page is loading ...
Page is loading ...
Page is loading ...
Page is loading ...
Page is loading ...
Page is loading ...
Page is loading ...
Page is loading ...
Page is loading ...
Page is loading ...
Page is loading ...
Page is loading ...
Page is loading ...
Page is loading ...
Page is loading ...
Page is loading ...
Page is loading ...
Page is loading ...
Page is loading ...
Page is loading ...
Page is loading ...
Page is loading ...
Page is loading ...
Page is loading ...
Page is loading ...
Page is loading ...
Page is loading ...
Page is loading ...
Page is loading ...
Page is loading ...
Page is loading ...
Page is loading ...
Page is loading ...
Page is loading ...
Page is loading ...
Page is loading ...
Page is loading ...
Page is loading ...
Page is loading ...
Page is loading ...
Page is loading ...
Page is loading ...
Page is loading ...
Page is loading ...
Page is loading ...
Page is loading ...
Page is loading ...
Page is loading ...
Page is loading ...
Page is loading ...
Page is loading ...
Page is loading ...
-
 1
1
-
 2
2
-
 3
3
-
 4
4
-
 5
5
-
 6
6
-
 7
7
-
 8
8
-
 9
9
-
 10
10
-
 11
11
-
 12
12
-
 13
13
-
 14
14
-
 15
15
-
 16
16
-
 17
17
-
 18
18
-
 19
19
-
 20
20
-
 21
21
-
 22
22
-
 23
23
-
 24
24
-
 25
25
-
 26
26
-
 27
27
-
 28
28
-
 29
29
-
 30
30
-
 31
31
-
 32
32
-
 33
33
-
 34
34
-
 35
35
-
 36
36
-
 37
37
-
 38
38
-
 39
39
-
 40
40
-
 41
41
-
 42
42
-
 43
43
-
 44
44
-
 45
45
-
 46
46
-
 47
47
-
 48
48
-
 49
49
-
 50
50
-
 51
51
-
 52
52
-
 53
53
-
 54
54
-
 55
55
-
 56
56
-
 57
57
-
 58
58
-
 59
59
-
 60
60
-
 61
61
-
 62
62
-
 63
63
-
 64
64
-
 65
65
-
 66
66
-
 67
67
-
 68
68
-
 69
69
-
 70
70
-
 71
71
-
 72
72
-
 73
73
-
 74
74
-
 75
75
-
 76
76
-
 77
77
-
 78
78
-
 79
79
-
 80
80
-
 81
81
-
 82
82
-
 83
83
-
 84
84
-
 85
85
-
 86
86
-
 87
87
-
 88
88
-
 89
89
-
 90
90
-
 91
91
-
 92
92
-
 93
93


UTStarcom GzOne Type S User manual
- Category
- Mobile phones
- Type
- User manual
- This manual is also suitable for
Ask a question and I''ll find the answer in the document
Finding information in a document is now easier with AI
Related papers
-
UTStarcom Verizon UV100 User manual
-
-
-
-
-
UTStarcom 860 User manual
-
-
-
-
Other documents
-
Casio GzOne Type S Owner's manual
-
-
PCD CDM2030 Alltel User manual
-
-
Sharp GX33 Owner's manual
-
KYOCERA Rally User manual
-
Casio Gz One Boulder User manual
-
ZTE TXTM8 3G Cricket Wireless User manual
-
Cricket MSGM8 II Cricket Wireless User manual
-
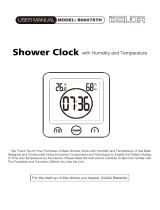 BALDR Waterproof Shower Clock User manual
