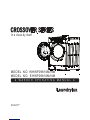
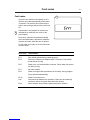
Laundrylux CROSSOVER EHWF09810M/NM Operating instructions
- Type
- Operating instructions
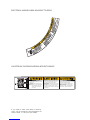
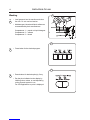
Laundrylux CROSSOVER EHWF09810M/NM is a high-efficiency front-loading washer designed to use less water while achieving high-quality laundering results. It features four built-in programs that can be modified by selecting various options, allowing users to customize the wash cycle to their needs. The control panel includes program selection buttons, option buttons, a start button, and a display that shows the time remaining and the price for each program.
Laundrylux CROSSOVER EHWF09810M/NM is a high-efficiency front-loading washer designed to use less water while achieving high-quality laundering results. It features four built-in programs that can be modified by selecting various options, allowing users to customize the wash cycle to their needs. The control panel includes program selection buttons, option buttons, a start button, and a display that shows the time remaining and the price for each program.


-
 1
1
-
 2
2
-
 3
3
-
 4
4
-
 5
5
-
 6
6
-
 7
7
-
 8
8
-
 9
9
-
 10
10
-
 11
11
-
 12
12
-
 13
13
-
 14
14
-
 15
15
-
 16
16
-
 17
17
-
 18
18
-
 19
19
-
 20
20
-
 21
21
-
 22
22
-
 23
23
-
 24
24
-
 25
25
-
 26
26
-
 27
27
-
 28
28
-
 29
29


Laundrylux CROSSOVER EHWF09810M/NM Operating instructions
- Type
- Operating instructions
Laundrylux CROSSOVER EHWF09810M/NM is a high-efficiency front-loading washer designed to use less water while achieving high-quality laundering results. It features four built-in programs that can be modified by selecting various options, allowing users to customize the wash cycle to their needs. The control panel includes program selection buttons, option buttons, a start button, and a display that shows the time remaining and the price for each program.
Ask a question and I''ll find the answer in the document
Finding information in a document is now easier with AI