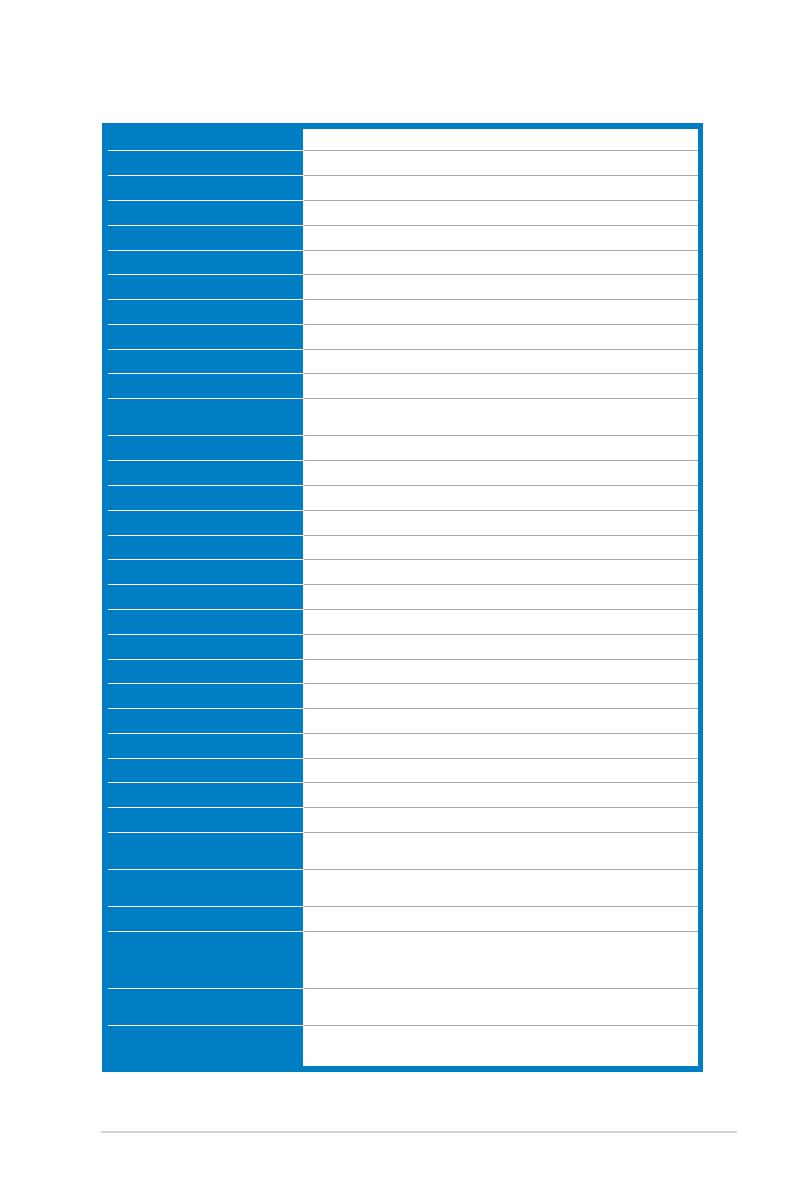
3.2 Specications summary (VW195U)
Panel Type TFT LCD
Panel size 19" (16:10) wide screen
Max. Resolution WXGA+ 1440 x 900
Pixel pitch 0.285mm
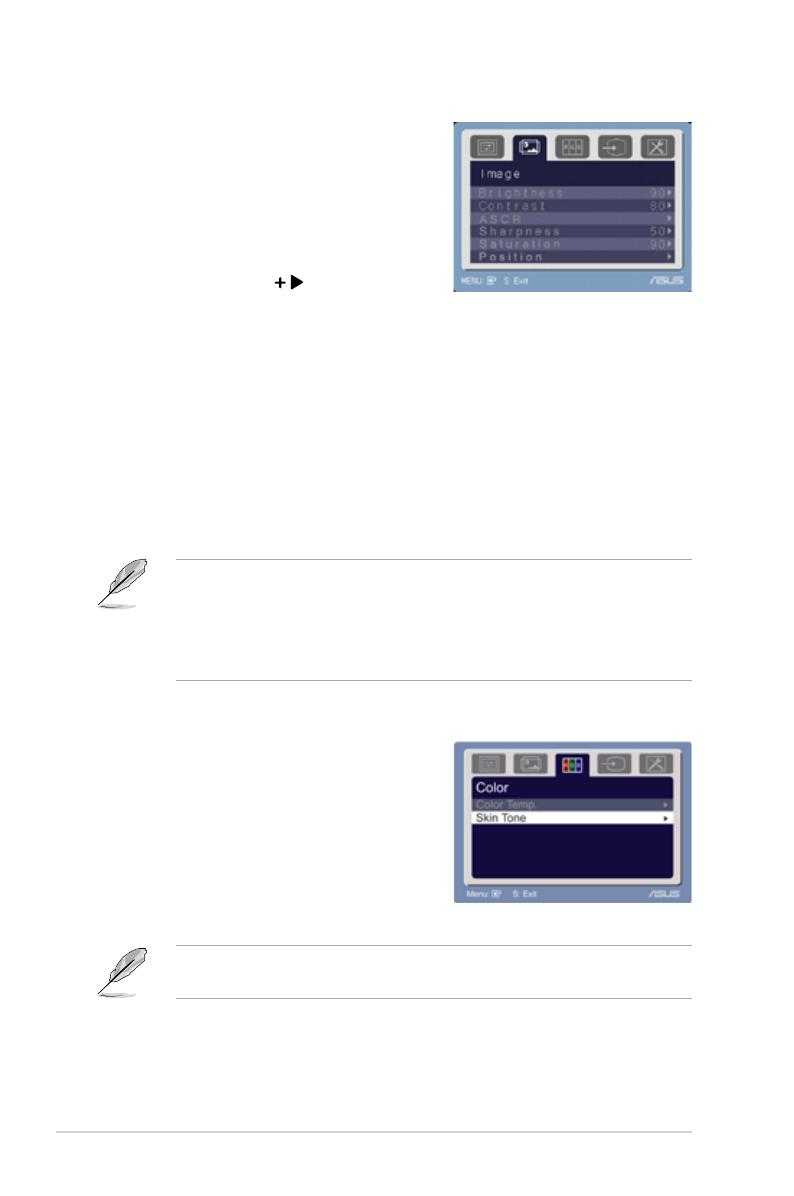
Brightness (Typ.) 250cd/m2
Brightness (Max.) 300cd/m2
Contrast Ratio (Typ.) 800:1
Contrast Ratio (Max.) 2000:1 (with ASCR ON)
Viewing angle(H/V) CR>10 160˚/160˚
Display colors 16.7M
Response time 2ms (Gray to Gray)
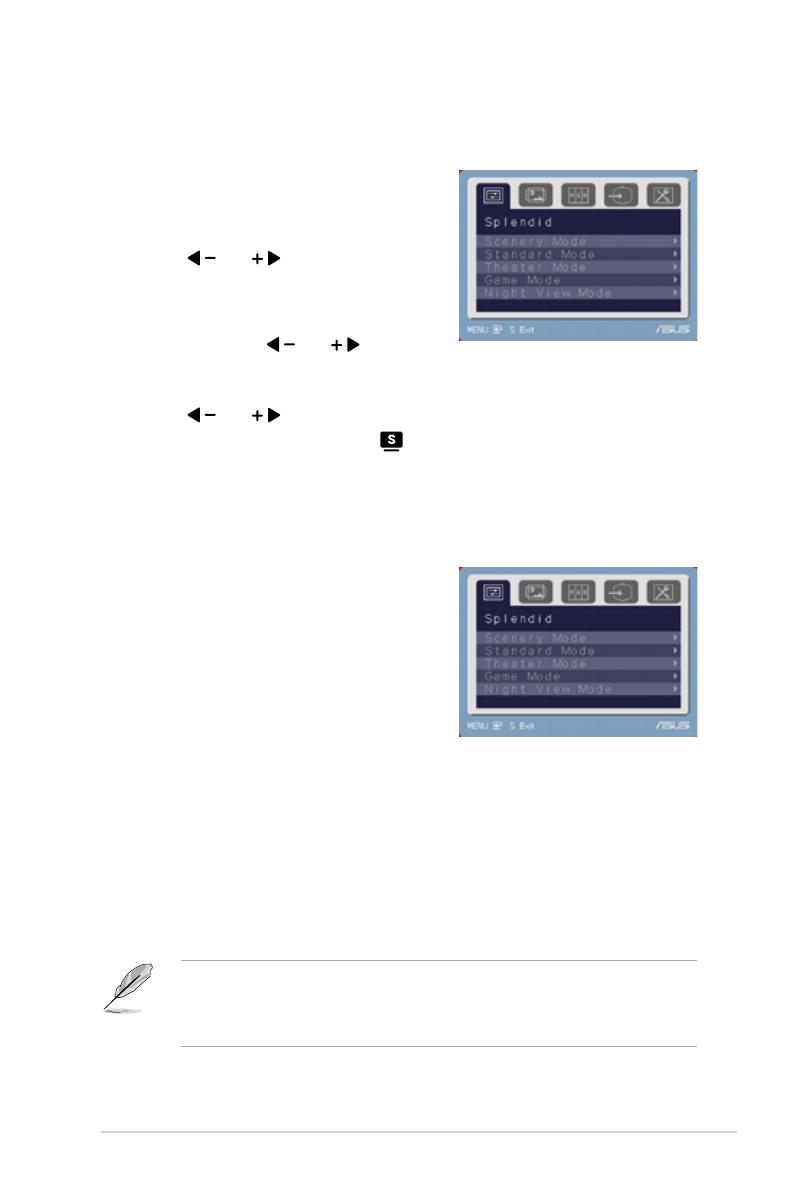
SPLENDID™ Video
Enhancement Yes
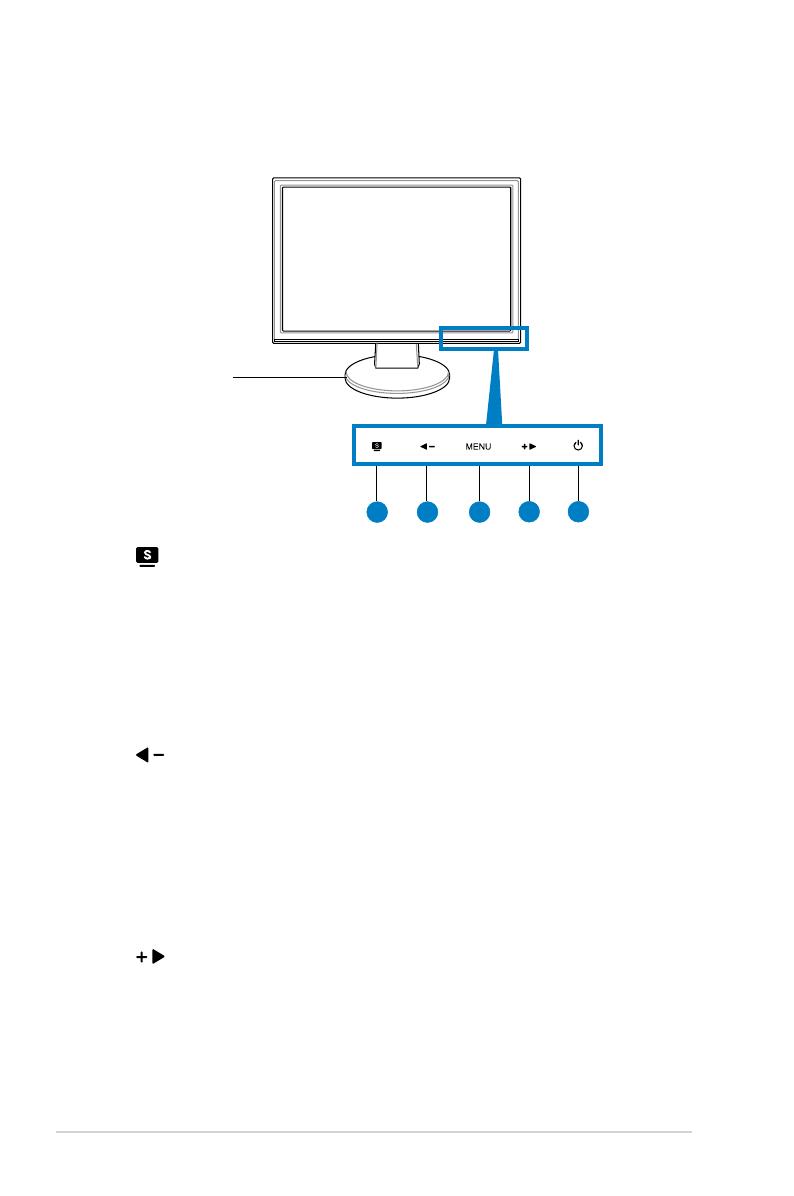
SPLENDID™ selection 5 video preset modes (by hotkey)
Auto adjustment Yes (by hotkey)
Color temperature selection 5 color temperatures
Skin-Tone selection 3 skin-tones
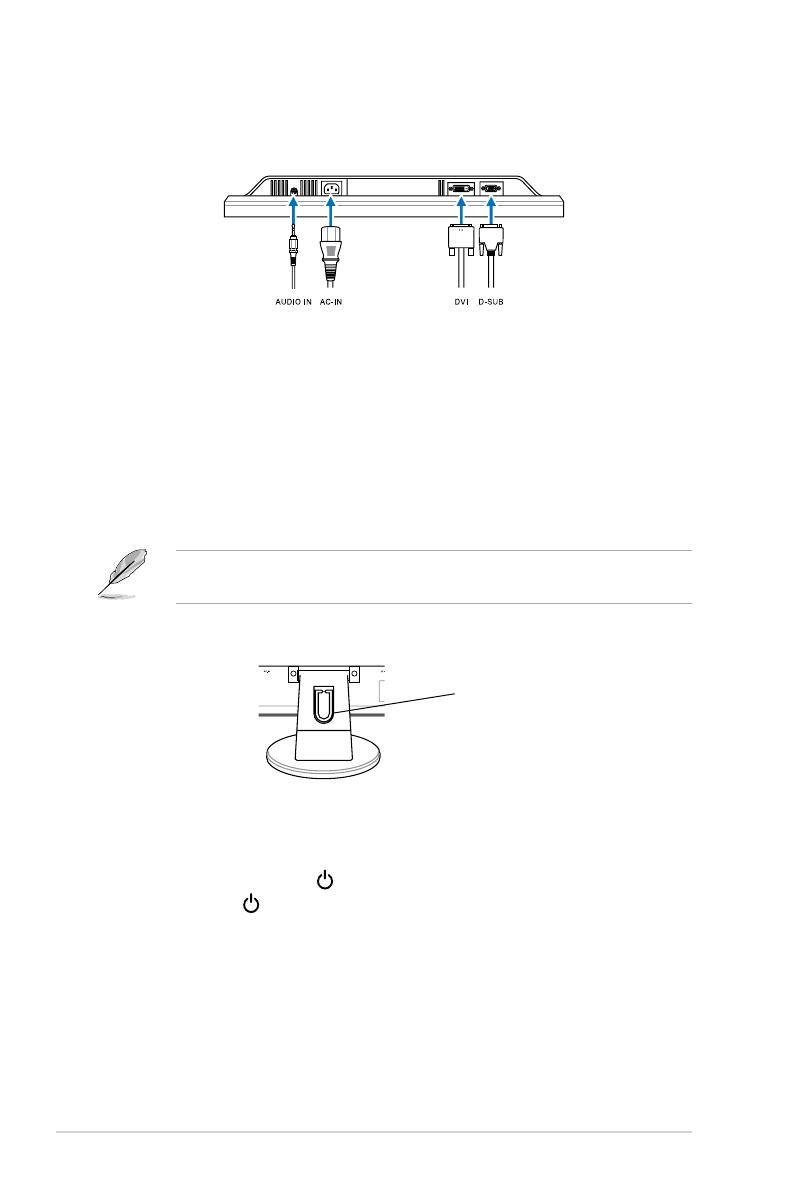
Digital input DVI-D with HDCP
Analog input D-Sub
Audio-in port 3.5 mm Mini-jack
Colors Black
Speaker (Built-in) 1W x 2 Stereo, RMS
Power LED Blue (On)/ Amber (Standby)
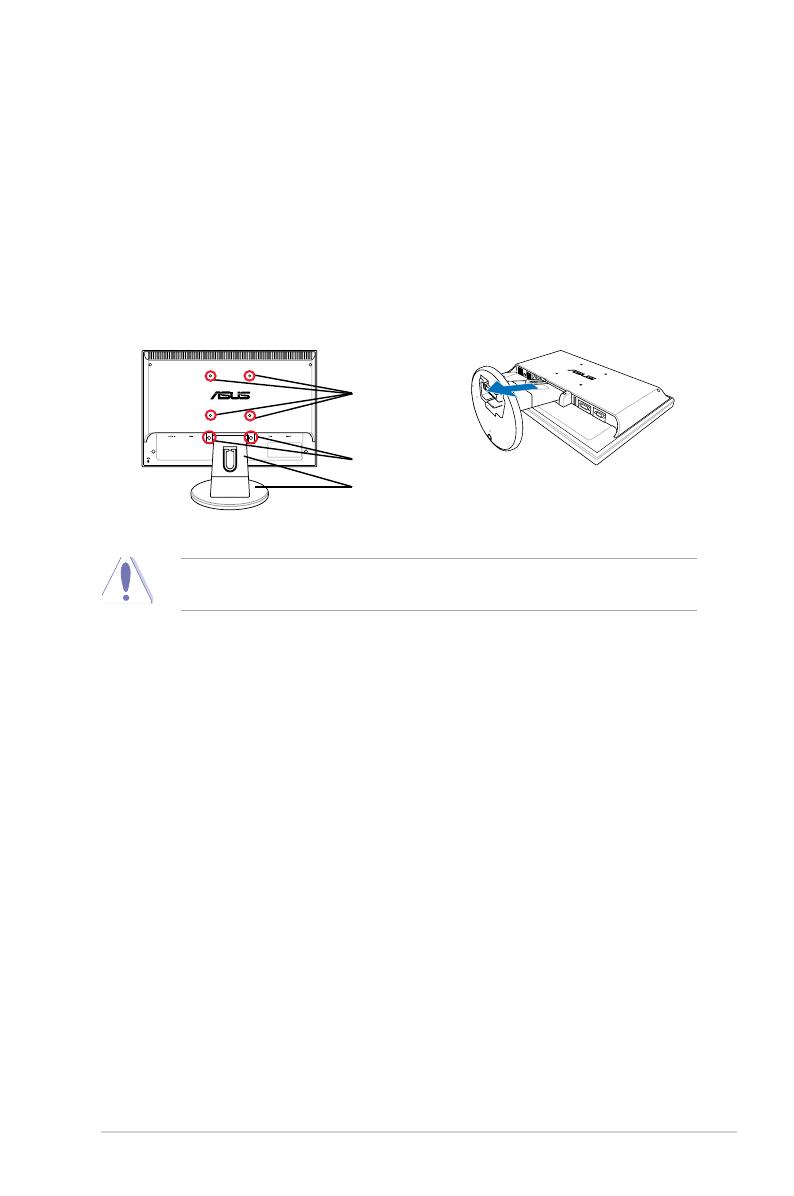
VESA wall mount 100 x 100mm
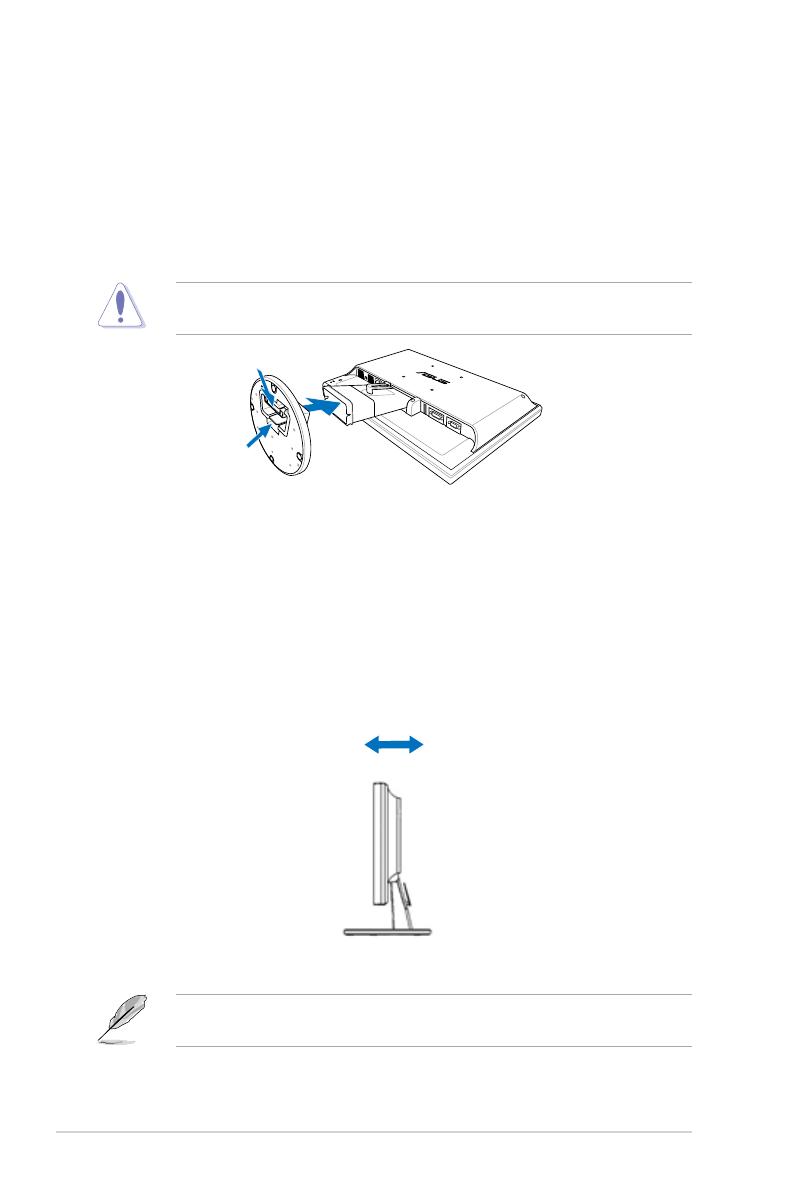
Tilt -5˚~+20˚
Kensington lock Yes
Voltage rating AC: 100~240V
Power consumption Power On : < 47W, Standby: < 2W, Power Off: <1W
Temperature (Operating) 0˚C~40˚C
Temperature
(Non-operating) -20˚C~+60˚C
Dimension (W x H x D) 444 mm x 376 mm x 210 mm (machine)
493 mm x 430 mm x 161 mm (package)
Weight (Esti.) 3.9 kg (Net) ; 5.7 kg (Gross)
Multi-languages
10 languages (English, German, Italian, French, Dutch,
Spanish, Russian, Traditional Chinese, Simplied Chinese,
Japanese)
Accessories VGA cable, DVI cable, audio cable, power cord, quick start
guide, warranty card
Regulation approvals Energy Star®, CB, CE, Gost-R, CCC, UL, FCC, C-Tick, BSMI,
VCCI, TCO03, RoHS, WEEE, PSB
*Specications are subject to change without notice.
10 ASUS VW195/VW225 Series LCD Monitor