Fujitsu AMILO Display SL 3230T User manual

Category
LED displays
Type
User manual

This manual is also suitable for

Are there ...
... any technical problems or other questions you need clarified?
Please contact
our Help Desk (see Warranty Booklet).
The latest information on our products, tips, updates, etc., can be found on the Internet under:
http://www.fujitsu-siemens.com
Edition 2
Icon Functions Detail
23" wide LCD Monitor
Edition 2
Technical data
Dimensions and weight (LCD monitor)
Visible diagonals: 58.42 cm (23” wide)
Screen size : 533.2mm x 312mm
Dimensions (W x H x D) incl. monitor base : 543.2 mm x 412.0 mm x 214.9mm
Dimensions box (W x H x D): 588 mm x 415 mm x 116 mm
Weight : 4.6 kg/5.9kg
Dot pitch : 0.266 mm
Maximal resolution : 1920 x 1080 pixels
Electrical data
Video: analogue, positive, 0.7 Vpp, 75 Ohm, 2 HDMIs,
Synchronisation : Separate H/V-sync
Horizontal frequency: 28kHz …. 82kHz
Refresh rate: 56 Hz ….75 Hz
Maximum pixel rate: 205 MHz
Power supply: 100 VAC - 240VACˈ50Hz - 60Hz, 1.2 A max.
Total power consumption: < 50 W (active)
< 1 W (stand by)
Environmental conditions
Environment class 3K2, IEC 721
Operating range: 5 °C .... 35 °C
Humidity: 15 % ... 85 %
Condensation must be avoided.
Preset operating modes
The picture position and size have been set set to optimum values at the factory for the
operating modes listed above.
Display resolution Refresh rate Horizontal frequency
640 x 480
640 x 480
720 x 400
800 x 600
800 x 600
1024 x768
1024 x 768
1280x1024
1440 x 900
1680x1050
1920x1080
60 Hz
75 Hz
70 Hz
60 Hz
75 Hz
60 Hz
75 Hz
60 Hz
60 Hz
60Hz
60Hz
31.5 kHz
37.5 kHz
31.5 kHz
37.9 kHz
46.9 kHz
48.4 kHz
60 kHz
64 kHz
59.9 kHz
64.7 kHz
67.2 kHz
23" wide LCD Monitor
Getting Started
Deutsch
Magyar
Ɋɭɫɫɤɢɣ
English
Ȼɴɥɝɚɪɫɤɢ
Norsk
Français
Română
Eesti keeles
Español
Türkçe
ƅƪƪƦƬƨƩƛ
Português
ΔѧѧѧѧѧѧѧѧѧѧϴΑήόϟ΍
Lietuviškas
Italiano
WEEE
Latviski
Svenska
Polski
Nederlands
Slovensko
Dansk
Slovenský
Suomi
ýesky
August 2007 edition
Copyright © Fujitsu Siemens Computers GmbH 2007
VESA, DDC and DPMS are registered trademarks of Video Electronics Standards
Association.
All rights, including rights of translation, reproduction by printing, copying or similar methods,
even of parts are reserved.
Offenders will be liable for damages.
All rights, including rights created by patent grant or registration of a utility model or design,
are reserved.
Delivery subject to availability. Right of technical modification reserved.
Edition 2 English
Contents
Introduction........................................................................................................................................... 1
Additional information................................................................................................................... 1
Important notes..................................................................................................................................... 2
Safety notes.................................................................................................................................. 2
Power cable.................................................................................................................................. 3
Transport ...................................................................................................................................... 3
Cleaning ....................................................................................................................................... 4
CE marking................................................................................................................................... 4
FCC Class B Compliance Statement ........................................................................................... 4
Checking the contents of the consignment........................................................................................... 5
Connecting the monitor ........................................................................................................................ 6
Operation of the monitor....................................................................................................................... 7
Troubleshooting.................................................................................................................................... 8
Assembling the monitor base ............................................................................................................. 10
Edition 2 English - 1
Introduction
This manual contains important information for correct set-up of your LCD monitor.
A screen controller with VGA interface is required to control the LCD monitor. The monitor processes
the data supplied to it by the screen controller. The screen controller/the associated driver software is
responsible for setting the modes (resolution and refresh rate).
When putting the monitor into operation for the first time, the screen display should be optimally
adapted to the screen controller used and adjusted in accordance with your needs.
Target group
You don't need to be an "expert" to perform the operations described here. However, please observe
the safety information given in the operating instructions of the computer and in this manual!
In the event of any problems occurring, please contact your sales outlet or our help desk.
Notational conventions
The meanings of the symbols and fonts used in this manual are as follows:
!
Pay particular attention to text marked with this symbol. Failure to observe this warning
endangers your life, destroys the device, or may lead to loss of data.
i
Supplementary information, remarks, and tips follow this symbol.
Ź Text which follows this symbol describes activities that must be performed in the order shown.
"Quotation marks" indicate names of chapters or terms.
This font indicates filenames and menu items.
This font indicates screen outputs.
Additional information
Details of how you set the resolution and refresh rate are provided in the documentation on your
screen controller/the associated driver software.
LCD monitor
2 - English Edition 2
Important notes
!
In this chapter you will find information regarding safety which is essential to take note of
with your monitor.
Safety notes
This device complies with the relevant safety regulations for data processing equipment, including
electronic office machines for use in an office environment. If you have any questions, contact your
sales outlet or our help desk.
Ɣ The display surface of the LCD monitor is sensitive to pressure and scratches. You should
therefore be careful with the display surface so as to avoid lasting damage (Newton rings,
scratches).
Ɣ If the device is brought into the installation site from a cold environment, condensation can form.
Before operating the device, wait until it is absolutely dry and has reached approximately the
same temperature as the installation site.
Ɣ To ensure sufficient ventilation, the intake and exhaust air openings of the monitor must never
be blocked.
Ɣ The monitor automatically sets itself to a mains voltage in the range of 100 V to 240 V. Ensure
that the local mains voltage lies within these limits.
Ɣ Ensure that the power socket on the device or the grounded mains outlet is freely accessible.
Ɣ The ON/OFF switch does not disconnect the device from the mains voltage. To completely
disconnect the mains voltage, remove the power plug from the socket.
Ɣ The monitor is equipped with a power cable that complies with safety standards.
Ɣ Lay all cables so that nobody can stand on them or trip over them. When attaching the device,
observe the relevant notes in the "Connecting the monitor" chapter.
Ɣ If you use a different data cable from the one supplied, ensure that it is adequately shielded.
CE conformance and optimum picture quality are guaranteed only if you use the data cable
supplied.
Ɣ No data transfer cables should be connected or disconnected during a thunderstorm.
Ɣ Make sure that no objects (e.g. jewellery chains, paper clips, etc.) or liquids get inside the
device (danger of electric shock, short circuit).
Ɣ The device is not waterproof! Never immerse the device in water and protect it from spray
water (rain, sea water).
Ɣ In emergencies (e.g. damaged casing, elements or cables, penetration of liquids or foreign
matter), switch off the unit, disconnect the power plug and contact your sales outlet or our help
desk.
LCD monitor
Edition 2 English - 3
Ɣ The monitor must be disposed of in accordance with the local regulations for disposal of
special waste. The screen background lighting contains mercury. You must observe the
applicable handling and disposal safety regulations for fluorescent tubes.
Ɣ Only qualified technicians should repair the device. Unauthorised opening and incorrect repair
may greatly endanger the user (electric shock, fire risk).
Ɣ Use a screen saver with moving images and activate the power management for your monitor
to prevent still images from "burning in".
Ɣ The screen may only be operated in the wide format (0° landscape mode). Turning with a
swivel arm or wall bracket mounted is not permitted.
Ɣ Store this manual close to the device. If you pass the device on to third parties, you should
pass this manual on with it.
Ɣ We recommend that you place your device on a durable, non-slip surface. In view of the many
different surface coatings and finishes used on furniture, it is possible that the feet of the device
could mark the surface they stand on.
Power cable
To guarantee safe operation, use the cable supplied. Use the following guidelines if it is necessary to
replace the original cable set.
Ɣ The female/male receptacles of the cord set must meet IEC60320/CEE-22 requirements.
Ɣ The cable has to be HAR-certified or VDE-certified. The mark HAR or VDE will appear on the
outer sheath.
Ɣ For devices which are mounted on a desk or table, type SVT or SJT cable sets may be used.
Ɣ The cable set must be selected according to the rated current for your device.
Ɣ If necessary, replace the original power cable with a regular grounded 3-core mains lead.
Transport
Ɣ Transport the monitor with care and only in its original packaging or another corresponding
packaging fit to protect it against knocks and jolts.
Ɣ Never drop the LCD monitor (danger of glass breakage).
LCD monitor
4 - English Edition 2
Cleaning
Ɣ Always pull out the power plug before you clean the monitor.
Ɣ Do not clean any interior parts yourself, leave this job to a service technician.
Ɣ Do not use any cleaning agents that contain abrasives or may corrode plastic.
Ɣ Ensure that no liquid will run into the system.
Ɣ Ensure that the ventilation areas of the monitor are free.
Ɣ The display surface of the LCD monitor is sensitive to pressure and scratches. Clean it only
using a soft, slightly moistened cloth.
Wipe the monitor casing with a dry cloth. If the monitor is particularly dirty, use a cloth which has
been moistened in mild domestic detergent and then carefully wrung out.
CE marking
The shipped version of this device complies with the requirements of the EC directives
2004/108/EC "Electromagnetic compatibility" and 73/23/EEC "Low voltage directive".
FCC Class B Compliance Statement
The following statement applies to the products covered in this manual, unless otherwise specified
herein. The statement for other products will appear in the accompanying documentation.
NOTE:
This equipment has been tested and found to comply with the limits for a "Class B" digital device,
pursuant to Part 15 of the FCC rules and meets all requirements of the Canadian Interference-
Causing Equipment Standard ICES-003 for digital apparatus. These limits are designed to provide
reasonable protection against harmful interference in a residential installation. This equipment
generates, uses and can radiate radio frequency energy and, if not installed and used in strict
accordance with the instructions, may cause harmful interference to radio communications. However,
there is no guarantee that interference will not occur in a particular installation. If this equipment does
cause harmful interference to radio or television reception, which can be determined by turning the
equipment off and on, the user is encouraged to try to correct the interference by one or more of the
following measures:
Ɣ Reorient or relocate the receiving antenna.
Ɣ Increase the separation between equipment and the receiver.
Ɣ Connect the equipment into an outlet on a circuit different from that to which the receiver is
connected.
Ɣ Consult the dealer or an experienced radio/TV technician for help.
Fujitsu Siemens Computers GmbH is not responsible for any radio or television interference caused
by unauthorised modifications of this equipment or the substitution or attachment of connecting
cables and equipment other than those specified by Fujitsu Siemens Computers GmbH. The
correction of interferences caused by such unauthorised modification, substitution or attachment will
be the responsibility of the user.
LCD monitor
Edition 2 English - 5
Checking the contents of the consignment
!
The display surface of the LCD monitor is sensitive to pressure and scratches. Always hold
the device by the casing!
Ź Unpack all the individual parts.
Ź Check the delivery for damage incurred during transportation.
Ź Check whether the delivery agrees with the details in the delivery note.
The complete LCD monitor package includes:
– one monitor
– data cable
one power cable
one Warranty Booklet
this "Getting Started" manual
Should you discover that the delivery does not correspond to the delivery note, notify your local sales
outlet immediately.
i
We recommend that you keep the original packaging material. You may need the
packaging in the future if you need to transport your device.
LCD monitor
6 - English Edition 2
Connecting the monitor
!
Please take note of the safety information in the "Important notes" chapter.
CE conformance and optimum picture quality are guaranteed only if you use the data cable
supplied.
Do not cover the ventilation openings of the monitor.
The computer power plug must be pulled out!
Ź Be sure that the monitor and the computer are switched off.
Connecting cables to the monitor
Ź If the data cable is not firmly connected to the monitor:
Connect one of the connectors of the data cable to the D-SUB connector on the monitor and
secure the plug-in connection by tightening the locking screws.
Ź Plug the power cable supplied into the power connector of the monitor.
Connecting cables to the computer
Information on the computer connections and interfaces is contained in the operating manual for your
computer.
i
If your computer has two monitor ports ("onboard" screen controller and separate
graphics card), the monitor port for the separate graphics card is usually active.
Ź Connect the data cable to the (active) monitor port on the computer and secure the plug-in
connection by tightening the safety screws.
Ź Connect the connector of the power cable supplied into a properly earthed mains outlet and
ensure a secure connection.
1=POWER CONNECTOR
2=HDMI1 CONNECTOR
3=HDMI2 CONNECTOR
5=AUDIO CONNECTOR
4= D-SUB CONNECTOR
6=Kensington Lock
LCD monitor
Edition 2 English - 7
Ź Plug the power connector of the computer into a properly grounded mains outlet.
i
When you start working with your monitor for the first time you should install the
appropriate graphics drivers for your application software. Details of how to do this are
provided in the documentation on your screen controller/the associated driver software.
Operation of the monitor
Adjusting rake
The rake of the monitor can be adjusted forward and back from its vertical position.
Ź Grasp the monitor with both hands on the right and left edge of the casing and adjust it to the
desired rake.
Switching the monitor on/off
1 = Buttons for the OSD menu
(On-Screen-display)
2 = Power indicator
3 = ON/OFF switch
The ON/OFF switch is used for switching the monitor on and off.
The power indicator glows green or blue when the monitor and computer are switched on. The power
indicator lights up yellow when the monitor does not receive a video signal or is in the energy saving
mode. The power indicator goes off when the monitor is switched off.
When you switch the computer system on, you must proceed in the following order:
Ź First switch the LCD monitor on with the ON/OFF switch.
Ź Then switch on the computer.
LCD monitor
8 - English Edition 2
Troubleshooting
Should an error occur, first check the following points. If the distortion is still not eliminated, the
monitor should, if possible, be checked on another computer.
If you are unable to solve the problem, please inform our help desk.
Having this problem? Check the following points:
No screen display
(power indicator does not light)
Ź Check whether the monitor is switched on.
Ź Check whether the power cable on the monitor is
connected correctly.
Ź Check whether the computer is switched on.
No screen display
(power indicator lights)
Ź Check whether the computer is switched on.
Ź Check whether the data cable for the monitor is
correctly attached to the monitor port on the
computer.
Ź Press any key on the computer keyboard - the
computer may be in energy saving mode.
Ź Alter the brightness and/or contrast until you get a
picture.
Message:
No Video Input
Or
No Signal
Ź Check whether the data cable for the monitor is
correctly attached to the monitor port on the
computer.
Ź Check whether the computer is switched on.
Message:
e.g.
This is 85 Hz overdrive.
Change computer display input
to ….. x ….. at 60 Hz.
or
Frequency out of range
Please change the display mode
to …….
The input signal (horizontal frequency and refresh rate)
does not correspond to the technical monitor data.
Ź Adjust the video frequency range using the computer
software (see documentation for your computer or
your graphics card).
Ź Adjust a different screen resolution using the
computer software (see documentation for your
computer or your screen controller).
Picture position not correct The monitor recognises an undefined mode.
Ź Carry out the auto-adjustment of the monitor (with
the AUTO button - if present - or via the OSD menu).
Ź Set the picture position with the OSD menu.
LCD monitor
Edition 2 English - 9
Having this problem? Check the following points:
Picture is shaking Ź Check whether the data cable for the monitor is
correctly attached to the monitor port on the
computer.
Ź Carry out the auto-adjustment of the monitor (with
the AUTO button - if present - or via the OSD menu).
Picture disturbances (vertical lines) Ź Carry out the auto-adjustment of the monitor (with
the AUTO button - if present - or via the OSD menu).
Picture disturbances
(horizontal lines, picture noise)
Ź Carry out the auto-adjustment of the monitor (with
the AUTO button - if present - or via the OSD menu).
Picture too light or too dark
Ź Carry out the auto-adjustment of the monitor (with
the AUTO button - if present - or via the OSD menu).
Ź Correctly set the contrast and brightness with the
OSD menu if the auto-adjustment function does not
supply satisfactory results.
Permanently unlit or lit pixels
The standard of production techniques today cannot guarantee an absolutely fault-free screen
display. A few isolated constant lit or unlit pixels may be present. The maximum permitted number of
pixels faults is stipulated in the stringent international standard ISO 13406-2 (Class II).
Example: A 17"/19" flat-screen monitor with a resolution of 1280 x 1024 has 1280 x 1024 = 1310720
pixels. Each pixel consists of three subpixels (red, green and blue), so there are almost 4 million
subpixels (or dots) in total. According to ISO 13406-2 (Class II), a maximum of 6 pixels and 7
subpixels may be defective, i. e. a total of 25 defective dots.
A 22" wide flat-screen monitor with a resolution of 1680 x 1050 has 1680 x 1050 = 1764000 pixels.
Each pixel consists of three subpixels (red, green and blue), so there are almost 5 million subpixels
(or dots) in total. In accordance with ISO 13406-2 (Class II), a maximum of 8 pixels and an additional
10 subpixels may be defective.
LCD monitor
10 - English Edition 2
Assembling the monitor base
!
The display surface of the LCD monitor is sensitive to pressure and scratches. Therefore,
lay the monitor on a soft surface when mounting or removing the monitor base.
ɀɢɞɤɨɤɪɢɫɬɚɥɥɢɱɟɫɤɢɣ ɞɢɫɩɥɟɣ
6 - Ɋɭɫɫɤɢɣ ɢɡɞɚɧɢɟ 2
ɉɨɞɤɥɸɱɟɧɢɟ ɦɨɧɢɬɨɪɚ
!
ɋɨɛɥɸɞɚɣɬɟ ɭɤɚɡɚɧɢɹ ɩɨ ɬɟɯɧɢɤɟ ɛɟɡɨɩɚɫɧɨɫɬɢ, ɩɪɢɜɟɞɟɧɧɵɟ ɜ ɝɥɚɜɟ "ȼɚɠɧɵɟ
ɭɤɚɡɚɧɢɹ".
ɋɨɨɬɜɟɬɫɬɜɢɟ ɬɪɟɛɨɜɚɧɢɹɦ ȿɋ (CE), ɚ ɬɚɤɠɟ ɨɩɬɢɦɚɥɶɧɨɟ ɤɚɱɟɫɬɜɨ ɢɡɨɛɪɚɠɟɧɢɹ
ɦɨɝɭɬ ɛɵɬɶ ɨɛɟɫɩɟɱɟɧɵ ɬɨɥɶɤɨ ɩɪɢ ɢɫɩɨɥɶɡɨɜɚɧɢɢ ɤɚɛɟɥɹ ɞɥɹ ɩɟɪɟɞɚɱɢ ɞɚɧɧɵɯ,
ɜɯɨɞɹɳɟɝɨ ɜ ɤɨɦɩɥɟɤɬ ɩɨɫɬɚɜɤɢ.
ɉɪɢɤɪɵɜɚɧɢɟ ɜɟɧɬɢɥɹɰɢɨɧɧɵɯ ɨɬɜɟɪɫɬɢɣ ɧɟ ɞɨɩɭɫɤɚɟɬɫɹ!
ȼɢɥɤɚ ɫɨɟɞɢɧɢɬɟɥɶɧɨɝɨ ɲɧɭɪɚ ɤɨɦɩɶɸɬɟɪɚ ɞɨɥɠɧɚ ɛɵɬɶ ɜɵɧɭɬɚ ɢɡ ɪɨɡɟɬɤɢ!
Ź ɍɛɟɞɢɬɟɫɶ ɜ ɬɨɦ, ɱɬɨ ɦɨɧɢɬɨɪ ɢ ɤɨɦɩɶɸɬɟɪ ɜɵɤɥɸɱɟɧɵ.
ɉɨɞɤɥɸɱɟɧɢɟ ɤɚɛɟɥɟɣ ɤ ɦɨɧɢɬɨɪɭ
Ź ȿɫɥɢ ɤɚɛɟɥɶ ɞɥɹ ɩɟɪɟɞɚɱɢ ɞɚɧɧɵɯ ɧɟ ɫɨɟɞɢɧɟɧ ɠɟɫɬɤɨ ɫ ɞɢɫɩɥɟɟɦ:
ɜɫɬɚɜɶɬɟ ɲɬɟɤɟɪ ɤɚɛɟɥɹ ɞɥɹ ɩɟɪɟɞɚɱɢ ɞɚɧɧɵɯ ɜ ɫɨɟɞɢɧɢɬɟɥɶɧɨɟ ɝɧɟɡɞɨ D-SUB ɞɢɫɩɥɟɹ ɢ
ɡɚɮɢɤɫɢɪɭɣɬɟ ɲɬɟɤɟɪɧɨɟ ɫɨɟɞɢɧɟɧɢɟ, ɡɚɬɹɧɭɜ ɮɢɤɫɢɪɭɸɳɢɟ ɜɢɧɬɵ.
Ź ȼɫɬɚɜɶɬɟ ɜɯɨɞɹɳɢɣ ɜ ɤɨɦɩɥɟɤɬ ɩɨɫɬɚɜɤɢ ɫɟɬɟɜɨɣ ɤɚɛɟɥɶ ɜ ɝɧɟɡɞɨ ɞɥɹ ɩɨɞɤɥɸɱɟɧɢɹ ɤ ɫɟɬɢ
ɧɚ ɦɨɧɢɬɨɪɟ.
ɉɨɞɤɥɸɱɟɧɢɟ ɤɚɛɟɥɟɣ ɤ ɤɨɦɩɶɸɬɟɪɭ
ɂɧɮɨɪɦɚɰɢɸ ɨ ɩɨɪɬɚɯ ɢ ɢɧɬɟɪɮɟɣɫɚɯ ɤɨɦɩɶɸɬɟɪɚ ȼɵ ɧɚɣɞɟɬɟ ɜ ɢɧɫɬɪɭɤɰɢɢ ɩɨ ɷɤɫɩɥɭɚɬɚɰɢɢ
ȼɚɲɟɝɨ ɤɨɦɩɶɸɬɟɪɚ.
i
ȿɫɥɢ ȼɚɲ ɤɨɦɩɶɸɬɟɪ ɨɛɨɪɭɞɨɜɚɧ ɞɜɭɦɹ ɩɨɪɬɚɦɢ ɞɥɹ ɩɨɞɤɥɸɱɟɧɢɹ ɦɨɧɢɬɨɪɚ
(ɤɨɧɬɪɨɥɥɟɪ ɦɨɧɢɬɨɪɚ "onboard" ɢ ɨɬɞɟɥɶɧɚɹ ɝɪɚɮɢɱɟɫɤɚɹ ɤɚɪɬɚ), ɚɤɬɢɜɧɵɦ ɜ
ɨɛɳɟɦ ɫɥɭɱɚɟ ɹɜɥɹɟɬɫɹ ɩɨɪɬ ɞɥɹ ɩɨɞɤɥɸɱɟɧɢɹ ɦɨɧɢɬɨɪɚ ɨɬɞɟɥɶɧɨɣ ɝɪɚɮɢɱɟɫɤɨɣ
ɤɚɪɬɵ.
Ź ȼɫɬɚɜɶɬɟ ɤɚɛɟɥɶ ɞɥɹ ɩɟɪɟɞɚɱɢ ɞɚɧɧɵɯ ɜ ɢɦɟɸɳɢɣɫɹ ɧɚ ɤɨɦɩɶɸɬɟɪɟ (ɚɤɬɢɜɧɵɣ) ɩɨɪɬ ɞɥɹ
ɩɨɞɤɥɸɱɟɧɢɹ ɦɨɧɢɬɨɪɚ ɢ ɡɚɬɹɧɢɬɟ ɩɪɟɞɨɯɪɚɧɢɬɟɥɶɧɵɟ ɜɢɧɬɵ ɜ ɰɟɥɹɯ ɮɢɤɫɚɰɢɢ
ɲɬɟɤɟɪɧɨɝɨ ɫɨɟɞɢɧɟɧɢɹ.
1=POWER CONNECTOR
2=HDMI1 CONNECTOR
3=HDMI2 CONNECTOR
5=AUDIO CONNECTOR
4= D-SUB CONNECTOR
6=Kensington Lock
LCD-ɦɨɧɢɬɨɪ
Ɋɟɞɚɤɰɢɹ 2 Ȼɴɥɝɚɪɫɤɢ - 9
ɋɜɟɬɥɢ ɢɥɢ ɬɴɦɧɢ ɬɨɱɤɢ ɜ ɢɡɨɛɪɚɠɟɧɢɟɬɨ
ɋɴɝɥɚɫɧɨ ɧɚɫɬɨɹɳɨɬɨ ɧɢɜɨ ɧɚ ɩɪɨɢɡɜɨɞɫɬɜɟɧɚɬɚ ɬɟɯɧɢɤɚ ɧɟ ɦɨɠɟ ɞɚ ɫɟ ɝɚɪɚɧɬɢɪɚ ɧɚɩɴɥɧɨ
ɛɟɡɩɨɝɪɟɲɧɨ ɢɡɨɛɪɚɠɟɧɢɟ. ȼɴɡɦɨɠɧɨ ɟ ɧɚɥɢɱɢɟɬɨ ɧɚ ɧɟɡɧɚɱɢɬɟɥɟɧ ɛɪɨɣ ɩɨɫɬɨɹɧɧɨ ɫɜɟɬɥɢ
ɢɥɢ ɬɴɦɧɢ ɬɨɱɤɢ ɧɚ ɢɡɨɛɪɚɠɟɧɢɟɬɨ. Ɇɚɤɫɢɦɚɥɧɨ ɞɨɩɭɫɬɢɦɢɹɬ ɛɪɨɣ ɩɨɞɨɛɧɢ ɞɟɮɟɤɬɧɢ ɬɨɱɤɢ ɨɬ
ɢɡɨɛɪɚɠɟɧɢɟɬɨ ɫɟ ɞɟɮɢɧɢɪɚ ɜ ɫɬɪɨɝɢɹ ɦɟɠɞɭɧɚɪɨɞɟɧ ɫɬɚɧɞɚɪɬ ISO 13406-2 (Ʉɥɚɫ II).
ɉɪɢɦɟɪ: ɉɥɨɫɴɤ ɦɨɧɢɬɨɪ 17"/19" ɫ ɪɚɡɞɟɥɢɬɟɥɧɚ ɫɩɨɫɨɛɧɨɫɬ 1280 x 1024 ɫɴɞɴɪɠɚ
1280 x 1024 = 1310720 ɟɥɟɦɟɧɬɢ ɨɬ ɢɡɨɛɪɚɠɟɧɢɟɬɨ (ɩɢɤɫɟɥɢ). ȼɫɟɤɢ ɩɢɤɫɟɥ ɫɟ ɫɴɫɬɨɢ ɨɬ ɬɪɢ
ɬɨɱɤɢ (ɱɟɪɜɟɧɚ, ɡɟɥɟɧɚ ɢ ɫɢɧɹ), ɬɚɤɚ ɱɟ ɫɟ ɩɨɥɭɱɚɜɚɬ ɨɛɳɨ ɩɨɱɬɢ 4 ɦɢɥɢɨɧɚ ɬɨɱɤɢ ɧɚ ɟɤɪɚɧɚ
(ɫɭɛɩɢɤɫɟɥɢ / Dots). ɋɴɝɥɚɫɧɨ ISO 13406-2 (ɤɥɚɫ II) ɟ ɪɚɡɪɟɲɟɧɨ ɞɚ ɢɦɚ ɞɟɮɟɤɬ ɦɚɤɫɢɦɚɥɧɨ ɜ
6 ɩɢɤɫɟɥɚ ɢ ɞɨɩɴɥɧɢɬɟɥɧɨ ɜ 7 ɬɨɱɤɢ, ɬ. ɟ. ɨɛɳɨ 25 ɞɟɮɟɤɬɧɢ ɬɨɱɤɢ.
ɉɥɨɫɴɤ ɦɨɧɢɬɨɪ 22" wide (ɲɢɪɨɤ) ɫ ɪɚɡɞɟɥɢɬɟɥɧɚ ɫɩɨɫɨɛɧɨɫɬ 1680 x 1050 ɫɴɞɴɪɠɚ 1680 x 1050
= 1764000 ɟɥɟɦɟɧɬɢ ɨɬ ɢɡɨɛɪɚɠɟɧɢɟɬɨ (ɩɢɤɫɟɥɢ). ȼɫɟɤɢ ɩɢɤɫɟɥ ɫɟ ɫɴɫɬɨɢ ɨɬ ɬɪɢ ɬɨɱɤɢ
(ɱɟɪɜɟɧɚ, ɡɟɥɟɧɚ ɢ ɫɢɧɹ), ɬɚɤɚ ɱɟ ɫɟ ɩɨɥɭɱɚɜɚɬ ɨɛɳɨ ɩɨɱɬɢ 5 ɦɢɥɢɨɧɚ ɬɨɱɤɢ ɧɚ ɟɤɪɚɧɚ
(ɫɭɛɩɢɤɫɟɥɢ / Dots). ɋɴɝɥɚɫɧɨ ISO 13406-2 (ɤɥɚɫ II) ɟ ɪɚɡɪɟɲɟɧɨ ɞɚ ɢɦɚ ɞɟɮɟɤɬ ɦɚɤɫɢɦɚɥɧɨ ɜ 8
ɩɢɤɫɟɥɚ ɢ ɞɨɩɴɥɧɢɬɟɥɧɨ ɜ 10 ɬɨɱɤɢ.
Ɇɨɧɬɢɪɚɧɟ ɧɚ ɩɨɫɬɚɜɤɚɬɚ ɧɚ ɦɨɧɢɬɨɪɚ
!
ɉɨɜɴɪɯɧɨɫɬɬɚ ɧɚ ɟɤɪɚɧɚ ɧɚ ɜɚɲɢɹ LCD-ɦɨɧɢɬɨɪ ɟ ɱɭɜɫɬɜɢɬɟɥɧɚ ɤɴɦ ɧɚɬɢɫɤ ɢ
ɧɚɞɪɚɫɤɜɚɧɟ. ɉɨɪɚɞɢ ɬɨɜɚ ɩɪɢ ɦɨɧɬɢɪɚɧɟ ɢ ɪɚɡɝɥɨɛɹɜɚɧɟ ɧɚ ɩɨɫɬɚɜɤɚɬɚ ɩɨɫɬɚɜɟɬɟ
ɦɨɧɢɬɨɪɚ ɜɴɪɯɭ ɦɟɤɚ ɩɨɞɥɨɠɤɚ.
WEEE
Edition 2
Deutsch
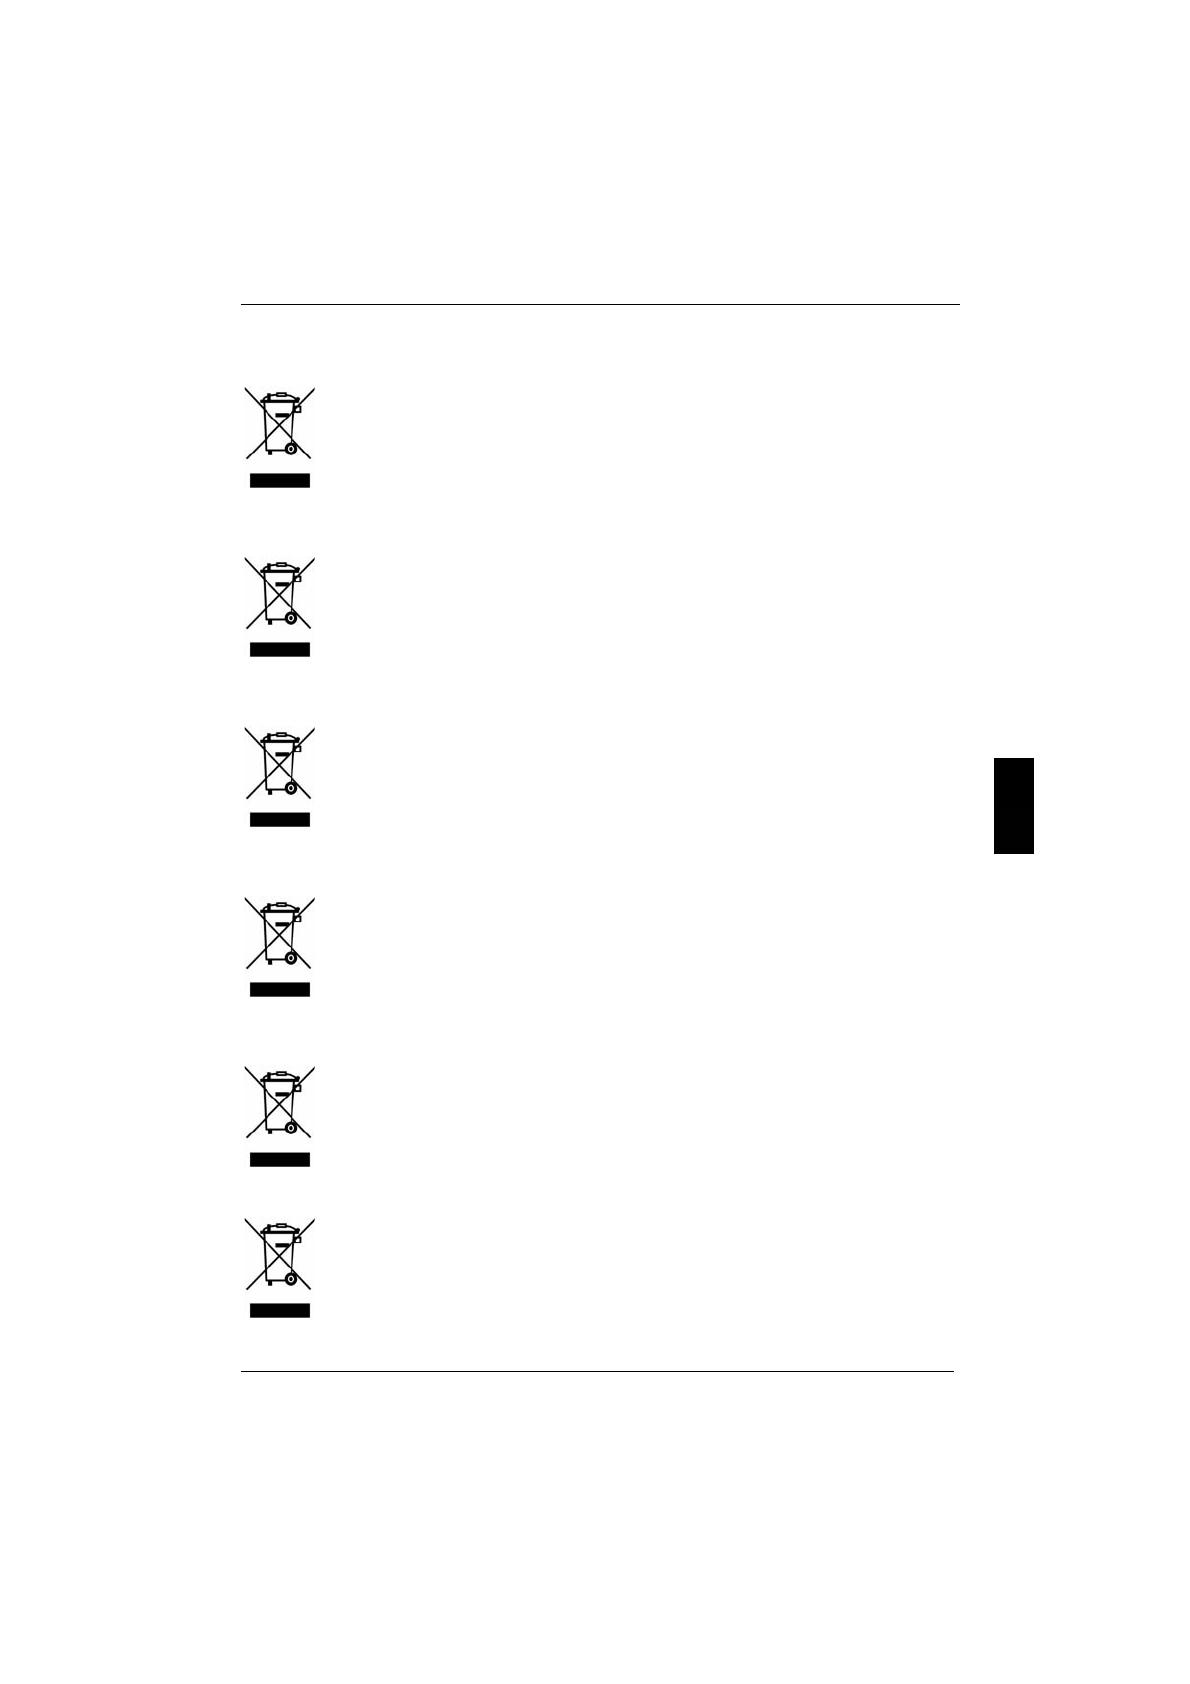
Das Gerät darf nicht mit dem Siedlungsabfall (Hausmüll) entsorgt werden. Dieses Gerät
ist entsprechend der europäischen Richtlinie 2002/96/EG über Elektro- und Elektronik-
Altgeräte (waste electrical and electronic equipment - WEEE) gekennzeichnet.
Die Richtlinie gibt den Rahmen für eine EU-weit gültige Rücknahme und Verwertung der
Altgeräte vor. Für die Rückgabe Ihres Altgeräts nutzen Sie bitte die Ihnen zur Verfügung
stehenden Rückgabe- und Sammelsysteme. Weitere Informationen hierzu finden Sie
unter www.fujitsu-siemens.com/recycling
English
The device may not be disposed of with household rubbish. This appliance is labelled in
accordance with European Directive 2002/96/EG concerning used electrical and
electronic appliances (waste electrical and electronic equipment - WEEE).
The guideline determines the framework for the return and recycling of used appliances
as applicable throughout the EU. To return your used device, please use the return and
collection systems available to you. You will find further information on this at www.fujitsu-
siemens.com/recycling
Français
Il est interdit d’éliminer l’appareil avec les déchets urbains (déchets ménagers). Cet
appareil est marqué selon la directive européenne 2002/96/CE relative aux appareils
électriques et électroniques usagés (waste electrical and electronic equipment - WEEE).
La directive définit le cadre pour une reprise et une récupération des appareils usagés
applicables dans les pays de la CE. Pour renvoyer votre ancien appareil, utilisez les
systèmes de renvoi et de collecte qui vous sont proposés. Vous trouverez d'autres
informations sur Internet à l'adresse www.fujitsu-siemens.com/recycling
Dansk
Apparatet må ikke bortskaffes sammen med husholdningsaffaldet. Dette apparat er
klassificeret iht. det europæiske direktiv 2002/96/EF om affald af elektrisk- og elektronisk
udstyr (waste electrical and electronic equipment - WEEE).
Dette direktiv angiver rammerne for indlevering og recycling af kasserede apparater
gældende for hele EU. Til tilbagelevering af Deres gamle apparater benytter De venligst
de til Deres rådighed stående tilbageleverings- og samlesystemer. Nærmere oplysninger
herom findes under www.fujitsu-siemens.com/recycling
Eesti keel
Seadet ei tohi utiliseerida koos majapidamisjäätmetega. Käesolev seade on märgistatud
vastavalt direktiivile 2002/96/EÜ elektri-ja elektroonikaseadmete jäätmete kohta.
Direktiiv sätestab elektri- ja elektroonikaseadmete jäätmete tagastamise ja ringlussevõtu
raamtingimused Euroopa Liidus. Vana seadme tagastamiseks kasutage Teie käsutuses
olevaid tagastus- ja kogumissüsteeme. Täiendava info selle kohta leiate aadressilt
www.fujitsu-siemens.com/recycling
Suomi
Tätä laitetta ei saa hävittää kotitalousjätteiden joukossa. Tämän laitteen merkintä
perustuu käytettyjä sähkö- ja elektroniikkalaitteita (waste electrical and electronic
equipment - WEEE) koskevaan direktiiviin 2002/96/EG.
Tämä direktiivi määrittää käytettyjen laitteiden palautus- ja kierrätys-säännökset koko
EU:n alueella. Toimita romutettu laite paikallisen jätehuoltolaitoksen tarjoamiin palautus-
ja keruupisteisiin. Katso lisätietoja nettiosoitteesta www.fujitsu-siemens.com/recycling
This manual was produced by
Xerox Global Services
Published by
Fujitsu Siemens Computers GmbH
AG 08/07
Edition 2
  • Page 1 1
  • Page 2 2
  • Page 3 3
  • Page 4 4
  • Page 5 5
  • Page 6 6
  • Page 7 7
  • Page 8 8
  • Page 9 9
  • Page 10 10
  • Page 11 11
  • Page 12 12
  • Page 13 13
  • Page 14 14
  • Page 15 15
  • Page 16 16
  • Page 17 17
  • Page 18 18
  • Page 19 19
  • Page 20 20
  • Page 21 21
  • Page 22 22
  • Page 23 23
  • Page 24 24
  • Page 25 25
  • Page 26 26
  • Page 27 27
  • Page 28 28
  • Page 29 29
  • Page 30 30
  • Page 31 31
  • Page 32 32
  • Page 33 33
  • Page 34 34
  • Page 35 35
  • Page 36 36
  • Page 37 37
  • Page 38 38
  • Page 39 39
  • Page 40 40
  • Page 41 41
  • Page 42 42
  • Page 43 43
  • Page 44 44
  • Page 45 45
  • Page 46 46
  • Page 47 47
  • Page 48 48
  • Page 49 49
  • Page 50 50
  • Page 51 51
  • Page 52 52
  • Page 53 53
  • Page 54 54
  • Page 55 55
  • Page 56 56
  • Page 57 57
  • Page 58 58
  • Page 59 59
  • Page 60 60
  • Page 61 61
  • Page 62 62
  • Page 63 63
  • Page 64 64
  • Page 65 65
  • Page 66 66
  • Page 67 67
  • Page 68 68
  • Page 69 69
  • Page 70 70
  • Page 71 71
  • Page 72 72
  • Page 73 73
  • Page 74 74
  • Page 75 75
  • Page 76 76
  • Page 77 77
  • Page 78 78
  • Page 79 79
  • Page 80 80
  • Page 81 81
  • Page 82 82
  • Page 83 83
  • Page 84 84
  • Page 85 85
  • Page 86 86
  • Page 87 87
  • Page 88 88
  • Page 89 89
  • Page 90 90
  • Page 91 91
  • Page 92 92
  • Page 93 93
  • Page 94 94
  • Page 95 95
  • Page 96 96
  • Page 97 97
  • Page 98 98
  • Page 99 99
  • Page 100 100
  • Page 101 101
  • Page 102 102
  • Page 103 103
  • Page 104 104
  • Page 105 105
  • Page 106 106
  • Page 107 107
  • Page 108 108
  • Page 109 109
  • Page 110 110
  • Page 111 111
  • Page 112 112
  • Page 113 113
  • Page 114 114
  • Page 115 115
  • Page 116 116
  • Page 117 117
  • Page 118 118
  • Page 119 119
  • Page 120 120
  • Page 121 121
  • Page 122 122
  • Page 123 123
  • Page 124 124
  • Page 125 125
  • Page 126 126
  • Page 127 127
  • Page 128 128
  • Page 129 129
  • Page 130 130
  • Page 131 131
  • Page 132 132
  • Page 133 133
  • Page 134 134
  • Page 135 135
  • Page 136 136
  • Page 137 137
  • Page 138 138
  • Page 139 139
  • Page 140 140
  • Page 141 141
  • Page 142 142
  • Page 143 143
  • Page 144 144
  • Page 145 145
  • Page 146 146
  • Page 147 147
  • Page 148 148
  • Page 149 149
  • Page 150 150
  • Page 151 151
  • Page 152 152
  • Page 153 153
  • Page 154 154
  • Page 155 155
  • Page 156 156
  • Page 157 157
  • Page 158 158
  • Page 159 159
  • Page 160 160
  • Page 161 161
  • Page 162 162
  • Page 163 163
  • Page 164 164
  • Page 165 165
  • Page 166 166
  • Page 167 167
  • Page 168 168
  • Page 169 169
  • Page 170 170
  • Page 171 171
  • Page 172 172
  • Page 173 173
  • Page 174 174
  • Page 175 175
  • Page 176 176
  • Page 177 177
  • Page 178 178
  • Page 179 179
  • Page 180 180
  • Page 181 181
  • Page 182 182
  • Page 183 183
  • Page 184 184
  • Page 185 185
  • Page 186 186
  • Page 187 187
  • Page 188 188
  • Page 189 189
  • Page 190 190
  • Page 191 191
  • Page 192 192
  • Page 193 193
  • Page 194 194
  • Page 195 195
  • Page 196 196
  • Page 197 197
  • Page 198 198
  • Page 199 199
  • Page 200 200
  • Page 201 201
  • Page 202 202
  • Page 203 203
  • Page 204 204
  • Page 205 205
  • Page 206 206
  • Page 207 207
  • Page 208 208
  • Page 209 209
  • Page 210 210
  • Page 211 211
  • Page 212 212
  • Page 213 213
  • Page 214 214
  • Page 215 215
  • Page 216 216
  • Page 217 217
  • Page 218 218
  • Page 219 219
  • Page 220 220
  • Page 221 221
  • Page 222 222
  • Page 223 223
  • Page 224 224
  • Page 225 225
  • Page 226 226
  • Page 227 227
  • Page 228 228
  • Page 229 229
  • Page 230 230
  • Page 231 231
  • Page 232 232
  • Page 233 233
  • Page 234 234
  • Page 235 235
  • Page 236 236
  • Page 237 237
  • Page 238 238
  • Page 239 239
  • Page 240 240
  • Page 241 241
  • Page 242 242
  • Page 243 243
  • Page 244 244
  • Page 245 245
  • Page 246 246
  • Page 247 247
  • Page 248 248
  • Page 249 249
  • Page 250 250
  • Page 251 251
  • Page 252 252
  • Page 253 253
  • Page 254 254
  • Page 255 255
  • Page 256 256
  • Page 257 257
  • Page 258 258
  • Page 259 259
  • Page 260 260
  • Page 261 261
  • Page 262 262
  • Page 263 263
  • Page 264 264
  • Page 265 265
  • Page 266 266
  • Page 267 267
  • Page 268 268
  • Page 269 269
  • Page 270 270
  • Page 271 271
  • Page 272 272
  • Page 273 273
  • Page 274 274
  • Page 275 275
  • Page 276 276
  • Page 277 277
  • Page 278 278
  • Page 279 279
  • Page 280 280
  • Page 281 281
  • Page 282 282
  • Page 283 283
  • Page 284 284
  • Page 285 285
  • Page 286 286
  • Page 287 287
  • Page 288 288
  • Page 289 289
  • Page 290 290
  • Page 291 291
  • Page 292 292
  • Page 293 293
  • Page 294 294
  • Page 295 295
  • Page 296 296
  • Page 297 297
  • Page 298 298
  • Page 299 299
  • Page 300 300
  • Page 301 301
  • Page 302 302
  • Page 303 303
  • Page 304 304
  • Page 305 305
  • Page 306 306
  • Page 307 307
  • Page 308 308
  • Page 309 309
  • Page 310 310
  • Page 311 311
  • Page 312 312

Fujitsu AMILO Display SL 3230T User manual

Category
LED displays
Type
User manual
This manual is also suitable for

Ask a question and I''ll find the answer in the document

Finding information in a document is now easier with AI