Page is loading ...
Page is loading ...
Page is loading ...
Page is loading ...
Page is loading ...
Page is loading ...
Page is loading ...
Page is loading ...
Page is loading ...
Page is loading ...
Page is loading ...
Page is loading ...
Page is loading ...
Page is loading ...

11
en
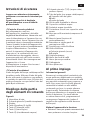
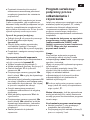
Safety instructions
Please read these instructions carefully
and keep for future reference.
This appliance is designed for domestic
and not commercial use.
! Risk of electric shock
Connect and operate the appliance only in
accordancewiththespecicationsonthe
rating label.
Do not use if either the the power cord or
the appliance is damaged.
Use indoors at room temperature only.
Keep children away from the appliance.
In the event of malfunction, unplug the
appliance immediately.
To avoid potential hazards, repairs such as
replacing a damaged cord should only be
performed by our service personnel.
Never immerse the appliance or power cord
in water.
Do not reach into the grinding unit.
! Risk of scalding
The nozzle for hot water and steam 9 gets
very hot. Hold the nozzle 9 by the plastic
part only, not by the metal parts. Keep body
parts away from the nozzle and do not aim
it at yourself or anyone else. When steam
or hot water is released, the nozzle 9 may
initially sputter.
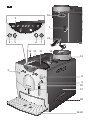
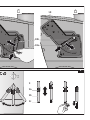
Overview
Fig. A
1 Power on/off switch
2 Dialforadjustingthellquantity
3 Display
4 Coffee dispensing button 4
5 Coffee strength button 5
6 Stand-by / on button a
7 Steam generation button h
8 Hot water / steam dial g/h
9 Nozzle (for hot water/steam)
a) Nozzle mounting
b) Sleeve
c) Nozzle tip
10 Height-adjustable coffee outlet
11 Lidforwatertank
12 Removable water tank
13 Bean container with aroma cover
14 Ground coffee / cleaning tablet duct
15 Cup shelf (warming function)
16 Sliding switch for adjusting grind
17 Doors to brewing unit
18 Brewing unit
a Button (red)
b Handle
19 Grate
20 Coffee grounds tray
21 Residual water tray
22 Float
23 Cord storage compartment
Before using
for the rst time
General
Fill the water tank with fresh, uncarbonated
water only, and if possible, use only beans
for fully automatic coffee and espresso
machines. Do not use coffee beans that
have been glazed, caramelized or treated
with other additives containing sugar, since
they will block the grinding unit. Check the
water hardness with the enclosed test strip.
If a value other than 4 is displayed, change
the setting on the appliance accordingly
(see “Setting the water hardness“).
Switching on the appliance
●Pullenoughofthepowercordoutofthe
storage compartment and plug it into the
electrical socket.
●Removeandrinsethewatertank12
andllitwithfreshcoldwater.Donotll
above the “max“ mark.
●Replacethewatertank12 and push it
rmlydownwardintoplace.
●Fillthebeancontainerwithcoffeebeans.
●Setthepoweron/offswitch1 to I. The
stand-by button a glows red.
●Makesurethatthehotwater/steamdial8
is at “O“.

12
en
●Pressthea button. 8 lights up on the
display.
Whenswitchedonforthersttime,the
waterpipesintheappliancemustbelled.
●Placeacupunderthenozzle9.
●Turnthedial8 to g/h. Water runs into
the cup. Turn the dial 8 back to O.
●Theabuttonwillnowash.
The appliance rinses and heats up.
The appliance is ready for use when all
four buttons 4, 5, a, h and the coffee
strength indicator (coffee beans) light up on
the display.
i The appliance’s factory settings are
programmed for optimal performance.
Note: If the appliance is being used for the
rsttimeorhasnotbeenoperatedfora
prolongedperiod,therstcupofcoffeewill
not have the full aroma and should not be
consumed.
Controls
1 Power on/off switch
The power switch 1 on the rear of the
appliance switches the power supply on or
off.
When the power has been switched on, the
a button glows red. The appliance is now in
stand-by mode.
Warning
Do not press the power on/off switch while
the appliance is operating. The appliance
should only be switched off when it is in
stand-by mode.
2 Dial for adjusting the amount of coffee
per cup
This dial 2 allows variable adjustment of the
quantity of coffee from a small cup E to a
large cup F.
3 Display
The display uses symbols to indicate
appliance settings and messages.
6 Coffee dispensing, 2 cups
7 ashing Lidforgroundcoffee
duct 14 is open
7 on Ground coffee / Cleaning
5 on Mild coffee
55 on Medium-strength coffee
555 on Strong coffee
555ashing Beancontainerempty
S on Service:
Descale/clean appliance
S ashing Serviceprogramme
in operation
9 on Fill water tank 12, hold cup
+ 8ashing undernozzle9 and turn
dial 8 to g/h.
8 ashing Turndial8 to g/h.
8 on Turn dial 8 to O.
D on Empty trays
Dashing Traysmissing
4 Coffee dispensing button 4
Coffee can be brewed by pressing this
button.
Press once for one cup. The coffee is
ground, brewed and dispensed into the cup.
Button 4ashesduringthisprocess.
Press twice within 3 seconds for two
cups. The coffee is ground, brewed and
dispensed into the cups (the grinding and
brewing process takes place twice). Button
4ashesand6 (2 cups) appears on the
display during this process.
i If the coffee dispensing button 4 is
pressed again, the coffee brewing
process is terminated.
5 Coffee strength button 5
This button 5 is used to select the coffee
strength:
5 mild
55 medium
555 strong
The selected setting is shown on the
display.

13
en
6 Standby button a
Button a switches on the appliance or
switches it to stand-by mode. When button
a is pressed, the appliance heats up and
buttonaasheswhiletheapplianceheats
up and is rinsed. When the buttons 4, 5, a
and h light up and one, two or three beans
(depending on the setting) appear on the
display, the appliance is ready for operation.
The appliance will not be rinsed if:
– it was still warm when switched on, or
– coffee was not discharged before it was
switched to “stand-by“ mode,
or
– steam was discharged shortly before it
was switched off.
7 Steam generation button h
Button h generates steam for foaming or
warming.
8 Steam dispensing dial
Hot water or steam can be dispensed by
turning the dial to hot water g or steam h.
To dispense steam, the steam generation
button hmustbepressedrst(see“Steam
for foaming milk“).
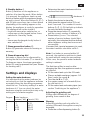
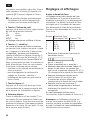
Settings and displays
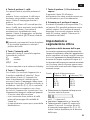
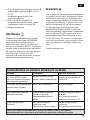
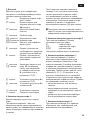
Setting the water hardness
It is important that the water hardness be
set correctly, so that the appliance indicates
accurately when the descaling programme
should be run. The factory setting is a water
hardness of 4. You can check the water
hardness using the enclosed test strip or by
asking your local water supplier.
Degree Water hardness
German (°dH) French (°fH)
1
2
3
4
1-7
8-15
16-23
24-30
1-13
14-27
28-42
43-54
●Determinethewaterhardnesswiththe
enclosed test strip.
e.g. = Hardness 2
●Switchthedevicetostandby.
●Holddownthesteambuttonh for at
least 3 seconds. The number of service
buttons 4, 5, a, h that light up indicate
the selected water hardness.
●Pressthesteambuttonh repeatedly
until the correct number of buttons is lit.
●Pressbuttona once. The selected
number of service buttons should light
upbriey;thisindicatesthatthedesired
water hardness setting has been saved
successfully.
Ifawaterlter(specialaccessory)isused,
the water hardness should be set to 1.
Note: If no button is pressed within 90
seconds, the appliance switches to stand-
by mode without saving the new settings.
In this case, the previous water hardness
setting is retained.
Thersttimealterisusedorafter
changingthelter,theapplianceneedsto
be cleaned.
●Fillthewatertankuptothe0.5lmark.
●Placeasuitablecontainer(approx.0.5
litres) under the nozzle 9.
●Turnthedial8 to g/h.
●Ifnowatercomesoutofnozzle9, turn
the dial back to O.
●Fillthewatertankandwaterpipes(see
section “Switching on the appliance”).
Adjusting the grinding unit
Sliding switch 16 adjusts the degree of
grinding,fromcoarsetone.
Warning
Adjust the grinding unit only while it is
running! Otherwise the appliance may be
damaged.
●Pressthecoffeedispensingbutton4.

14
●Whilethegrindingunitisrunning,move
the sliding switch 16 to the desired
position:thesmallerthedots,thenerthe
grind.
i The new setting will not become apparent
until the second or third cup is brewed.
Tip: For dark roast coffee beans, choose a
coarsergrind;forlightroastbeans,selecta
nergrind.
Float
Theoat22 in the water tray 21 shows
when the tray needs emptying.
●Iftheoat22 is clearly visible, empty the
water tray 21.
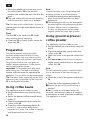
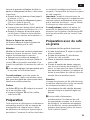
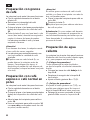
Preparation
This fully automatic espresso/coffee
machine grinds beans freshly for each
brew. If possible, use only beans for fully
automatic coffee and espresso machines.
Deep-freeze or store in a cool place in
sealed, airtight containers. Coffee beans
can be ground while frozen.
Important: Fill the water tank with fresh
water every day. The tank must always
containsufcientwaterforoperatingthe
appliance. Do not allow it to become empty.
Tip: Pre-warm cups, especially small, thick
espresso cups, by placing on the cup shelf
15 or rinsing with hot water.
Using coffee beans
The appliance must be ready for use.
●Setthedesiredpercupquantityusing
dial 2.
●Selectthedesiredcoffeestrengthusing
button 5.
●Placetheprewarmedcup(s)underthe
coffee outlet 10.
●Pressthecoffeedispensingbutton4
once for 1 cup or twice within three
seconds for 2 cups. The coffee is brewed
and dispensed into the cup(s).
Note
If you select two cups, the grinding and
brewing process is performed twice.
●Coffeedispensingstopsautomatically
when the selected quantity has been
dispensed.
i The brewing process can be terminated
by pressing the coffee dispensing button
4 again. When coffee is brewed for
2 cups, it is dispensed via two outlet
nozzles (place the cups side by side).
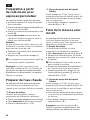
Using ground espresso/
coffee powder
The appliance must be ready for use.
●Setthedesiredpercupquantityusingthe
dial 2.
●Placetheprewarmedcup(s)underthe
coffee outlet 10.
●Openthecoverofthegroundcoffeeduct
14.
●Addone to two level scoops of ground
coffee(grind:mediumne)totheground
coffee duct 14.
Note
Do not add whole beans or instant coffee!
Use a maximum of two level scoops of
coffee.
●Closethecoverofthegroundcoffeeduct
14.
●Pressthecoffeedispensingbutton4.
i Repeat the process if a second cup is
desired.
Note: If coffee is not brewed within 90
seconds, the brewing chamber is emptied
automaticallyinordertopreventoverlling.
The appliance is rinsed.
en

15
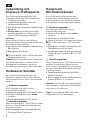
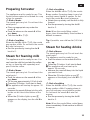
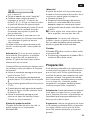
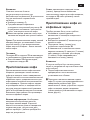
Preparing hot water
The appliance must be ready for use. This
function allows water to be heated for a cup
of tea, for example.
! Risk of burns
The nozzle gets very hot. Do not touch the
metal parts!
●Placeanappropriatecupunderthe
nozzle 9.
●Pushthesleeveonthenozzle9 all the
way down.
●Turnthedial8 to g/h.
! Risk of scalding
When the dial 8 is set to g/h, the nozzle
may sputter a little. Do not touch the nozzle
9 or aim it at anyone.
●Endtheprocessbyturningthedial8
back to O.
Steam for foaming milk
The appliance must be ready for use. You
canfoamthemilkrstandaddthecoffee
on top, or foam the milk separately and
pour it into the coffee.
! Risk of burns
The nozzle gets very hot. Do not touch the
metal parts!
●Pushthesleeveonthenozzle9 all the
way down.
●Fillthecupapproximately1/3fullofmilk.
●Pressthehbutton.Itwillstarttoash.
i The appliance will heat up for approx. 20
seconds.
●Immersethenozzle9 deep into the milk,
but do not let it touch the bottom of the
cup.
●Whentheh button lights up and 8
appears on the display, turn the dial 8 to
g/h.
! Risk of scalding
When the dial 8 is set to g/h, the nozzle
9 may sputter. Escaping steam is very hot
and may cause liquids to sputter. Do not
touch the nozzle 9 or aim it at anyone.
●Rotatethecupslowlyuntilthemilkisfully
foamed.
●Endtheprocessbyturningthedial8
back to O.
Note: When the nozzle 9 has cooled
down, clean it immediately. Dried residue is
difculttoremove.
Tip: If possible, use cold low-fat (1.5% fat)
milk.
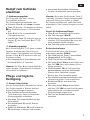
Steam for heating drinks
! Risk of burns
The nozzle gets very hot. Do not touch the
metal parts!
The appliance must be ready for use.
●Pushthesleeveonthenozzle9 all the
way up.
●Pressthehbutton.Itwillstarttoash.
i The appliance will now heat up for
approx. 20 seconds.
●Immersethenozzle9 deep into the liquid
you want to heat.
●Whentheh button lights up and 8
appears on the display, turn dial 8 to g/
h.
! Risk of scalding
When the dial 8 is set to g/h, the nozzle
9 may sputter a little. Escaping steam is
very hot and may cause liquid to sputter.
Do not touch the nozzle 9 or aim it at
anyone.
●Endtheprocessbyturningthedial8
back to O.
Note: When the nozzle 9 has cooled down,
cleanimmediately.Driedresidueisdifcult
to remove.
en

16
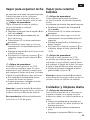
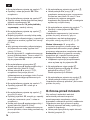
Maintenance and daily
cleaning
! Risk of electric shock
Unplug the appliance before cleaning it.
Never immerse the appliance in water. Do
not use a steam cleaner.
●Wipetheoutsideoftheappliancewitha
damp cloth. Do not use scouring agents.
●Washallremovablepartsbyhandonly.
●Rinseoutthewatertank12 with water
only.
●Remove,emptyandcleanthetraysfor
coffee grounds 20 and residual water 21.
●Wipeoutorvacuumtheinsideofthe
appliance (tray holders).
Note: If the appliance is cold when switched
on with the a button, or if it is set to stand-
by after brewing coffee, it is automatically
rinsed, i.e. the system cleans itself.
Nozzle 9 for hot water/steam
●Unscrewthenozzle9 from the steam
pipe.
●Dismantleallparts(Fig. E).
●Cleanwithacausticcleaningsolutionand
a soft brush. Clean the tip of the nozzle
9/c with a blunt needle.
●Thoroughlyrinseanddryallparts.
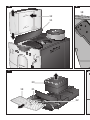
Brewing unit
The brewing unit can be removed for
cleaning (Fig. D).
●Turnofftheappliancewithbuttona.
●Turnthepoweron/offswitch1 to 0.
●Openthedoor17 to the brewing unit 18.
●Holdtheredbutton18a down and push
the handle 18b up until you hear it
engage.
●Graspthebrewingunit18 by the handle,
remove carefully, and rinse under running
water. Do not use cleaning agents. Do not
place in the dishwasher.
●Vacuumtheinsideoftheappliance,or
clean it with a damp cloth.
●Reinsertthebrewingunit18 all the way
into the appliance.
●Holdtheredbutton18a down and push
the handle 18b down as far as it goes,
until you hear it engage. The brewing unit
is now secure.
●Closethedoorsofthebrewingunit.
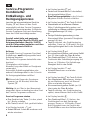
Service programme:
Combined cleaning and
descaling process
If an S is shown on the display while the
appliance is on, the service programme
must be run immediately to clean and
descale the appliance. If the service
programme is not run as instructed, the
appliance may be damaged.
Specially-developed descaling (order no.
310451) and cleaning agents (order no.
310575) are included with the appliance
and can also be obtained from customer
service.
Warning
Each time you run the service programme,
you should follow the instructions for
using the cleaning and descaling agents
carefully.
Never interrupt the descaling programme.
Do not drink the liquids.
Never use vinegar or vinegar-based
products.
Never put descaling tablets or other
descaling materials into the duct for
cleaning tablets.
i The Ssymbolasheswhiletheservice
programme is running (approx. 40
minutes).
Important:Ifthereisalterinthewater
tank, it needs to be removed before the
service programme is run.
en

17
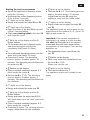
Starting the service programme
●Switchtheappliancetostandbymode
using the a button.
●Holddownthecoffeedispensingbutton
4 for at least 3 seconds.
D lights up on the display.
●Emptyandreinsertthetrays20 and 21.
7 lights up on the display.
●Openthecoveroftheduct14 for ground
coffee / cleaning tablets.
●Placeone cleaning tablet in the duct 14
and close the cover.
9 lights up on the display and the 4
buttonashes.
●Fillthewatertankwithlukewarmwater,
add descaling agent and dissolve
completely (total liquid: 0.5 litres).
or
●Pourprepareddescalingmixtureintothe
water tank (total liquid: 0.5 litres).
●Pressthe4 button. The descaling
process begins. Duration approx. 10
minutes.Thedescalingsolutionowsinto
the water tray 21.
8ashesonthedisplay.
●Placeasuitablecontainer(approx.0.5
litres) under the nozzle 9.
●Setthedial8 to g/h. The descaling
process begins. Duration approx. 5
minutes.Thedescalingsolutionowsinto
the container.
D lights up on the display.
●Emptyandreinsertthewatertray21.
9 lights up on the display and the 4
buttonashes.
●Emptyandcleanthewatertank12,ll
with fresh water up to the “max“ mark and
reinsert.
●Placeasuitablecontainer(approx.0.5
litres) under the nozzle 9.
●Pressthe4 button. The cleaning process
begins.Waterowsintothecontainer.
8 lights up on the display.
●Turnthedial8 to O. The cleaning process
begins. Duration approx. 10 minutes.
Liquidowsintotray21 inside the
appliance, then from the coffee outlet.
D lights up on the display.
●Empty,cleanandreinsertthetrays20
and 21.
The appliance heats up and is ready for use
again when all four buttons 4, 5, a and h
light up and remain lit.
Important: If the service programme is
interrupted, e.g. owing to a loss in power,
it is vital that the water tank be emptied,
rinsedandlledwithfreshwaterbefore
the appliance is used again. Then turn the
appliance on.
●Theappliancerinses,liquidowsinto
tray 21.
8ashesonthedisplay.
●Holdacupunderthenozzle9 and turn
the knob 8 to g/h.
Water runs into the cup.
8 lights up on the display.
●Turntheknob8 back to O.
The appliance rinses and is ready for use
again.
en

18
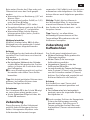
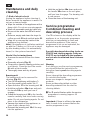
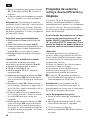
Anti-freeze
In order to avoid damage through cold
during transportation and storage, the
appliance must be emptied completely
rst.
The appliance must be ready for use.
●Remove,empty,andreplacewatertank.
●Placealarge,narrowcontainerunder
nozzle 9.
●Pressh button.
●Assoonas8 lights up on display, turn
dial 8 to g/h.
The appliance will release steam for a
while.
●Whennozzle9 stops releasing steam,
turn dial back to ‘O’.
●Turnofftheappliance.
Disposal
A
This appliance is labelled in accordance
with the European Directive 2002/96/EG
relating to waste electrical and electronic
equipment – WEEE. The directive provides
the framework for the EU-wide take-back
and disposal of end-of-life appliances.
Please ask your specialist retailer about
current disposal facilities.
Guarantee
The guarantee conditions for this appliance
areasdenedbyourrepresentativeinthe
country in which it is sold. Details regarding
these conditions can be obtained from the
dealer from whom the appliance was pur-
chased. The bill of sale or receipt must be
produced when making any claim under the
terms of this guarantee.
Rightofmodicationreserved.
en

19
en
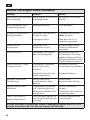
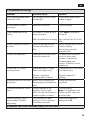
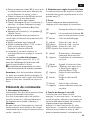
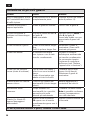
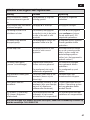
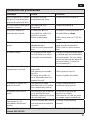
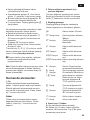
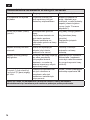
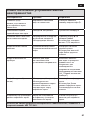
Troubleshooting
Problem Possible cause Solution
555 ashingwhenbean
container is full.
The grinding unit is not yet
full enough.
Press coffee dispensing
button
4 again
No hot water or steam
discharge.
Nozzle 9 is blocked. Clean nozzle 9.
Foaminsufcientortoo
runny.
Sleeve b on nozzle 9 not in
correct position.
Milk not suitable for foaming
Push down sleeve b on
nozzle 9.
Use cold low-fat (1.5% fat)
milk.
Coffee dispensing slows to
a trickle.
Coffeeisgroundtoone.
Pre-ground coffee is too
ne.
Adjust the grinding unit to a
coarser setting.
Use a more coarsely-
ground coffee.
Coffee not dispensed. Watertanknotlledornot
correctly positioned.
Fill water tank and make
sure it is in the right
position. If necessary,
llwaterpipes(see
section “Switching on the
appliance”).
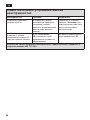
Coffee has no ”crema”
(creamy foam).
Unsuitable type of coffee.
Beans no longer fresh.
Degree of grinding
inappropriate for beans.
Change type of coffee used.
Use fresh beans.
Optimize degree of
grinding.
Grinding unit does not grind
the beans.
Beans are not falling into
the grinding unit (beans too
oily).
Gently tap the bean
container.
Grinding unit makes a loud
noise.
Foreign objects in the
grinding unit (e.g. grit,
which can be found even in
superior types of coffee).
Call the hotline.
Note: The appliance can
still be used to make pre-
ground coffee.
Stand-by button
a and
steam button hash
alternately.
The brewing unit
18 is
missing, or is not properly
inserted or secured.
Insert and secure the
brewing unit 18.
If problems cannot be eliminated, always call the hotline.
Page is loading ...
Page is loading ...
Page is loading ...
Page is loading ...
Page is loading ...
Page is loading ...
Page is loading ...
Page is loading ...
Page is loading ...
Page is loading ...
Page is loading ...
Page is loading ...
Page is loading ...
Page is loading ...
Page is loading ...
Page is loading ...
Page is loading ...
Page is loading ...
Page is loading ...
Page is loading ...
Page is loading ...
Page is loading ...
Page is loading ...
Page is loading ...
Page is loading ...
Page is loading ...
Page is loading ...
Page is loading ...
Page is loading ...
Page is loading ...
Page is loading ...
Page is loading ...
Page is loading ...
Page is loading ...
Page is loading ...
Page is loading ...
Page is loading ...
Page is loading ...
Page is loading ...
Page is loading ...
Page is loading ...
Page is loading ...
Page is loading ...
Page is loading ...
Page is loading ...
Page is loading ...
Page is loading ...
Page is loading ...
Page is loading ...
Page is loading ...
Page is loading ...
Page is loading ...
Page is loading ...
Page is loading ...
Page is loading ...
Page is loading ...
Page is loading ...
Page is loading ...
Page is loading ...
Page is loading ...
Page is loading ...
Page is loading ...
Page is loading ...
Page is loading ...
Page is loading ...
Page is loading ...
Page is loading ...
Page is loading ...
Page is loading ...
Page is loading ...
-
 1
1
-
 2
2
-
 3
3
-
 4
4
-
 5
5
-
 6
6
-
 7
7
-
 8
8
-
 9
9
-
 10
10
-
 11
11
-
 12
12
-
 13
13
-
 14
14
-
 15
15
-
 16
16
-
 17
17
-
 18
18
-
 19
19
-
 20
20
-
 21
21
-
 22
22
-
 23
23
-
 24
24
-
 25
25
-
 26
26
-
 27
27
-
 28
28
-
 29
29
-
 30
30
-
 31
31
-
 32
32
-
 33
33
-
 34
34
-
 35
35
-
 36
36
-
 37
37
-
 38
38
-
 39
39
-
 40
40
-
 41
41
-
 42
42
-
 43
43
-
 44
44
-
 45
45
-
 46
46
-
 47
47
-
 48
48
-
 49
49
-
 50
50
-
 51
51
-
 52
52
-
 53
53
-
 54
54
-
 55
55
-
 56
56
-
 57
57
-
 58
58
-
 59
59
-
 60
60
-
 61
61
-
 62
62
-
 63
63
-
 64
64
-
 65
65
-
 66
66
-
 67
67
-
 68
68
-
 69
69
-
 70
70
-
 71
71
-
 72
72
-
 73
73
-
 74
74
-
 75
75
-
 76
76
-
 77
77
-
 78
78
-
 79
79
-
 80
80
-
 81
81
-
 82
82
-
 83
83
-
 84
84
-
 85
85
-
 86
86
-
 87
87
-
 88
88
-
 89
89
-
 90
90
-
 91
91
-
 92
92
-
 93
93


Ask a question and I''ll find the answer in the document
Finding information in a document is now easier with AI
in other languages
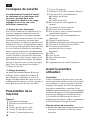
- italiano: Bosch TCA5401 Manuale utente
- français: Bosch TCA5401 Manuel utilisateur
- español: Bosch TCA5401 Manual de usuario
- Deutsch: Bosch TCA5401 Benutzerhandbuch
- русский: Bosch TCA5401 Руководство пользователя
- Nederlands: Bosch TCA5401 Handleiding
- polski: Bosch TCA5401 Instrukcja obsługi
- Türkçe: Bosch TCA5401 Kullanım kılavuzu
Related papers
-
Bosch TCA 5601 Owner's manual
-
-
-
-
-
-
-
-
Bosch TES50129RW Owner's manual
-
Other documents
-
Siemens TZ56002(00) Owner's manual
-
Siemens TK52001CH/02 Owner's manual
-
Siemens TK52001 Owner's manual
-
Siemens TK 53... Owner's manual
-
-
-
-
Siemens TE501503DE/07 Owner's manual
-
-