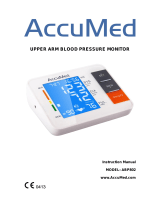
Blood Glucose Monitor

Kinetik Blood Glucose Monitor, BPX1a, user manual User manual

  • Hello! I am an AI chatbot trained to assist you with the Kinetik Blood Glucose Monitor User manual. I’ve already reviewed the document and can help you find the information you need or explain it in simple terms. Just ask your questions, and providing more details will help me assist you more effectively!
  • What is the recommended method for taking a blood pressure reading?
    Which arm should be used for taking blood pressure?
    How long should I wait between measurements?
    What is the recommended number of daily measurements?
    What is Measure While Inflate technology?
User Manual
BPx1A
Battery Loading 5
Connecting the Cuff 5
Putting on the Cuff 6
Your first test
Start
Measuring Process
What the results mean
Re-measuring
Shut Down
Memory
Interpretation of Blood Pressure Results
Additional Information on Blood Pressure
Using your Blood Pressure Monitor
7-14
7
8
9
10
11
11
12
13
14
Setting up your Blood Pressure Monitor 5-6
Support 2
Introduction 3
Parts 4
Specification 15
Return Policy / Warning and safety 16
notices
EMC Table 17-19
Frequently Asked Questions 20-21
Abnormality & Troubleshooting 22
Maintenance 23
Blood Pressure Record Table 24
Explanation of symbols on unit 25
Content
Support
Our manual should provide you with all the information you need to set up and use this product.
If you have a question, have a look at our Frequently Asked Questions or Abnormality & Troubleshooting page!
For further assistance, why not contact our Customer Care team directly? We’re here to help!
Our Customer Care team are available from 9am-5pm, Monday to Friday (excluding bank holidays).
We promise to respond to all queries and will ensure to resolve any issue you may be having.
You can reach us by…
Phone:
+44 1483 937969
Live Chat:
Simply visit www.kinetikwellbeing.com and send us a message.
Email:
Post:
Kinetik Medical Devices Limited
Unit 3, Perrywood Business Park, Honeycrock Lane,
Salfords, Redhill. RH1 5DZ
2
Introduction
Thank you for buying your Kinetik Fully Automatic Blood Pressure Monitor. Whether you have
already been diagnosed with high blood pressure or want to track any changes to your blood
pressure, you have taken the first step to quick, easy and accurate measurement that will keep you
and, if necessary, your doctor informed.
Easy to use – fully automatic, works at the push of a button.
Easy to read – quick reference indicator.
Comfortable - quick release one size cuff suitable for a wide range of arm sizes.
Memory to store 90 measurements.
Before you start, it is important that you read this manual carefully. Blood pressure testing is
easy but to make sure you have the most accurate readings, it is important to follow the instruc-
tions. Please keep them in a safe place in case you need to refer back to them at a later date.
3
Cuff tubule socket
Memory
LCD
Set
Parts
Cuf f
Rubber tubule
WHO
Systolic Blood Pressure
Diastolic Blood Pressure
Unit Indicator
Date/Time
Measurement Progress Indicator /
Indicator
Memory
Battery Indicator
Pulse
Heartbeat Symbol
Start/Stop
(Power On/Off)
4
Loading the Batteries
a. Open the battery cover at the back of the monitor.
b. Insert three “AA” batteries, observing correct polarity.
c. Close the battery cover.
Replacing Batteries
When the LCD screen displays ‘ ’, new batteries must be inserted
immediately to ensure accurate results.
Rechargeable batteries with a voltage of 1.2V are not suitable for this product.
Please dispose of batteries according to battery manufacture’s instructions.
Insert the rubber tube plug of
the cuff firmly into the cuff socket
located on the side of the monitor
to ensure there is no air leakage.
The cuff should be ready to use. Ensure
that the end is passed through the metal
loop and the hook and loop fastening is
facing outwards.
Do not mix old and new batteries or different types of batteries. Do not use rechargeable batteries. Only batteries of the
same or equivalent type as recommended are to be used. Batteries must be handled with care under adult supervision. If
batteries leak and come into contact with the skin or eyes, wash immediately with copious amount of water.
Setting up your Blood Pressure Monitor
b.
a.
Connecting the Cuff
5
Setting up your Blood Pressure Monitor
Putting on the Cuff
a. Place the cuff 1~2cm above the elbow joint.
Measuring can be done on light clothing such as a
shirt or blouse. However, if you have a weak
pulse, it is recommended you test on a bare arm.
Remove any tight or restrictive clothing from your
arm. For example, restriction caused by rolling up
shirt sleeve.
b. Place hand on a flat surface with the palm
facing up and with the rubber tube running
down the center of the arm.
The cuff can be cleaned by hand with warm,
soapy water. Rinse thoroughly with cold water
and towel dry.
DO NOT IRON.
d. Use your free hand to adjust the
tightness of the cuff until it is firm.
To get the correct tightness of the cuff, you should
be able to fit two fingers under the cuff.
Concerned about which arm to use?
Please refer to ‘Your first test’ on page 6.
c. Turn the cuff end outwards and tighten it
by pulling it through the metal loop and
pressing the hook surface of the cuff on
to the loop surface of the cuff.
6
Using your Blood Pressure Monitor
Your first test
The British Hypertension Society (BHS) recommends that for your first test, you test both
your arms. (Note: Ensure you do not suffer from any medical conditions which will prevent
you from having your blood pressure measured in both arms). This will determine which arm
should be used for future measurements. Take note of your systolic (high number) reading
on both arms. The arm which gives the higher systolic reading should be used in the future
for testing.
Example
Left arm: 132 (systolic)
86 (diastolic)
Right arm: 128 (systolic)
84 (diastolic)
Then use your left arm
7
Setting the time and date
Once the batteries are inserted and the battery cover is put back into place, the display will flash the year 2015 in the bottom left
hand corner. To adjust the Year press the MEM button repeatedly until correct (pressing and holding the MEM button will advance
the year rapidly). When the correct year is shown, press the SET button and the display will now show the date in Day/Month form.
Press the MEM button to adjust the Day then press the SET button to select the Month. Again adjust the Month using the MEM
button. Once complete, press the SET button to adjust the hours and minutes. Finally, press the MEM button for the last time to
select either 12 or 24 hour time format. Once the time and date have been set, press the START/STOP button. The unit will switch
off with the time and date stored correctly.
Note: The time and date will be stored even when the batteries have been removed to be changed. To re-adjust the time and date
(when the clocks change for example), remove and reinstall the batteries to re-start the setting procedure. If however no change of
time and date is necessary after changing the batteries, simply press the START/STOP button to cancel the setting procedure.
Start
a. We recommend that you carry out you test whilst sitting at a table (ensuring the cuff is at the same height as your heart). This
will place your arm and the monitor in an ideal position for the best results.
b. Place the cuff on your selected arm (please refer to ‘Your first test’ on how to select an arm).
Ensure the cuff is secure. Do not inflate the cuff when it is not wrapped around the arm.
c. Once you are in a comfortable position, switch the unit on by pressing the START/STOP button to begin automatic inflation.
Using your Blood Pressure Monitor
if you feel any discomfort or pain during this time, press the START/STOP button and remove the cuff
immediately. Consult your local pharmacist or healthcare professional for advice.
8
Using your Blood Pressure Monitor
Measuring Process
a. This monitor is uses Measure While Inflate technology. This means that the measurement is
made as the cuff inflates, rather than fully inflating first then measuring during the deflation stage.
As the cuff inflates the display will show the following:
*Shown when a pulse is detected during the measurement process.
If there is an error or abnormal reading, please refer to the“Abnormality & Troubleshooting” section.
Cuff Pressure in mmHg
Measurement Progress Indicator
Pulse Detection*
9
What the results mean
a. The LCD screen will automatically display the systolic and diastolic pressure
reading in mmHg and the pulse rate in pulse/min after each measurement.
b. Record date, time, systolic reading, diastolic reading and pulse rate on your record card
which you will find in the pack (including anything that may have influenced
your blood pressure reading e.g. stress, anxiety). This will help you monitor
trends. Please take this record card with you on your visits to your doctor,
pharmacist or healthcare professional.
Measurements should ideally be taken at the same time, under the same conditions and in the same
position each time.
Please be aware that blood pressure can fluctuate since it responds to minute changes in the body. It is unusual for it to
continuously remain at the same value, hence it is recommended that the blood pressure be determined based on an
average of multiple measurements. If you experience a higher than normal reading, do not panic as this can happen.
Relax and take a break for at least 10 minutes before measuring your blood pressure again. Low blood pressure
(Hypotension) and high blood pressure (Hypertension) can only be diagnosed by a qualified healthcare professional,
such as a doctor, pharmacist. If you have any concerns or questions, please contact your pharmacist or healthcare
professional.
Measure one hour after eating and avoid measuring immediately after bathing.
Measure one hour after smoking or drinking alcohol/coffee.
Relax for 10-20 minutes before taking a measurement and remain relaxed whilst measuring.
Do not move or talk during measurement, as this will affect the accuracy.
Do not use this monitor if you suffer from atrial or ventricular premature beats or atrial fibrillation.
To get an accurate value:
Using your Blood Pressure Monitor
10
Using your Blood Pressure Monitor
Re-measuring
If you want to measure again, just press the START/STOP button twice.
Leave at least three minutes between measurements to allow blood
circulation to the arm to return to normal.
Do not measure your blood pressure too many times in one session as
it may cause discomfort in the arm.
If you feel any discomfort or pain, turn the monitor off and remove
the cuff immediately.
Shut Down
Please turn the unit off after measurement if not re-measuring.
The unit has an automatic ‘switch off’ mechanism which means it will
turn off after 2 minutes if not being used.
11
Using your Blood Pressure Monitor
Memory
The memory can store 90 sets of measurements and these results will be automatically stored
after each reading.
To check the memory, press the MEM button (either just after a measurement has been taken
or while the unit is off). Press the MEM button to scroll up or the SET button to scroll down
through the individual memories.
Note that the most recent measurement is always stored in memory slot 1. Once all 90
memory slots are filled, the oldest memory will be erased during the next measurement to
make room for the latest memory.
Deleting the Memory
With the unit off, press the MEM button to switch the unit on then press and hold the SET
button for 4 seconds. Press the SET button again to alternate between ‘DEL NO’ and ‘DEL
YES’. Confirm by pressing the START/STOP button.
The above procedure will delete the entire memory bank, not just a single measurement.
Once deleted, the memory cannot be recovered.
12
Interpretation of Blood Pressure (BP) Results
13
Category of Blood
Pressure
Systolic BP
(mmHg)
Diastolic BP
(mmHg)
Advice on Results
Hypotension <100 <60 Practice a healthy lifestyle.
Consult your doctor only if suffering symptoms of low BP
(eg. fainting)
Ideal <120 <80 Practice a healthy lifestyle.
Normal 120-129 80-84 Practice a healthy lifestyle.
High Normal 130-139 85-89 Practice a healthy lifestyle.
Hypertension 140-159 90-99 Practice a healthy lifestyle.
(mild)* Re-measure BP monthly over next 3 months.
If high levels (140/90) persist (eg. 2 high readings on
2 seperate occasions) consult doctor
Hypertension 160-179 100-109 Practice a healthy lifestyle.
(moderate)* Re-measure BP monthly over next 4 months.
If high levels (140/90) persist (eg. 2 high readings
on 2 seperate occasions) consult doctor
Hypertension 180-219 110-119 Re-measure BP in a few days. If BP180/110, consult
(severe)* doctor
Hypertension  220  120 We would recommend that you see your pharmacist or
(very severe)* healthcare professional.
* Your BP should be re-assessed professionally at least once a year - speak to your pharmacist or healthcare
professional. If systolic BP and diastolic BP fall into different categories, the higher value should be taken
for classification.
Additional Information on Blood Pressure
Your heart is just like a pump which works all the time to make the blood flow through all blood
vessels. Blood pressure measures the force on the wall of the blood vessels caused by the
pressure of the blood. The output of blood from the heart when it pushes blood around the body
is called systolic blood pressure. Diastolic blood pressure is the measurement of the blood returning
to the heart.
Blood pressure is normally written as, for example:
120 (systolic)
80 (diastolic)
Fluctuation of Blood Pressure
Blood pressure fluctuates constantly during the day. Its value in
the daytime is higher than in the evening with the lowest level
being at midnight. The pressure begins to rise again at 03:00am
and reaches its highest level any time during the day – so it is
impossible to get a consistent reading. For this reason, please
take your measurements at the same time of day.
Systolic Diastolic
14
Pulse rate accuracy: Within
+
5% (7)
(4) Measuring Accuracy: Within
+
3mmHg
(1) Model: BPx1A (12) Automatic power off: To be automatically cut off
(2) Digital display system after 2minutes of not being use to save energy.
(3) Measuring method: Oscillometric method (13) Battery life: Approx.3 months with 3 times usage per day
(14) Environmental temperature for using: 10~40
o
C
(5) Blood pressure Measuring range: 0mmHg~299mmHg (15) Environmental temperature for storage: -20~60
o
C
(6) Pulse rate range: 40~180/min (16) Environmental humidity for using: <90%
(17) Environmental humidity for storage: <95%
(8) Power source: 3 x AA size batteries (18) Transport condition:
(9) Classification: Internal powered Equipment Type B Atmospheric pressure range: 80kPa~105kPa
(10) Pressurisation: automatic air inflation by an air pump Humidity range: Less than 95%
(11) Deflation: Automatic exhaust Ambient temperature range: -20~60
o
C
This is a Class IIa medical device and fulfils the provisions of the medical devices directive 93/42/EEC
Blood pressure measurements determined with this device are equivalent to those obtained by a trained
observer using the cuff/stethoscope auscultation method, within the limits prescribed by the American
National Standard, Electronic or automated sphygmomanometers.
15
Specification
Regarding the application of the CUFF and its pressurization on any limb where intravascular access or therapy,
or an arterio-venous (A-V) shunt, is present because of temporary interference to blood flow and could result in injury
to the PATIENT;
Regarding the application of the CUFF and its pressurization on the arm on the side of a mastectomy;
Regarding the information that pressurization of the CUFF can temporarily cause loss of function of
simultaneously used monitoring ME EQUIPMENT on the same limb;
Regarding the need to check (for example, by observation of the limb concerned) that operation of the
AUTOMATED SPHYGMOMANOMETER does not result in prolonged impairment of the circulation of the blood of
the PATIENT.
When the arm is oppressed by air pressure,please loosen CUFF or remove batteries.
Not touch the patient and battery output simultaneously when measurement.
Warning: not allow to use the luer connectors.If Luer lock connectors are used in the construction of tubing,
there is a possibility that they might be inadvertently connected to intravascular fluid systems, allowing air to be
pumped into a blood vessel.
Warning and safety notices
Product may be returned if faulty, please contact the Retailer or Kinetik directly if you’re experiencing issues with
your product. This does not affect your statutory rights. Please note the retailer’s own return policy may still be valid,
contact the retailer for more information.
16
EMC Table
Emission test
RF emission
Harmonic
Voltage
Group 1
Class B
Not applicable
Not applicable
The Digital Blood Pressure Monitor use RF energy only for its internal function. Therefore, its RF emissions are very low and are not
likely to cause any interference in nearby electronic equipment.
The Digital Blood Pressure Monitor is suitable for use in all establishments other than domestic and those directly connected to
the public low-voltage power supply network that supplies buildings used for domestic purposes.
CISPR 11
RF emissions
emissions
fluctuations/
flicker emissions
IEC 61000-3-3
IEC 61000-3-2
CISPR 11
Compliance
Electromagnetic environment – guidance
The Digital Blood Pressure Monitor is intended for use in the electromagnetic environment specified below. The customer of the user of the Digital Blood Pressure
Monitor should assure that it is used in such an environment.
Power frequency
magnetic field IEC
61000-4-8
±6 kV contact
±8 kV air
±6 kV contact
±8 kV air
3V/m 3V/m
(50Hz/60Hz)
Electrostatic
IEC 61000-4-2
discharge (ESD)
Immunity test
IEC 60601 test level
Compliance level
The Digital Blood Pressure Monitor is intended for use in the electromagnetic environment specified below. The customer or the user of Digital Blood Pressure Monitor
should assure that it is used in such an environment.
Guidance and manufacture’s declaration
Guidance and manufacture’s declaration – electromagnetic emission
NOTE UT is the a.c. mains voltage prior to application of the test level.
Floors should be wood, concrete or ceramic tile. If floor are covered with
synthetic material, the relative humidity should be at least 30%.
Power frequency magnetic fields should be at levels characteristic of a
typical location in a typical commercial or hospital environment.
Electromagnetic environment – guidance
The Digital Blood Pressure Monitor is intended for use in the electromagnetic environment specified below. The customer or the user of Digital Blood Pressure Monitor
should assure that it is used in such an environment.
Guidance and manufacture’s declaration – electromagnetic immunity
17
EMC Table
Immunity test
Radiated RF
IEC 61000-4-3
3V/m
80 MHz to
2.5 GHz
3V/m
Portable and mobile RF communications equipment should be used no closer to any part of the Digital Blood
Pressure Monitor, including cables, than the recommended separation distance calculated from the equation
applicable to the frequency of the transmitter.
Recommended separation distance
80 MHz to 800 MHz
800 MHz to 2.5 GHz
Where P is the maximum output power rating of the transmitter in watts (W) according to the transmitter
manufacturer and d is the recommended separation distance in metres (m).
Field strengths from fixed RF transmitters, as determined by an electromagnetic site survey
a
, should be less
than the compliance level in each frequency range.
b
Interference may occur in the vicinity of equipment marked with the following symbol:
IEC 60601 test
level
Compliance
level
a
Field strengths from fixed transmitters, such as base stations for radio (cellular/cordless) telephones and land mobile radios, amateur radio, AM and FM radio
broadcast and TV broadcast cannot be predicted theoretically with accuracy. To assess the electromagnetic environment due to fixed RF transmitters, an
electromagnetic site survey should be considered. If the measured field strength in the location in which the Digital Blood Pressure Monitor is used exceeds the
applicable RF compliance level above, the Digital Blood Pressure Monitor should be observed to verify normal operation. If abnormal performance is observed,
additional measures may be necessary, such as reorienting or relocating the Digital Blood Pressure Monitor.
b
Over the frequency range 150 KHz to 80 MHz, field strengths should be less than 3V/m.
NOTE 1 At 80 MHz and 800 MHz, the higher frequency range applies.
NOTE 2 These guidelines may not apply in all situations. Electromagnetic propagation is affected by absorption and reflection from structures, objects and people.
Electromagnetic environment - guidance
18
EMC Table
output power
of transmitter
The Digital Blood Pressure Monitor is intended for use in an electromagnetic environment in which radiated RF disturbances are controlled. The customer or
the user of the Digital Blood Pressure Monitor can help prevent electromagnetic interference by maintaining a minimum distance between portable and mobile
RF communications equipment (transmitters) and the Digital Blood Pressure Monitor as recommended below, according to the maximum output power of the
communications equipment.
For transmitters rated at a maximum output power not listed above, the recommended separation distance d in metres (m) can be estimated using the
equation applicable to the frequency of the transmitter, where P is the maximum output power rating of the transmitter in watts (W) according to the
transmitter manufacturer.
NOTE 1 At 80 MHz and 800 MHz. the separation distance for the higher frequency range applies.
NOTE 2 These guidelines may not apply in all situations .Electromagnentic propagation is affected by absorption and reflection from structures, objects
and people.
80 MHz to 800 MHz
800 MHz to 2.5GHz
Recommended separation distances between
portable and mobile RF communications equipment and the Digital Blood Pressure Monitor.
Separation distance
according to frequency of transmitter
(m)
100
10
0.1
0.01
1
11 . 6 6 7
3.689
0.369
0.117
1.167
23.333
7.379
0.738
0.233
2.333
19
/