Nilfisk-ALTO SV 8000 Operating Instructions Manual
- Category
- Vacuum cleaners
- Type
- Operating Instructions Manual
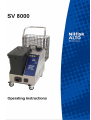
Nilfisk-ALTO SV 8000: The SV 8000 combines steam and vacuum cleaning in one compact machine, allowing for efficient and thorough cleaning of various surfaces. With its powerful steam capabilities, it sanitizes and removes dirt, grease, and stains without the use of harsh chemicals. The vacuum function conveniently collects the loosened dirt and debris, leaving surfaces clean and dry.
Nilfisk-ALTO SV 8000: The SV 8000 combines steam and vacuum cleaning in one compact machine, allowing for efficient and thorough cleaning of various surfaces. With its powerful steam capabilities, it sanitizes and removes dirt, grease, and stains without the use of harsh chemicals. The vacuum function conveniently collects the loosened dirt and debris, leaving surfaces clean and dry.


-
 1
1
-
 2
2
-
 3
3
-
 4
4
-
 5
5
-
 6
6
-
 7
7
-
 8
8
-
 9
9
-
 10
10
-
 11
11
-
 12
12
-
 13
13
-
 14
14
-
 15
15
-
 16
16


Nilfisk-ALTO SV 8000 Operating Instructions Manual
- Category
- Vacuum cleaners
- Type
- Operating Instructions Manual
Nilfisk-ALTO SV 8000: The SV 8000 combines steam and vacuum cleaning in one compact machine, allowing for efficient and thorough cleaning of various surfaces. With its powerful steam capabilities, it sanitizes and removes dirt, grease, and stains without the use of harsh chemicals. The vacuum function conveniently collects the loosened dirt and debris, leaving surfaces clean and dry.
Ask a question and I''ll find the answer in the document
Finding information in a document is now easier with AI
Related papers
-
Nilfisk-ALTO GR 8000 Operating Instructions Manual
-
-
Nilfisk-ALTO SV 8000 Operating Instructions Manual
-
-
-
Nilfisk-ALTO NEPTUNE 4 FA Owner's manual
-
Nilfisk-ALTO NEPTUNE 5 FA Operating Instructions Manual
-
-
Nilfisk-ALTO NEPTUNE 2 Operating Instructions Manual
-
Other documents
-
 Nilfisk-Advance America SDV 4500 User manual
-
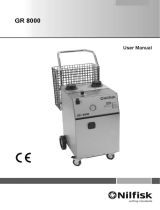 Nilfisk-Advance America GR 8000 User manual
-
Nilfisk SO4500 EU-UK Owner's manual
-
Dimplex SV8000 User manual
-
Gerni MH 5M Operating Instructions Manual
-
-
Nilfisk 11426700 User manual
-
Vax POWERPLUS Owner's manual
-
Alto STC 3000 User manual
-

