Page is loading ...

LED TV
user manual
Thank you for purchasing this Samsung product.
To receive more complete service, please register
your product at
www.samsung.com/register
Model _____________ Serial No. _____________
E-MANUAL
© 2013 Samsung Electronics Co., Ltd. All rights reserved.
BN68-04935A
BN68-04935A-05
Contact SAMSUNG WORLD WIDE
If you have any questions or comments relating to Samsung products, please contact the SAMSUNG customer care centre.
Country
Customer Care Centre
Web Site
AUSTRALIA 1300 362 603 www.samsung.com/au
NEW ZEALAND 0800 SAMSUNG (0800 726 786) www.samsung.com/nz
CHINA 400-810-5858 www.samsung.com
HONG KONG (852) 3698 4698 www.samsung.com/hk (Chinese)
www.samsung.com/hk_en (English)
INDIA 1800 3000 8282
1800 266 8282
www.samsung.com/in
INDONESIA 0800-112-8888 (Toll Free)
(021) 56997777
www.samsung.com/id
JAPAN 0120-327-527 www.samsung.com
MALAYSIA 1800-88-9999 www.samsung.com/my
PHILIPPINES 1-800-10-7267864 [PLDT]
1-800-8-7267864 [Globe landline and Mobile]
02-4222111 [Other landline]
www.samsung.com/ph
SINGAPORE 1800-SAMSUNG(726-7864) www.samsung.com/sg
THAILAND 0-2689-3232,
1800-29-3232
www.samsung.com/th
TAIWAN 0800-32-9999 www.samsung.com/tw
VIETNAM 1 800 588 889 www.samsung.com
GEORGIA 0-800-555-555 www.samsung.com
ARMENIA 0-800-05-555 www.samsung.com
AZERBAIJAN 088-55-55-555 www.samsung.com
UZBEKISTAN 8-10-800-500-55-500 www.samsung.com
KYRGYZSTAN 00-800-500-55-500 www.samsung.com
TADJIKISTAN 8-10-800-500-55-500 www.samsung.com
MONGOLIA +7-800-555-55-55 www.samsung.com
BELARUS 810-800-500-55-500 www.samsung.com
MOLDOVA 0-800-614-40 www.samsung.com
ALGERIA 0800 100 100 www.samsung.com/n_africa
PAKISTAN 0800-Samsung (72678) www.samsung.com/pk/
TUNISIA 80-1000-12 www.samsung.com/n_africa
[UF6100-AR]BN68-04935A-05ENG.indd 2-3 2013-10-08 2:13:41

English - 2
- English -
• Theslotsandopeningsinthecabinetandinthebackorbottomareprovidedfornecessaryventilation.Toensurereliableoperationofthisapparatus,
andtoprotectitfromoverheating,theseslotsandopeningsmustneverbeblockedorcovered.
-Donotcovertheslotsandopeningswithaclothorothermaterials.
-Donotblocktheslotsandopeningsbyplacingthisapparatusonabed,sofa,rugorothersimilarsurface.
-Donotplacethisapparatusinaconnedspace,suchasabookcaseorbuilt-incabinet,unlessproperventilationisprovided.
• Donotplacethisapparatusnearoroveraradiatororheatregister,orwhereitisexposedtodirectsunlight.
• Donotplaceavesselcontainingwater(vasesetc.)onthisapparatus,asthiscanresultinariskofreorelectricshock.
• Donotexposethisapparatustorainorplaceitnearwater(nearabathtub,washbowl,kitchensink,orlaundrytub,inawetbasement,orneara
swimmingpooletc.).Ifthisappratusaccidentallygetswet,unplugitandcontactanauthorizeddealerimmediately.
• Makesuretopulloutthepowercordfromtheoutletbeforecleaning.
• Thisapparatususebatteries.Inyourcommunity,theremightberegulationsthatrequireyoutodisposeofthesebatteriesproperlytoprotectthe
environment.Pleasecontactyourlocalauthoritiesfordisposalorrecyclinginformation.
• Donotoverloadwalloutlets,extensioncords,oradaptorsbeyondtheircapacity,sincethiscanresultinreorelectricshock.
• Power-supplycordsshouldberoutedsothattheyarenotlikelytobewalkedonorpinchedbyitemsplaceduponoragainstthem.Payparticular
attentiontocordsattheplugend,whereconnectedtoadaptors,andatthepointwheretheyexitfromtheapparatus.
• Toprotectthisapparatusfromalightningstorm,orwhenitisleftunattendedandunusedforlongperiodsoftime,unplugitfromthewalloutletand
disconnecttheantennaorcablesystem.Thiswillpreventdamagetothesetduetolightningandpowerlinesurges.
• BeforeconnectingtheACpowercordtotheDCadaptoroutlet,makesurethevoltagedesignationoftheDCadaptorcorrespondstothelocal
electricalsupply.(dependingonthemodel)
• Neverinsertanythingmetallicintotheopenpartsofthisapparatus.Doingsomaycreateadangerofelectricshock.
• Toavoidelectricshock,nevertouchtheinsideofthisapparatus.Onlyaqualiedtechnicianshouldopenthisapparatus.
• Makesuretoplugthepowercordinuntilitisrmlyinserted.Pullontheplug,notthecord,whenremovingthepowercordfromtheoutlet.Donot
touchthepowercordwithwethands.
• Ifthisappratusdoesnotoperatenormally-inparticular,ifthereareanyunusualsoundsorsmellscomingfromit-unplugitimmediatelyandcontact
anauthorizeddealerorservicecenter.
• BesuretopullthepowerplugoutoftheoutletiftheTVistoremainunusedorifyouaretoleavethehouseforanextendedperiodoftime(especially
whenchildren,elderlyordisabledpeoplewillbeleftaloneinthehouse).
-Accumulateddustcancauseanelectricshock,anelectricleakage,orarebycausingthepowercordtogeneratesparksandheat,orcausethe
insulationtodeteriorate.
• Besuretocontactanauthorizedservicecenter,wheninstallingyoursetinalocationwithheavydust,highorlowtemperatures,highhumidity,
chemicalsubstancesorwhereitwilloperatefor24hoursa
daysuchasinanairport,atrainstation,etc.Failuretodosomaycauseseriousdamage
toyourset.
• Useonlyaproperlygroundedplugandreceptacle.
-Animpropergroundmaycauseelectricshockorequipmentdamage.(ClasslEquipmentonly.)
• Toturnofftheapparatuscompletely,youmustpullthepowerplugoutofthewallsocket.Consequently,thepowerplugshouldbereadilyaccessible
atalltimes.
• Donotallowchildrentohangontotheproduct.
• Storetheaccessories(batteries,etc.)inalocationsafelyoutofthereachofchildren.
• Donotinstalltheproductinanunstablelocationsuchasashakyself,aslantedoor,oralocationexposedtovibration.
• Donotdroporimpartashocktotheproduct.Iftheproductisdamaged,disconnectthepowercordandcontactaservicecenter.
• Tocleantheproduct,unplugthepowercordfromthepoweroutletandwipetheproductusingasoft,drycloth.Donotuseanychemicalssuch
aswax,benzene,alcohol,thinners,insecticide,airfreshener,lubricantordetergent.Thismaydamagetheappearanceorerasetheprintingonthe
product.
• Donotexposetheapparatusto
drippingorsplashing.
• Donotdisposeofbatteriesinare.
• Donotshortcircuit,disassemble,oroverheatthebatteries.
• notshortcircuit,disassemble,oroverheatthebatteries.
• Thereisadangerofexplosionifyoureplacethebatterieswiththewrongtypeofbattery.Replaceonlywiththesameorequivalenttype.
• WARNING-TOPREVENTTHESPREADOFFIRE,KEEPCANDLESOROTHEROPENFLAMESAWAYFROMTHISPRODUCTATALLTIMES.
Warning! Important Safety Instructions
(Please read the safety instructions below before installing and using the product.)
CAUTION
CAUTION:TOREDUCETHERISKOFELECTRICSHOCK,DONOTREMOVE
COVER(ORBACK).THEREARENOUSERSERVICEABLEPARTSINSIDE.RE-
FERALLSERVICINGTOQUALIFIEDPERSONNEL.
RISKOFELECTRICSHOCK.DONOTOPEN
Thissymbolindicatesthathighvoltageispresentinside.It
isdangeroustomakeanykindofcontactwithanyinternal
partofthisproduct.
Thissymbolindicatesthatimportantliteratureconcerning
operationandmaintenancehasbeenincludedwiththis
product
.
[UF6100-AR]BN68-04935A-05ENG.indd 2 2013-10-08 2:14:29

English - 3
For more information on how to use e-Manual (P. 9)
Figures and illustrations in this User Manual are provided for reference only and may differ from actual product appearance. Product
design and specifications may be changed without notice.
Still image warning
Avoid displaying still images (like jpeg picture files) or still image element (like TV programme logo, panorama or 4:3 image format, stock or news bar at screen bottom
etc.) on the screen. Constant displaying of still picture can cause ghosting of LED screen, which will affect image quality. To reduce risk of this effect, please follow
below recommendations:
• Avoid displaying the same TV channel for long periods.
• Always try do display any image on full screen, use TV set picture format menu for best possible match.
• Reduce brightness and contrast values to minimum required to achieve desired picture quality, exceeded values may speed up the burnout process.
• Frequently use all TV features designed to reduce image retention and screen burnout, refer to proper user manual section for details.
Securing the Installation Space
Keep the required distances between the product and other objects (e.g. walls) to ensure proper ventilation.
Failing to do so may result in fire or a problem with the product due to an increase in the internal temperature of the product.
✎
When using a stand or wall-mount, use parts provided by Samsung Electronics only.
• If you use parts provided by another manufacturer, it may result in a problem with the product or an injury due to the product falling.
✎
The appearance may differ depending on the product.
✎
Be careful when you contact the TV because some parts can be somewhat hot.
Installation with a stand. Installation with a wall-mount.
10 cm10 cm
10 cm
10 cm
10 cm
10 cm
10 cm
For India Only
This marking on the product, accessories or literature indicates that the product and its electronic accessories should not
be disposed of with other household waste at the end of their working life. To prevent possible harm to the environment or
human health from uncontrolled waste disposal, please separate these items from other types of waste and recycle them
responsibly to promote the sustainable reuse of material resources.
For more information on safe disposal and recycling visit our website www.samsung.com/in or contact our Helpline numbers -
18002668282, 180030008282.
[UF6100-AR]BN68-04935A-05ENG.indd 3 2013-10-08 2:14:29

English - 4
List of Features
3D
• This exciting new feature enables you to view 3D content.
Media Play
• Allows you to play music files, pictures, and movies saved on a USB device.
e-Manual
• Allows you to read on screen full manual. (p. 9)
Accessories
✎
Please make sure the following items are included with your TV. If any items are missing, contact your dealer.
✎
The items’ colours and shapes may vary depending on the models.
✎
Cables not included in the package contents can be purchased separately.
• Remote Control & Batteries (AAA x 2)
• Warranty Card / Regulatory Guide
• 3D Active Glasses (depending on the model)
• Power Cord
• Owner’s Instructions
1
1
1
1
• Holder Ring
(UA46F6100 / UA50F6100 : 2EA)
(UA55F6100 / UA60F6100 : 4EA)
Case A. Installing the SAMSUNG Wall-
Mount
Case B. Installing another company’s
Wall-Mount
• Cable manager Assembling the Cable manager
[UF6100-AR]BN68-04935A-05ENG.indd 4 2013-10-08 2:14:30

English - 5
Installing batteries (Battery size: AAA)
Viewing the Remote Control
✎
This is a special remote control for the visually impaired persons and has Braille points on the Power, Channel, and Volume
buttons.
ABCD
E-MANUAL
HDMI
SPORTS
X
Turns the TV on and off.
Displays and selects the available video sources.
Returns to the previous channel.
Cuts off the sound temporarily.
Changes channels.
Displays channel lists on the screen.
Selects the HDMI mode directly.
Displays information on the TV screen.
Exits the menu.
Press to directly access to channels.
Adjusts the volume.
Alternately select Teletext ON, Double, Mix or OFF.
Displays the main on-screen menu.
Quickly select frequently used functions.
Displays Media Play.
Returns to the previous menu.
Selects the on-screen menu items and changes the
values seen on the menu.
Use these buttons according to the direction on
screen.
Use these buttons in a specific feature.
For details, refer to the e-Manual.
E-MANUAL: Displays the e-Manual guide. (p. 9)
X
: Sets the video, which provided with 3D signal.
: Turns the Sports Mode on or off.
[UF6100-AR]BN68-04935A-05ENG.indd 5 2013-10-08 2:14:30

English - 6
Using the TV’s Controller (Panel Key)
The TV's Controller, a small joy stick like button on the rear right side of the TV, lets you control the TV without the remote control.
✎
Some functions which require a PIN code may not be available.
✎
The product colour and shape may vary depending on the model.
✎
Exits the menu when pressing the controller more than 1 second.
✎
When selecting the function by moving the controller to the up/down/left/right directions, be sure not to press the controller. If you
press it first, you cannot operate it to move the up/down/left/right directions.
Remote control sensor
TV Controller
The image is drawn by facing the front
side of the TV.
Return
Selecting the Media Play
Selecting a Source
Power off
Selecting the Menu
Function menu
Standby mode
Do not leave your TV in standby mode for long periods of time (when you are away on a holiday, for example). A small amount of electric
power is still consumed even when the power button is turned off. It is best to unplug the power cord.
Initial Setup
When the TV is initially powered on, a sequence of on-screen prompts will assist in configuring basic settings. Press the POWER
P
button. Setup is available only when the source is set to TV.
If You Want to Reset This Feature...
Select System - Setup (Initial Setup). Enter your 4 digit PIN number. The default PIN number is “0-0-0-0”. If you want to change the PIN
number, use the Change PIN function.
You should do Setup (MENU → System) again at home although you did in shop.
✎
If you forget the PIN code, press the remote control buttons in the following sequence in Standby mode, which resets the PIN to
“0-0-0-0”: MUTE → 8 → 2 → 4 → POWER (on)
[UF6100-AR]BN68-04935A-05ENG.indd 6 2013-10-08 2:14:31

English - 7
Connections
✎
NOTE
• PC(D-Sub) and PC/DVI AUDIO IN input are not supported.
• Connecting through the HDMI cable may not be supported depending on the PC.
• If an HDMI to DVI cable is connected to the HDMI IN 2(DVI) port, the audio does not work.
• For set-top box connection using HDMI cable, we highly recommend you to connect the HDMI IN 1(STB) port.
HDMI IN 2
(DVI)
ANT IN
USB
HDMI IN 1
(STB)
AUDIO OUT
R-AUDIO-L
PR PB Y
COMPONENT OUT
HDMI OUT
AUDIO OUT
R-AUDIO-L
VIDEO OUT
RB
R BRG
WR
WR
R
Y
Y
W R
R
W
W
R
G
OPTICAL
DVI OUT
AUDIO IN
R-AUDIO-L
VHF/UHF Antenna
Cable
USB
or
TV Side Panel
VCR
AV connection
Blu-ray player / DVD
Component connection
TV Rear Panel
✎
The position of port may differ
depending on the model.
HDMI connection
Blu-ray player
/ DVD / Set-top box
PC connection
PC
Audio
connection
(Digital)
Digital Audio
System
Audio
connection
(Analog)
DVD / Home
Theater
[UF6100-AR]BN68-04935A-05ENG.indd 7 2013-10-08 2:14:31

English - 8
Changing the Input Source
Source
TV / HDMI1 / HDMI2/DVI / AV / Component
Use to select TV or other external input sources such as DVD / Blu-ray players / cable box / STB satellite receiver connected to the TV.
✎
Press the SOURCE button. In the displaying Source list, connected inputs will be highlighted.
✎
PC(D-Sub) input is not supported. If you want to connect PC to the TV, you can connect the HDMI to DVI cable with the HDMI IN
2(DVI) port on the TV.
✎
Press the TOOLS button.
• Edit Name
You can set an external input source name you want.
– When connecting a PC to the HDMI IN 2(DVI) port with HDMI cable, you should set the TV to PC mode under Edit Name.
– When connecting a PC to the HDMI IN 2(DVI) port with HDMI to DVI cable, you should set the TV to DVI PC mode under
Edit Name.
– When connecting an AV devices to the HDMI IN 2(DVI) port with HDMI to DVI cable, you should set the TV to DVI Devices
mode under Edit Name.
• Information
You can see detailed information about the connected external device.
[UF6100-AR]BN68-04935A-05ENG.indd 8 2013-10-08 2:14:31

English - 9
How to use the e-Manual
E-MANUAL
You can find instructions about your TV’s features in the e-Manual in your TV. To use, press the E-MANUAL button on
your remote. Move the cursor using the up/down/right/left buttons to highlight a category, then a topic, and then press
the ENTER
E
button. The e-Manual displays the page you want to see.
You can also access it through the menu:
O
MENUm → Support → e-Manual → ENTERE
✎
To return to the e-Manual main menu, press the E-MANUAL button on the remote.
Screen Display
Operation Buttons
}
Index: Displays the index screen.
E
Enter: Selects a category or sub-menu.
e
Exit: Exit the e-Manual.
<Viewing the Contents>
a
Try now: Displays the OSD menu that corresponds to the topic. To return to the e-Manual screen, press the
E-MANUAL button.
b
Home: Moves to the e-Manual home screen.
L
Page: Moves to previous or next page.
{ Zoom: Magnifies a screen.
– Press the
{
(Zoom) button to magnify the screen. You can scroll through the magnified screen by
using the ▲ or ▼ buttons. To return to the screen to normal size, press the RETURN button.
Basic Features
Changing the Preset Picture Mode
Adjusting Picture Settings
Changing the Picture Options
Changing the Preset Sound Mode
Adjusting Sound Settings
}
Index
E
Enter
e
Exit
Currently displayed
video, TV
Programme, etc.
The category list. Press ◄ or ► button to
select the category you want.
Displays the sub-menu list. Use the arrow
buttons on your remote to move the cursor.
Press ENTER
E
button to select the sub-
menu you want.
How to toggle between an e-Manual topic and the corresponding OSD menu(s).
✎
This function is not enabled in some menus.
✎
You cannot use the Tr y now function if the menu is not activated.
Method 1 Method 2
1. If you want to use the menu that corresponds to an e-Manual topic,
press the red button to select Try now.
2. To return to the e-Manual screen, press the E-MANUAL button.
1. Press the ENTER
E
button when a topic is displayed. “Are you sure?”
appears. Select Yes, and then press the ENTER
E
button. The OSD
window appears.
2. To return to the e-Manual screen, press the E-MANUAL button.
How to search for a topic on the index page
✎
This function may not be supported depending on the language.
1. If you want to search a keyword, press the blue button to select Index.
2. Press the ◄ or ► button to select a character order you want.
3. Press the ▲ or ▼ button to select a keyword you want to see, and then press the ENTER
E
button.
4. You can view the corresponding e-Manual instruction screen.
✎
To close the Index screen, press the RETURN button.
[UF6100-AR]BN68-04935A-05ENG.indd 9 2013-10-08 2:14:32

English - 10
Teletext Feature
The index page of the Teletext service gives you information on how to use the service. For Teletext information to be displayed correctly,
channel reception must be stable. Otherwise, information may be missing or some pages may not be displayed.
✎
You can change Teletext pages by pressing the numeric buttons on the remote control.
MEDIA.P
HDMI
E-MANUAL
X
SPORTS
A B C D
1
4
6
0
7
@
!
8
9
2
3
5
1
0
(mode): Selects the Teletext mode (LIST/FLOF). If pressed during LIST mode,
switches the mode to List save mode. In List save mode, you can save a Teletext page
into a list using the
8
(store) button.
2
/
(Teletext on/mix/off): Activates the Teletext mode for the current channel. Press
the button twice to overlap the Teletext mode with the current broadcasting screen.
Press it one more time to exit teletext.
3
1
(sub-page): Displays the available sub-page.
4
8
(store): Stores the Teletext pages.
5
6
(index): Displays the index (contents) page at any time while you are viewing Teletext.
6
4
(size): Displays the teletext on the upper half of the screen in double-size. To move
the text to the lower half of the screen, press it again. For normal display, press it once
again.
7
9
(hold): Holds the display at the current page, in the case that there are several
secondary pages that follow automaticially. To undo, press it again.
8
2
(page up): Displays the next Teletext page.
9
3
(page down): Displays the previous Teletext page.
0
5
(reveal): Displays the hidden text (answers to quiz games, for example). To display
the normal screen, press it again.
!
7
(cancel): Shrinks the Teletext display to overlap with the current broadcast.
@
Colour buttons (red, green, yellow, blue): If the FASTEXT system is used by the
broadcasting company, the different topics on a Teletext page are colour-coded and
can be selected by pressing the coloured buttons. Press the colour corresponding to
the topic of your choice. A new colourcoded page is displayed. Items can be selected in
the same way. To display the previous or next page, press the corresponding coloured
button.
The Teletext pages are organized according to six categories
Part Contents
A
E
F
B C D
A
Selected page number.
B
Broadcasting channel identity.
C
Current page number or search indications.
D
Date and time.
E
Text.
F
Status information. FASTEXT information.
[UF6100-AR]BN68-04935A-05ENG.indd 10 2013-10-08 2:14:32

English - 11
Features
Samsung's SSG-5100GB 3D glasses enable you to view 3D
images on your 3D TV. The Samsung 3D glasses communicate with
Samsung 3D TVs via the 2.4GHz RF band.
✎
The Samsung 3D glasses are only compatible with Samsung
D, E, and F series 3D TV's that were released in 2011, 2012,
and 2013. These 3D glasses cannot be connected to other
Bluetooth devices.
Parts
LED Indicator & Power Button
Liquid crystal shutter
Battery Cover
✎
For details on how to attach the glasses' temples and how to pair
the glasses with the TV, refer to the separate 3D glasses manual.
Pairing 3D Active Glasses
✎
What is Pairing? Pairing is the process of connecting 3D glasses and a
3D TV so that the two devices can exchange data.
✎
Ensure your Samsung TV and 3D glasses are no farther than 19.5 in (50
cm) apart from each other while pairing is in progress.
Operating range
Recommended pairing distance
2~6m
50cm
Turning the glasses on
Press the power button briefly. The
green LED is turned on for 3 seconds.
(Make sure that 3D is activated on the
TV before using the 3D glasses.)
Turning the glasses off
Press the power button briefly. The red
LED is turned on for 3 seconds.
Performing the pairing process
Turn the TV on and let it power up
completely. Press and hold the Power
button on the glasses. The green and
the red LEDs blink alternately for 2
seconds.
Recommended viewing distance
Recommended viewing
distance
2~6m
(6.5 to 19.5 ft)
Recommended pairing
distance
50 cm or less
(19.5 in)
✎
Once the 3D glasses are paired, the remaining battery capacity is
displayed on the TV screen. (This feature only applies to Samsung F series
3D TVs and 3D glasses that have been available since 2013.)
✎
If you keep trying to pair the glasses and the TV, the battery level will
decrease significantly. However, the battery level will recover to a certain
degree in about a minute.
✎
The working distance depends on the existence of obstacles (a person,
metal, walls, etc.) between the glasses and the TV and the strength of the
Bluetooth signal.
✎
Turn off the 3D glasses while they are not in use. If you leave the 3D
glasses on, the battery lifespan decreases.
Pairing steps
1. Turn on the TV, and then move the glasses within 19.5 inches of the TV.
2. Press the power button on the 3D glasses briefly. The 3D glasses will
power on and pairing will start.
3. The message “3D glasses are connected to TV.” will be displayed on the
TV screen when the pairing is successfully completed.
✎
If pairing fails, the 3D glasses will power off.
✎
If the first attempt to pair fails, power the TV off and on again and
perform step 2.
✎
How to pair again: Press the power button on the 3D glasses for
more than 1 second.
<Pairing is needed again in the following situations:>
• If the 3D glasses do not function, even when the power button is pressed,
especially on the 3D TV after a repair.
• If you want to play 3D content on another Samsung 3D TV model that
belongs to the D, E, or F series released in 2011 through 2013.
Replacing the Battery
If the red LED blinks every two seconds continually, replace the battery with a
new one.
Pull the
battery cover
downward
Open the
battery cover
Remove the
battery
Replace the
battery
Push the
battery cover
downward
Close the
battery cover
✎
Insert the "+" side of the battery into the side marked with "+" in the
battery compartment.
✎
To check the remaining battery capacity, refer to the pairing section in this
manual.
Viewing guidelines
• When viewing a 3D video under a fluorescent lamp (50 Hz – 60 Hz) or
3-wavelength lamp, you may notice a small amount of screen flickering.
• If this occurs, dim or turn off the light.
• Switching the input mode while watching a 3D movie may disable the 3D
function on the TV. As a result, the 3D glasses may not function and the
movie may not be displayed properly.
• If the 3D glasses are moved outside of their working distance, the signal
from the TV will disconnect and the glasses' 3D function will turn off after
several seconds.
• The 3D glasses will power off after the 3D function turns off. When this
happens, the red LED will turn on for 3 seconds.
• Under some circumstances, the 3D glasses may malfunction due to
interference from other devices.
• Ensure you are within the working distance of the glasses when you view a
3D video.
• The images may not be viewable in 3D if you move outside of the working
distance for 3 seconds.
• If you lie on your side while watching TV with 3D active glasses, the picture
may appear dark or may not be visible.
• The 3D glasses may not work properly due to interference from other 3D
products or electronic devices that operate on the 2.4GHz frequency such
as a microwave oven or Internet AP. If the 3D function malfunctions due to
interference, please move all other electronic or wireless communication
devices as far away from the glasses and the TV as possible.
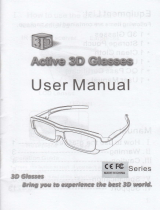
3D Active Glasses - SSG-5100GB
[UF6100-AR]BN68-04935A-05ENG.indd 11 2013-10-08 2:14:33

English - 12
• The 3D effect may be experienced differently depending on the viewer. You
may not notice the 3D effect at all if you wear glasses and have an unusual
prescription.
• If a part of the 3D glasses or lenses is defective or damaged, it cannot be
repaired and the glasses should be replaced. If the glasses stop working
within the warranty period, the glasses can be repaired or replaced for
free. If the glasses have been damaged due to the fault of the customer
or the warranty period has expired, a new pair of glasses will have to be
purchased.
CAUTION!
IMPORTANT HEALTH AND SAFETY INFORMATION FOR 3D
IMAGES. READ THE FOLLOWING CAUTIONS BEFORE YOU
OR YOUR CHILD USE THE 3D FUNCTION.
• Adults should frequently check on children who are using the 3D function. If
there are any complaints of tired eyes, headaches, dizziness or nausea, stop
the child from viewing the 3D TV and ensure that they rest.
• Do not use the 3D glasses for other purposes such as general wear,
sunglasses, protective goggles, etc.
• Some viewers may experience discomfort such as dizziness, nausea and
headaches while viewing 3D TV. If you experience any of these symptoms,
stop viewing the 3D TV, remove the 3D glasses and rest for awhile.
• Watching 3D pictures for an extended period of time may cause eye strain.
If you experience any eye strain, stop viewing the 3D TV, remove the 3D
glasses and rest for awhile.
• Do not use the 3D function or 3D glasses while walking or moving around.
Using the 3D function or 3D Active Glasses while moving around may result
in injury from running into objects, tripping, and/or falling.
SAFETY PRECAUTIONS
The following safety instructions are to ensure your personal
safety and prevent property damage. Please read them to
ensure the proper use of the product.
• Do not place the product in a location exposed to direct sunlight, heat, fire,
or water. Exposure may result in a product malfunction or fire.
• Do not apply force to the lenses of the 3D glasses. Do not drop or bend
the product. Applying force, dropping, or bending may result in a product
malfunction.
• Use only the specified standard batteries. When replacing the battery, insert
the battery so that its polarity (+, –) is correct. Failing to do so may damage
the battery or result in fire, personal injury or environmental damage caused
by liquid leaking from the battery.
• Keep the used battery out of the reach of children so that they do not
accidently swallow the battery. If your child has swallowed the battery,
consult your doctor immediately.
• When cleaning the product, do not spray water or cleaner directly onto the
surface of the product. Spraying water or cleaner directly onto the glasses
may result in fire or electric shock, damage to the product's surface, or
cause the indicator labels on the product's surface to come loose.
• Do not use chemicals containing alcohol, solvents, or surfactants, or
chemicals such as wax, benzene, thinner, mosquito repellant, lubricant or
cleaners. These may cause a discolouration of or cracks in the product
surface and cause the indicator labels on the product's surface to come
loose.
• Since the product surface and lens are easily scratched, make sure to use a
clean soft cloth (a cloth consisting of superfine fibers or cotton flannel) when
cleaning to avoid scratching either the surface or the lens. As the product
may become scratched if there are any foreign items on the cloth, make
sure to shake off any dust before using it.
• Never disassemble, repair, or modify the 3D glasses yourself. Do not use the
glasses when they are out of order or broken.
• Take care that you do not injure your eyes with the edges of the frame of the
3D glasses when wearing them.
• Use your hands to put on or remove the 3D glasses.
Troubleshooting
If you encounter... Try this...
My 3D glasses do not
work.
• Replace the battery.
• The 3D glasses should be close to the TV. Make sure
that the distance between the TV and your 3D glasses
is less than 19.5 feet (6m) in a straight line.
• Check the 3D function settings of your TV.
The LED keeps blinking • The battery is dead. Replace the battery.
Specifications (Model Number: SSG-5100GB)
Optics
Shutters Liquid crystal Transmittance
36±2%
Recommended
viewing distance
2 ~ 6m (6.5 to
19.5 ft)
Field Rate
120 fields/
second
Weight Glasses
21.5g/.76 oz. (including the battery:
24.0±0.5g/.85.±.018oz.)
Power Glasses
One 3V lithium/manganese dioxide battery
3V(CR2025)
Power
Consumption
Glasses 0.85mA (Average)
Battery
Type 165mAh, 3.0V (CR2025)
Operating time
when On
150 hours
Operating
Conditions
Operating
Temperature
10°C 40°C 50°F 104°F
-20°C 45°C -4°F 113°F
~
10°C 40°C 50°F 104°F
-20°C 45°C -4°F 113°F
(
10°C 40°C 50°F 104°F
-20°C 45°C -4°F 113°F
~
10°C 40°C 50°F 104°F
-20°C 45°C -4°F 113°F
)
Custody
Temperature
10°C 40°C 50°F 104°F
-20°C 45°C -4°F 113°F
~
10°C 40°C 50°F 104°F
-20°C 45°C -4°F 113°F
(
10°C 40°C 50°F 104°F
-20°C 45°C -4°F 113°F
~
10°C 40°C 50°F 104°F
-20°C 45°C -4°F 113°F
)
✎
Product specifications may be changed without notice in order to
enhance product performance.
✎
The continuous operating time may differ depending on the wireless
communication environment and usage conditions.
WARRANTY
This Samsung product is warranted for the period of the listed
period at the table (Refer to the warranty period table by the country)
from the original date of purchase, against defective materials and
workmanship. In the event that warranty service is required, you
should first return the product to the retailer from whom it was
purchased. However, Samsung Authorised Service Centres will
comply with this warranty during the Warranty Period. To obtain
details, please contact your nearest Authorised Service Centre.
[UF6100-AR]BN68-04935A-05ENG.indd 12 2013-10-08 2:14:34

English - 13
PROCEDURE FOR MAKING A WARRANTY CLAIM
To make a claim under the warranty, you must contact the
Samsung Centre during the Warranty Period to discuss
the problems you are having with the product. If a repair or
replacement is required, you will be provided with a Warranty
Claim Number and address of an Authorised Service Centre. If
you are provided with a Warranty Claim Number, to obtain a repair
or replacement of the product, you must send the product to the
Authorised Service Centre advised together with:
• a copy of your completed warranty card or, if you have already
provided this to Samsung, your name, address and contact
telephone number;
• your original receipt, invoice or sales slip for the purchase of the
product as new;
• your Warranty Claim Number.
Samsung will then repair or replace the product and return it to
you using the contact details provided.
WARRANTY CONDITIONS
1. The warranty is only valid if the above procedure for making a
warranty claim is followed.
2. Samsung’s obligations are limited to the repair or, at its
discretion, replacement of the product or the defective part.
3. Warranty repairs must be carried out by Samsung Authorised
Service Centres. No re-imbursement will be made for
repairs carried out by service centres or dealers that are
not authorised by Samsung and any such repair work and
damage to the products caused by such repair work will not
be covered by this warranty.
4. This product is not considered to be defective in materials nor
workmanship by reason that it requires adaptation in order to
conform to national or local technical or safety standards in
force in any country other than the one for which the product
was originally designed and manufactured. This warranty
will not cover, and no reimbursement will be made for such
adaptation, nor any damage which may result.
5. The warranty does not apply to any product that has been
damaged or rendered defective as a result of any of the
following excluded reasons, namely:
• as a result of accident, misuse, or abuse;
• through the failure to use this product for its normal
purposes;
• by the use of parts not manufactured or sold by Samsung;
• by modification without the written permission of Samsung;
• by damage resulting from transit, neglect, power surge or
failure;
• by damage resulting from lightning, water, fire, or acts of
God;
• as a result of normal wear and tear; or
• differences in broadcasting methods or product standards
between countries.
6. This warranty is valid for any person who legally acquired
possession of the product during the warranty period.
7. NOTHING IN THESE WARRANTY CONDITIONS SHALL
EXCLUDE OR LIMIT SAMSUNG’S LIABILITY FOR DEATH
OR PERSONAL INJURY CAUSED BY THE PROVEN
NEGLIGENCE OF SAMSUNG, UNLESS SUCH LIMITATION
OR EXCLUSION IS PERMITTED BY APPLICABLE LAW.
8. WITH THE EXCEPTION OF SAMSUNG’S LIABILITY WHICH
CANNOT BE EXCLUDED OR LIMITED BY LAW, SAMSUNG
SHALL NOT BE LIABLE FOR: ANY INDIRECT, INCIDENTAL,
SPECIAL OR CONSEQUENTIAL DAMAGES LOSSES OR
EXPENSES; OR LOST PROFITS; OR LOSS OF USE OR
LOSS OF DATA; OR DAMAGE TO GOODWILL, REPUTATION
OR LOST BUSINESS, ARISING DIRECTLY OR INDIRECTLY,
FROM THE PURCHASE, USE OR SALE OF THE PRODUCT,
WHETHER OR NOT SAMSUNG WAS ADVISED OR AWARE
OF THE POSSIBILITY OF SUCH DAMAGES, LOSSES OR
EXPENSES.
9. WITH THE EXCEPTION OF SAMSUNG’S LIABILITY WHICH
CANNOT BE EXCLUDED OR LIMITED BY LAW, SAMSUNG’S
LIABILITY UNDER OR IN CONNECTION WITH THIS
WARRANTY OR THE PURCHASE, USE OR SALE OF THE
PRODUCT SHALL NOT EXCEED THE PRICE PAID FOR THE
PRODUCT AS NEW.
10. UNLESS PROVIDED FOR IN THIS WARRANTY, ALL
CONDITIONS, WARRANTIES AND TERMS IMPLIED BY
STATUTE OR OTHERWISE ARE HEREBY EXCLUDED TO
THE MAXIMUM EXTENT PERMISSIBLE BY LAW.
11. The above warranty conditions do not affect your statutory
rights as a consumer or otherwise.
Botswana UAE
BTA
REGISTERED No. :
BTA/TA/2012/385
TRA
REGISTERED No. :
ER0101541/13
DEALER No. : 0016333/08
Mozambique Zambia
Approval No : 18ETA12
Model : SSG-5100GB
ZMB/ZICTA/TA/
2013/1/1
Pakistan
Approved by PTA (2013)
Model : SSG-5100GB
South Africa
TA-2012/1903
APPROVED
Mauritania
AGREE PAR L’ANRT Mauritanie
Numéro d’agrément : 0099/ARE/2012
Date d’agrément : 02/12/2012
Philippine
NTC TAC
No.: ESD-1307130C
[UF6100-AR]BN68-04935A-05ENG.indd 13 2013-10-08 2:14:34

English - 14
Troubleshooting
If the TV seems to have a problem, first try this list of possible problems and solutions. If none of these troubleshooting tips apply, visit
“www.samsung.com”, then click on Support, or call Samsung customer service centre.
Issues Solutions and Explanations
Picture Quality
First of all, please perform the Picture Test and confirm that your TV is properly displaying test image.
(go to MENU - Support - Self Diagnosis - Picture Test) If the test image is properly displayed, the poor
picture may caused by the source or signal.
The TV image does not look as
good as it did in the store.
• If you have an analogue cable/set top box, upgrade to a digital set top box. Use HDMI or Component
cables to deliver HD (high definition) picture quality.
• Cable/Satellite subscribers: Try HD stations from the channel line up.
• Aerial connection: Try HD stations after performing Auto tuning.
✎
Many HD channels are up scaled from SD (Standard Definition) contents.
• Adjust the Cable/Set top box video output resolution to 1080i or 720p.
• Make sure you are watching the TV at the minimum recommended distance based on the size and
definition of the signal.
The picture is distorted:
macroblock error, small block,
dots, pixelization
• Compression of video contents may cause picture distortion especially in fast moving pictures such as
sports and action movies.
• Low signal level or bad quality can cause picture distortion. This is not a TV issue.
• Mobile phones used close to the TV (cca up to 1m) may cause noise in picture on analogue and digital
T V.
Colour is wrong or missing.
• If you’re using a component connection, make sure the component cables are connected to the
correct jacks. Incorrect or loose connections may cause colour problems or a blank screen.
There is poor colour or
brightness.
• Adjust the Picture options in the TV menu. (go to Picture Mode / Colour / Brightness / Sharpness)
• Adjust Energy Saving option in the TV menu. (go to MENU - System - Eco Solution - Energy
Saving)
• Try resetting the picture to view the default picture settings. (go to MENU - Picture - Reset Picture)
There is a dotted line on the
edge of the screen.
• If the picture size is set to Screen Fit, change it to 16:9.
• Change cable/satellite box resolution.
The picture is black and white.
• If you are using an AV composite input, connect the video cable (yellow) to the Green jack of
component input 1 on the TV.
When changing channels, the
picture freezes or is distorted or
delayed.
• If connected with a cable box, please try to reset the cable box. Reconnect the AC cord and wait until
the cable box reboots. It may take up to 20 minutes.
• Set the output resolution of the cable box to 1080i or 720p.
Sound Quality
First of all, please perform the Sound Test to confirm that your TV audio is properly operating. (go to
MENU - Support - Self Diagnosis - Sound Test)
If the audio is ok, the sound problem may be caused by the source or signal.
There is no sound or the sound
is too low at maximum volume.
• Please check the volume of the device connected to your TV.
The picture is good but there is
no sound.
• Set the Speaker Select option to TV Speaker in the sound menu.
• If you are using an external device, make sure the audio cables are connected to the correct audio input
jacks on the TV.
• If you are using an external device, check the device’s audio output option (ex. you may need to change
your cable box’s audio option to HDMI when you have a HDMI connected to your TV).
• If you are using a DVI to HDMI cable, a separate audio cable is required.
• Reboot the connected device by reconnecting the device’s power cable.
The speakers are making an
inappropriate noise.
• Check the cable connections. Make sure a video cable is not connected to an audio input.
• For aerial or cable connections, check the signal strength. Low signal level may cause sound distortion.
[UF6100-AR]BN68-04935A-05ENG.indd 14 2013-10-08 2:14:35

English - 15
Issues Solutions and Explanations
No Picture, No Video
The TV will not turn on.
• Make sure the AC power cord is securely plugged in to the wall outlet and the TV.
• Make sure the wall outlet is working.
• Try pressing the POWER button on the TV to make sure the problem is not the remote. If the TV turns
on, refer to “The remote control does not work” below.
The TV turns off automatically.
• Ensure the Sleep Timer is set to Off in the Time menu.
• Make sure the AC power cord is plugged in securely to the wall outlet and the TV.
• When watching TV from an aerial or cable connection, the TV will turn off after 10 ~ 15 minutes if there
is no signal.
You can not play 3D videos in
some of the BD players.
• Take out the disk from player and put it again, or restart the BD player.
There is no picture/video.
• Check cable connections (remove and reconnect all cables connected to the TV and external devices).
• Set your external device’s (Cable/Set top Box, DVD, Blu-ray etc) video outputs to match the
connections to the TV input. For example, if an external device’s output is HDMI, it should be connected
to an HDMI input on the TV.
• Make sure your connected devices are powered on.
• Be sure to select the TV’s correct source by pressing the SOURCE button on the remote control.
Aerial (Air/Cable) Connection
The TV is not receiving all
channels.
• Make sure the Aerial cable is connected securely.
• Please try Setup (Initial setup) to add available channels to the channel list. Go to MENU - System -
Setup (Initial setup) and wait for all available channels to be stored.
• Verify the Aerial is positioned correctly.
The picture is distorted: macro
block error small block, dots,
pixelization
• Compression of video contents may cause picture distortion, especially on fast moving pictures such as
sports and action movies.
• A low signal can cause picture distortion. This is not a TV issue.
PC Connection
A “Mode Not Supported”
message appears.
• Set your PC’s output resolution so it matches the resolutions supported by the TV.
The video is OK but there is no
audio.
• If you are using a HDMI connection, check the audio output setting on your PC.
Others
The picture will not display in full
screen.
• HD channels will have black bars on either side of the screen when displaying up scaled SD (4:3)
contents.
• Black bars on the top and bottom will appear during movies that have aspect ratios different from your
T V.
• Adjust the picture size options on your external device or TV to full screen.
The remote control does not
work.
• Replace the remote control batteries with the poles (+/–) in the right direction.
• Clean the sensor’s transmission window on the remote.
• Try pointing the remote directly at the TV from 5~6 feet away.
The cable/set top box remote
control doesn’t turn the TV on or
off, or adjust the volume.
• Programme the Cable/Set top box remote control to operate the TV. Refer to the Cable/Set top box
user manual for the SAMSUNG TV code.
A “Mode Not Supported”
message appears.
• Check the supported resolution of the TV, and adjust the external device’s output resolution accordingly.
There is a plastic smell from
the TV.
• This smell is normal and will dissipate over time.
TV is tilted to the right or left
side.
• Remove the stand base from the TV and reassemble it.
There are difficulties assembling
the stand base.
• Make sure the TV is placed on a flat surface. If you can not remove the screws from the TV, please use
a magnetized screw driver.
The Broadcasting menu is grey
out (unavailable).
• The Broadcasting menu is only available when the TV source is selected.
[UF6100-AR]BN68-04935A-05ENG.indd 15 2013-10-08 2:14:35

English - 16
Issues Solutions and Explanations
Your settings are lost after 30
minutes or every time the TV is
turned off.
• If the TV is in the Store Demo mode, it will reset audio and picture settings every 30 minutes. If you
want to change the settings from Store Demo mode to Home Use, press the SOURCE button to
select TV mode, and go to MENU → Support → Use Mode.
You have intermittent loss of
audio or video.
• Check the cable connections and reconnect them.
• Loss of audio or video can be caused by using overly rigid or thick cables. Make sure the cables are
flexible enough for long term use. If mounting the TV to the wall, we recommend using cables with 90
degree connectors.
You see small particles when
you look closely at the edge of
the frame of the TV.
• This is part of the product’s design and is not a defect.
You turned the TV off 45
minutes ago, and it turned on
again.
• It is normal. The TV operates the OTA (Over The Aerial) function itself to upgrade firmware downloaded
whilst your watching TV.
There are recurrent picture/
sound issues.
• Check and change the signal/source.
A reaction may occur between
the rubber cushion pads on the
base stand and the top finish of
some furniture.
• To prevent this, use felt pads on any surface of the TV that comes in direct contact with furniture.
✎ This TFT LED panel uses a panel consisting of sub pixels which require sophisticated technology to produce. However, there may be a few bright or
dark pixels on the screen. These pixels will have no impact on the performance of the product.
✎
You can keep your TV as optimum condition upgrading the latest firmware on web site (www.samsung.com
→
Support) by USB.
[UF6100-AR]BN68-04935A-05ENG.indd 16 2013-10-08 2:14:35

English - 17
Installing the Wall Mount
The wall mount kit (sold separately) allows you to mount the TV on
the wall. For detailed information on installing the wall mount, see
the instructions provided with the wall mount. Contact a technician
for assistance when installing the wall mount bracket. We do not
advice you to do it yourself.
Samsung Electronics is not responsible for any damage to the
product or injury to yourself or others if you select to install the TV
on your own.
Remove the screws from the Wall Mount hole, before
installing the Wall Mount. (UA60F6100)
Wall Mount Kit Specifications (VESA)
✎
Wall mount kit is not supplied but sold separately.
Install your wall mount on a solid wall perpendicular to the floor.
When attaching to other building materials, please contact your
nearest dealer. If installed on a ceiling or slanted wall, it may fall
and result in severe personal injury.
✎
NOTE
• Standard dimensions for wall mount kits are shown in the
table below.
• When purchasing our wall mount kit, a detailed installation
manual and all parts necessary for assembly are provided.
• Do not use screws that do not comply with the VESA
standard screw specifications.
• Do not use screws longer than the standard dimension, as
they may cause damage to the inside of the TV set.
• For wall mounts that do not comply with the VESA
standard screw specifications, the length of the screws
may differ depending on their specifications.
• Do not fasten the screws too strongly, this may damage
the product or cause the product to fall, leading to
personal injury. Samsung is not liable for these kinds of
accidents.
• Samsung is not liable for product damage or personal
injury when a non-VESA or non-specified wall mount
is used or the consumer fails to follow the product
installation instructions.
• Do not exceed 15 degrees tilt when mounting this TV.
Models VESA Spec. (A * B) Standard Screw Quantity
UA32F6100 /
UA40F6100
200 X 200
M8 4
UA46F6100 /
UA50F6100 /
UA55F6100 /
UA60F6100
400 X 400
Do not install your Wall Mount
Kit while your TV is turned on. It
may result in personal injury due
to electric shock.
Securing the TV to the Wall
Caution: Pulling, pushing, or climbing onto the
TV may cause the TV to fall. In particular, ensure
that your children do not hang over or destabilize
the TV; doing so may cause the TV to tip over,
resulting in serious injuries or death. Follow all
safety precautions provided on the included Safety
Flyer. For added stability, install the anti-fall device
for safety purposes, as follows.
To avoid the TV from falling
Wall
1. Put the screws into the clamps and firmly fasten them onto
the wall. Confirm that the screws have been firmly installed
onto the wall.
✎
You may need additional material such as an anchor
depending on the type of wall.
✎
Since the necessary clamps, screws, and string are not
supplied, please purchase these additionally.
2. Remove the screws from the centre back of the TV, put the
screws into the clamps, and then fasten the screws onto the
TV again.
✎
Screws may not be supplied with the product. In this
case, please purchase the screws of the following
specifications.
3. Connect the clamps fixed onto the TV and the clamps fixed
onto the wall with a strong string and then tie the string tightly.
✎
NOTE
• Install the TV near to the wall so that it does not fall
backwards.
• It is safe to connect the string so that the clamps fixed
on the wall are equal to or lower than the clamps fixed
on the TV.
• Untie the string before moving the TV.
4. Verify all connections are properly secured. Periodically check
connections for any sign of fatigue for failure. If you have
any doubt about the security of your connections, contact a
professional installer.
[UF6100-AR]BN68-04935A-05ENG.indd 17 2013-10-08 2:14:36

English - 18
Anti-theft Kensington Lock
The Kensington Lock is not supplied by Samsung. It is a device
used to physically fix the system when using it in a public place.
The appearance and locking method may differ from the illustration
depending on the manufacturer. Refer to the manual provided with
the Kensington Lock for additional information on proper use.
✎
Please find a “
K
” icon on the rear of the TV. A kensington
slot is beside the “
K
” icon.
✎
The position and colour may differ depending on the model.
<Optional>
To lock the product, follow these steps:
1. Wrap the Kensington lock cable around a large, stationary
object such as desk or chair.
2. Slide the end of the cable with the lock attached through the
looped end of the Kensington lock cable.
3. Insert the locking device into the Kensington slot on the
product.
4. Lock the lock.
✎
These are general instructions. For exact instructions, see
the User manual supplied with the locking device.
✎
The locking device has to be purchased separately.
Storage and Maintenance
✎
If you remove the attached sticker on the TV screen, clean
the residues and then watch TV.
✎
The exterior and screen of the product can get scratched
during cleaning. Be sure to wipe the exterior and screen
carefully using a soft cloth to prevent scratches.
Do not spray water directly onto the
product. Any liquid that goes into the
product may cause a failure, fire, or
electric shock.
Clean the product with a soft cloth
dapped in a small amount of water.
Do not use a flammable liquid (e.g.
benzene, thinners) or a cleaning agent.
Caution of the cover-jack
(UA40F6100 / UA46F6100 / UA50F6100)
Caution
Caution: The cover-jack is for use by qualified service
personnel only. To reduce the risk of electric shock or
fire hazard, do not use the cover jack, unless you are
qualified to do so.
TV Rear Panel
Cover-jack
✎
The rear panel may differ depending on the model.
[UF6100-AR]BN68-04935A-05ENG.indd 18 2013-10-08 2:14:36

English - 19
Specifications
Environmental Considerations
Operating Temperature
Operating Humidity
Storage Temperature
Storage Humidity
10°C 40°C 50°F 104°F
-20°C 45°C -4°F 113°F
to
10°C 40°C 50°F 104°F
-20°C 45°C -4°F 113°F
(
10°C 40°C 50°F 104°F
-20°C 45°C -4°F 113°F
to
10°C 40°C 50°F 104°F
-20°C 45°C -4°F 113°F
)
10% to 80%, non-condensing
10°C 40°C 50°F 104°F
-20°C 45°C -4°F 113°F
to
10°C 40°C 50°F 104°F
-20°C 45°C -4°F 113°F
(
10°C 40°C 50°F 104°F
-20°C 45°C -4°F 113°F
to
10°C 40°C 50°F 104°F
-20°C 45°C -4°F 113°F
)
5% to 95%, non-condensing
Display Resolution 1920 X 1080
Sound (Output) 10W X 2
Model Name UA32F6100 UA40F6100 UA46F6100
Screen Size 81 cm 102 cm 117cm
Dimensions (W x H x D)
Body
With stand
74.3 x 44.1 x 4.9 (cm)
74.3 X 50.8 X 19.1(cm)
93.4 x 54.8 x 4.9 (cm)
93.4 X 61.7 X 23.5 (cm)
106.5 x 62.2 x 4.9 (cm)
106.5 X 69.7 X 23.5 (cm)
Weight
Without Stand
With Stand
5.7 kg
6.3 kg
9.1 kg
10.6 kg
11.5 kg
13.0 kg
Model Name UA50F6100 UA55F6100 UA60F6100
Screen Size 126 cm 139 cm 152 cm
Dimensions (W x H x D)
Body
With stand
114.2 x 66.4 x 4.9 (cm)
114.2 X 73.1 X 23.5 (cm)
125.6 x 72.9 x 4.9 (cm)
125.6 X 79.8 X 23.5 (cm)
137.7 x 79.8 x 4.9 (cm)
137.7 X 86.9 X 32.9 (cm)
Weight
Without Stand
With Stand
13.6 kg
15.1 kg
17.5 kg
19.0 kg
23.0 kg
27.2 kg
✎
Design and specifications are subject to change without prior notice.
✎
For information about power supply, and more about power consumption, refer to the label attached to the product.
Manufactured under license from Dolby
Laboratories. Dolby and the double-D symbol are
trademarks of Dolby Laboratories.
Manufactured under a license from U.S. Patent
No’s: 5,956,674, 5,974,380, 5,978,762,
6,487,535, 6,226,616, 7,212,872, 7,003,467,
7,272,567, 7,668,723, 7,392,195, 7,930,184,
7,333,929 and 7,548,853. DTS, the Symbol,
and DTS and the Symbol together are registered
trademarks & DTS Premium Sound | 5.1 is a
trademark of DTS, Inc. ©2012 DTS, Inc. All Rights
Reserved.
Manufactured under a license from U.S. Patent
No’s: 6,285,767, 8,027,477, 5,319,713,
5,333,201, 5,638,452, 5,771,295, 5,970,152,
5,912,976, 7,200,236, 7,492,907, 8,050,434,
7,720,240, 7,031,474, 7,907,736 and 7,764,802.
DTS, the Symbol, and DTS and the Symbol
together are registered trademarks & DTS Studio
Sound is a trademark of DTS, Inc. ©2012 DTS,
Inc. All Rights Reserved.
The terms HDMI and HDMI High-Definition
Multimedia Interface, and the HDMI Logo are
trademarks or registered trademarks of HDMI
Licensing LLC in the United States and other
countries.
DivX Certified® to play DivX® video up to HD
1080p, including premium content.
ABOUT DIVX VIDEO: DivX® is a digital video format created by DivX, LLC, a
subsidiary of Rovi Corporation. This is an official DivX Certified® device that
plays DivX video. Visit divx.com for more information and software tools to
convert your files into DivX videos.
ABOUT DIVX VIDEO-ON-DEMAND: This DivX Certified® device must be
registered in order to play purchased DivX Video-on-Demand (VOD) movies.
To obtain your registration code, locate the DivX VOD section in your device
setup menu. Go to vod.divx.com for more information on how to complete
your registration. Covered by one or more of the following U.S. patents :
7,295,673; 7,460,668; 7,515,710; 7,519,274
DivX®, DivX Certified® and associated logos are trademarks of Rovi
Corporation or its subsidiaries and are used under license.
Open source licence notice
In the case of using open source software, Open Source Licences are
available on the product menu.
Open Source Licence Notice is written only English.
Licence
[UF6100-AR]BN68-04935A-05ENG.indd 19 2013-10-08 2:14:37

English - 20
Supported Video Formats
File Extention Container Video Codec Resolution Frame rate (fps) Bit rate (Mbps) Audio Codec
*.avi / *.mkv
*.asf / *.wmv
*.mp4 / *.3gp
*.vro / *.mpg
*.mpeg / *.ts
*.tp / *.trp
*.mov / *.flv
*.vob / *.svi
*.divx
AVI
MKV
ASF
MP4
3GP
MOV
FLV
VRO
VOB
PS
TS
DivX 3.11/4.x/5.x/6.x
1920 x 1080
6~30
30
AC3
LPCM
ADPCM
(IMA, MS)
AAC
HE-AAC
WMA
DD+
MPEG (MP3)
DTS (Core)
G.711(A-Law, μ-Law)
MPEG4 SP/ASP
H.264 BP/MP/HP
Motion JPEG 640 x 480 8
Window Media Video v9
1920 x 1080
30
MPEG2
MPEG1
*.webm WebM VP8 20 Vorbis
✎
Other Restrictions
• Video content will not play, or not play correctly, if there is an error in the content or the container.
• Sound or video may not work if the contents have a standard bit rate/frame rate above the compatible Frame/sec listed in the table.
• If the Index Table is in error, the Seek (Jump) function is not supported.
• Some USB/digital camera devices may not be compatible with the player.
• The menu can be displayed late if the video is over 10Mbps(bit rate).
Video decoder Audio decoder
• Supports up to H.264, Level 4.1 (FMO/ASO/RS are not supported.)
• frame rate :
- Below 1280 x 720: 60 frame max
- Above 1280 x 720: 30 frame max
• VC1 AP L4 is not supported.
• GMC 2 or higher is not supported.
• WMA 10 Pro supports up to 5.1 channel and M2 profile.
• WMA lossless audio is not supported.
• Vorbis supports up to 2ch.
• DD+ supports up to 5.1 channel.
Supported Subtitle Formats
• External
Name File extension
MPEG-4 timed text .ttxt
SAMI .smi
SubRip .srt
SubViewer .sub
Micro DVD .sub or .txt
SubStation Alpha .ssa
Advanced SubStation Alpha .ass
Powerdivx .psb
• Internal
Name Container Format
Xsub AVI Picture Format
SubStation Alpha MKV Text Format
Advanced SubStation Alpha MKV Text Format
SubRip MKV Text Format
MPEG-4 Timed text MP4 Text Format
Supported Photo Formats
File Extension Type Resolution
*.jpg
*.jpeg
JPEG 15360 X 8640
*.bmp BMP 4096 X 4096
*.mpo MPO 15360 X 8640
✎
The MPO type file does not support Zoom, Rotate and Slide
Show Effect functions.
Supported Music Formats
File Extension Type Codec Remark
*.mp3 MPEG MPEG1 Audio Layer 3
*.m4a
*.mpa
*.aac
MPEG4 AAC
*.flac FLAC FLAC Supports up to 2ch.
*.ogg OGG Vorbis Supports up to 2ch.
*.wma WMA WMA
WMA 10 Pro supports up to 5.1 channel
and M2 profile. (WMA lossless audio is
not supported.)
*.wav wav wav
*.mid
*.midi
midi midi type 0 and type 1
[UF6100-AR]BN68-04935A-05ENG.indd 20 2013-10-08 2:14:38
/