Page is loading ...

Made by
Handbook
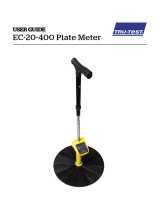
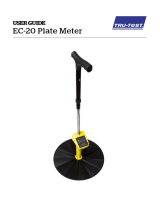
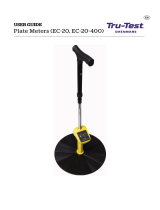
EC20 Platemeter

sales@nzagriworks.com
Contents
1 Introduction/safety warning
2 Assembly instructions
3 Handle assembly
4 Operating the electronic counter
4-5 Operation
5 Using your platemeter
5 Maintenance
6 Faultnding
To use the EC20 you will need an Android device with the following
features:
Version 4.3 or newer
GPS location if using auto paddock recognition provided by Farm IQ.
Wiifyoudonothaveaphoneconnection
Bluetooth to connect to EC20 Hardware devices
File Ref: Handbook EC20 generic

1
Introducon
Congratulations on the purchase of your EC20 platemeter. This meter is a highly
engineered precision device for measuring the average height of pasture relative
to density of the pasture. This is directly relative to the quantity of dry matter pres-
ent (Kilograms of dry matter.) (kgDM/ha)
Operating the EC20 platemeter is a simple learning process, and you will soon
ndittobeaninvaluabletoolinyourfarmingoperationforday-to-dayfeeding
decisions and long-term feed budgeting.
Safety
Read and understand all the instrucons before using the platemeter. A copy of
this user guide can be downloaded from www.jenquip.co.nz or www.nzagriworks.
co.nz
Your platemeter is designed only for measuring pastures. Use it for no other
purpose (e.g. it is not a walking sck.) This platemeter has been manufactured
using quality materials and techniques, however, if faults do occur, have them
corrected before you use the platemeter.
Be careful around electric fences. Parts of the platemeter will conduct
electricity!
Store the plate correctly. Be careful that the wind does not blow the plate away. It
is not to be thrown.
Water blasng or submerging the unit will void the warranty.
!

Assembly Instrucons
The platemeter is supplied in three parts:
The plate
The plate sits on top of the pasture to establish average height and density. The
area-to-weight rao of the plate has been carefully calibrated.
The rod with meter
The grooved rod allows pasture to be measured in 0.5 cm intervals (clicks). The
rod includes the electronic meter.
The handle
Aach top handle to the rod. Ensure that the rod does not fall through the coun-
ter as this will damage the gear and void warranty.
2

3
Handle assembly
Screw top handle onto the top of the
grooved rod where it comes out of
the counter.
Put 4 drops of thread locker into the
female end.
Screw threaded rod extension into grooved
rod and do up rmly by hand,
wiping o any excess thread locker that may
have leaked out with a dry cloth. Do not use
tools as this will damage the grooved rod.
Refer to page 4 of this manual for zero
calibraon before use.
Grooved Rod Extension (for the
400mm model)
Turn upside down and slip o the O ring.

Operang the electronic counter
Switching the unit on and o
The platemeter is switched on and o using the
black switch at the back of the unit. O is in the
‘down’ posion. When the unit is switched o no
lights are displayed on the counter.
Rubber Bung
On/o switch
4
Operaon
To turn the unit off, hold down the power switch for one second, until the tune
signals the unit is off.
If left on, the unit will turn off automatically after 15 minutes if no “plonking” action
has occurred.
The product consumes about 10 to 20 mA when switched on, depending on the
battery voltage and whether it is beeping. This could be used to estimate run
times on rechargeable NiMh battery packs.
The“BatteryStatus”LEDshowsgreenforthersthalfofthebatterylife.As
the battery becomes weaker, the LED will gradually change to orange, then red
whenitisat6V.From6Vto5V,theLEDwillslowlyashredindicatingthere
is approximately one hour of life left. A good quality alkaline battery should last
approximately 28 hours or longer. Below 5V, the unit will play a tune and turn off.
Make sure that the Pot Zero Calibration is correct. To do this perform a plonking
action. The unit should beep as the platemeter is lifted off the pasture, registering
the plonk. The Bluetooth link does not need to be active to do this test. If the
phoneAppisconnectedthe“Wireless/Error”LEDshouldbeblueandwillicker
brieyasdataisbeingsenttothephoneApp.
If there is no beep and you continue to perform three plonk actions in a row, the
unit will play a warning alarm sound and the Wireless/Error” LED will blink four
times red: “Ze-ro-Er-ror”. This means that the Pot has not returned to “Zero”
between each plonk. No plonk data is sent to the phone in this condition, although
thephoneAppisnotiedoftheerrorcondition,socouldbeenhancedtoinstruct
the user to perform a zero-calibration procedure on the EC20.

5
Every 20 seconds the warning alarm will be heard
until the unit is turned off or a screwdriver is used
to zero out the potentiometer. To zero out, insert
screwdriver into the slot. Turn anti clockwise gently
until the potentiometer stops turning. Overturning will
damage potentiometer and void warranty.
If the EC20 does not beep with a plonk action the
Android App may have “Paused” the paddock data
collection. When the “Resume” button is pressed on
the phone, the EC20 will continue to collect new data
for the paddock.
The Bluetooth module is set to its lowest power level so that battery life
is conserved. The phone should be kept within four meters of the EC20 to
ensure the wireless link is preserved.
Using Your Platemeter
Technique: practice the technique of an uninterrupted slow walking pace, taking
care not to “roll” the meter. (This is where the plate is not square to the ground
and it will provide a false HIGH reading.) The meter should also be lowered
consistently—not gently but not forced into the ground either.
Farm Walk: the more regularly you take readings the better. Astute farmers will
take readings weekly, sometimes more often during critical times of the year and
less frequently during times of static conditions.
The more samples taken per paddock the less margin of error. We recommend 20
to 40 samples per paddock but if you have bad conditions i.e. pugged paddocks,
then more samples should be taken.
Most paddocks will have areas of good growth and areas of poor growth. If
recently grazed, the pasture may be clumpy. Ensure that your walk includes
representative samples of both areas. Avoid tracks, stock camp sites and other
uncharacteristic areas.

6
Using your platemeter (connued)
Take samples every three paces or so, rather than choosing by eye the spot to
sample. This removes operator preference for long or short patches.
Be consistent. Plan the same walk every me, although it can be done in reverse.
this allows for each walk to be compared with another.
Maintenance
Your meter has been developed over a number of years to be simple, effective
and reliable. However a little maintenance will ensure many years of trouble free
use from this meter.
Before Use
After assembling the plate onto the counter move the plate up and down a few
times to ensure no binding occurs. If its movement is restricted the reason must
befoundandrectiedbeforethemeterisused.
Aer Use
Remove the plate and wash it clean.
Wash / wipe and dry the area around the bottom of the meter. Move the counter
so that all dirt and accumulated grass can be washed away.

7
Check
The cog is worn
Potentiometer damaged. The
Potentiometer is the shaft part
that drives the cog. NB: Under
no circumstances should you
apply CRC or a light oil to the
potentiometer. It is a dry bearing
and any lubricant will render the
potentiometer useless).
Resolution
Replace. Request a spare cog
from your service agent.
Send to your service agent for
repair.
Platemeter not running freely
(low results):
Check
Metal shaft is bent
Grass or soil build-up inside case
Flutes on steel shaft have become
lledwithgrassorsoil
Resolution
Straighten or request a replace-
ment part from your service agent
Clean the platemeter
Clean the platemeter
Fault Finding
NOTE: Most problems are due to the counter being out of calibration (see
following points as to why. If in doubt it is worth zero calibrating just to make sure
it is correct.
The counter does not “beep” when taking a reading
If it doesn’t beep this means the counter does not know where the bottom is -
therefore does not record the “plonk”.
/


