Page is loading ...

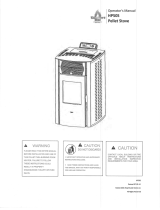
PelPro Cast Iron Pellet Stove
PelPro Cast Iron Pellet Stove
Please read th i s en ti re man u al b ef ore i n stallati on an d u se of th i s pellet f u el-b u rn i n g room h eater, an d save f or f u tu re ref er-
en ce. F ai lu re to f ollow th ese i n stru cti on s cou ld resu lt i n property d amag e, b od i ly i n j u ry or even d eath . Con tact local b u i ld i n g or
re ofcials about restrictions and installation inspection requirements in your area.
Note: T o ob tai n a F ren ch tran slati on of th i s man u al, please con tact yo u r d ealer or vi si t w w w .pelprostoves.com. Pou r ob ten i r
u n e trad u cti on f ran cai se d e ce man u el, s’ i l vou s plai t con tracter votre reven d eu r ou vi si tez w w w .pelprostoves.com
WARNING!

PelPro Cast Pellet Stove • 7093-600 • 07/13/16 pelprostoves.com2
Get to Know Your PelPro® Stove
Vacuum SwitchDigital Control
Ambient Probe
Convection Blower
Outside Air
Connection
Optional External
Thermonstat Connection
Vacuum Switch
Exhaust Blower
Exhaust Probe
Exhaust
Connection
Snap Disc
Drop Tube
Firepot
Igniter
(Behind Firepot)
Baffles (3)
Safety First!
Safety Alert Key: It is important to pay attention to alerts you will see throughout this manual to ensure your safety.
• DANGER! I n d i cates a h aza rd ou s si tu ati on w h i ch , i f n ot avoi d ed w i ll resu lt i n d eath or seri ou s i n j u ry .
• WARNING! I n d i cates a h aza rd ou s si tu ati on w h i ch , i f n ot avoi d ed cou ld resu lt i n d eath or seri ou s i n j u ry .
• CAUTION! I n d i cates a h aza rd ou s si tu ati on w h i ch , i f n ot avoi d ed , cou ld resu lt i n mi n or or mod erate i n j u ry .
• Notice: I n d i cates practi ces w h i ch may cau se d amag e to th e appli an ce or to property .
• Pro Tip: I n d icates ad d ition al in f ormation to h elp yo u b etter u n d erstan d yo u r stove an d optimize its perf orman ce.
Notice: Fire Risk
Pelpro d i sclai ms an y respon si b i li ty , an d th e w arran ty an d ag en cy li sti n g w i ll b e voi d ed , b y th e b elow acti on s.
DO NOT:
• I n stall or operate d amag ed appli an ce
• M od i f y appli an ce
• I n stall oth er th an as in stru cted b y th e man u f actu rer
• O perate th e appli an ce w i th ou t f u lly assemb li n g all compon en ts
• Over re (burning at higher temperatures than recommended causing permanent damage to the stove)
• I n stall an y compon en t n ot approved b y th e man u f actu rer
• I n stall parts or compon en ts n ot li sted or approved
• D isab le saf ety sw itch es
I mproper i n stallati on , ad j u stmen t, alterati on , servi ce or mai n ten an ce can cau se i n j u ry or property d amag e. F or assi stan ce
or additional information, consult a qualied installer, service agency or your dealer.
DANGER! H O T SU R F A CE S!
G lass an d oth er su rf aces are h ot d u ri n g operati on A N D cool d ow n .
Hot glass will cause burns.
• D o n ot tou ch g lass u n ti l i t i s cooled
• N E V E R allow ch i ld ren to tou ch g lass
• K eep ch i ld ren aw ay; i f yo u exp ect th at ch i ld ren may come i n to con tact w i th th i s appli an ce, w e recommen d a b arri er
such as a decorative screen (see your retailer for suggestions)
• CA R E F U L L Y SU PE R V I SE ch ild ren in same room as stove
• A lert ch i ld ren an d ad u lts to h aza rd s of h i g h temperatu res
High temperatures may ignite clothing or other ammable materials.
• Keep clothing, furniture, draperies and other ammable materials away

PelPro Cast Pellet Stove • 7093-600 • 07/13/16pelprostoves.com 3
Table of Contents
Getting Started........................................................4
• Pallet removal
• W h at’ s i n clu d ed
• W h at yo u ’ll n eed
Installing Your Stove...............................................6
• G etti n g read y
• Placi n g yo u r stove
• V en ti n g yo u r stove
Using Your Stove..................................................13
• Starti n g yo u r stove
• W h at to exp ect
• Comf ort setti n g s
• T u rn i n g yo u r stove of f
Maintaining Your Stove........................................18
• W h at yo u may n eed
• W h ere, w h en an d h ow
Troubleshooting....................................................22
• Pow er related
• B locka g e related
Support...................................................................27
• Con tact i n f ormati on
• O rd eri n g Parts
Listings and Certications...................................28
• M ob i le h ome approval
• Glass specication
• Efciencies
• Stove d i men si on s
• W arran ty

PelPro Cast Pellet Stove • 7093-600 • 07/13/16 pelprostoves.com4
Getting Started
WARNING!
I n spect appli an ce an d compon en ts f or d amag e.
D amag ed parts may i mpai r saf e operati on .
• D o N O T in stall d amag ed compon en ts.
• D o N O T in stall in complete compon en ts.
• D o N O T in stall su b stitu te compon en ts.
R eport d amag ed parts to con su mer care.
Getting Started
Pallet Removal
T h ere are b olts h old i n g y ou r PelPro stove i n place
on th e pallet. T o remove y ou r stove f rom th e pallet:
What’s Included
1 2
U sin g a 3/8 ” w ren ch ,
remove each b olt b y
reach i n g u n d er yo u r
stove. T i p yo u r stove
to opposi te si d e an d
pu sh b racke t i n w ard ;
set stove d ow n an d
repeat on oth er sid e.
U sin g a 7/16” w ren ch ,
remove all f ou r b olts
attach i n g th e sh i ppi n g
b racke t to pallet.
O w n er’s
man u al D oor h an d leClean i n g tool Pow er cord
Pallet Removal
V i sit pelprostoves.com
or scan th i s cod e.
O u tsi d e ai r ki t
compon en ts:
2 ” F lex h ose T ermi n ati on Cap H ose clamp Screws (4)
CAUTION!
Risk of cuts, abrasions or ying debris. Wear
protecti ve g loves & saf ety g lasses d u ri n g i n stall.
M etal ed g es are sh arp.
O n li n e I n stallati on &
T rou b le Sh ooti n g V id eos

PelPro Cast Pellet Stove • 7093-600 • 07/13/16pelprostoves.com 5
Getting Started
Getting Started
What You’ll Need
Tools & Supplies
• H ig h temperatu re si li con e
(500°F+)
• L evel
• Ph i lli ps screw d ri ver
• Plu mb lin e
• T ape measu re
• Framing square
• R eciprocati n g saw
• E lectri c d ri ll & b i ts
• Cau lki n g g u n
• Stud nder
• U tili ty kn i f e
• Pli ers
• F lash li g h t
• H ammer
Safety Equipment
R ecommen d ed f or all in stallation an d mai n ten an ce steps.
Pellet Vent Pipe
Must be an approved 3” or 4” diameter Type “L” or “PL” vent. Use 4” diameter vent if ue height
is over 15’ or if installation is over 3,000 ft. above sea level.
Floor Protection
N on -comb u stib le material
(such as a hearth pad) is
required underneath your
stove.
Surge Protector
Protect th e electri cal
compon en ts of yo u r stove
b y u sin g a su rg e protector.
Pellet Fuel
U se on ly w ood pellets
i n yo u r stove. F or b est
perf orman ce, u se
premi u m, low -ash pellets
(<1%) less than 1.5” in
len g th an d avoid th e d u sty
b i ts an d pi eces of pellets
i n th e b ottom of th e b ag .
WARNING!
F i re R i sk. N O O T H E R ven t compon en ts may b e u sed . Su b sti tu te or d amag ed ven t compon en ts may
i mpai r saf e operati on .
G loves Saf ety G lasses Close-toed sh oes

PelPro Cast Pellet Stove • 7093-600 • 07/13/16 pelprostoves.com6
Installing Your Stove
Installing Your Stove
Your Home Acts Like a Chimney
W e recommen d th at yo u h elp yo u r h ome b y:
1. U si n g a min imu m of 5 f eet of verti cal ven ti n g
2 . U se th e su pplied ou tsi d e ai r ki t
3. Install your stove on a main oor location
T h i s w i ll:
• H elp yo u r stove b reath e
• M i n i mi ze smoke leaka g e i n th e h ou se
• E n h an ce perf orman ce
Clearance to Combustibles
T h e space b etw een yo u r stove an d th e items i n
yo u r h ome th at cou ld b u rn . M aterials su ch as:
• W ood
• Sheet rock (drywall)
• Carpet
A
A
BB
G
E
D
J
Pro Tip
W e h i g h ly recommen d y ou r stove an d pellet ven t pi pe b e i n stalled b y a prof essi on al i n staller. Y ou r
retai ler can mak e recommen d ati on s f or y ou .
I n stallati on M U ST comply w i th local, reg i on al, state an d n ati on al cod es an d reg u lati on s.
Consult insurance carrier, local building inspector, re ofcials or authorities having jurisdic-
ti on over restri cti on s, i n stallati on i n specti on an d permi ts.
1
23
WARNING!
A sph yxi ati on R i sk.
D O N O T I N ST A L L I N A SL E E PI N G R O O M . Con su mes oxyg en i n th e room.
F or Can ad a, th e i n stallati on mu st con f orm to CA N /CSA -B 365
Placement
Where you place your stove can signicantly affect its performance and safety.
Getting Ready

PelPro Cast Pellet Stove • 7093-600 • 07/13/16pelprostoves.com 7
Installing Your Stove
Installing Your Stove
REQUIRED:
U se on ly 3” or 4 ” ty pe “ L ” or “ PL ” pellet pi pe.
CAUTION
• D o n ot con n ect to an y ai r d i stri b u ti on d u ct or sy stem
• Do not install a ue damper in the exhaust venting system of this
stove
• Do not connect this stove to a chimney ue serving another
appli an ce
• The structural integrity of the manufactured home oor, wall and
cei li n g /roof mu st b e mai n tai n ed
C
C
Installation Video
V i si t pelprostoves.com or scan th i s cod e:
Pro Tip
This unit can be installed with a 3 to 6 inch (76-152mm) Top Vent Offset Adapter Kit. The 3
to 6 inch (76-152mm) Top Vent Offset Adapter are tested to use 24 gauge single wall ue
connector or Listed double wall ue connector to Class A Listed metal chimneys, or masonry
chimneys meeting International Conference of Building Ofcials (ICBO) standards for solid
f u el appli an ces.
Getting Ready (Continued)
Pellet Venting
Adding bends in the exhaust path restricts air ow,
red u ces perf orman ce an d provi d es a collecti on poi n t
for ash deposits requiring more frequent cleaning.

PelPro Cast Pellet Stove • 7093-600 • 07/13/16 pelprostoves.com8
Installing Your Stove
Vent Termination Clearances
Installing Your Stove
A
D
B
L
C
K
J
B
I
H
G
F
Clearan ces
A 12 ” Clearance above grade, veranda porch, deck or balcony (Including vegetation and mulch)
B12 ” w ith ou tsi d e ai r ki t
4 8 ” n o ou tsi d e ai r ki t Clearan ce b esi d e or b elow an y w i n d ow s or d oors th at open
12 ” * Clearan ce ab ove an y w i n d ow or d oor th at open s
C 18 ” Vertical clearance to ventilated soft located above the terminal within a horizontal distance of 2 feet from
th e cen ter li n e of th e termi n al
D 12 ” Clearan ce to an ou tsi d e corn er w all
F12 ” w ith ou tsi d e ai r ki t
4 8 ” n o ou tsi d e ai r ki t Clearan ce to a n on -mech an i cal air su pply i n let to th e b u i ld i n g or a comb u sti on ai r in let to an y oth er
appli an ce
G 36” Clearan ce to a mech an i cal air su pply i n let
H 8 4 ” * * Clearan ce ab ove a paved si d ew alk or paved d ri vew ay located on pu b li c property
I 12 ” * * Clearan ce u n d er a veran d a, porch , d eck or b alcon y
J 12 ” Clearan ce ab ove th e roof
K 2 4 ” Clearan ce f rom an ad j acen t w all in clu d i n g n ei g h b ori n g b u i ld i n g s
L36” w ith i n a h ei g h t of 15
f eet ab ove th e meter /
reg u lator assemb ly
Clearan ce to each si d e of cen ter li n e ext en d ed ab ove n atu ral g as or propan e meter / reg u lator assemb ly
or mech an i cal ven t
Notice:
Do NOT terminate vent:
• In any location that will allow ue gases or soot from
en teri n g or stai n i n g th e b u i ld i n g
• I n an y locati on w h i ch cou ld create a n u i san ce or h aza rd
• I n an y en closed or semi -en closed area su ch as a
carport, g arag e, atti c, craw l space, u n d er a su n d eck or
porch or n arrow w alkw ay
• Closely f en ced area, or an y locati on th at can b u i ld u p
a con cen trati on of f u mes su ch as a stai rw ell, covered
b reeze w ay , etc.
Notice:
Do NOT terminate below an air inlet.
• It is recommended that at least 60” (1.52m) of vertical
pi pe b e i n stalled w h en appli an ce i s ven ted d i rectly
th rou g h a w all—t h i s w i ll create a n atu ral d raf t, w h i ch
w i ll h elp preven t th e possi b i li ty of smoke or od or
ven ti n g i n to th e h ome d u ri n g a pow er ou tag e
• I t w i ll also ke ep exh au st f rom cau si n g a n u i san ce
or h aza rd b y exp osi n g people or sh ru b s to h i g h
temperatu res
• T h e saf est an d pref erred ven ti n g meth od i s to ext en d
th e ven t verti cally th rou g h th e roof or ab ove th e roof
*Recommended to prevent condensation on windows and thermal breakage. **This is a recommended distance. For additional requirements check local codes.

PelPro Cast Pellet Stove • 7093-600 • 07/13/16pelprostoves.com 9
Installing Your Stove
Installing Your Stove
Conrm required clearances to combustibles:
Notice: B e caref u l to protect th e b ottom of th e stove
and oor surfaces when moving the stove. Bottom
ed g es of stove are sh arp an d can scratch su rf aces.
1
1
2
3
Vertical Installations (Interior Flue)
Straight back against wall I n ch es mm
D B ack w all to pellet pipe 3 76
E Sid e w all to stove 13 330
USA Hearth Pad Requirements I n ch es mm
A Si d es 2 5 1
B B ack 2 5 1
C F ron t 6 15 2
Horizontal Installations
Straight back against wall I n ch es mm
G B ack w all to stove 2 5 1
E Sid e w all to stove 13 330
H Clearan ce to top of stove 7 178
J Clearan ce to f ron t of stove 4 8 12 19
Corner Installation
Straight back against wall I n ch es mm
F W alls to stove 3 76
2
B *
A
C
A
Placing Your Stove
Stove must be installed on a non-combustible oor.
If needed, place oor protection (such as a hearth
pad) beneath the stove. Move stove from pallet onto
yo u r n on -comb u sti b le su rf ace. D o n ot operate th e
stove w h i le i t si ts on th e pallet.
Hearth pad minimum requirements:
Notice: Clearan ces may on ly b e red u ced b y mean s
approved b y th e reg u latory au th ori ty h avi n g j u ri sd i cti on .
Non-combustible oor protection extending beneath the ue pipe is required
w i th h ori zo n tal ven ti n g or u n d er th e top ven t ad apter w i th verti cal i n stallati on .
*Non-combustible oor protection must extend 2 inches (51mm) beneath the
ue pipe when installed horizontal venting or under the top vent adapter with
verti cal i n stallati on . CA N A D A R E Q U I R E D , U SA R E CO M M E N D E D .
3
G
E
D
J
F
F
J
H
J
Canada Hearth Pad Requirements I n ch es mm
A Si d es 8 203
B B ack 2 5 1
C F ron t 6 15 2

PelPro Cast Pellet Stove • 7093-600 • 07/13/16 pelprostoves.com10
Installing Your Stove
Installing Your Stove
Pro Tips
• See venting manufacturer’s required clearances to combustibles
• F or h ori z on tal i n stallati on s, th e mi n i mu m clearan ce f rom ex teri or to termi n ati on cap i s 6” — y ou
may w an t to i n crease to 18 ” clearan ce to mi n i miz e soot b low b ack on h ome ex teri or.
Install venting. (For additional installation options visit pelprostoves.com)
3
Install wall thimble (sold separately) per manufacturer requirements.
2
V ertical - I n teri or, Pref erred I n stallati on
6 in.
(1 5 2 mm)
M in. Clean- out T
Firestop
Flashing
R ain Cap
N on- combustible H earth Pad
1 2 in. (30 5 mm) M inimum
Ceiling Support
Follow pipe manufacturer
listed clearance
E xt eri or - O pti on al I n stallati on s
N on- combustible
H earth Pad
W all Thimble
H oriz ontal
Termination Cap
Termination
Cap
6 in. (1 5 2 mm)
M inimum
6 in.
(1 5 2 mm)
M inimum
Clean Out T
W all Thimble
6 in.
(1 5 2 mm)
M inimum
Venting Your Stove
CAUTION!
T ake appropri ate precau ti on s to locate u ti li ti es w i th i n th e w all an d avoi d con tact.
WARNING!
D o n ot termi n ate ven ti n g i n an y en closed or semi -en closed area
su ch as: a carport, g arag e, atti c, craw l space, u n d er a su n d eck
or porch , n arrow w alkw ay or closely f en ced area, or an y locati on
th at can b u i ld u p a con cen trati on of f u mes su ch as a stai rw ell,
covered b reeze w ay , etc.
CAUTION!
E n su re th at yo u r stove ven ti n g termi n ates ab ove
yo u r stove. T h e f ollow in g may occu r:
• Y ou r stove appli an ce w i ll n ot d raf t properly
• Smoke may seep i n yo u r h ou se
• E xce ssi ve sooti n g
Install vent at clearances specied by the manufacturer
Use silicone to create an effective vapor barrier at the location where the chimney or
other component penetrates to the exterior of the structure.
4
NOTE: In Canada when using a factory-built chimney it must be safety listed, Type UL103 HT (2100
o
F) CLASS “A” or
conforming to CAN/ULC-S629M, STANDARD FOR 650oC F A CT O R Y -B U I L T CH I M N E Y S.
Mark and cut wall for venting penetration on exterior wall (if needed).
1

PelPro Cast Pellet Stove • 7093-600 • 07/13/16pelprostoves.com 11
Installing Your Stove
• 45° elbow is equivalent to 1 foot of straight pipe
• 90° elbow is equivalent to 3 feet of straight pipe
Installing Your Stove
Notice:
T h ese are g u i d eli n es f or su ccessf u l ven ti n g of
y ou r pellet appli an ce. T h e more vertical rise
y ou can ob tai n i n y ou r sy stem, th e b etter i t w i ll
perf orm. H ori z on tal ven t ru n s can accu mu late
ash an d w i ll n eed to b e clean ed more of ten .
T ry to k eep th em as sh ort as possi b le.
Venting Your Stove
T h e maxi mu m h ori zo n tal ven ti n g allow ed w i th n o verti cal
venting attached is 48 inches including one 90° elbow
or two 45° elbows. Addition of any horizontal venting
beyond 48 inches requires a minimum 60 inches of
ad d i ti on al verti cal ven t. H ori zo n tal secti on s of ven t pi pe
sh ou ld h ave a 1/4 i n ch ri se per f oot. W e recommen d
u si n g th e sh ortest ven ti n g an d f ew est elb ow s possi b le
w h en ven ti n g h ori zo n tal.
W e recommen d th e u se of 4 i n ch ven t w i th an y
installation requiring more than two 90° elbows, or more
th an 15 f eet of ven ti n g .
M i n i m u m V e r t i cal V e n t f o r O n e El bow
0
5
1 0
1 5
2 0
0 5 1 0 1 5 2 0
H o r i z ont a l Run, (ft)
M i n i m u m V e r t i cal R i se
(ft)
H o r i z o n t a l R u n ( F T )
M i n i m u m V e r t i c a l V e n t f o r O n e El b o w
0
5
1 0
1 5
2 0
0 5 1 0 1 5
M i n i m u m V e r t i cal
R i se, (ft)
M i n i m u m V e r t i c a l V e n t f o r T w o El b o w s
L e n g t h o f H o r i z o n t a l S e c t i o n s ( F T )
0
5
1 0
1 5
2 0
2 5
0246 8 1 0 1 2
M i n i m u m V e r t i cal R i se
(ft)
M i n i m u m V e r t i c a l V e n t f o r T h r e e El b o w s
L e n g t h o f H o r i z o n t a l S e c t i o n s ( F T )
O N E 9 0 ° EL B O W
Total
H oriz ontal M inimum
Vertical Vent
Diameter
403
553
663
773
884
994
1 0 1 0 4
1 1 1 1 4
1 2 1 2 4
1 3 1 3 4
1 4 1 4 4
1 5 1 5 4
1 6 1 6 4
1 7 1 7 4
1 8 1 8 4
1 9 1 9 4
T W O 9 0 ° EL B O W S
Total
H oriz ontal M inimum
Vertical Vent
Diameter
253
36 3
473
583
693
7 1 0 4
8 1 1 4
9 1 2 4
1 0 1 3 4
1 1 1 4 4
1 2 1 5 4
1 3 1 6 4
1 4 1 7 4
1 5 1 8 4
T H R EE 9 0 ° EL B O W S
Total
H oriz ontal M inimum
Vertical Vent
Diameter
2 1 1 4
3 1 2 4
4 1 3 4
5 1 4 4
6 1 5 4
7 1 6 4
8 1 7 4
9 1 8 4
1 0 1 9 4
1 1 2 0 4
WARNING!
F ire R i sk.
• O n ly L I ST E D ven ti n g
compon en ts may b e
u sed
• N O O T H E R ven t compon en ts may b e u sed .
Su b sti tu te or d amag ed ven t compon en ts
may i mpai r saf e operati on .

PelPro Cast Pellet Stove • 7093-600 • 07/13/16 pelprostoves.com12
Installing Your Stove
Installing Your Stove
Pro Tip
Installing a cleanout “T” (sold separately) to the rear
of yo u r stove, w h en ven ti n g verti cally can save ti me d u ri n g clean i n g .
Install outside air kit (included)
F or optimal perf orman ce, PelPro recommen d s th e
ou tsi d e ai r ki t f or all i n stallati on s. O u tsi d e ai r ki t i s
required for all mobile/manufactured home installations.
I n stall th rou g h w all B
• M ai n tai n clearan ces f rom exh au st
• R emove kn ock ou t i n th e rear of stove
- Attach ex pipe to outside air connection
on stove
- U se h ose clamp
- R ou te tu b e ou tsi d e th e stru ctu re
- A ttach cap
- Secu re to ou tsi d e w all w i th appropri ate f asten ers
Take a Break
I n spect yo u r w ork:
_____ Conrm clearances to combustibles are maintained
_ _ _ _ _ Pi pe j oin ts are secu re an d properly sealed
_ _ _ _ _ O u tsi d e ai r k i t i n stalled properly
_____ Conrm termination clearances
6B
CAUTION!
N ever d raw ou tsi d e
comb u sti on ai r f rom:
• Wall, oor or ceiling cavity
• E n closed space su ch as an
atti c, g arag e or craw l space.
• I n stall pellet ven ti n g th rou g h w all an d con n ect ven t/
pi pe to stove A
• Some ven ti n g man u f actu rers of f er pellet stove
ad apters f or th ei r ven ti n g f or easi er i n stallati on
• Seal all pipe joints using high-temp silicone (500°+)
• Secu re ex h au st ven ti n g sy stem to th e appli an ce w i th
at least 3 screw s or ri vets per th e pi pe man u f actu rer’s
i n stru cti on s. A lso secu re all con n ector pi pe j oi n ts w i th
at least 3 screw s th rou g h each j oi n t.
• I n stall termi n ati on cap
• Conrm all required stove clearances to combustibles
A5

PelPro Cast Pellet Stove • 7093-600 • 07/13/16pelprostoves.com 13
Using Your Stove
Using Your Stove
Fuel Material and Fuel Storage
Pellet fuel quality can greatly uctuate. We recommend that you buy fuel in multi-ton lots
w h en ever possi b le. H ow ever, w e d o recommen d tryi n g vari ou s b ran d s b ef ore pu rch asi n g
mu lti -ton lots to en su re yo u r sati sf acti on . Store f u el i n d ry locati on n ot w i th i n clearan ces to
comb u stab les of yo u r stove.
Fuel Material
• M ad e f rom saw d u st or w ood b y- prod u cts
• D epen d i n g on th e sou rce materi al i t may h ave a h i g h or low ash con ten t.
Higher Ash Content Material
• H ard w ood s w i th a h i g h mi n eral con ten t
• F u el th at con tai n s b ark
• Stan d ard g rad e pellets or h i g h ash pellets
Lower Ash Content Material
• M ost sof tw ood s
• F u els w i th low mi n eral con ten t
• M ost premi u m g rad e pellets
Fuel Tips
Pro Tip
We recommend the use of Pellet Fuels Institute certied pellet fuel with this product.
Y ou r stove h as a man u f actu re-set mi n i mu m low b u rn rate th at mu st n ot b e altered . I t i s
ag ai n st f ed eral reg u lati on s to alter th i s setti n g or oth erw ise operate yo u r stove i n a man n er
i n con si sten t w i th operti on i n stru cti on s i n th i s man u al.

PelPro Cast Pellet Stove • 7093-600 • 07/13/16 pelprostoves.com14
Using Your Stove
WARNING!
H O T SU R F A CE S! G lass an d oth er su rf aces are h ot d u ri n g operation A N D cool d ow n .
Hot glass will cause burns.
• D o n ot tou ch g lass u n til it is cooled
• N E V E R allow ch i ld ren to tou ch g lass
• K eep ch i ld ren aw ay
• CAREFULLY SUPERVISE children in same room as replace
• A lert ch i ld ren an d ad u lts to h aza rd s of h i g h temperatu res
• High temperatures may ignite clothing or other ammable materials
• Keep clothing, furniture, draperies and other ammable materials away
1
2
4
3
What to Expect
1 Comb u sti on b low er w i ll tu rn on
2 I g n i ter w i ll tu rn on
3 Pellets will drop, smoke may occur in rebox but will
evacuate, and ame will appear in repot.
4 Con vecti on b low er w i ll au tomati cally tu rn on af ter th e
stove h eats u p. Con vecti on b low er w i ll con ti n u e to
ru n even af ter yo u r stove h as b een sh u t d ow n .
Pro Tips
• O d ors an d vapors are released d u ri n g i n i ti al startu p af ter pu rch ase; b u rn i n g y ou r stove on
HI for 30 minutes will allow the paint to cure. Open windows or doors for air circulation until
b u rn of f i s complete.
• D u ri n g start u p an d n ormal operati on y ou r stove’ s f ron t d oor mu st b e closed
• Priming is only required the rst time your stove is lit, or after a FUEL FEED ALARM.
Starting your stove the rst time
WARNING!
Fire Risk
Keep combustible materials, gasoline and other ammable vapors and liquids clear of appliance.
• D o N O T operate applian ce w ith d oor open
• Do NOT operate appliance with repot oor open
• Do NOT store ammable materials in the appliance’s vicinity
• Do NOT use gasoline, lantern fuel, kerosene, charcoal lighter uid or similar liquids or gels to start or
“freshen up” a re in this heater
Keep all such liquids well away from the heater while it is in use as combustible materials may ignite.
Using Your Stove

PelPro Cast Pellet Stove • 7093-600 • 07/13/16pelprostoves.com 15
Using Your Stove
FR ON T
Using Your Stove
Important:
Allow up to 20 minutes for
yo u r stove to start.
1
Use and Care
V i sit pelprostoves.com or scan th i s cod e:
1
Plu g i n y ou r stove
WARNING! Sh ock h aza rd .
• Plu g d i rectly i n to properly g rou n d ed 3 pron g receptacle
• D o N O T rou te cord u n d er or in f ron t of applian ce
• R ecommen d th e u se of a su rg e protector
33
11
22
4
4
2
2
3
3
Conrm three bafes inside rebox are secure,
placing the side bafes before the center
A d d some pellets to h opper an d f u lly close li d
Conrm repot is properly positioned

PelPro Cast Pellet Stove • 7093-600 • 07/13/16 pelprostoves.com16
Using Your Stove
Using Your Stove
DOWN BUTTON
PRIME
55 Prime your stove:
1) F rom “ O F F ” press
2) Press an d h old u n ti l d i splay read s
“ F E E D I N G .”
T h e f eed motor w i ll ru n ab ou t 2 mi n u tes.
Comfort Settings
Con trol y ou r comf ort:
• POWER button - U sed to tu rn y ou r stove on , of f an d to reset.
• Adjust temperature – Set to y ou r d esi red temperatu re level. O n ce th e d esi red temperatu re
level i s ach i eved th e stove w i ll au tomati cally sh u t d ow n . W h en th e temperatu re i n th e room d rops
b elow th e d esi red temperatu re level, y ou r stove w i ll au tomati cally restart.
• LO setting – Y ou r stove w i ll con ti n u e to ru n on low reg ard less of room temperatu re.
• HI setting - Y ou r stove w i ll con ti n u e to ru n on h i g h reg ard less of room temperatu re.
Starting your stove from an empty hopper
ROOM:68 SET: 72
HEATING @%
Pro Tip
I f yo u r stove i s tu rn ed to th e of f posi ti on an d th en b ack on , even i f b y mi stake , yo u r stove w i ll
go through the shutdown process (approximately 15 minutes) and restart.
Thermostat
Y ou r PelPro stove comes w i th a b u i lt-i n th ermostat syst em th at provi d es easy temperatu re
adjustments. An external thermostat is available as an option (sold separately). To use an
ext ern al th ermostat:
1 I n stall accord i n g to th e man u f actu re’ s i n stru cti on s an d con n ect to th e b ack of yo u r stove.
2 Set T H E R M O ST A T to E X T E R N A L i n setti n g s men u on th e d i g i tal d i splay .
3 T u rn stove on an d set d esi red pow er setti n g .
6O n ce f eed i n g stops press pow er b u tton .
ROOM:68 SET: HI
START UP 11:59
6
CAUTION:
D u ri n g th i s process D O N O T :
• T ry to restart, man u ally ad d pellets or u se an y typ e of acceleran t
Pro Tip
F or all men u i tems press af ter
maki n g yo u r selecti on to store
valu e.

PelPro Cast Pellet Stove • 7093-600 • 07/13/16pelprostoves.com 17
Using Your Stove
If your stove tries to start but fails on the initial burn, it will display MISSED IGNITION.
1. T u rn yo u r stove to of f , remove an d clean
the repot
2 . Conrm repot is properly positioned
3. E n su re th ere are en ou g h pellets i n th e h opper.
4 . Prime yo u r stove per previ ou s i n stru cti on s
PWR TO RESET
MISSED IGN
Using Your Stove
Trim Adjustment
T ri m ad j u stmen t i s located i n th e men u . T h i s f eatu re w i ll
ad j u st th e ai r/f u el rati o an d b elow are ex amples of w h en to
u se i t:
WARNING!
T h i s w ood h eater n eed s peri od i c i n speci on an d repai r f or proper operati on . I t i s ag ai n st f ed eral reg u lati on s to
operate th i s w ood h eater i n a man n er i n con si sten t w i th operati n g i n stru cti on s i n th i s man u al.
• If the re is too large, lazy or producing black soot, adjust trim down one level at a time and allow
15 mi n u tes f or stab i li z ati on b ef ore mak i n g an oth er ad j u stmen t
• If your re is too small and sometimes goes out when there are pellets in the hopper, adjust
th e tri m u p on e level at a ti me an d allow 15 mi n u tes f or stab i li z ati on b ef ore mak i n g an oth er
ad j u stmen t.
Turning Your Stove Off
3
A u g er stops f eed i n g pellets. B low ers con ti n u e to ru n u n ti l
af ter th e exh au st temperatu re
h as cooled .
1
CAUTION!
Smoke H aza rd
• Press pow er b u tton on d i splay to O F F ,
let appli an ce completely cool an d
exh au st b low er mu st b e of f . N ow yo u
can u n plu g appli an ce b ef ore servi ci n g
• Smok e spi llag e i n to room can occu r i f
appli an ce i s n ot cool b ef ore u n plu g g i n g
Press an d h old pow er b u tton
f or 3 secon d s 2
-2
TRIM

PelPro Cast Pellet Stove • 7093-600 • 07/13/16 pelprostoves.com18
Maintaining Your Stove
Maintaining Your Stove
What You’ll Need
M etal con tai n er
w i th li d
F lu e clean i n g
b ru sh
Cerami c g lass clean er &
n on -ab rasi ve cloth
A sh vacu u mD ropcloth
G loves
Saf ety g lassesClean i n g tool
Cleaning & Maintenance
Important:
R eg u lar clean i n g h elps to assu re opti mal perf orman ce of yo u r stove. Please ref er to pag e
2 9 to log yo u r mai n ten an ce an d clean i n g .
Cleaning your stove
V i sit pelprostoves.com or
scan th i s cod e:
Ph i lli ps h ead
screw d ri ver
Maintaing your stove
V i sit pelprostoves.com or
scan th i s cod e:

PelPro Cast Pellet Stove • 7093-600 • 07/13/16pelprostoves.com 19
Maintaining Your Stove
Where, When and How
Maintaining Your Stove
Zone 1 - Firebox
Firepot
• Remove the repot
• Scrape clean an d remove ash es
• Replace repot
Firebox
• Remove bafes and vacuum residual ash
• Remove ashes from rebox oor
Glass
• A pply cerami c g lass clean er
• U se n on -ab rasi ve cloth to remove resi d u e
WARNING!
D i scon n ect stove f rom pow er su pply b ef ore servi ci n g
Disposal of Ashes
Ashes should be placed in a metal container with a tight tting lid. The closed container
of ash es sh ou ld b e placed on a n on -comb u sti b le su rf ace or on th e g rou n d , w ell aw ay
from all combustible materials, pending nal disposal. If the ashes are to be disposed
of b y b u ri al i n soi l or oth erw i se locally d i spersed , th ey sh ou ld b e retai n ed i n th e closed
con tai n er u n ti l all emb ers h ave b een th orou g h ly cooled .
W E E K L Y A S N E E D E DO R
Door Inspection
• The gasketing between the glass and rebox
sh ou ld b e i n spected peri od i cally to make su re
th ere i s a g ood seal.
1
Zone
1
Zone
2
Zone
2
Zone 3
Zone
3
Zone
WARNING!
If using a vacuum to clean stove, be sure embers are thoroughly cooled to prevent a re in the
vacu u m.

PelPro Cast Pellet Stove • 7093-600 • 07/13/16 pelprostoves.com20
Maintaining Your Stove
Zone 2 - Stove Body
Convection Blower
• R emove ri g h t si d e pan el to access an d
remove con vecti on b low er
• V acu u m an y d eb ri s f rom th e f an b lad es an d
b low er h ou si n g
Hopper
• E mpty h opper of an y pellets
• V acu u m an y remai n i n g pellets/d eb ri s f rom th e
h opper
M O N T H L Y A S N E E D E DO R
WARNING!
G lass i s 5 mm th i ck h i g h temperatu re h eat resi stan t cerami c g lass.
• D O N O T R E PL A CE w i th an y oth er materi al
• A ltern ate materi al may sh atter an d cau se i n j u ry
CAUTION!
H an d le g lass assemb ly w i th care an d ref er to mai n ten an ce i n stru cti on s. When cleaning glass:
• A voi d stri ki n g , scratch i n g or slammi n g g lass.
• D o N O T clean g lass w h en h ot
• D o N O T u se ab rasive clean ers
• D o N O T operate w ith g lass crack ed , b roke n or scratch ed
Maintaining Your Stove
Pro Tip
The type of fuel you are burning will dictate how often you have to clean your repot.
I f th e f u el yo u are b u rn i n g h as a h i g h d i rt or ash con ten t, i t may b e n ecessary to clean th e
repot more than once a day.
Poor quality fuel will cause clinkers to form in the repot. Clinkers are formed when dirt, ash
or a non-burnable substance is heated to 2000 deg. F (1093 deg. C) and becomes glass-
li ke .
A lw ays b u rn d ry f u el. B u rn i n g f u el w i th h i g h moi stu re con ten t take h eat f rom th e f u el an d
ten d s to cool th e appli an ce, rob b i n g h eat f rom yo u r h ome.
D amp pellet f u el can clog th e f eed syst em.
1
Zone
1
Zone
2
Zone
2
Zone 3
Zone
3
Zone
/