-
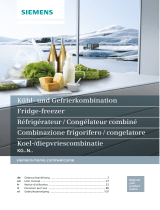
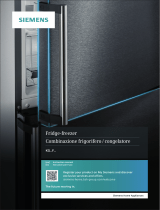
Siemens Free-standing fridge-freezer Operating instructions
-
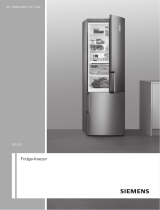
Siemens Free-standing fridge-freezer Owner's manual
-
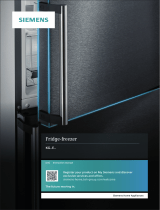
Siemens Free-standing fridge-freezer Owner's manual

-
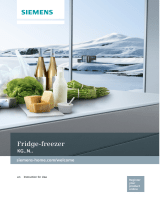
Siemens Free-standing fridge-freezer Owner's manual

-
Siemens Free-standing fridge-freezer Owner's manual

-
Siemens Free-standing fridge-freezer Supplemental
-
Siemens Free-standing fridge-freezer Supplemental
-
Siemens Free-standing fridge-freezer User manual
-
Siemens Free-standing fridge-freezer User manual
-
Siemens Free-standing fridge-freezer User manual

-
Siemens Free-standing fridge-freezer User manual
-
Siemens Free-standing fridge-freezer User manual

-
Siemens Free-standing fridge-freezer User manual
-
Siemens Free-standing fridge-freezer User manual

-
Siemens Free-standing fridge-freezer User manual
-
Siemens Free-standing fridge-freezer User manual

-
Siemens Free-standing fridge-freezer User manual

-
Siemens Free-standing fridge-freezer User manual

-
Siemens Free-standing fridge-freezer User manual

-
Siemens Free-standing fridge-freezer User manual
-
Siemens Free-standing fridge-freezer User manual

-
Siemens Free-standing fridge-freezer User manual
-
Siemens Free-standing fridge-freezer User manual

-
Siemens Free-standing fridge-freezer User manual
-
Siemens Free-standing fridge-freezer User manual

-
Siemens Free-standing fridge-freezer User manual

-
Siemens Free-standing fridge-freezer User manual

-
Siemens Free-standing fridge-freezer User manual
-
Siemens Free-standing fridge-freezer User manual

-
Siemens Free-standing fridge-freezer User manual
-
Siemens Free-standing fridge-freezer User manual

-
Siemens Free-standing fridge-freezer User manual

-
Siemens Free-standing fridge-freezer User manual

-
Siemens Free-standing fridge-freezer User manual

-
Siemens Free-standing fridge-freezer User manual

-
Siemens Free-standing fridge-freezer User manual

-
Siemens Free-standing fridge-freezer User manual
-
Siemens Free-standing fridge-freezer User manual

-
Siemens Free-standing fridge-freezer User manual

-
Siemens Free-standing fridge-freezer User manual

-
Siemens Free-standing fridge-freezer User manual
-
Siemens Free-standing fridge-freezer User manual

-
Siemens Free-standing fridge-freezer User manual
-
Siemens Free-standing fridge-freezer User manual

-
Siemens Free-standing fridge-freezer User manual

-
Siemens Free-standing fridge-freezer User manual

-
Siemens Free-standing fridge-freezer User manual
-
Siemens Free-standing fridge-freezer User manual

-
Siemens Free-standing fridge-freezer User manual
-
Siemens Free-standing fridge-freezer User manual

-
Siemens Free-standing fridge-freezer User manual

-
Siemens Free-standing fridge-freezer User manual

-
Siemens Free-standing fridge-freezer User manual

-
Siemens Free-standing fridge-freezer User manual

-
Siemens Free-standing fridge-freezer User manual

-
Siemens Free-standing fridge-freezer User manual
-
Siemens Free-standing fridge-freezer User manual

-
Siemens Free-standing fridge-freezer User manual

-
Siemens Free-standing fridge-freezer User manual

-
Siemens Free-standing fridge-freezer User manual
-
Siemens Free-standing fridge-freezer User manual
-
Siemens Free-standing fridge-freezer User manual
-
Siemens Free-standing fridge-freezer User manual
-
Siemens Free-standing fridge-freezer User manual
-
Siemens Free-standing fridge-freezer User manual

-
Siemens Free-standing fridge-freezer User manual

-
Siemens Free-standing fridge-freezer User manual

-
Siemens Free-standing fridge-freezer User manual

-
Siemens Free-standing fridge-freezer User manual

-
Siemens Free-standing fridge-freezer User manual
-
Siemens Free-standing fridge-freezer User manual
-
Siemens Free-standing fridge-freezer User manual

-
Siemens Free-standing fridge-freezer User manual
-
Siemens Free-standing fridge-freezer User manual

-
Siemens Free-standing fridge-freezer User manual
-
Siemens Free-standing fridge-freezer User manual

-
Siemens Free-standing fridge-freezer User manual

-
Siemens Free-standing fridge-freezer User manual

-
Siemens Free-standing fridge-freezer User manual

-
Siemens Free-standing fridge-freezer User manual

-
Siemens Free-standing fridge-freezer User manual
-
Siemens Free-standing fridge-freezer User manual

-
Siemens Free-standing fridge-freezer User manual

-
Siemens Free-standing fridge-freezer User manual
-
Siemens Free-standing fridge-freezer User manual

-
Siemens Free-standing fridge-freezer User manual
-
Siemens Free-standing fridge-freezer User manual

-
Siemens Free-standing fridge-freezer User manual

-
Siemens Free-standing fridge-freezer User manual

-
Siemens Free-standing fridge-freezer User manual


